Our Approach to Healthy Eating
At Carter Cre8tive Studio, we believe healthier eating should still feel satisfying, flavorful, and realistic. You don’t have to give up the foods you enjoy or make every meal look like “diet food.” Thoughtful ingredient choices, balanced portions, plenty of flavor, and foods you genuinely enjoy can all have a place in a healthier lifestyle.
Our recipes are designed to give you a practical starting point while leaving room to make them your own. Choose the ingredients and portions that work best for you, your family, your preferences, and your individual nutrition needs.
A Note About Nutrition
Nutrition information provided with each recipe is an estimate based on the ingredients, preparation method, and recommended serving size listed. When a complete meal includes recommended sides, the nutrition estimate reflects the full serving shown in the recipe.
Actual nutrition may vary depending on the brands and ingredients you use, substitutions you make, cooking methods, and your individual portion size. Increasing or decreasing the recommended serving size will also change the calories and nutritional values.
Southern Chicken Salad & Pecan Wrap
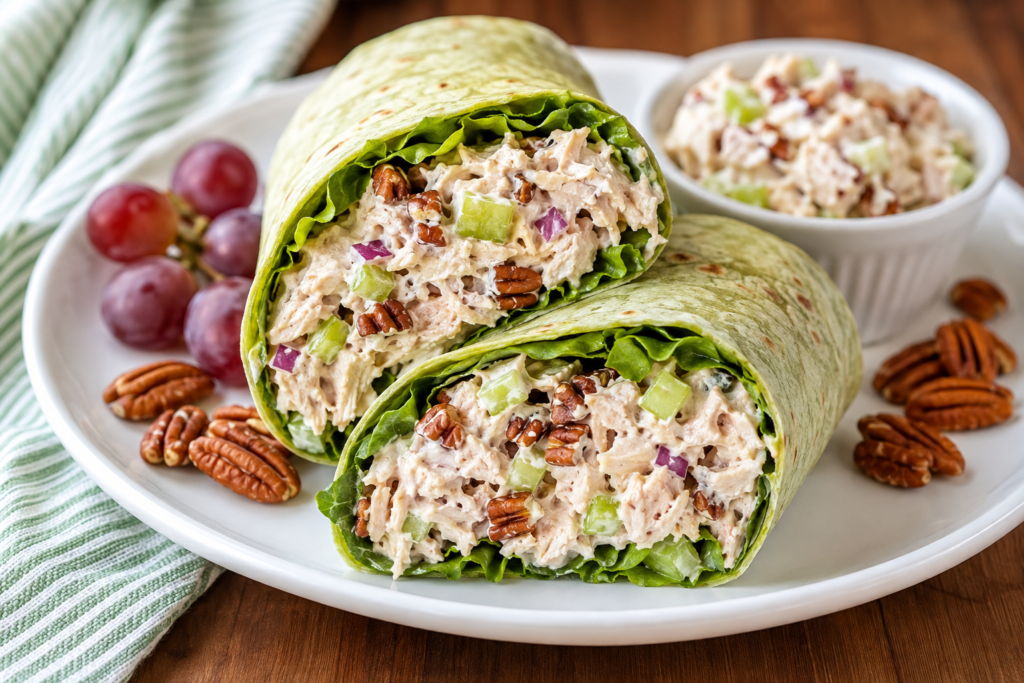
This Southern-inspired chicken salad wrap brings together tender chicken, crisp celery, juicy grapes, toasted pecans, and a creamy, tangy dressing for a lunch that feels comforting without being overly heavy. Wrapped with fresh lettuce in a soft spinach or whole-wheat tortilla, it has the sweet-and-savory flavor and satisfying crunch people love in classic chicken salad. Using a combination of Greek yogurt and light mayonnaise keeps the filling creamy while adding protein and reducing some of the heaviness of a traditional all-mayo chicken salad. Chicken salad combinations featuring grapes, celery, pecans, and Greek-yogurt-based dressings are also well-established lighter lunch options.
Prep Time: 15 minutes
Cook Time: 5 minutes (for toasting pecans)
Chill Time: 30 minutes (optional but recommended)
Total Time: 20 minutes, plus optional chilling
Servings: 4 wraps
Ingredients
3 cups cooked chicken breast, shredded or finely chopped
1/2 cup seedless red grapes, halved
1/2 cup celery, finely diced
1/4 cup red onion, finely diced
1/3 cup pecans, chopped
1/2 cup plain Greek yogurt
1/4 cup light mayonnaise
1 tablespoon Dijon mustard
1 tablespoon fresh lemon juice
1 teaspoon honey
1/2 teaspoon garlic powder
1/4 teaspoon paprika
1/4 teaspoon salt, or to taste
1/4 teaspoon black pepper
4 large spinach or whole-wheat tortillas
4 large lettuce leaves or 1 cup shredded romaine
Directions
- Place the chopped pecans in a dry skillet over medium-low heat. Toast for 3–5 minutes, stirring frequently, until fragrant. Remove from the heat and allow to cool.
- In a large bowl, combine the Greek yogurt, light mayonnaise, Dijon mustard, lemon juice, honey, garlic powder, paprika, salt, and black pepper. Stir until smooth and creamy.
- Add the cooked chicken, grapes, celery, red onion, and toasted pecans. Gently fold everything together until the chicken is evenly coated with the dressing.
- Taste and adjust the salt, pepper, or lemon juice as desired. For the best flavor, cover and refrigerate the chicken salad for about 30 minutes before assembling the wraps.
- Lay each tortilla flat and place lettuce across the center.
- Spoon approximately 3/4 cup of chicken salad over the lettuce, leaving enough space around the edges to fold the wrap.
- Fold the sides of the tortilla inward, then roll tightly from the bottom to form the wrap.
- Slice each wrap diagonally and serve immediately, or keep the chicken salad and tortillas separate until ready to eat.
Make It Your Way
Spinach Wrap: Use a spinach tortilla for extra color and a deli-style presentation.
Lower-Carb Option: Skip the tortilla and spoon the chicken salad into large romaine or butter-lettuce leaves.
Fruit Swap: Replace the grapes with diced apple, pear, or a small amount of dried cranberries.
Nut Swap: Substitute walnuts or sliced almonds for the pecans.
No Nuts: Leave the pecans out and add extra celery for crunch.
Extra Southern Flavor: Add a small pinch of celery seed or a spoonful of sweet pickle relish.
Creamier Version: Increase the light mayonnaise slightly if you prefer the flavor of traditional Southern chicken salad.
Higher-Protein Option: Use all Greek yogurt instead of the Greek yogurt and mayonnaise combination.
Budget-Friendly Swap: Use leftover roasted chicken or drained canned chicken instead of cooking chicken breasts specifically for this recipe. Sunflower seeds can also replace pecans when nuts are expensive.
Storage & Meal Prep
Store the prepared chicken salad in an airtight container in the refrigerator for up to 3–4 days.
For meal prep, keep the chicken salad, tortillas, and lettuce separate and assemble the wrap shortly before eating. This prevents the tortilla and lettuce from becoming soggy.
If packing the wrap for work or school, keep it refrigerated or in an insulated lunch bag with an ice pack until ready to eat.
Chicken salad containing dairy and mayonnaise should not remain at room temperature for more than 2 hours, or more than 1 hour in temperatures above 90°F.
Freezing the assembled chicken salad or wraps is not recommended because the creamy dressing, grapes, celery, and lettuce can develop an undesirable texture after thawing.
Nutrition Information
Estimated Nutrition Per Serving (1 wrap):
Calories: approximately 440
Protein: approximately 35 g
Carbohydrates: approximately 35 g
Fiber: approximately 5 g
Fat: approximately 19 g
Nutrition values are estimates and may vary depending on ingredients, brands, toppings, tortilla size, and serving sizes.
Why You’ll Love It
High Protein
Sweet & Savory
Creamy & Crunchy
Meal Prep Friendly
Quick & Easy
Great for Work Lunches
Easy to Customize
Lighter Comfort Food
Budget-Friendly Swap
Grilled Chicken Avocado Ranch Wrap
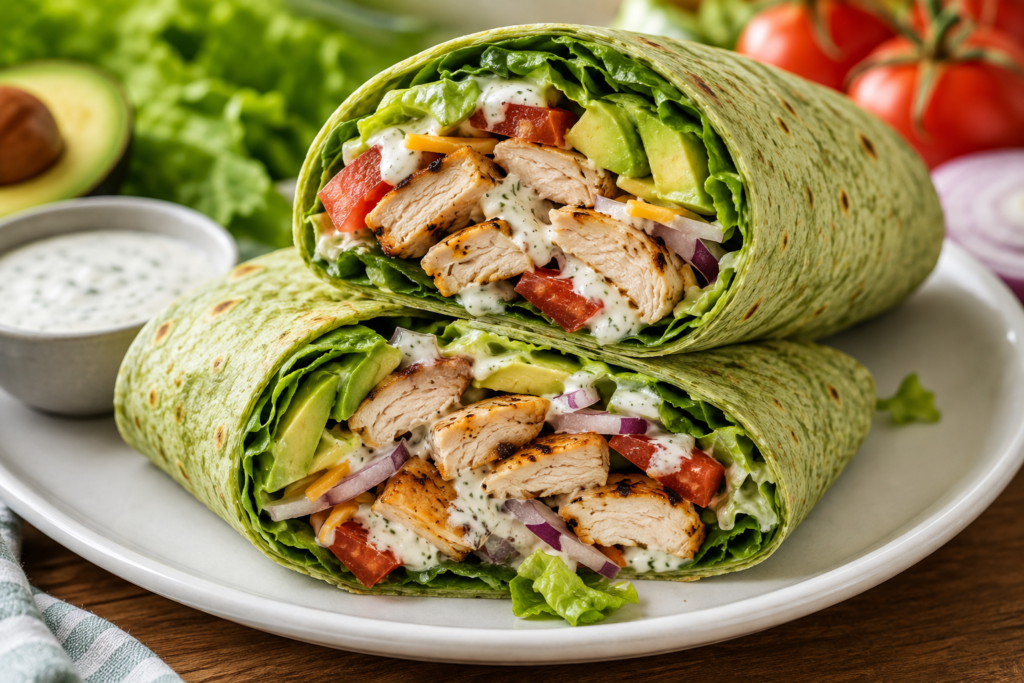
Juicy seasoned chicken, creamy avocado, crisp romaine, fresh tomatoes, red onion, and a cool ranch drizzle come together in this satisfying wrap. The Carter Cre8tive Studio version uses a spinach or whole-wheat tortilla and gives you the option of a lighter Greek-yogurt ranch, keeping the familiar chicken-and-ranch flavor while adding fresh vegetables and healthy fats from avocado. Chicken-avocado wraps are a well-established lunch combination, with popular versions emphasizing grilled chicken, avocado, fresh vegetables, and creamy dressing.
Prep Time: 15 minutes
Cook Time: 10–12 minutes
Rest Time: 5 minutes
Total Time: 30 minutes
Servings: 4 wraps
Ingredients
1 1/2 pounds boneless, skinless chicken breasts
1 tablespoon olive oil
1 teaspoon garlic powder
1 teaspoon smoked paprika
1/2 teaspoon onion powder
1/2 teaspoon dried parsley
1/2 teaspoon salt
1/4 teaspoon black pepper
4 large spinach or whole-wheat tortillas
2 cups chopped romaine lettuce
1 cup cherry tomatoes, halved
1/4 cup thinly sliced red onion
1 large avocado, sliced
1/2 cup shredded reduced-fat cheddar or Colby Jack cheese
1/2 cup light ranch or Greek-yogurt ranch dressing
1 tablespoon fresh lime juice
Directions
- Pat the chicken dry. Rub with olive oil and season evenly with garlic powder, smoked paprika, onion powder, dried parsley, salt, and black pepper.
- Heat a grill pan or skillet over medium heat. Cook the chicken for approximately 5–6 minutes per side, depending on thickness, until browned and the thickest portion reaches an internal temperature of 165°F.
- Transfer the chicken to a clean plate and allow it to rest for 5 minutes before slicing into thin strips.
- While the chicken rests, prepare the lettuce, tomatoes, red onion, and avocado. Toss the avocado gently with the fresh lime juice to add brightness and help slow browning.
- Warm the tortillas briefly in a dry skillet or microwave until soft and pliable.
- Spread approximately 2 tablespoons of ranch dressing across the center of each tortilla. Layer with romaine, grilled chicken, tomatoes, red onion, avocado, and shredded cheese.
- Fold the sides of each tortilla toward the center, then roll tightly from the bottom to form a secure wrap.
- Serve immediately, or place the finished wrap seam-side down in a dry skillet for 1–2 minutes per side for a warm, lightly toasted exterior.
Make It Your Way
Make It Spicy: Add sliced jalapeños, crushed red pepper, or a drizzle of your favorite hot sauce.
Avocado-Lime Ranch: Mash a small amount of avocado into the ranch with an extra squeeze of lime for an even creamier dressing.
Extra Veggies: Add cucumber, shredded carrots, bell peppers, spinach, or corn.
Cheese Swap: Try pepper Jack for a little heat, Monterey Jack for a milder flavor, or leave the cheese out completely.
Lower-Carb Option: Replace the tortilla with large lettuce leaves or serve all the ingredients as a chicken-avocado salad bowl.
Rotisserie Shortcut: Use shredded or sliced rotisserie chicken when you need lunch on the table quickly.
Greek-Yogurt Ranch: Choose a Greek-yogurt-based ranch or make a simple version with plain Greek yogurt, ranch seasoning, a splash of milk, and fresh herbs.
Budget-Friendly Swap: Use chicken tenderloins, boneless chicken thighs, or leftover cooked chicken when they’re less expensive than chicken breasts. Skip the avocado when prices are high and add cucumber or extra vegetables for freshness and volume.
Storage & Meal Prep
Cooked chicken can be refrigerated in an airtight container for 3–4 days.
For the best meal-prep results, store the chicken, vegetables, avocado, dressing, and tortillas separately. Assemble the wrap shortly before eating to prevent sogginess.
Because cut avocado browns quickly, prepare it the day you plan to eat the wrap when possible. Tossing it with lime juice can help slow browning.
An assembled wrap can be tightly wrapped and refrigerated for up to 24 hours, although the tortilla will gradually soften.
Keep packed lunches refrigerated or in an insulated lunch bag with an ice pack until ready to eat.
Do not leave cooked chicken or an assembled wrap at room temperature for more than 2 hours, or more than 1 hour when temperatures are above 90°F.
Freezing the completed wrap is not recommended because avocado, lettuce, tomatoes, and ranch dressing do not maintain their best texture after thawing.
Nutrition Information
Estimated Nutrition Per Serving (1 wrap):
Calories: approximately 450
Protein: approximately 39 g
Carbohydrates: approximately 34 g
Fiber: approximately 7 g
Fat: approximately 19 g
Nutrition values are estimates and may vary depending on ingredients, brands, toppings, tortilla size, and serving sizes.
Why You’ll Love It
High Protein
Fresh & Flavorful
Creamy & Crunchy
Healthy Fats
Quick & Easy
Great for Work Lunches
Meal Prep Friendly
Easy to Customize
Grab & Go
Budget-Friendly Swap
Turkey, Spinach & Pepper Jack Panini
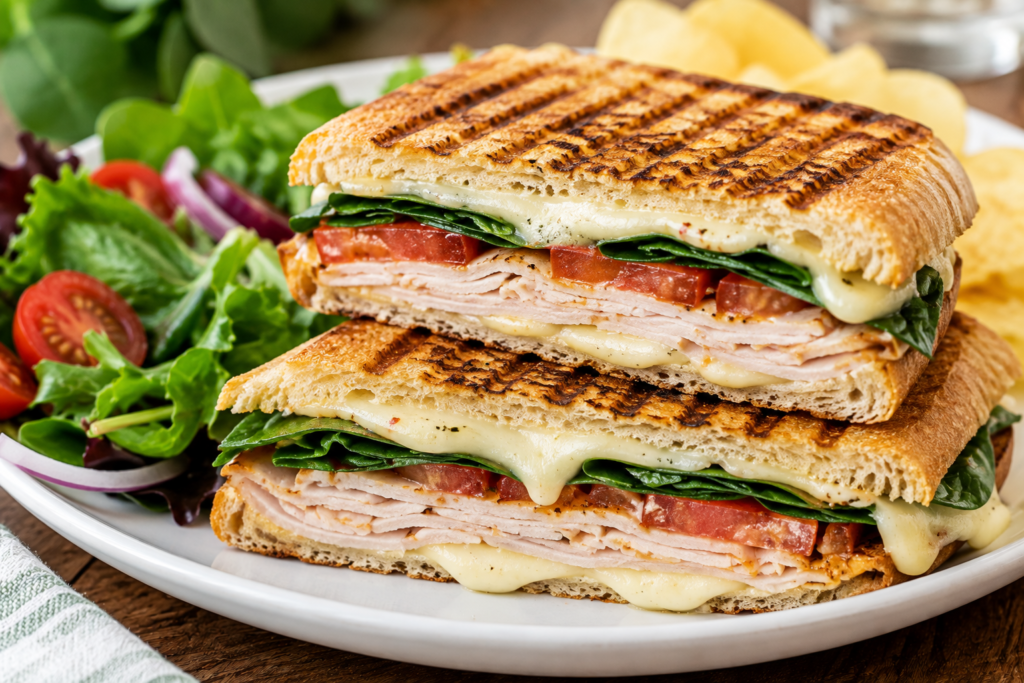
This warm, crispy panini turns an everyday turkey sandwich into a satisfying café-style lunch. Lean turkey, fresh spinach, juicy tomato, and melty pepper Jack are layered between hearty bread with a thin spread of Dijon for extra flavor. Toasting the sandwich until golden gives you that comforting crunch and gooey cheese people love, while keeping the ingredients simple enough for a quick weekday lunch.
Prep Time: 10 minutes
Cook Time: 8 minutes
Total Time: 18 minutes
Servings: 4 panini sandwiches
Ingredients
8 slices hearty whole-grain, sourdough, or ciabatta bread
12 ounces thinly sliced cooked turkey breast
4 slices pepper Jack cheese
2 cups fresh baby spinach
1 large tomato, thinly sliced
1/4 small red onion, very thinly sliced
2 tablespoons Dijon mustard
2 tablespoons plain Greek yogurt
1 teaspoon honey
1/2 teaspoon garlic powder
1/4 teaspoon black pepper
2 teaspoons olive oil or softened butter, for grilling
Directions
- In a small bowl, stir together the Dijon mustard, Greek yogurt, honey, garlic powder, and black pepper to make a creamy Dijon spread.
- Lay the bread slices on a clean work surface. Spread a thin layer of the Dijon mixture over the inside of each slice.
- Divide the turkey evenly among 4 slices of bread.
- Top each with pepper Jack cheese, tomato, red onion, and fresh spinach. Finish with the remaining bread slices.
- Lightly brush the outside of each sandwich with olive oil or spread with a very thin layer of softened butter.
- Preheat a panini press or large skillet over medium heat.
- Cook the sandwiches for approximately 3–4 minutes per side, pressing gently if using a skillet, until the bread is crisp and golden and the cheese is completely melted.
- Allow the panini to rest for 1–2 minutes before slicing. Serve warm.
Make It Your Way
Milder Cheese: Replace pepper Jack with provolone, mozzarella, Swiss, or reduced-fat cheddar.
Add Avocado: Add thin avocado slices after grilling for extra creaminess and healthy fats.
Extra Veggies: Add roasted red peppers, mushrooms, cucumber, or additional spinach.
Spicy Version: Add sliced jalapeños or a small drizzle of hot sauce.
Bread Options: Try whole-grain bread for extra fiber, sourdough for tangy flavor, or ciabatta for a classic café-style panini.
No Panini Press: Cook the sandwich in a skillet and place a second heavy skillet on top to gently press it while cooking.
Budget-Friendly Swap: Use leftover roasted turkey or chicken instead of deli turkey. Store-brand cheese and whole-grain sandwich bread also work perfectly and can significantly lower the cost.
Storage & Meal Prep
For the best texture, assemble and grill the panini shortly before serving.
Turkey, cheese, and prepared vegetables can be portioned separately in the refrigerator for quick assembly throughout the week.
Cooked panini can be refrigerated in an airtight container for up to 2 days, although the bread will soften during storage.
Reheat in a skillet, panini press, toaster oven, or air fryer until the bread becomes crisp again and the filling is heated through. Microwaving is convenient but will produce softer bread.
Keep turkey and other perishable ingredients refrigerated and do not leave the sandwich at room temperature for more than 2 hours, or more than 1 hour when temperatures are above 90°F.
Freezing the fully assembled panini with fresh tomato and spinach is not recommended because the vegetables can become watery after thawing.
Nutrition Information
Estimated Nutrition Per Serving (1 panini):
Calories: approximately 420
Protein: approximately 34 g
Carbohydrates: approximately 39 g
Fiber: approximately 5 g
Fat: approximately 15 g
Nutrition values are estimates and may vary depending on ingredients, brands, bread size, cheese, spreads, and serving sizes.
Why You’ll Love It
High Protein
Ready in Under 20 Minutes
Warm & Satisfying
Crispy & Cheesy
Easy to Customize
Great for Lunch
Lighter Comfort Food
Family Friendly
Budget-Friendly Swap
Lightened-Up Chicken Caesar Wrap
This Chicken Caesar Wrap takes the familiar flavors of a classic Caesar salad and turns them into an easy, satisfying handheld lunch. Juicy seasoned chicken, crisp romaine, Parmesan, tomatoes, and a creamy lighter Caesar dressing are tucked into a soft whole-wheat or spinach tortilla. A few crunchy croutons give it that classic Caesar experience without making the wrap overly heavy.
Prep Time: 15 minutes
Cook Time: 12 minutes
Rest Time: 5 minutes
Total Time: 32 minutes
Servings: 4 wraps
Ingredients
1 1/4 pounds boneless, skinless chicken breasts
1 tablespoon olive oil
1 teaspoon garlic powder
1 teaspoon Italian seasoning
1/2 teaspoon paprika
1/2 teaspoon salt
1/4 teaspoon black pepper
4 large whole-wheat or spinach tortillas
3 cups chopped romaine lettuce
1 cup cherry tomatoes, halved
1/3 cup shredded or shaved Parmesan cheese
1/2 cup seasoned whole-grain croutons, lightly crushed
For the Lighter Caesar Dressing:
1/2 cup plain Greek yogurt
2 tablespoons grated Parmesan cheese
1 tablespoon fresh lemon juice
2 teaspoons Dijon mustard
1 teaspoon Worcestershire sauce
1 small garlic clove, finely minced
1 teaspoon olive oil
1–2 tablespoons water, as needed
Black pepper, to taste
Directions
- Pat the chicken dry and rub it with olive oil. Season with garlic powder, Italian seasoning, paprika, salt, and black pepper.
- Heat a grill pan or skillet over medium heat. Cook the chicken for approximately 5–6 minutes per side, depending on thickness, until golden and the thickest portion reaches an internal temperature of 165°F.
- Transfer the chicken to a clean plate and allow it to rest for 5 minutes before slicing into thin strips.
- Meanwhile, prepare the lighter Caesar dressing. Combine Greek yogurt, Parmesan, lemon juice, Dijon mustard, Worcestershire sauce, garlic, olive oil, and black pepper. Stir until creamy. Add 1–2 tablespoons of water as needed to reach your preferred consistency.
- Place the chopped romaine in a bowl and toss lightly with enough Caesar dressing to coat the lettuce without making it soggy.
- Warm the tortillas briefly until soft and pliable.
- Divide the dressed romaine among the tortillas. Top with sliced chicken, tomatoes, Parmesan, and a small handful of crushed croutons.
- Drizzle with a little additional Caesar dressing if desired.
- Fold in the sides of each tortilla and roll tightly. Slice diagonally and serve immediately.
Make It Your Way
Rotisserie Shortcut: Use shredded rotisserie chicken for an even faster lunch.
Extra Crunch: Add sliced cucumber or extra romaine.
Spicy Caesar: Add crushed red pepper, Cajun seasoning, or a dash of hot sauce to the dressing.
No Croutons: Leave them out or replace them with toasted sunflower seeds for crunch.
Lower-Carb Option: Skip the tortilla and serve everything as a Chicken Caesar Salad Bowl.
Cheese Lover’s Version: Add a little extra shaved Parmesan just before rolling.
Traditional Caesar Flavor: Add a small amount of anchovy paste to the dressing if you enjoy the deeper savory flavor of traditional Caesar dressing.
Budget-Friendly Swap: Use leftover cooked chicken instead of preparing chicken specifically for the wraps. Homemade toasted bread cubes can replace packaged croutons, and grated Parmesan generally costs less per serving than specialty Parmesan shavings.
Storage & Meal Prep
Cooked chicken can be refrigerated in an airtight container for 3–4 days.
The homemade Caesar dressing can be prepared ahead and refrigerated in a covered container for up to 3–4 days.
For meal prep, store the chicken, lettuce, tomatoes, dressing, croutons, Parmesan, and tortillas separately. Assemble shortly before eating for the best texture.
Do not add dressing or croutons to wraps several days ahead. The dressing can soften the tortilla and lettuce, while the croutons will lose their crunch.
An assembled wrap can be tightly wrapped and refrigerated for up to 24 hours.
Keep packed wraps refrigerated or in an insulated lunch bag with an ice pack.
Do not leave cooked chicken or prepared wraps at room temperature for more than 2 hours, or more than 1 hour when temperatures are above 90°F.
Freezing assembled Chicken Caesar Wraps is not recommended because lettuce, tomatoes, dressing, and croutons do not freeze and thaw well.
Nutrition Information
Estimated Nutrition Per Serving (1 wrap):
Calories: approximately 410
Protein: approximately 38 g
Carbohydrates: approximately 36 g
Fiber: approximately 6 g
Fat: approximately 14 g
Nutrition values are estimates and may vary depending on ingredients, brands, toppings, tortilla size, and serving sizes.
Why You’ll Love It
High Protein
Fresh & Crunchy
Creamy Caesar Flavor
Quick & Easy
Meal Prep Friendly
Great for Work Lunches
Easy to Customize
Lighter Comfort Food
Budget-Friendly Swap
Buffalo Chicken Ranch Bowl
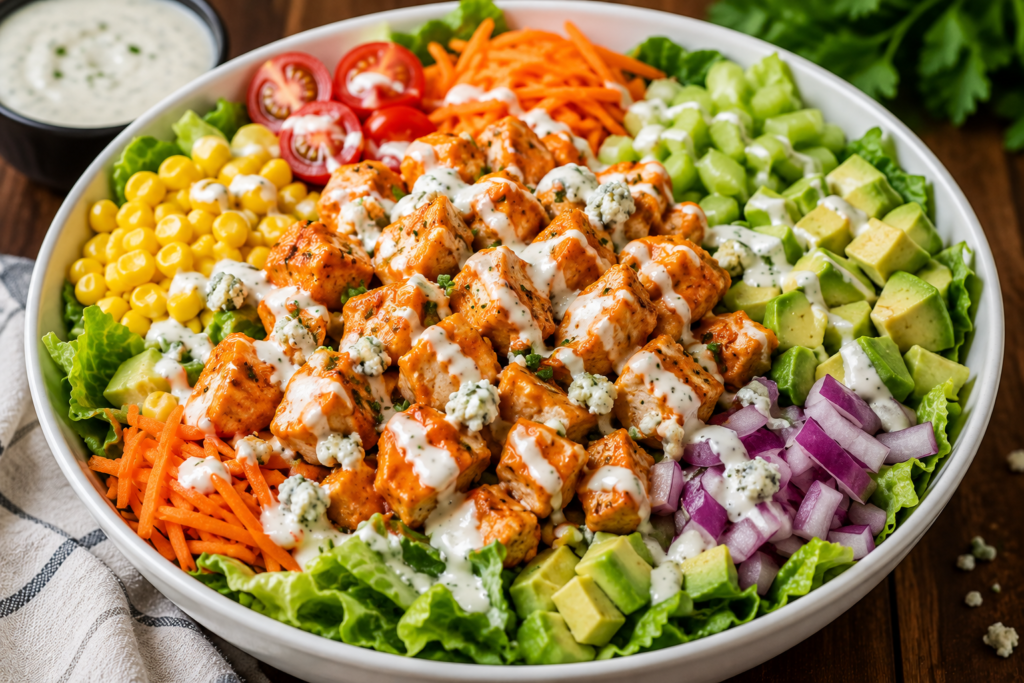
This Buffalo Chicken Ranch Bowl delivers the bold, tangy flavor of Buffalo chicken in a fresh, filling lunch bowl. Tender seasoned chicken is tossed in Buffalo sauce and served over crisp romaine with sweet corn, juicy tomatoes, crunchy carrots, celery, avocado, and a cool drizzle of lighter ranch. It gives you the satisfying Buffalo-and-ranch combination without relying on fried chicken, making it a flavorful high-protein option for lunch or meal prep.
Prep Time: 15 minutes
Cook Time: 12 minutes
Rest Time: 5 minutes
Total Time: 32 minutes
Servings: 4 bowls
Ingredients
1 1/2 pounds boneless, skinless chicken breasts, cut into bite-size pieces
1 tablespoon olive oil
1 teaspoon garlic powder
1/2 teaspoon onion powder
1/2 teaspoon smoked paprika
1/2 teaspoon salt
1/4 teaspoon black pepper
1/3 cup Buffalo-style hot sauce
1 tablespoon melted butter or olive oil
6 cups chopped romaine lettuce
1 cup corn, cooked and cooled
1 cup cherry tomatoes, halved
1 cup shredded carrots
2 celery stalks, thinly sliced
1 large avocado, diced
1/4 cup thinly sliced red onion
1/2 cup light ranch or Greek-yogurt ranch dressing
1/4 cup crumbled blue cheese or reduced-fat cheddar, optional
4 lime wedges, for serving
Directions
- Pat the chicken dry and season with garlic powder, onion powder, smoked paprika, salt, and black pepper.
- Heat olive oil in a large skillet over medium-high heat. Add the chicken and cook for approximately 8–10 minutes, stirring occasionally, until browned and the chicken reaches an internal temperature of 165°F.
- In a small bowl, combine the Buffalo sauce with the melted butter or olive oil.
- Remove the skillet from the heat. Pour the Buffalo sauce mixture over the cooked chicken and toss until every piece is evenly coated. Allow the chicken to rest for about 5 minutes.
- Divide the chopped romaine among four bowls.
- Arrange the corn, tomatoes, shredded carrots, celery, avocado, and red onion over the lettuce.
- Divide the warm Buffalo chicken evenly among the bowls.
- Drizzle each bowl with ranch dressing. Add blue cheese or cheddar if desired.
- Serve with a fresh lime wedge and additional Buffalo sauce or ranch on the side, if desired.
Make It Your Way
Adjust the Heat: Use mild Buffalo sauce for less heat or add extra hot sauce for a spicier bowl.
Add a Grain: Serve over brown rice, quinoa, or farro when you want a heartier meal.
Extra Protein: Add black beans or chickpeas along with the chicken.
Cheese Options: Use traditional blue cheese, shredded cheddar, feta, or skip the cheese altogether.
Lower-Carb Option: Keep the recipe exactly as written without adding grains, or replace the corn with cucumber.
Turn It Into a Wrap: Place the Buffalo chicken and vegetables inside a whole-wheat or spinach tortilla for another easy lunch.
Homemade Lighter Ranch: Combine plain Greek yogurt with ranch seasoning and enough milk or water to reach a drizzleable consistency.
Budget-Friendly Swap: Use boneless chicken thighs when they’re less expensive than chicken breasts. Frozen corn and store-brand vegetables work well, and you can skip avocado when prices are high without sacrificing the overall flavor of the bowl.
Storage & Meal Prep
Cooked Buffalo chicken can be stored in an airtight container in the refrigerator for 3–4 days.
For meal prep, divide the chicken, corn, carrots, and celery into containers but keep the lettuce, avocado, and ranch dressing separate when possible.
Add avocado shortly before serving for the freshest color and texture.
The chicken can be eaten cold or reheated until hot before adding it to the fresh vegetables.
Do not microwave the entire assembled bowl if it contains lettuce, avocado, and ranch. Remove the chicken and other ingredients you want warmed and heat them separately.
Keep prepared bowls refrigerated or in an insulated lunch bag with an ice pack.
Do not leave cooked chicken or prepared bowls at room temperature for more than 2 hours, or more than 1 hour when temperatures are above 90°F.
Freezing the completed bowl is not recommended. The cooked Buffalo chicken can be frozen separately in an airtight freezer-safe container for up to 2–3 months.
Nutrition Information
Estimated Nutrition Per Serving (1 bowl):
Calories: approximately 430
Protein: approximately 40 g
Carbohydrates: approximately 28 g
Fiber: approximately 8 g
Fat: approximately 19 g
Nutrition values are estimates and may vary depending on ingredients, brands, toppings, dressing, and serving sizes.
Why You’ll Love It
High Protein
Bold & Flavorful
Fiber-Rich
Fresh & Crunchy
Meal Prep Friendly
Easy to Customize
Lower-Carb Friendly
Great for Work Lunches
Budget-Friendly Swap
Honey Mustard Chicken Crunch Salad
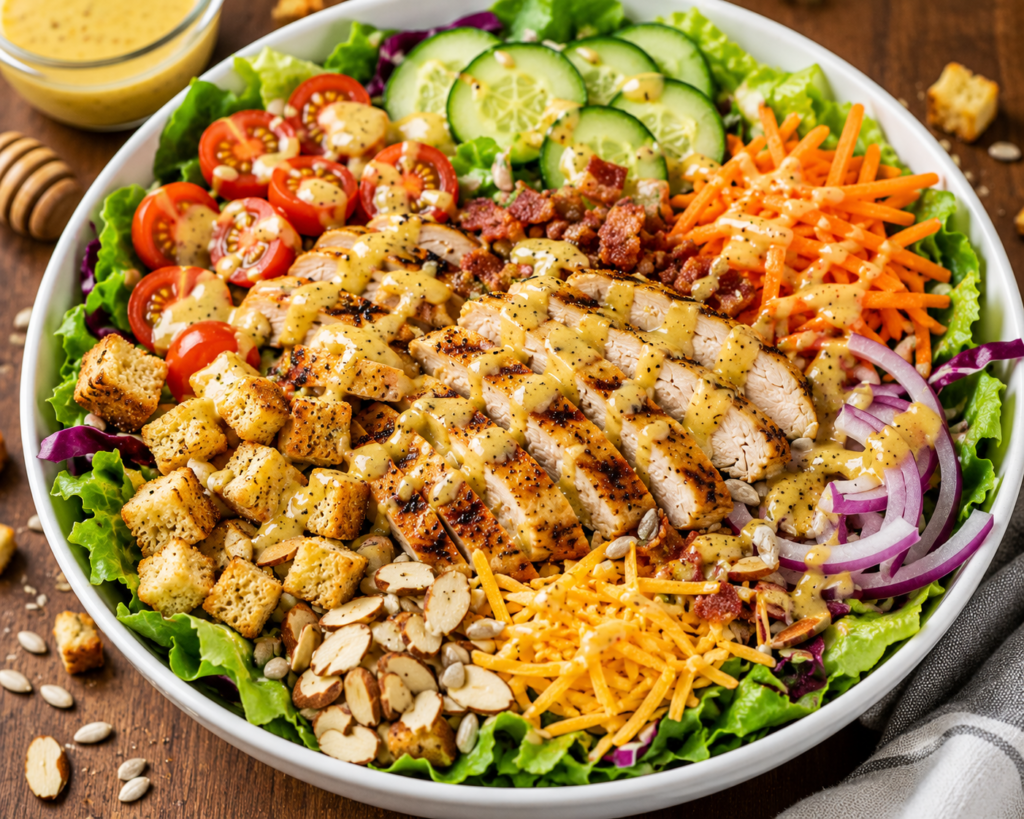
Juicy seasoned chicken, crisp romaine, crunchy cabbage, carrots, cucumber, tomatoes, red onion, toasted almonds, and a little cheddar come together under a creamy homemade honey mustard dressing. This Carter Cre8tive Studio version is built to be a real, satisfying lunch salad—high in protein, loaded with texture, and flavorful enough that it doesn’t feel like you’re settling for “diet food”.
Prep Time: 20 minutes
Cook Time: 12 minutes
Rest Time: 5 minutes
Total Time: 37 minutes
Servings: 4
Ingredients
1 1/2 pounds boneless, skinless chicken breasts
1 tablespoon olive oil
1 teaspoon garlic powder
1/2 teaspoon smoked paprika
1/2 teaspoon onion powder
1/2 teaspoon salt
1/4 teaspoon black pepper
6 cups chopped romaine lettuce
2 cups thinly shredded red or green cabbage
1 cup shredded carrots
1 cup cherry tomatoes, halved
1 cup sliced cucumber
1/3 cup thinly sliced red onion
1/3 cup shredded sharp cheddar cheese
1/3 cup sliced almonds, lightly toasted
1 cup whole-grain croutons
For the Honey Mustard Dressing:
1/3 cup plain Greek yogurt
2 tablespoons Dijon mustard
2 tablespoons honey
1 tablespoon apple cider vinegar
1 tablespoon olive oil
1 teaspoon fresh lemon juice
1/4 teaspoon garlic powder
Pinch of salt
Black pepper, to taste
1–2 tablespoons water, as needed
Directions
- Pat the chicken dry. Rub with olive oil and season evenly with garlic powder, smoked paprika, onion powder, salt, and black pepper.
- Heat a grill pan or skillet over medium heat. Cook the chicken for approximately 5–6 minutes per side, depending on thickness, until browned and the thickest portion reaches an internal temperature of 165°F.
- Transfer the cooked chicken to a clean plate and allow it to rest for 5 minutes before slicing.
- To prepare the honey mustard dressing, whisk together Greek yogurt, Dijon mustard, honey, apple cider vinegar, olive oil, lemon juice, garlic powder, salt, and black pepper. Add water 1 tablespoon at a time until the dressing reaches your preferred consistency.
- Divide the romaine and shredded cabbage among four large salad bowls.
- Arrange the carrots, tomatoes, cucumber, red onion, cheddar cheese, toasted almonds, and croutons over the greens.
- Top each salad with sliced grilled chicken.
- Drizzle with honey mustard dressing immediately before serving and gently toss if desired.
Make It Your Way
Extra Crunch: Add sunflower seeds, pumpkin seeds, chopped pecans, or crispy chickpeas.
Fruit Twist: Add thinly sliced apple, pear, or a small handful of dried cranberries for a sweet-and-savory variation.
Cheese Swap: Replace cheddar with feta, goat cheese, or Monterey Jack.
Lower-Carb Option: Leave out the croutons and increase the cucumber, cabbage, or other fresh vegetables.
Rotisserie Shortcut: Use cooked rotisserie chicken when you need an extra-fast lunch.
Make It Spicy: Add cayenne or hot sauce to the honey mustard dressing for a sweet-and-spicy version.
No Nuts: Replace the almonds with roasted sunflower or pumpkin seeds.
Budget-Friendly Swap: Use whichever lettuce or cabbage is on sale, choose frozen or leftover cooked chicken when appropriate, and replace almonds with sunflower seeds. Homemade toasted bread cubes also make an inexpensive alternative to packaged croutons.
Storage & Meal Prep
Cooked chicken can be stored in an airtight container in the refrigerator for 3–4 days.
The honey mustard dressing can be prepared ahead and refrigerated in a covered container for up to 3–4 days. Stir well before serving.
For meal prep, portion the chicken and sturdy vegetables into containers, but keep the dressing, croutons, almonds, and delicate greens separate whenever possible.
Add the dressing and crunchy toppings immediately before eating to prevent the salad from becoming soggy.
If packing for work or school, keep the salad refrigerated or use an insulated lunch bag with an ice pack.
Do not leave cooked chicken or prepared salad at room temperature for more than 2 hours, or more than 1 hour when temperatures are above 90°F.
Freezing the assembled salad is not recommended. Cooked chicken may be frozen separately for up to 2–3 months.
Nutrition Information
Estimated Nutrition Per Serving:
Calories: approximately 460
Protein: approximately 42 g
Carbohydrates: approximately 38 g
Fiber: approximately 7 g
Fat: approximately 18 g
Nutrition values are estimates and may vary depending on ingredients, brands, toppings, dressing amounts, and serving sizes.
Why You’ll Love It
High Protein
Fresh & Crunchy
Sweet & Savory
Fiber-Rich
Meal Prep Friendly
Colorful & Satisfying
Easy to Customize
Great for Work Lunches
Budget-Friendly Swap
Southwest Chicken & Black Bean Bowl
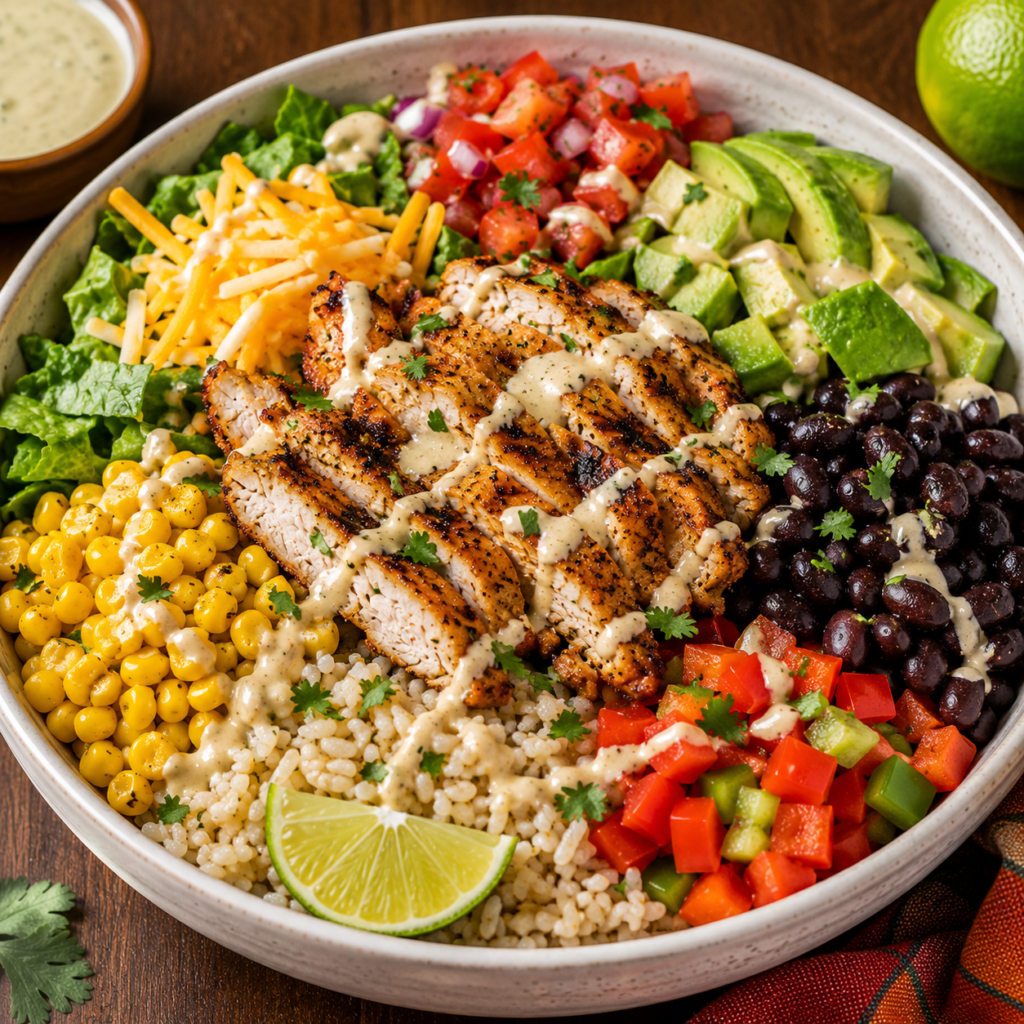
This colorful Southwest bowl brings together smoky seasoned chicken, black beans, corn, brown rice, crisp vegetables, avocado, cheese, and a creamy lime dressing for a filling lunch packed with flavor and texture. It has the fresh ingredients people enjoy in a Southwest-style meal, but the rice, beans, and chicken make it substantial enough to stand on its own as a complete lunch rather than feeling like another basic salad.
Prep Time: 20 minutes
Cook Time: 15 minutes
Rest Time: 5 minutes
Total Time: 40 minutes
Servings: 4 bowls
Ingredients
1 1/2 pounds boneless, skinless chicken breasts
1 tablespoon olive oil
1 teaspoon chili powder
1 teaspoon smoked paprika
1 teaspoon ground cumin
1/2 teaspoon garlic powder
1/2 teaspoon onion powder
1/2 teaspoon salt
1/4 teaspoon black pepper
2 cups cooked brown rice
1 15-ounce can black beans, drained and rinsed
1 1/2 cups corn, cooked and cooled
2 cups chopped romaine lettuce
1 cup diced tomatoes or fresh pico de gallo
1 red bell pepper, diced
1 large avocado, diced
1/4 cup finely diced red onion
1/2 cup shredded reduced-fat cheddar or Mexican-blend cheese
1/4 cup chopped fresh cilantro
1 lime, cut into wedges
For the Creamy Lime Dressing:
1/2 cup plain Greek yogurt
2 tablespoons fresh lime juice
1 tablespoon olive oil
1 teaspoon honey
1/2 teaspoon ground cumin
1/2 teaspoon chili powder
1/4 teaspoon garlic powder
Pinch of salt
1–2 tablespoons water, as needed
Directions
- Pat the chicken dry. Rub with olive oil and season evenly with chili powder, smoked paprika, cumin, garlic powder, onion powder, salt, and black pepper.
- Heat a grill pan or skillet over medium heat. Cook the chicken for approximately 5–7 minutes per side, depending on thickness, until browned and the thickest portion reaches an internal temperature of 165°F.
- Transfer the chicken to a clean plate and allow it to rest for 5 minutes before slicing.
- Prepare the creamy lime dressing by whisking together Greek yogurt, lime juice, olive oil, honey, cumin, chili powder, garlic powder, and salt. Add water 1 tablespoon at a time until the dressing reaches a drizzleable consistency.
- Divide the cooked brown rice among four bowls.
- Arrange black beans, corn, romaine, tomatoes or pico de gallo, bell pepper, avocado, and red onion around the rice.
- Add sliced Southwest chicken to the center of each bowl.
- Sprinkle with shredded cheese and fresh cilantro.
- Drizzle each bowl with creamy lime dressing and serve with a fresh lime wedge.
Make It Your Way
Make It Spicy: Add sliced jalapeños, cayenne pepper, hot sauce, or spicy salsa.
Rice Swap: Use white rice, cilantro-lime rice, quinoa, or cauliflower rice.
Vegetarian Version: Leave out the chicken and increase the black beans, or add seasoned roasted chickpeas.
Extra Veggies: Add sautéed zucchini, roasted peppers, cucumber, or shredded cabbage.
Cheese Swap: Use pepper Jack, cotija, feta, or leave the cheese out.
Salsa Shortcut: Use your favorite prepared salsa or pico de gallo instead of chopping additional tomatoes and onions.
Avocado Alternative: Add a spoonful of guacamole when fresh avocados aren’t available.
Budget-Friendly Swap: Use chicken thighs instead of breasts when they’re less expensive. Canned black beans, frozen corn, store-brand brown rice, and seasonal vegetables keep this bowl affordable. You can also increase the beans slightly and reduce the chicken for an economical high-protein meal.
Storage & Meal Prep
Cooked chicken can be stored in an airtight container in the refrigerator for 3–4 days.
Cooked rice, chicken, black beans, and corn can be portioned together for meal prep. Keep lettuce, avocado, tomatoes, cheese, and dressing separate for the best texture.
Add freshly diced avocado shortly before serving to prevent excessive browning.
To reheat, warm the chicken, rice, beans, and corn separately from the cold vegetables until hot. Add the fresh toppings and dressing afterward.
Keep prepared bowls refrigerated at 40°F or below. Refrigerate perishable foods within 2 hours, or within 1 hour when temperatures are above 90°F.
Cooked chicken and other leftovers should generally be used within 3–4 days and reheated to 165°F. :contentReference[oaicite:0]{index=0}
The chicken, rice, beans, and corn can be frozen separately for future meal prep. Do not freeze the fully assembled bowl with lettuce, avocado, tomatoes, and creamy dressing.
Nutrition Information
Estimated Nutrition Per Serving:
Calories: approximately 520
Protein: approximately 43 g
Carbohydrates: approximately 55 g
Fiber: approximately 12 g
Fat: approximately 17 g
Nutrition values are estimates and may vary depending on ingredients, brands, toppings, dressing amounts, and serving sizes.
Why You’ll Love It
High Protein
Fiber-Rich
Filling & Satisfying
Meal Prep Friendly
Southwest Flavor
Colorful & Fresh
Easy to Customize
Great for Work Lunches
Budget-Friendly Swap
Chicken Tortilla Soup
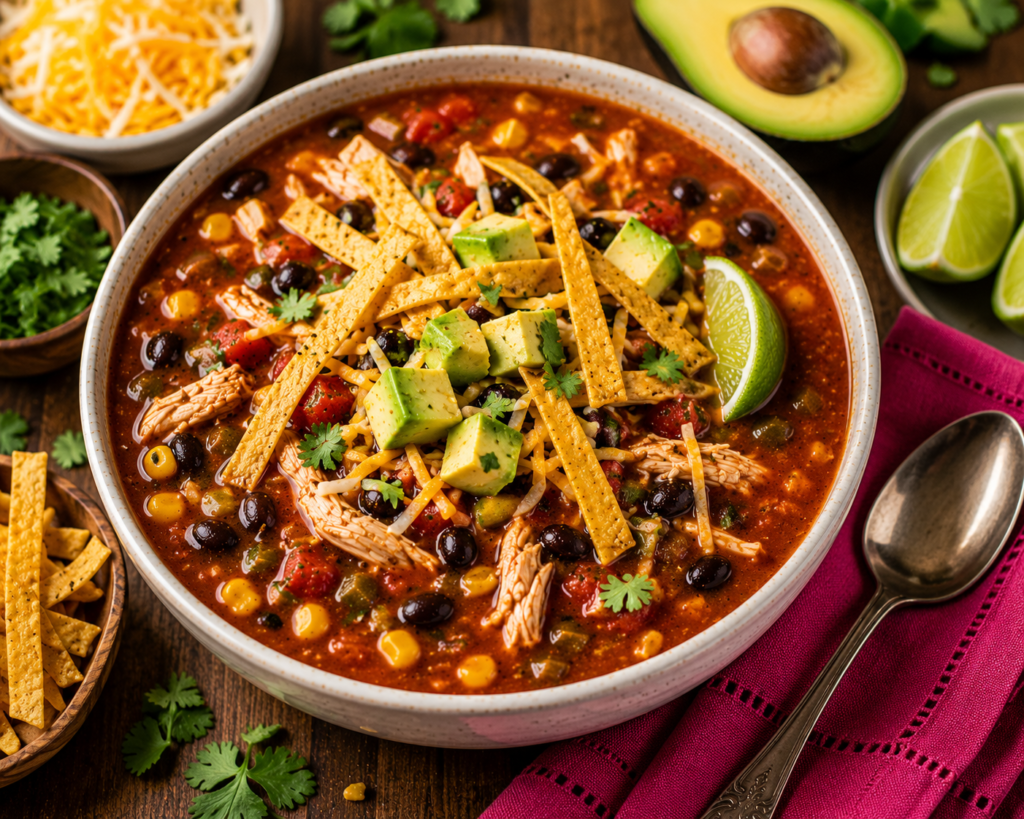
Warm, hearty, and packed with Southwest-inspired flavor, this Chicken Tortilla Soup combines tender shredded chicken, black beans, corn, tomatoes, peppers, and savory spices in a rich tomato-based broth. Fresh lime brightens everything up, while avocado, cheese, cilantro, and crispy tortilla strips turn each bowl into a satisfying lunch that feels comforting without being overly heavy.
Prep Time: 15 minutes
Cook Time: 30 minutes
Total Time: 45 minutes
Servings: 6 bowls
Ingredients
1 tablespoon olive oil
1 medium yellow onion, diced
1 red bell pepper, diced
3 cloves garlic, minced
1 teaspoon ground cumin
1 teaspoon chili powder
1/2 teaspoon smoked paprika
1/2 teaspoon dried oregano
1/2 teaspoon salt
1/4 teaspoon black pepper
4 cups low-sodium chicken broth
1 14.5-ounce can fire-roasted diced tomatoes
1 4-ounce can diced green chiles
1 15-ounce can black beans, drained and rinsed
1 1/2 cups corn, fresh, frozen, or drained canned corn
3 cups cooked shredded chicken
1 tablespoon fresh lime juice
1/4 cup chopped fresh cilantro
For Serving:
1 avocado, diced
1/2 cup shredded cheddar or Mexican-blend cheese
1 cup crispy tortilla strips
Lime wedges
Plain Greek yogurt, optional
Fresh cilantro, optional
Directions
- Heat the olive oil in a large soup pot over medium heat. Add the onion and bell pepper and cook for 4–5 minutes, stirring occasionally, until they begin to soften.
- Add the garlic, cumin, chili powder, smoked paprika, oregano, salt, and black pepper. Cook for about 1 minute, stirring constantly, until fragrant.
- Pour in the chicken broth, fire-roasted tomatoes, and green chiles. Stir well.
- Add the black beans and corn. Bring the soup to a gentle boil.
- Reduce the heat to medium-low and simmer uncovered for approximately 15 minutes to allow the flavors to develop.
- Stir in the cooked shredded chicken and continue simmering for another 5–7 minutes, until the chicken is heated through.
- Stir in the fresh lime juice and chopped cilantro. Taste and adjust the seasonings as desired.
- Ladle the soup into bowls and top with diced avocado, shredded cheese, crispy tortilla strips, cilantro, Greek yogurt, and an extra squeeze of lime as desired.
- Serve hot, keeping extra tortilla strips on the side so they stay crisp.
Make It Your Way
Make It Spicy: Add diced jalapeño, chipotle pepper, cayenne, or your favorite hot sauce.
Make It Creamy: Stir a spoonful of plain Greek yogurt into individual bowls for a creamy finish.
Extra Veggies: Add diced zucchini, spinach, carrots, or additional bell peppers.
Bean Swap: Substitute pinto beans or kidney beans for the black beans.
Lower-Carb Option: Leave out the corn and use fewer tortilla strips.
Rotisserie Shortcut: Use shredded rotisserie chicken to make preparation even faster.
More Filling: Add cooked brown rice or quinoa for a heartier meal.
Budget-Friendly Swap: Use leftover cooked chicken, store-brand broth and canned beans, and frozen corn. You can also increase the beans slightly and reduce the amount of chicken to stretch the recipe while maintaining plenty of protein and fiber.
Storage & Meal Prep
Allow leftover soup to cool slightly before transferring it to airtight containers.
Refrigerate Chicken Tortilla Soup for up to 3–4 days.
Keep avocado, cheese, tortilla strips, Greek yogurt, and other toppings separate from the soup until serving.
Reheat individual portions in the microwave or warm the soup gently in a saucepan on the stovetop until steaming hot.
For meal prep, portion the soup into individual containers and pack the toppings separately.
The soup base freezes well. Freeze cooled soup without avocado, cheese, Greek yogurt, or tortilla strips in freezer-safe containers for up to 2–3 months.
Thaw frozen soup overnight in the refrigerator before reheating.
Do not leave cooked soup at room temperature for more than 2 hours, or more than 1 hour when temperatures are above 90°F.
Nutrition Information
Estimated Nutrition Per Serving (1 bowl, before optional toppings):
Calories: approximately 310
Protein: approximately 29 g
Carbohydrates: approximately 31 g
Fiber: approximately 8 g
Fat: approximately 8 g
Nutrition values are estimates and may vary depending on ingredients, brands, toppings, and serving sizes.
Why You’ll Love It
High Protein
Fiber-Rich
Warm & Comforting
Bold Southwest Flavor
Meal Prep Friendly
Freezer Friendly
Family Friendly
Easy to Customize
Great for Leftovers
Budget-Friendly Swap
Creamy Broccoli Cheddar Soup — Lightened Up
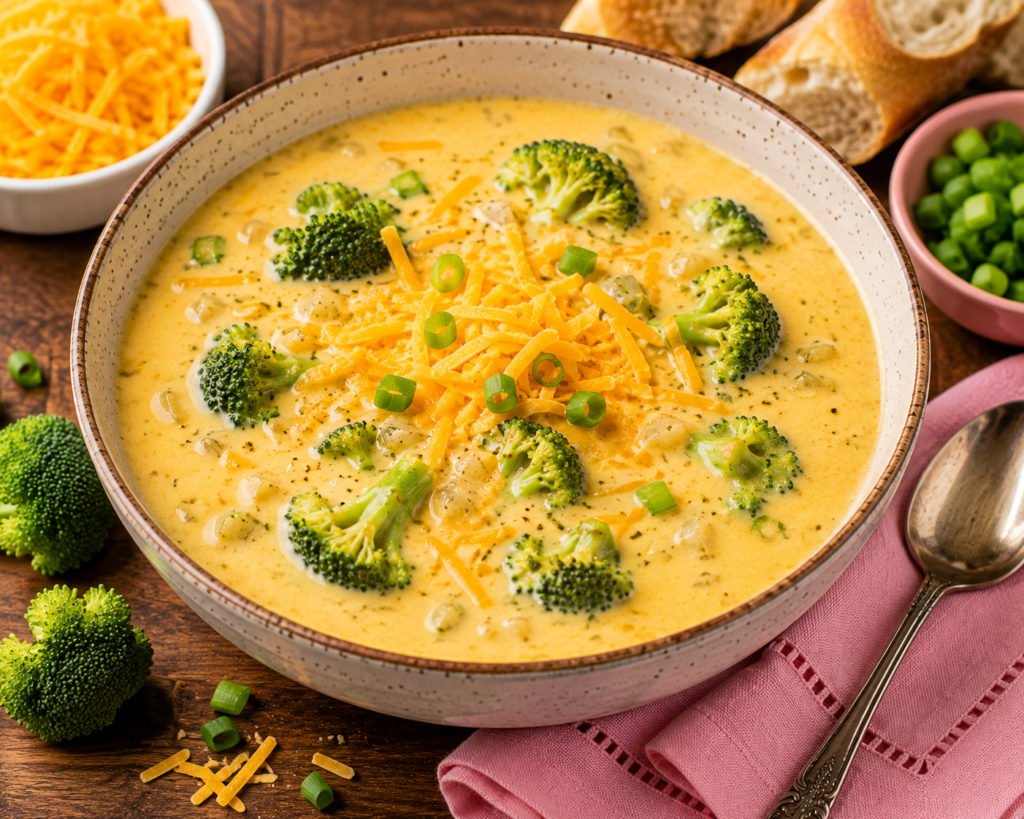
Creamy, cheesy, and full of tender broccoli, this lightened-up Broccoli Cheddar Soup delivers the cozy comfort-food flavor you expect without relying on heavy cream. Fresh broccoli, aromatic vegetables, sharp cheddar, and a creamy milk-based broth create a satisfying lunch that feels indulgent while still fitting beautifully into a balanced lifestyle. Serve it with crusty whole-grain bread or a simple sandwich for an easy café-style meal at home.
Prep Time: 15 minutes
Cook Time: 30 minutes
Total Time: 45 minutes
Servings: 6 bowls
Ingredients
2 tablespoons olive oil or unsalted butter
1 small yellow onion, finely diced
2 medium carrots, finely diced or shredded
2 cloves garlic, minced
1/4 cup all-purpose flour
4 cups low-sodium vegetable or chicken broth
2 cups 2% milk
5 cups fresh broccoli florets, chopped into bite-size pieces
1/2 teaspoon Dijon mustard
1/2 teaspoon garlic powder
1/2 teaspoon onion powder
1/4 teaspoon smoked paprika
1/2 teaspoon salt, or to taste
1/4 teaspoon black pepper
2 cups freshly shredded sharp cheddar cheese
1/4 cup plain Greek yogurt
2 green onions, sliced, optional for garnish
Directions
- Heat the olive oil or butter in a large soup pot over medium heat. Add the onion and carrots and cook for 4–5 minutes, stirring occasionally, until they begin to soften.
- Add the garlic and cook for about 30 seconds, just until fragrant.
- Sprinkle the flour over the vegetables and stir continuously for about 1 minute. This creates the base that will help thicken the soup.
- Slowly pour in the broth while whisking or stirring constantly to prevent lumps.
- Add the milk, broccoli, Dijon mustard, garlic powder, onion powder, smoked paprika, salt, and black pepper. Stir well.
- Bring the soup to a gentle simmer. Reduce the heat to medium-low and cook for approximately 15–20 minutes, stirring occasionally, until the broccoli and carrots are tender.
- For a thicker, creamier texture, carefully blend about 1–2 cups of the soup with an immersion blender, leaving plenty of whole broccoli pieces. You can also transfer a small portion to a regular blender and return it to the pot.
- Reduce the heat to low. Add the shredded cheddar a handful at a time, stirring after each addition until completely melted. Do not allow the soup to boil after adding the cheese.
- Remove the pot from the heat and stir in the Greek yogurt until smooth and creamy.
- Taste and adjust the salt and pepper as needed. Garnish with a small amount of additional cheddar and sliced green onions if desired. Serve warm.
Make It Your Way
Extra Protein: Stir in diced cooked chicken for a heartier high-protein lunch.
Extra Veggies: Add cauliflower along with the broccoli or stir in fresh spinach near the end of cooking.
Cheese Options: Sharp cheddar provides plenty of flavor, but you can combine cheddar with Monterey Jack for an extra-creamy finish.
Gluten-Free Option: Use a gluten-free all-purpose flour blend or thicken the soup with a cornstarch slurry instead of regular flour.
Smoother Soup: Blend more of the finished soup if you prefer a creamier consistency with fewer vegetable pieces.
Chunkier Soup: Skip the blending step completely and leave all of the broccoli and vegetables intact.
Café-Style Lunch: Serve a smaller bowl alongside half of a turkey, chicken, or veggie sandwich.
Budget-Friendly Swap: Frozen broccoli works well when fresh broccoli is expensive or out of season. Store-brand sharp cheddar, milk, broth, and frozen vegetables can also significantly reduce the cost without sacrificing flavor.
Storage & Meal Prep
Allow leftover soup to cool slightly before transferring it to airtight containers.
Refrigerate for up to 3–4 days.
Reheat gently on the stovetop over low to medium-low heat, stirring frequently. You can also microwave individual portions in short intervals, stirring between intervals.
Avoid boiling the soup when reheating because excessive heat can cause the dairy and cheese to separate.
If the refrigerated soup becomes thicker than desired, stir in a splash of milk or broth while reheating.
This soup can be prepared ahead for work lunches and portioned into individual microwave-safe containers.
Because dairy-based soups can develop a grainy or separated texture after freezing and thawing, freezing is not the preferred storage method for this recipe.
Do not leave the soup at room temperature for more than 2 hours, or more than 1 hour when temperatures are above 90°F.
Nutrition Information
Estimated Nutrition Per Serving (1 bowl):
Calories: approximately 300
Protein: approximately 17 g
Carbohydrates: approximately 24 g
Fiber: approximately 4 g
Fat: approximately 16 g
Nutrition values are estimates and may vary depending on ingredients, brands, toppings, and serving sizes.
Why You’ll Love It
Warm & Comforting
Creamy Without Heavy Cream
Vegetable-Packed
Good Source of Protein
Family Friendly
Meal Prep Friendly
Easy to Customize
Lighter Comfort Food
Café-Style Lunch at Home
Budget-Friendly Swap
Lemon Chicken Orzo Soup
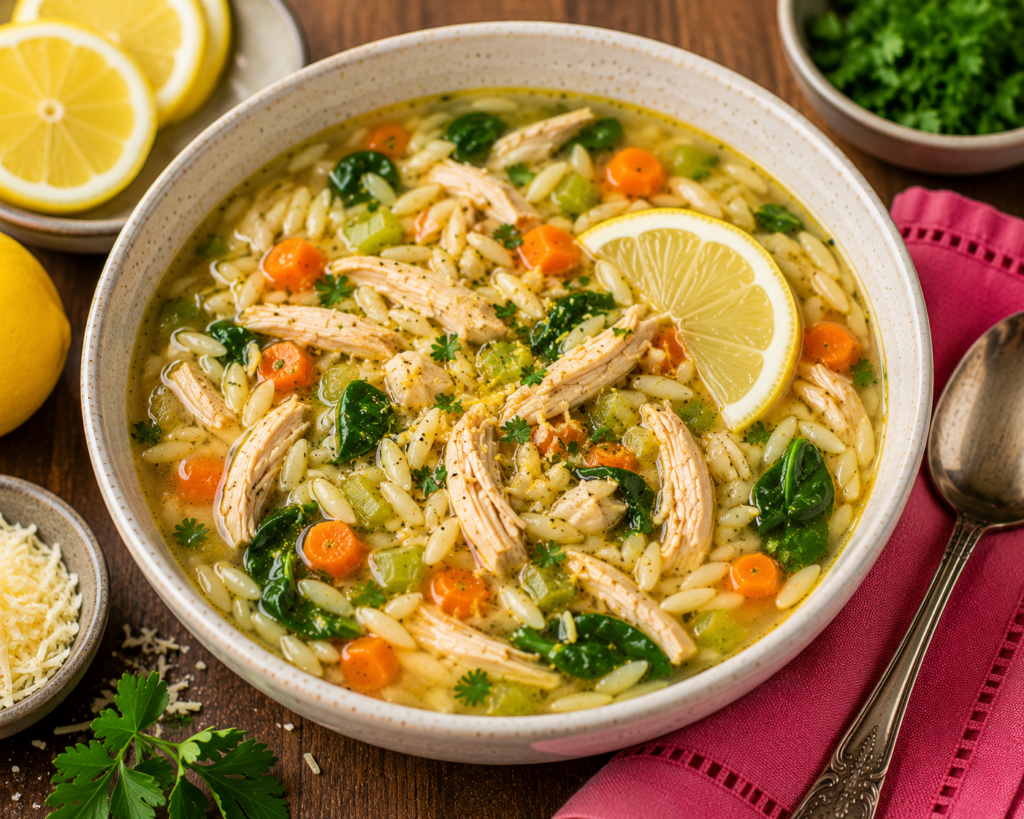
Bright, comforting, and full of fresh flavor, this Lemon Chicken Orzo Soup combines tender chicken, delicate orzo pasta, carrots, celery, spinach, and herbs in a savory lemon-infused broth. Fresh lemon juice and zest give this cozy soup a refreshing finish, making it light enough for lunch while still hearty enough to leave you satisfied. It’s an easy, nourishing meal that works beautifully for meal prep, work lunches, or a simple family meal.
Prep Time: 15 minutes
Cook Time: 30 minutes
Total Time: 45 minutes
Servings: 6 bowls
Ingredients
1 tablespoon olive oil
1 small yellow onion, diced
2 medium carrots, peeled and sliced
2 celery stalks, sliced
3 cloves garlic, minced
1 teaspoon dried oregano
1/2 teaspoon dried thyme
1/2 teaspoon garlic powder
1/2 teaspoon salt, or to taste
1/4 teaspoon black pepper
6 cups low-sodium chicken broth
3/4 cup dry orzo pasta
3 cups cooked shredded chicken
2 cups fresh baby spinach
Zest of 1 lemon
3 tablespoons fresh lemon juice
2 tablespoons chopped fresh parsley
Fresh lemon slices, for serving
Grated Parmesan cheese, optional
Directions
- Heat the olive oil in a large soup pot over medium heat.
- Add the onion, carrots, and celery. Cook for 4–5 minutes, stirring occasionally, until the vegetables begin to soften.
- Add the garlic, oregano, thyme, garlic powder, salt, and black pepper. Cook for about 1 minute, stirring frequently, until fragrant.
- Pour in the chicken broth and bring the mixture to a gentle boil.
- Stir in the dry orzo. Reduce the heat to a steady simmer and cook according to the package directions, usually about 8–10 minutes, stirring occasionally so the orzo does not stick to the bottom of the pot.
- When the orzo is almost tender, add the shredded cooked chicken and continue cooking for 3–5 minutes until the chicken is heated through.
- Stir in the spinach and cook for another 1–2 minutes, just until wilted.
- Remove the pot from the heat. Stir in the lemon zest, fresh lemon juice, and parsley.
- Taste and adjust the salt, pepper, or lemon juice as desired.
- Ladle into bowls and garnish with fresh parsley, a lemon slice, and a small amount of Parmesan if desired. Serve warm.
Make It Your Way
Extra Veggies: Add zucchini, green beans, peas, kale, or additional spinach.
More Lemon Flavor: Add extra lemon zest or serve each bowl with a fresh lemon wedge.
Pasta Swap: Replace orzo with ditalini, small shells, or another small pasta.
Whole-Grain Option: Use whole-wheat orzo when available for additional fiber.
Rotisserie Shortcut: Use shredded rotisserie chicken to save preparation time.
Herb Boost: Add fresh dill along with the parsley for another layer of fresh flavor.
Creamy Lemon Chicken Orzo: Stir a small amount of plain Greek yogurt into individual bowls after the soup has cooled slightly for a creamy variation.
Budget-Friendly Swap: Use leftover cooked chicken, store-brand broth, frozen spinach, and whichever small pasta is already in your pantry. If chicken is expensive, slightly reduce the chicken and increase the vegetables and pasta to stretch the recipe.
Storage & Meal Prep
Allow leftover soup to cool slightly before transferring it to airtight containers.
Refrigerate for up to 3–4 days.
The orzo will continue absorbing broth while refrigerated, so the soup may become thicker during storage. Add a splash of chicken broth or water when reheating to restore the desired consistency.
Reheat gently on the stovetop until hot or microwave individual portions, stirring between heating intervals.
For meal prep, you can cook the orzo separately and add it to individual servings. This helps prevent the pasta from becoming overly soft after several days in the refrigerator.
For freezing, the soup base can be frozen without the orzo for up to 2–3 months. Pasta tends to soften after freezing and thawing, so prepare fresh orzo when reheating the frozen soup for the best texture.
Thaw frozen soup overnight in the refrigerator before reheating.
Do not leave cooked soup at room temperature for more than 2 hours, or more than 1 hour when temperatures are above 90°F.
Nutrition Information
Why You’ll Love It
High Protein
Light & Comforting
Fresh Lemon Flavor
Vegetable-Packed
Meal Prep Friendly
Family Friendly
Easy to Customize
Great for Work Lunches
Freezer-Friendly Soup Base
Budget-Friendly Swap
Southern White Chicken Chili
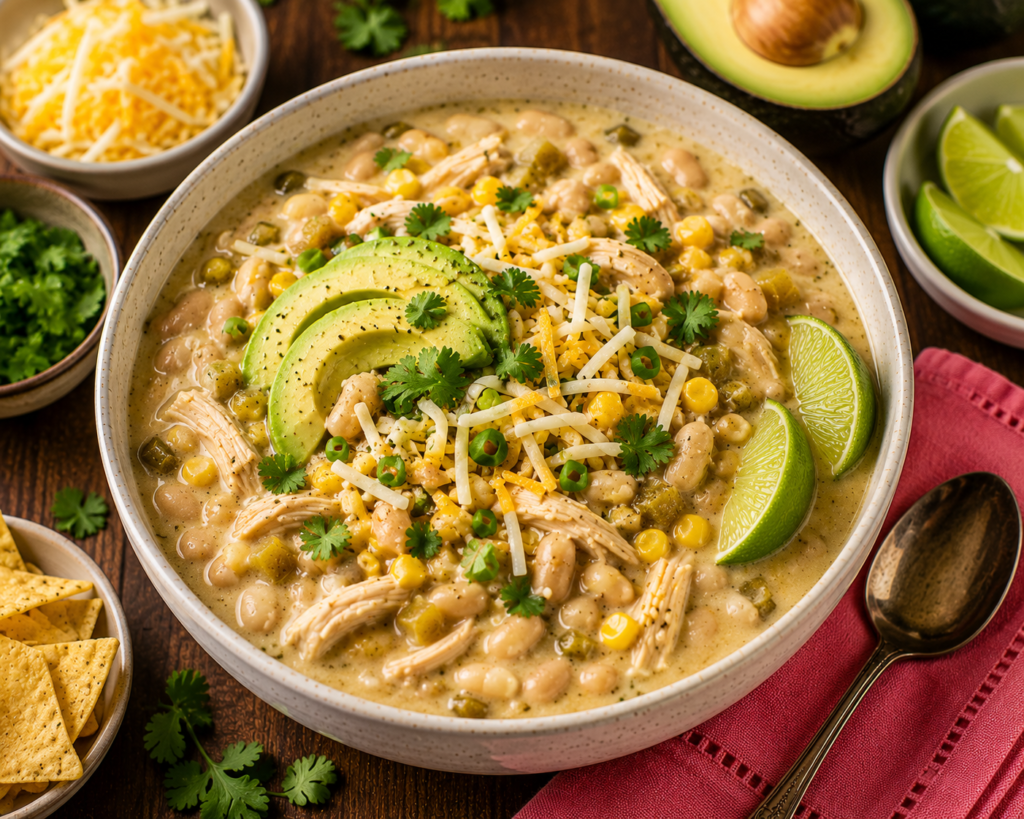
Creamy, hearty, and packed with comforting flavor, this Southern White Chicken Chili combines tender chicken, creamy white beans, sweet corn, green chiles, and warm spices in a rich, savory broth. A touch of Greek yogurt and cream cheese creates that satisfying creamy finish without requiring a heavy cream base. It’s an easy one-pot lunch that’s especially good for meal prep, chilly days, or anytime you want something warm and filling without making a heavy meal.
Prep Time: 15 minutes
Cook Time: 30 minutes
Total Time: 45 minutes
Servings: 6 bowls
Ingredients
1 tablespoon olive oil
1 medium yellow onion, diced
1 small green bell pepper, diced
3 cloves garlic, minced
1 teaspoon ground cumin
1 teaspoon chili powder
1/2 teaspoon smoked paprika
1/2 teaspoon dried oregano
1/4 teaspoon cayenne pepper, optional
1/2 teaspoon salt, or to taste
1/4 teaspoon black pepper
4 cups low-sodium chicken broth
2 15-ounce cans Great Northern or cannellini beans, drained and rinsed
1 4-ounce can diced green chiles
1 1/2 cups corn, fresh, frozen, or drained canned corn
3 cups cooked shredded chicken
4 ounces reduced-fat cream cheese, softened
1/2 cup plain Greek yogurt
2 tablespoons fresh lime juice
1/4 cup chopped fresh cilantro
Optional Toppings:
Diced avocado
Shredded Monterey Jack or cheddar cheese
Fresh cilantro
Sliced jalapeño
Green onions
Lime wedges
Crushed tortilla chips
Directions
- Heat the olive oil in a large soup pot over medium heat. Add the onion and green bell pepper and cook for 4–5 minutes, stirring occasionally, until softened.
- Add the garlic, cumin, chili powder, smoked paprika, oregano, cayenne if using, salt, and black pepper. Cook for about 1 minute, stirring frequently, until fragrant.
- Pour in the chicken broth. Add the white beans, green chiles, and corn and stir well.
- Bring the chili to a gentle boil, then reduce the heat and simmer uncovered for approximately 15 minutes.
- Remove about 1 1/2 cups of the beans and broth and carefully mash or blend until mostly smooth. Return the mixture to the pot. This naturally thickens the chili without adding heavy cream.
- Add the shredded chicken and simmer for another 5 minutes, until heated through.
- Reduce the heat to low. Add the softened cream cheese in small pieces and stir until completely melted and incorporated.
- Remove the pot from the heat and allow it to cool for 2–3 minutes. Stir in the Greek yogurt, lime juice, and cilantro until creamy and well combined.
- Taste and adjust the seasonings as needed.
- Ladle into bowls and finish with avocado, shredded cheese, cilantro, green onions, jalapeño, lime, or a few crushed tortilla chips as desired.
Make It Your Way
Make It Spicy: Add extra cayenne, fresh jalapeños, hot sauce, or a second can of diced green chiles.
Bean Options: Great Northern, cannellini, or navy beans all work well.
Extra Veggies: Add diced zucchini, spinach, poblano pepper, or additional corn.
Dairy-Free Option: Leave out the Greek yogurt and cream cheese and mash additional white beans to create a naturally thicker broth.
Slow-Cooker Shortcut: Add the broth, vegetables, beans, corn, spices, and cooked chicken to a slow cooker. Cook on LOW for 3–4 hours, then finish with the cream cheese, Greek yogurt, lime, and cilantro.
Rotisserie Shortcut: Shredded rotisserie chicken makes this an especially quick meal.
Southern Touch: Add a small pinch of smoked paprika and serve with a piece of warm cornbread for a Southern-inspired comfort-food lunch.
Budget-Friendly Swap: Use leftover chicken, store-brand canned beans, frozen corn, and store-brand broth. Increase the white beans and slightly reduce the chicken when you need to stretch the recipe further.
Storage & Meal Prep
Allow leftover chili to cool slightly before transferring it to airtight containers.
Refrigerate for up to 3–4 days.
Store avocado, tortilla chips, cheese, and other toppings separately and add them immediately before serving.
Reheat gently on the stovetop over medium-low heat, stirring frequently, or microwave individual portions in short intervals until hot.
Avoid rapidly boiling the chili during reheating because the creamy ingredients can separate under excessive heat.
If the chili thickens during refrigeration, add a small splash of chicken broth or water while reheating.
For freezing, the chili freezes best before adding the cream cheese and Greek yogurt. Freeze the chili base in freezer-safe containers for up to 2–3 months, thaw overnight in the refrigerator, reheat, and add the creamy ingredients afterward.
Do not leave cooked chili at room temperature for more than 2 hours, or more than 1 hour when temperatures are above 90°F.
Nutrition Information
Estimated Nutrition Per Serving (1 bowl, before optional toppings):
Calories: approximately 360
Protein: approximately 34 g
Carbohydrates: approximately 38 g
Fiber: approximately 9 g
Fat: approximately 10 g
Nutrition values are estimates and may vary depending on ingredients, brands, toppings, and serving sizes.
Why You’ll Love It
High Protein
Fiber-Rich
Creamy & Comforting
One-Pot Meal
Meal Prep Friendly
Family Friendly
Easy to Customize
Great for Leftovers
Lighter Comfort Food
Budget-Friendly Swap
Honey Garlic Chicken & Veggie Stir-Fry
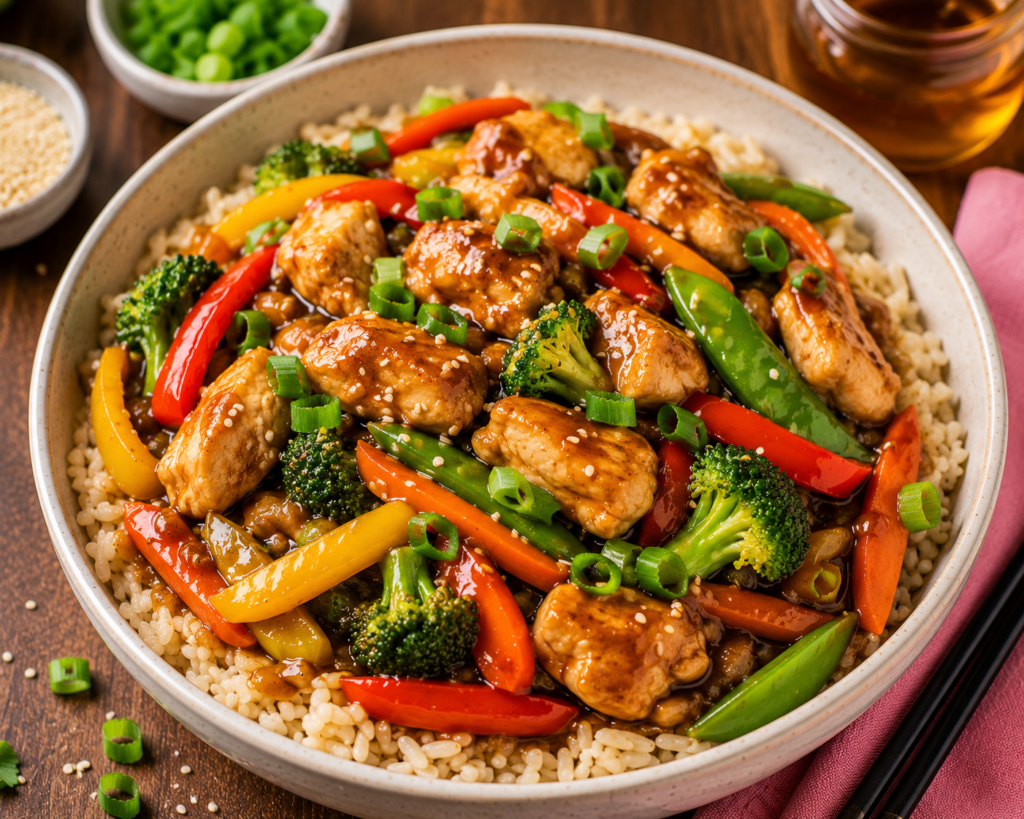
Sweet, savory, colorful, and satisfying, this Honey Garlic Chicken & Veggie Stir-Fry combines tender chicken with crisp broccoli, bell peppers, carrots, and snap peas in a flavorful homemade honey garlic sauce. Served over brown rice or quinoa, it makes a quick, protein-packed lunch that feels more like your favorite takeout meal than typical “healthy food.” It’s also easy to customize, practical for meal prep, and a great way to add plenty of colorful vegetables to your day.
Prep Time: 15 minutes
Cook Time: 20 minutes
Total Time: 35 minutes
Servings: 4 bowls
Ingredients
1 pound boneless, skinless chicken breast, cut into bite-size pieces
1 tablespoon olive oil
2 cups broccoli florets
1 red bell pepper, sliced
1 yellow bell pepper, sliced
1 cup snap peas
1 cup thinly sliced carrots
3 cloves garlic, minced
1 teaspoon fresh ginger, grated
Salt and black pepper, to taste
For the Honey Garlic Sauce:
3 tablespoons low-sodium soy sauce
2 tablespoons honey
1 tablespoon rice vinegar
1 tablespoon hoisin sauce
1 teaspoon sesame oil
1 teaspoon cornstarch
2 tablespoons water
For Serving:
2 cups cooked brown rice or quinoa
2 green onions, sliced
1 tablespoon sesame seeds, optional
Directions
- In a small bowl, whisk together the soy sauce, honey, rice vinegar, hoisin sauce, sesame oil, cornstarch, and water until smooth. Set aside.
- Lightly season the chicken with salt and black pepper.
- Heat the olive oil in a large skillet or wok over medium-high heat.
- Add the chicken and cook for approximately 5–6 minutes, stirring occasionally, until browned and the thickest pieces reach an internal temperature of 165°F. Transfer the cooked chicken to a clean plate.
- Add the broccoli, carrots, and snap peas to the same skillet. Stir-fry for approximately 3 minutes.
- Add the bell peppers, garlic, and ginger. Continue cooking for another 2–3 minutes, stirring frequently, until the vegetables are tender-crisp and the garlic is fragrant.
- Return the cooked chicken to the skillet.
- Whisk the honey garlic sauce again and pour it over the chicken and vegetables.
- Stir everything together and cook for 1–2 minutes, until the sauce thickens and evenly coats the chicken and vegetables.
- Remove from the heat and serve over brown rice or quinoa. Garnish with sliced green onions and sesame seeds if desired.
Make It Your Way
Make It Spicy: Add crushed red pepper flakes, sriracha, or chili garlic sauce.
Protein Swap: Substitute shrimp, lean beef, turkey, or extra-firm tofu for the chicken.
More Veggies: Add mushrooms, zucchini, baby corn, bok choy, cabbage, or whichever vegetables need to be used from your refrigerator.
Lower-Carb Option: Serve over cauliflower rice or enjoy the chicken and vegetables without a grain.
Rice Options: Serve with brown rice, jasmine rice, quinoa, or cauliflower rice.
Gluten-Free Option: Use gluten-free tamari instead of soy sauce and choose a certified gluten-free hoisin sauce.
Extra Flavor: Add a splash of fresh orange or lime juice to the finished sauce.
Budget-Friendly Swap: Use frozen stir-fry vegetables instead of purchasing several fresh vegetables separately. Chicken thighs can also replace chicken breasts when they are less expensive, and store-brand soy sauce, rice, and honey work perfectly.
Storage & Meal Prep
Allow leftovers to cool slightly before transferring them to airtight containers.
Refrigerate the stir-fry for up to 3–4 days.
For meal prep, divide the cooked brown rice or quinoa among individual containers and top with the chicken and vegetables.
Reheat in a skillet over medium heat with a small splash of water or broth until hot, or microwave individual portions until heated through.
Avoid overcooking when reheating so the vegetables retain some of their texture.
The cooked chicken and vegetable stir-fry can be frozen in freezer-safe containers for up to 2–3 months. For the best texture, slightly undercook the vegetables if preparing specifically for freezing.
Thaw frozen portions overnight in the refrigerator before reheating.
Do not leave the cooked stir-fry at room temperature for more than 2 hours, or more than 1 hour when temperatures are above 90°F.
Nutrition Information
Estimated Nutrition Per Serving (1 bowl with brown rice):
Calories: approximately 420
Protein: approximately 35 g
Carbohydrates: approximately 48 g
Fiber: approximately 6 g
Fat: approximately 11 g
Nutrition values are estimates and may vary depending on ingredients, brands, toppings, grain choice, and serving sizes.
Why You’ll Love It
High Protein
Packed with Vegetables
Sweet & Savory
Better-Than-Takeout Flavor
Quick & Easy
Meal Prep Friendly
Colorful & Satisfying
Easy to Customize
Family Friendly
Budget-Friendly Swap
Loaded BBQ Chicken Sweet Potato
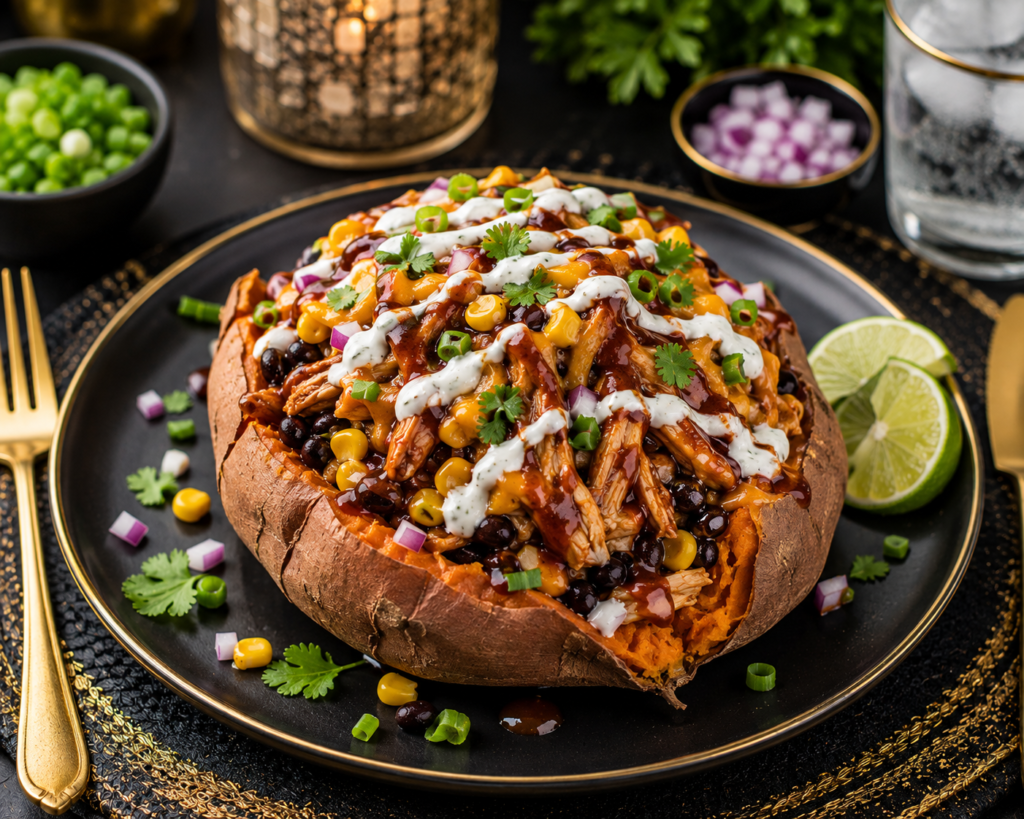
Sweet, smoky, savory, and satisfying, this Loaded BBQ Chicken Sweet Potato turns a simple baked sweet potato into a flavorful complete lunch. Tender shredded chicken is tossed with barbecue sauce and piled onto a fluffy roasted sweet potato with black beans, corn, red onion, and melted cheese. A cool Greek-yogurt drizzle and fresh green onions finish it off for a colorful comfort-food meal that is filling without feeling overly heavy.
Prep Time: 15 minutes
Cook Time: 45–55 minutes
Total Time: 60–70 minutes
Servings: 4 loaded sweet potatoes
Ingredients
4 medium sweet potatoes, scrubbed and dried
1 teaspoon olive oil
2 1/2 cups cooked shredded chicken
1/2 cup barbecue sauce, plus more if desired
1 teaspoon smoked paprika
1/2 teaspoon garlic powder
1/4 teaspoon black pepper
1 cup black beans, drained and rinsed
1 cup corn, cooked and drained
1/2 cup shredded sharp cheddar or Monterey Jack cheese
1/4 cup finely diced red onion
2 green onions, thinly sliced
For the Creamy Drizzle:
1/2 cup plain Greek yogurt
1 tablespoon fresh lime juice
1–2 tablespoons water
Pinch of salt
Optional Garnishes:
Fresh cilantro
Diced avocado
Sliced jalapeños
Extra barbecue sauce
Lime wedges
Directions
- Preheat the oven to 400°F.
- Pierce each sweet potato several times with a fork. Lightly rub the skins with olive oil and place the potatoes on a baking sheet.
- Bake for approximately 45–55 minutes, depending on size, until the potatoes are very tender when pierced with a fork.
- While the potatoes bake, combine the shredded chicken, barbecue sauce, smoked paprika, garlic powder, and black pepper in a saucepan or skillet.
- Warm the chicken over medium-low heat for approximately 5 minutes, stirring occasionally, until heated through. Cooked chicken should reach 165°F when reheated.
- Warm the black beans and corn separately or stir them into the barbecue chicken during the final few minutes of cooking.
- Prepare the creamy drizzle by stirring together the Greek yogurt, lime juice, salt, and enough water to create a smooth, drizzleable consistency.
- Carefully slice each baked sweet potato lengthwise without cutting completely through the bottom. Gently fluff the inside with a fork.
- Divide the barbecue chicken, black beans, and corn among the sweet potatoes.
- Sprinkle each potato with shredded cheese. Return to the oven for 2–3 minutes if desired, just until the cheese melts.
- Finish with red onion, green onions, creamy Greek-yogurt drizzle, and any desired optional garnishes.
- Serve warm with extra barbecue sauce or lime wedges on the side.
Make It Your Way
Spicy BBQ: Add sliced jalapeños, cayenne pepper, chipotle powder, or hot sauce.
Cheese Swap: Try pepper Jack for extra heat, smoked Gouda for deeper barbecue flavor, or leave the cheese off.
Extra Veggies: Add sautéed bell peppers, spinach, diced tomatoes, or shredded cabbage.
Avocado Finish: Add diced avocado after baking for extra creaminess.
No Chicken: Replace the chicken with additional black beans and seasoned chickpeas for a meatless version.
Faster Cooking Option: Microwave pierced sweet potatoes until nearly tender, then finish them in the oven or air fryer to improve the skin texture.
Southern-Inspired Twist: Use a smoky or slightly tangy barbecue sauce and add a small spoonful of crunchy vinegar-based slaw on top just before serving.
Budget-Friendly Swap: Use leftover cooked chicken or rotisserie chicken, frozen corn, store-brand black beans, and whichever barbecue sauce you already have. You can also use less chicken and increase the beans to stretch the filling across all four potatoes.
Storage & Meal Prep
Baked sweet potatoes and the barbecue chicken mixture can be prepared ahead and refrigerated separately in airtight containers for up to 3–4 days.
For meal prep, pack one sweet potato with a portion of barbecue chicken, beans, and corn. Keep the Greek-yogurt drizzle, green onions, avocado, and other fresh toppings separate.
Reheat the sweet potato and chicken filling in the microwave until thoroughly hot, then add the cold toppings.
The barbecue chicken filling can be frozen separately in a freezer-safe container for up to 2–3 months.
Cooked sweet potatoes may also be frozen, although their texture will become softer after thawing.
Thaw frozen components safely in the refrigerator before reheating.
Do not leave cooked chicken or prepared loaded potatoes at room temperature for more than 2 hours, or more than 1 hour when temperatures are above 90°F.
Nutrition Information
Estimated Nutrition Per Serving (1 loaded sweet potato):
Calories: approximately 470
Protein: approximately 34 g
Carbohydrates: approximately 62 g
Fiber: approximately 10 g
Fat: approximately 10 g
Nutrition values are estimates and may vary depending on ingredients, brands, toppings, barbecue sauce, sweet potato size, and serving sizes.
Why You’ll Love It
High Protein
Fiber-Rich
Sweet & Smoky
Lighter Comfort Food
Filling & Satisfying
Meal Prep Friendly
Colorful & Flavorful
Easy to Customize
Great for Leftover Chicken
Budget-Friendly Swap
Turkey Taco Stuffed Bell Peppers
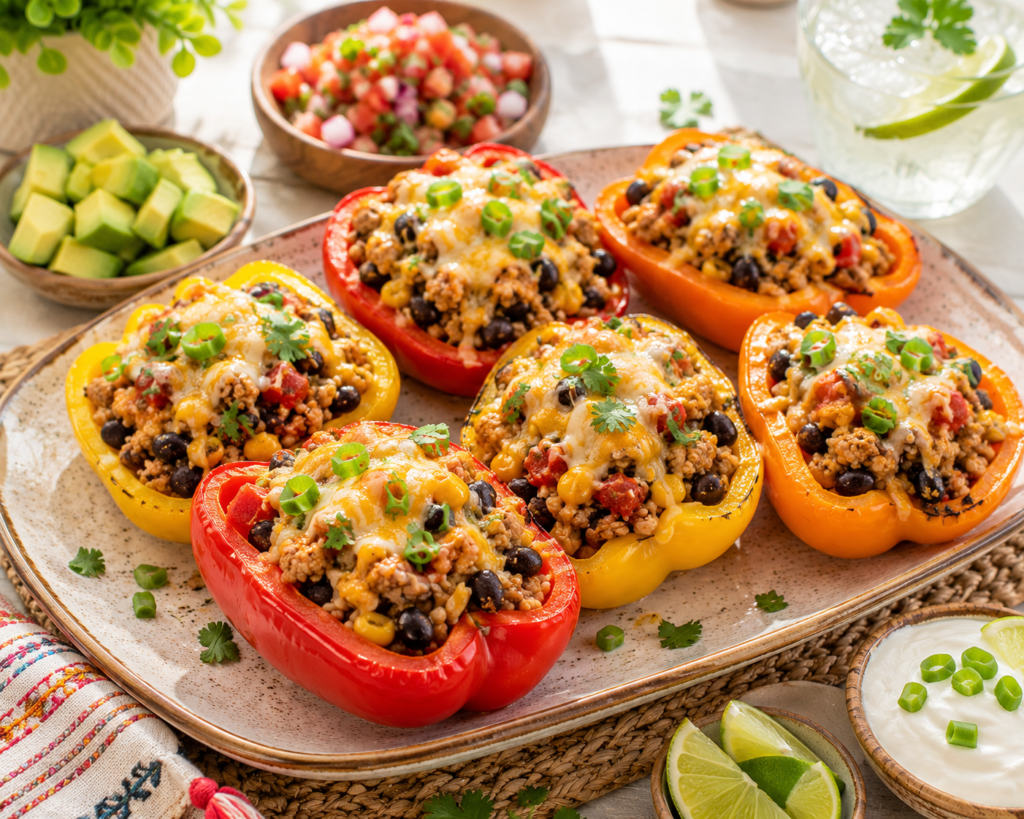
These Turkey Taco Stuffed Bell Peppers bring all the bold, cheesy flavor of taco night into a colorful, vegetable-packed lunch. Sweet bell peppers are filled with seasoned lean ground turkey, black beans, corn, tomatoes, brown rice, and melted cheese, then finished with fresh taco-style toppings. They’re satisfying enough for a full meal, easy to portion for meal prep, and another way to enjoy familiar comfort-food flavors without making lunch feel repetitive.
Prep Time: 20 minutes
Cook Time: 35 minutes
Total Time: 55 minutes
Servings: 4 servings
Serving Size: 2 pepper halves
Ingredients
4 large bell peppers, any color
1 tablespoon olive oil
1 pound lean ground turkey
1 small yellow onion, diced
2 cloves garlic, minced
2 teaspoons chili powder
1 teaspoon ground cumin
1/2 teaspoon smoked paprika
1/2 teaspoon dried oregano
1/2 teaspoon salt
1/4 teaspoon black pepper
1 cup cooked brown rice
1 cup black beans, drained and rinsed
3/4 cup corn
1 cup diced tomatoes, drained if very juicy
1/3 cup salsa
1 cup shredded reduced-fat cheddar or Mexican-blend cheese
2 tablespoons chopped fresh cilantro
Optional Toppings:
Diced avocado
Plain Greek yogurt
Fresh pico de gallo
Sliced green onions
Fresh cilantro
Sliced jalapeños
Lime wedges
Directions
- Preheat the oven to 375°F.
- Slice the bell peppers in half lengthwise and remove the seeds and membranes.
- Arrange the pepper halves cut-side up in a baking dish. Add about 1/4 cup water to the bottom of the dish, cover loosely with foil, and bake for 10 minutes to begin softening the peppers.
- Meanwhile, heat the olive oil in a large skillet over medium heat. Add the onion and cook for 2–3 minutes.
- Add the ground turkey and cook, breaking it into crumbles, until no longer pink.
- Add the garlic, chili powder, cumin, smoked paprika, oregano, salt, and black pepper. Cook for another minute until fragrant. Ground turkey should reach an internal temperature of 165°F.
- Stir in the cooked brown rice, black beans, corn, tomatoes, and salsa. Cook for 2–3 minutes until the filling is heated through and well combined.
- Remove the peppers from the oven and carefully drain any excess water from the baking dish.
- Divide the turkey mixture evenly among the 8 pepper halves.
- Sprinkle the shredded cheese evenly over the stuffed peppers.
- Return the peppers to the oven uncovered and bake for approximately 15–20 minutes, until the peppers are tender and the cheese is melted.
- Sprinkle with fresh cilantro and serve with avocado, Greek yogurt, pico de gallo, green onions, jalapeños, or lime as desired.
Make It Your Way
Make It Spicy: Add cayenne, jalapeños, chipotle powder, or hot salsa to the turkey filling.
Rice Swap: Use quinoa, white rice, cauliflower rice, or another cooked grain.
Bean Swap: Pinto beans work just as well as black beans.
Extra Veggies: Add diced zucchini, mushrooms, spinach, or additional tomatoes to the filling.
Cheese Options: Try pepper Jack for more heat or Monterey Jack for a milder flavor.
Lower-Carb Option: Replace the brown rice with cauliflower rice or simply increase the turkey and vegetables.
Vegetarian Version: Leave out the turkey and increase the beans, corn, rice, and vegetables.
Taco Bowl Variation: Skip the peppers and serve the filling over chopped lettuce or rice when you need an even quicker meal.
Budget-Friendly Swap: Use whichever color bell peppers are on sale, store-brand canned beans and corn, and leftover cooked rice. You can also slightly reduce the ground turkey and increase the beans and rice to stretch the filling.
Storage & Meal Prep
Allow leftover stuffed peppers to cool slightly before transferring them to an airtight container.
Refrigerate for up to 3–4 days.
For meal prep, portion two pepper halves into each container and keep avocado, Greek yogurt, pico de gallo, and other cold toppings separate.
Reheat in the microwave until thoroughly hot or cover and warm in a 350°F oven until heated through.
Stuffed peppers can be assembled a day ahead, refrigerated, and baked when ready to serve.
For freezing, cool the cooked stuffed peppers completely and place them in freezer-safe containers. Freeze for up to 2–3 months.
Thaw overnight in the refrigerator before reheating. The peppers may be slightly softer after freezing but will still work well for meal prep.
Do not leave cooked turkey or prepared stuffed peppers at room temperature for more than 2 hours, or more than 1 hour when temperatures are above 90°F.
Nutrition Information
Estimated Nutrition Per Serving (2 stuffed pepper halves):
Calories: approximately 430
Protein: approximately 35 g
Carbohydrates: approximately 43 g
Fiber: approximately 10 g
Fat: approximately 14 g
Nutrition values are estimates and may vary depending on ingredients, brands, toppings, pepper size, and serving sizes.
‘Why You’ll Love It
High Protein
Fiber-Rich
Vegetable-Packed
Taco-Inspired Flavor
Meal Prep Friendly
Colorful & Satisfying
Family Friendly
Easy to Customize
Freezer Friendly
Budget-Friendly Swap
Mediterranean Chicken Pita Pockets
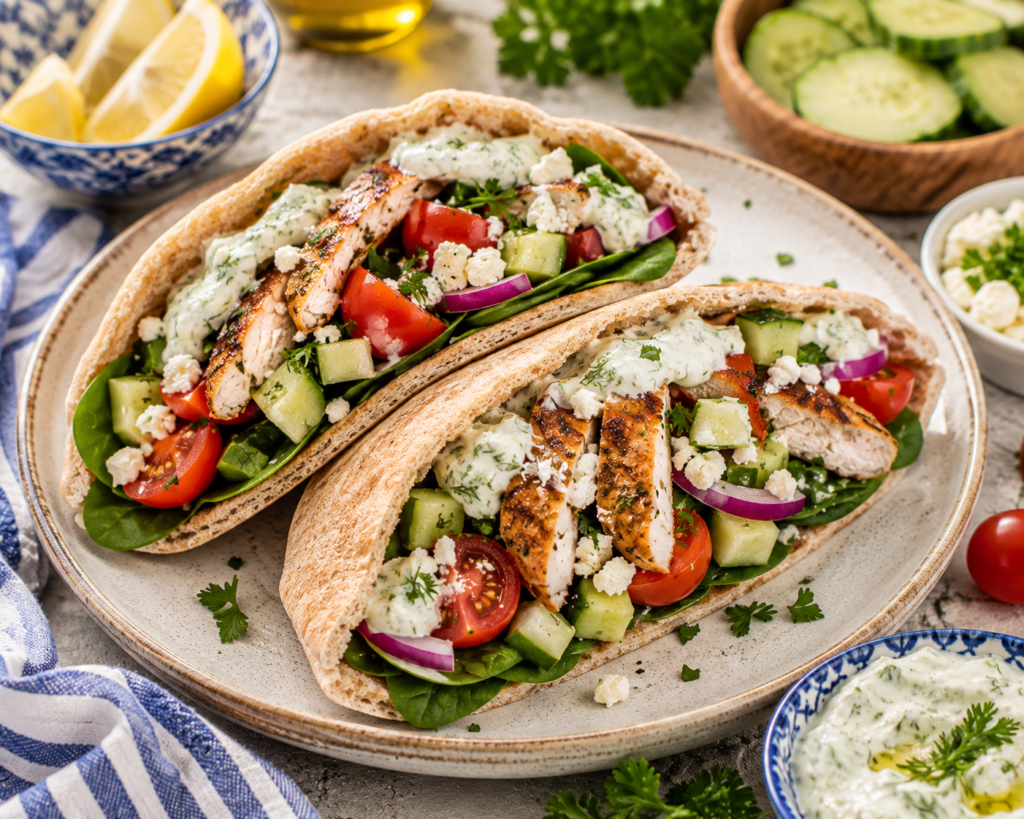
Fresh, colorful, and packed with Mediterranean-inspired flavor, these Mediterranean Chicken Pita Pockets combine juicy herb-seasoned chicken with crisp cucumber, tomatoes, red onion, spinach, feta, and a cool homemade Greek-yogurt tzatziki sauce. Everything is tucked into warm whole-wheat pita pockets for a satisfying handheld lunch that feels completely different from a traditional sandwich or wrap. They’re easy enough for a weekday lunch but flavorful and attractive enough to serve when you want something a little special.
Prep Time: 20 minutes
Cook Time: 12 minutes
Rest Time: 5 minutes
Total Time: 37 minutes
Servings: 4
Serving Size: 2 filled pita halves
Ingrediants
1 1/4 pounds boneless, skinless chicken breasts
1 tablespoon olive oil
1 tablespoon fresh lemon juice
1 teaspoon dried oregano
1 teaspoon garlic powder
1/2 teaspoon smoked paprika
1/2 teaspoon salt
1/4 teaspoon black pepper
4 whole-wheat pita breads, cut in half
2 cups fresh baby spinach
1 cup cherry tomatoes, halved
1 cup diced cucumber
1/3 cup thinly sliced red onion
1/2 cup crumbled feta cheese
1/4 cup chopped fresh parsley
For the Homemade Tzatziki:
3/4 cup plain Greek yogurt
1/2 cup finely grated cucumber, excess moisture squeezed out
1 tablespoon fresh lemon juice
1 teaspoon olive oil
1 small garlic clove, finely minced
1 tablespoon chopped fresh dill
1/4 teaspoon salt
Black pepper, to taste
Directions
- In a small bowl, combine the olive oil, lemon juice, oregano, garlic powder, smoked paprika, salt, and black pepper.
- Coat the chicken evenly with the seasoning mixture.
- Heat a grill pan or skillet over medium heat. Cook the chicken for approximately 5–6 minutes per side, depending on thickness, until golden and the thickest portion reaches an internal temperature of 165°F.
- Transfer the chicken to a clean plate and allow it to rest for 5 minutes before slicing into thin strips.
- While the chicken rests, prepare the tzatziki. Combine the Greek yogurt, grated cucumber, lemon juice, olive oil, garlic, dill, salt, and black pepper. Stir until creamy and well combined.
- Warm the pita breads briefly in a dry skillet, oven, or microwave until soft and pliable.
- Carefully open each pita half to create a pocket.
- Add baby spinach to each pita pocket, followed by sliced chicken, tomatoes, cucumber, red onion, and feta.
- Spoon the homemade tzatziki over the filling.
- Finish with fresh parsley and serve immediately with additional lemon or tzatziki if desired.
Make It Your Way
Rotisserie Shortcut: Use sliced or shredded rotisserie chicken when you need an especially quick lunch.
Veggie Boost: Add shredded carrots, roasted red peppers, olives, or chopped romaine.
Cheese Swap: Replace feta with goat cheese or leave the cheese out.
Make It Spicy: Add crushed red pepper, sliced pepperoncini, or a little hot sauce.
Hummus Addition: Spread a thin layer of hummus inside the pita before adding the other ingredients.
Lower-Carb Option: Serve the chicken and Mediterranean toppings in lettuce cups instead of pita.
Vegetarian Version: Replace the chicken with seasoned chickpeas or falafel.
Budget-Friendly Swap: Use chicken thighs when they’re less expensive than chicken breasts. Store-brand Greek yogurt and whole-wheat pita work perfectly, and seasonal tomatoes and cucumbers can help keep produce costs down.
Storage & Meal Prep
Cooked chicken can be refrigerated in an airtight container for 3–4 days.
Homemade tzatziki can be refrigerated in a covered container for approximately 3–4 days. Stir before serving if any liquid separates.
For meal prep, store the chicken, vegetables, pita, feta, and tzatziki separately and assemble the pita pockets shortly before eating.
Avoid assembling several days in advance because tomatoes, cucumber, and tzatziki can make the pita soggy.
An assembled pita can be tightly wrapped and refrigerated for up to 24 hours, although freshly assembled provides the best texture.
Keep packed pita ingredients refrigerated or in an insulated lunch bag with an ice pack.
Freezing the fully assembled pita pockets is not recommended. Cooked chicken may be frozen separately for up to 2–3 months.
Do not leave cooked chicken or prepared pita pockets at room temperature for more than 2 hours, or more than 1 hour when temperatures are above 90°F.
Nutrition Information
Estimated Nutrition Per Serving (2 pita halves):
Calories: approximately 440
Protein: approximately 40 g
Carbohydrates: approximately 42 g
Fiber: approximately 7 g
Fat: approximately 14 g
Nutrition values are estimates and may vary depending on ingredients, brands, toppings, pita size, and serving sizes.
Why You’ll Love It
High Protein
Fresh & Flavorful
Mediterranean-Inspired
Creamy & Crunchy
Quick & Easy
Great for Work Lunches
Meal Prep Friendly
Easy to Customize
Handheld Lunch
Budget-Friendly Swap
Crispy Chicken & Avocado Quesadillas
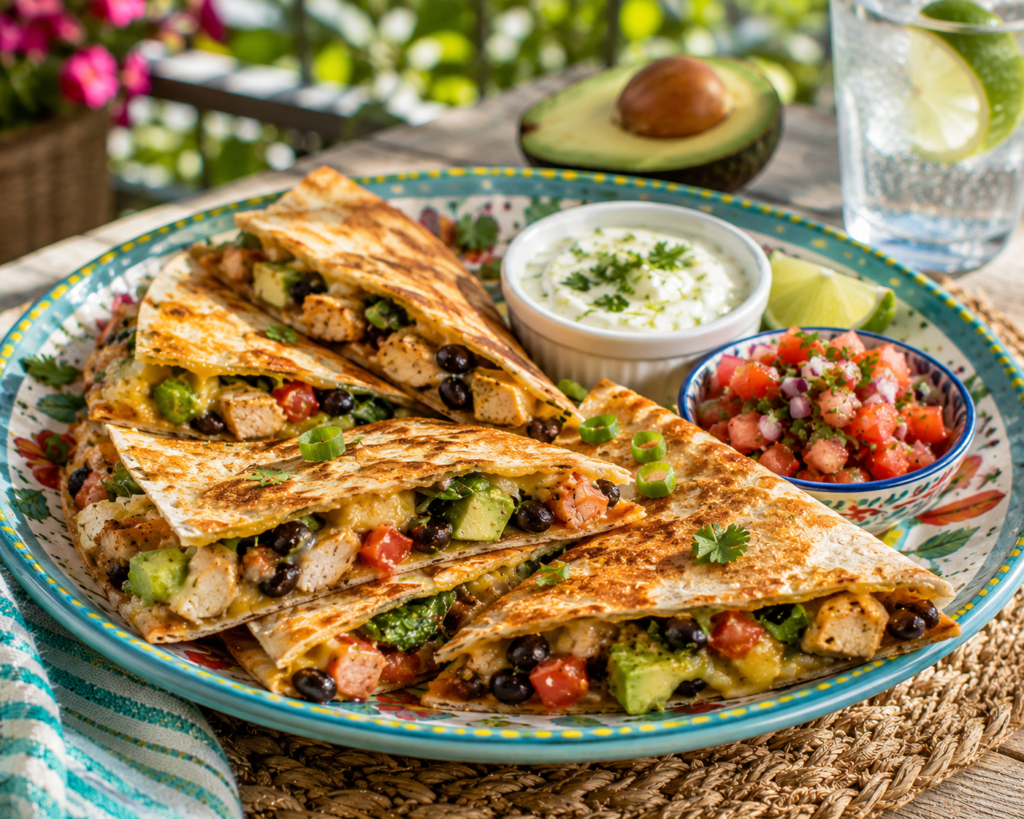
Golden and crispy on the outside with a warm, flavorful filling inside, these Crispy Chicken & Avocado Quesadillas make an easy lunch that feels satisfying without being overly heavy. Seasoned chicken, creamy avocado, black beans, fresh tomatoes, spinach, and melted cheese are tucked inside whole-wheat tortillas and toasted until crisp. Served with fresh salsa and a cool lime Greek-yogurt dip, they bring plenty of familiar Tex-Mex flavor while adding protein, fiber, vegetables, and healthy fats.
Prep Time: 15 minutes
Cook Time: 15 minutes
Total Time: 30 minutes
Servings: 4
Serving Size: 1 quesadilla, cut into wedges
Ingredients
2 cups cooked chicken breast, shredded or finely chopped
1 teaspoon chili powder
1/2 teaspoon ground cumin
1/2 teaspoon garlic powder
1/2 teaspoon smoked paprika
1/4 teaspoon black pepper
1 tablespoon fresh lime juice
4 large whole-wheat tortillas
1 large avocado, diced
3/4 cup black beans, drained and rinsed
1/2 cup diced tomatoes, excess liquid drained
1 cup fresh baby spinach, roughly chopped
1 1/4 cups shredded Monterey Jack, cheddar, or Mexican-blend cheese
2 green onions, thinly sliced
2 teaspoons olive oil, divided
For the Lime Greek-Yogurt Dip:
1/2 cup plain Greek yogurt
1 tablespoon fresh lime juice
1 tablespoon chopped fresh cilantro
1/4 teaspoon garlic powder
Pinch of salt
For Serving:
Fresh salsa or pico de gallo
Fresh cilantro
Lime wedges
Directions
- Place the cooked chicken in a bowl. Add the chili powder, cumin, garlic powder, smoked paprika, black pepper, and lime juice. Toss until evenly seasoned.
- Prepare the lime Greek-yogurt dip by stirring together the Greek yogurt, lime juice, cilantro, garlic powder, and salt. Refrigerate until ready to serve.
- Lay the tortillas on a clean work surface.
- Sprinkle cheese over one half of each tortilla, reserving a small amount for the top layer.
- Divide the seasoned chicken, avocado, black beans, tomatoes, spinach, and green onions evenly among the tortillas.
- Sprinkle the remaining cheese over the filling. Fold the empty half of each tortilla over the filling and press gently.
- Heat approximately 1/2 teaspoon olive oil in a large nonstick skillet over medium heat.
- Cook each quesadilla for approximately 2–3 minutes per side, until the tortilla is golden and crisp and the cheese has melted. Cook in batches if necessary.
- Transfer the quesadillas to a cutting board and allow them to rest for 1–2 minutes.
- Slice each quesadilla into wedges.
- Serve warm with fresh salsa or pico de gallo, lime Greek-yogurt dip, cilantro, and lime wedges.
Make It Your Way
Make It Spicy: Add sliced jalapeños, pepper Jack cheese, cayenne, or your favorite hot sauce.
Rotisserie Shortcut: Use shredded rotisserie chicken for an especially quick lunch.
Extra Veggies: Add sautéed bell peppers, mushrooms, corn, zucchini, or additional spinach.
Cheese Swap: Try pepper Jack, reduced-fat cheddar, Monterey Jack, or a combination.
More Avocado Flavor: Mash the avocado with lime juice and spread it lightly over the tortilla before adding the other ingredients.
Vegetarian Version: Leave out the chicken and increase the black beans and vegetables.
Lower-Carb Option: Use your preferred lower-carbohydrate tortilla.
Corn & Black Bean Version: Add 1/2 cup corn for a sweet and smoky Southwest variation.
Budget-Friendly Swap: Use leftover cooked chicken, store-brand tortillas and cheese, and canned black beans. You can also reduce the chicken slightly and increase the beans to make the filling stretch further.
Storage & Meal Prep
Cooked quesadillas can be refrigerated in an airtight container for up to 3–4 days.
For the crispiest leftovers, reheat quesadilla wedges in a dry skillet, toaster oven, or air fryer until hot and crisp. Microwaving works but will produce a softer tortilla.
The chicken filling can be prepared ahead and refrigerated separately for quick assembly.
For work lunches, allow the cooked quesadilla to cool before packing so trapped steam does not make the tortilla excessively soft.
Keep salsa, Greek-yogurt dip, and other wet toppings in separate containers until serving.
Quesadillas can be frozen, although fresh avocado may soften after thawing. For freezer meal prep, prepare some quesadillas without avocado and add fresh avocado after reheating.
Freeze cooled quesadillas individually before transferring them to a freezer-safe container. Use within approximately 2 months for best quality.
Do not leave cooked chicken or prepared quesadillas at room temperature for more than 2 hours, or more than 1 hour when temperatures are above 90°F.
Nutrition Information
Estimated Nutrition Per Serving (1 quesadilla):
Calories: approximately 470
Protein: approximately 36 g
Carbohydrates: approximately 41 g
Fiber: approximately 9 g
Fat: approximately 20 g
Nutrition values are estimates and may vary depending on ingredients, brands, toppings, tortilla size, cheese, and serving sizes.
Why You’ll Love It
High Protein
Fiber-Rich
Crispy & Cheesy
Ready in About 30 Minutes
Healthy Fats
Family Friendly
Great for Leftover Chicken
Easy to Customize
Meal Prep Friendly
Budget-Friendly Swap
Turkey Avocado Club Sandwich
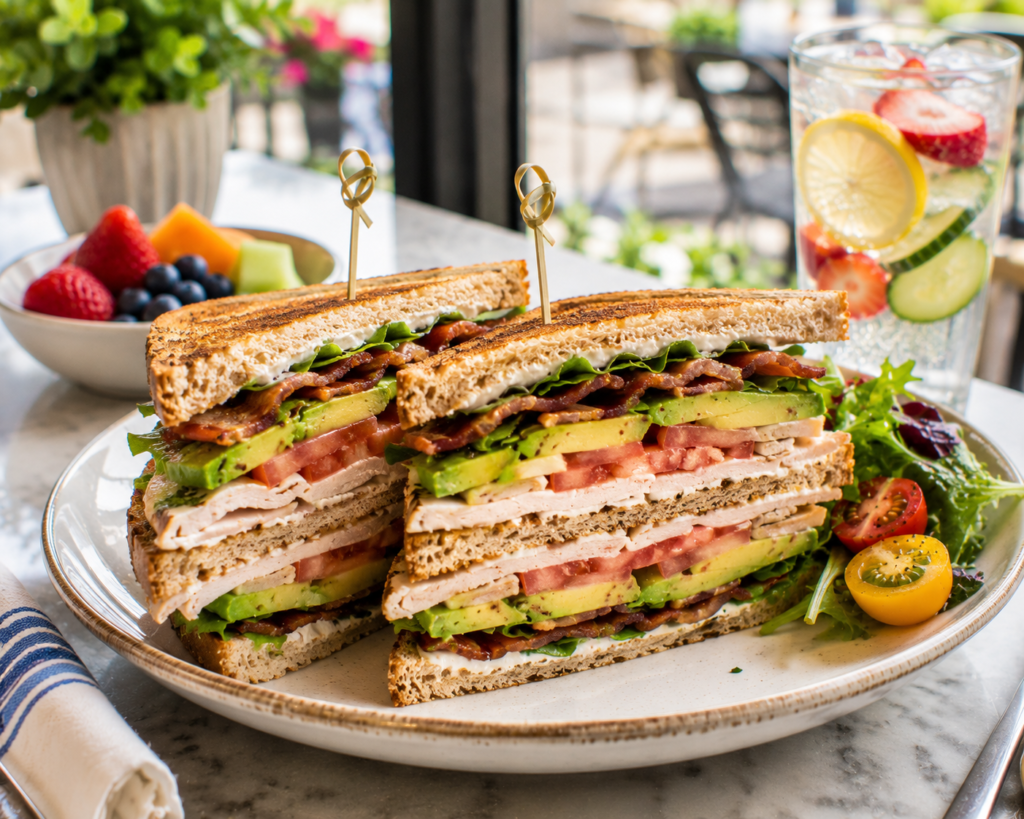
This Turkey Avocado Club Sandwich takes a familiar deli favorite and gives it a fresh, satisfying upgrade. Layers of lean turkey, creamy avocado, crisp turkey bacon, juicy tomato, leafy greens, and a tangy Dijon Greek-yogurt spread are stacked between toasted whole-grain bread. It delivers the hearty feel of a classic club sandwich while adding fiber, healthy fats, and plenty of protein—perfect for a quick lunch at home or an easy meal to pack for work.
Prep Time: 15 minutes
Cook Time: 5 minutes
Total Time: 20 minutes
Servings: 4 sandwiches
Ingredients
12 slices whole-grain bread
12 ounces sliced roasted turkey breast
8 slices turkey bacon, cooked until crisp
1 large avocado, thinly sliced
1 large tomato, thinly sliced
2 cups romaine lettuce or mixed greens
1/4 small red onion, thinly sliced, optional
For the Dijon Greek-Yogurt Spread:
1/2 cup plain Greek yogurt
1 tablespoon Dijon mustard
1 teaspoon honey
1 teaspoon fresh lemon juice
1/4 teaspoon garlic powder
Pinch of salt
Black pepper, to taste
Directions
- Cook the turkey bacon according to package directions until crisp. Transfer to a paper-towel-lined plate and set aside.
- Lightly toast the whole-grain bread until golden and crisp.
- Prepare the Dijon Greek-yogurt spread by combining the Greek yogurt, Dijon mustard, honey, lemon juice, garlic powder, salt, and black pepper in a small bowl.
- Spread a thin layer of the Dijon Greek-yogurt mixture over one side of each piece of toasted bread.
- To assemble each club, place lettuce, sliced turkey, tomato, avocado, and one slice of turkey bacon over the first piece of toast.
- Place a second piece of toast on top, spread-side facing up.
- Add another layer of turkey, lettuce, tomato, avocado, and turkey bacon.
- Finish with the third piece of toast, spread-side facing down.
- Gently press the sandwich together. Secure with sandwich picks if needed and slice diagonally into halves or quarters.
- Serve immediately with fresh fruit, vegetable sticks, or another light side of your choice.
Make It Your Way
Cheese Please: Add a thin slice of Swiss, provolone, cheddar, or pepper Jack.
Add Some Heat: Spread a little hot sauce into the Dijon mixture or add sliced jalapeños.
Bread Swap: Use sourdough, seeded whole-grain bread, or your favorite high-fiber bread.
Chicken Club: Substitute sliced or shredded cooked chicken for the turkey.
Extra Crunch: Add cucumber slices, sprouts, or shredded cabbage.
No Turkey Bacon: Leave it off completely or substitute a small amount of your preferred cooked bacon.
Single-Layer Option: Skip the traditional three-slice club construction and make a smaller two-slice sandwich for a lighter meal.
For the best texture, assemble this sandwich shortly before serving.
Budget-Friendly Swap: Use leftover roasted turkey or chicken instead of deli meat. Choose store-brand whole-grain bread and Greek yogurt, and use whichever leafy greens are already in your refrigerator.
Storage & Meal Prep
The Dijon Greek-yogurt spread can be prepared ahead and refrigerated in an airtight container for up to 3–4 days.
Cooked turkey bacon can also be prepared ahead and refrigerated according to package storage guidance.
If packing the sandwich for work, thoroughly dry the lettuce and tomatoes before assembling.
To help prevent soggy bread, place lettuce directly against the bread to create a barrier between the toast and wetter ingredients such as tomato.
Avocado is best added shortly before serving. A light coating of lemon juice can help slow browning.
Keep prepared sandwiches refrigerated or in an insulated lunch bag with an ice pack.
Freezing the assembled sandwich is not recommended because avocado, tomato, lettuce, and the yogurt spread will not retain their best texture after thawing.
Do not leave the prepared sandwich at room temperature for more than 2 hours, or more than 1 hour when temperatures are above 90°F.
Nutrition Information
Estimated Nutrition Per Serving (1 club sandwich):
Calories: approximately 450
Protein: approximately 36 g
Carbohydrates: approximately 43 g
Fiber: approximately 9 g
Fat: approximately 17 g
Nutrition values are estimates and may vary depending on ingredients, brands, toppings, bread size, and serving sizes.
Why You’ll Love It
High Protein
Fiber-Rich
Healthy Fats
Classic Lunch Favorite
Quick & Easy
Ready in About 20 Minutes
Great for Work Lunches
Fresh & Satisfying
Easy to Customize
Budget-Friendly Swap
Cilantro Lime Chicken Quinoa Bowl
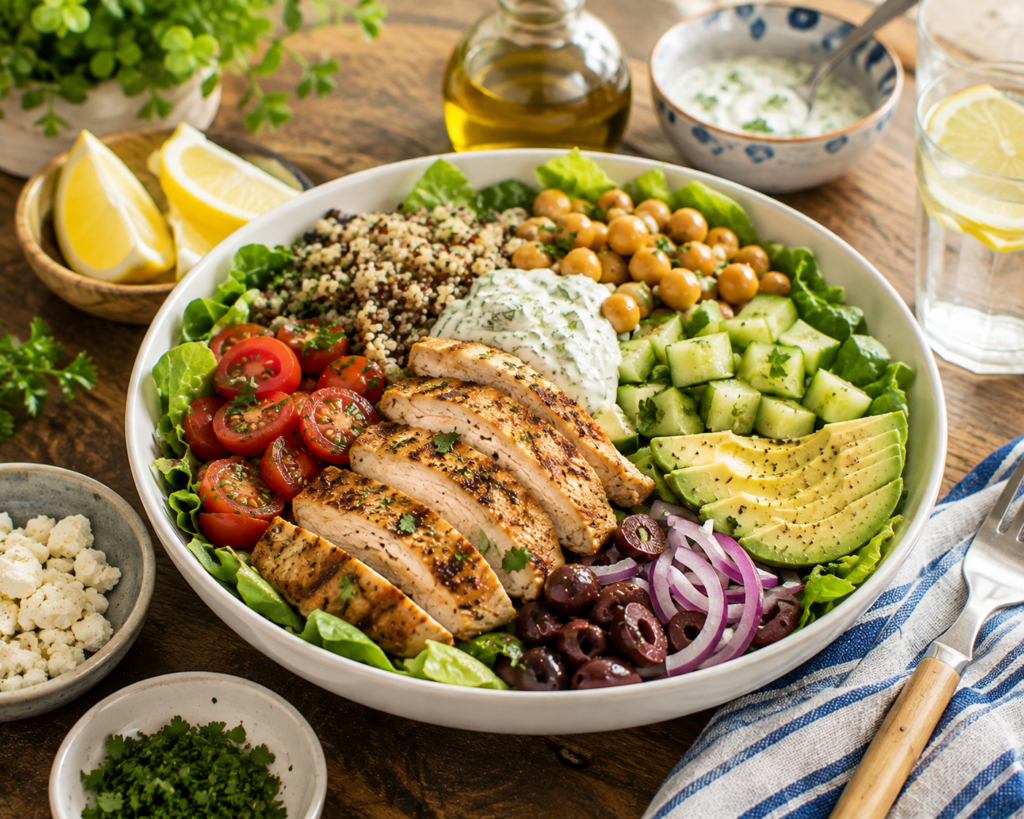
Fresh, colorful, and packed with bold flavor, this Cilantro Lime Chicken Quinoa Bowl combines juicy seasoned chicken with fluffy quinoa, black beans, sweet corn, avocado, tomatoes, and crisp greens. A creamy cilantro-lime sauce ties everything together with a bright, tangy finish. With plenty of protein, fiber, vegetables, and satisfying textures, this bowl makes a filling lunch that works just as well for meal prep as it does for a fresh meal at home.
Prep Time: 20 minutes
Cook Time: 15 minutes
Rest Time: 5 minutes
Total Time: 40 minutes
Servings: 4 bowls
Ingredients
For the Chicken:
1 1/2 pounds boneless, skinless chicken breasts
1 tablespoon olive oil
2 tablespoons fresh lime juice
1 teaspoon chili powder
1 teaspoon ground cumin
1 teaspoon garlic powder
1/2 teaspoon smoked paprika
1/2 teaspoon salt
1/4 teaspoon black pepper
For the Bowls:
2 cups cooked quinoa
1 15-ounce can black beans, drained and rinsed
1 1/2 cups corn, cooked and cooled
1 1/2 cups cherry tomatoes, halved
1 large avocado, diced
2 cups chopped romaine or mixed greens
1/4 cup finely diced red onion
1/4 cup chopped fresh cilantro
Fresh lime wedges, for serving
For the Creamy Cilantro Lime Sauce:
3/4 cup plain Greek yogurt
1/2 cup loosely packed fresh cilantro
2 tablespoons fresh lime juice
1 tablespoon olive oil
1 small garlic clove
1 teaspoon honey
1/4 teaspoon ground cumin
1/4 teaspoon salt
1–2 tablespoons water, as needed
Directions
- Place the chicken in a shallow dish. Add the olive oil, lime juice, chili powder, cumin, garlic powder, smoked paprika, salt, and black pepper. Turn the chicken until evenly coated.
- Heat a grill pan or large skillet over medium heat.
- Cook the chicken for approximately 5–7 minutes per side, depending on thickness, until browned and the thickest portion reaches an internal temperature of 165°F.
- Transfer the cooked chicken to a clean plate and allow it to rest for 5 minutes before slicing.
- While the chicken rests, prepare the creamy cilantro-lime sauce. Add the Greek yogurt, cilantro, lime juice, olive oil, garlic, honey, cumin, and salt to a blender or food processor.
- Blend until smooth and creamy. Add water 1 tablespoon at a time until the sauce reaches your preferred consistency.
- Divide the cooked quinoa among four bowls.
- Arrange the black beans, corn, cherry tomatoes, avocado, greens, and red onion around the quinoa.
- Add sliced cilantro-lime chicken to each bowl.
- Drizzle the creamy cilantro-lime sauce over the chicken and other ingredients.
- Garnish with fresh cilantro and serve with lime wedges for squeezing over the bowl.
Make It Your Way
Make It Spicy: Add sliced jalapeños, crushed red pepper, cayenne, or hot sauce.
Grain Swap: Replace quinoa with brown rice, wild rice, farro, or cauliflower rice.
Extra Veggies: Add roasted bell peppers, cucumber, shredded cabbage, zucchini, or sautéed spinach.
Cheese Addition: Add crumbled cotija, feta, or shredded pepper Jack if desired.
Vegetarian Version: Replace the chicken with seasoned roasted chickpeas and increase the black beans.
Avocado Alternative: Use a spoonful of fresh guacamole when whole avocados aren’t available.
Dairy-Free Sauce: Replace the Greek yogurt with your preferred unsweetened dairy-free yogurt.
Budget-Friendly Swap: Use chicken thighs when they’re less expensive than chicken breasts. Frozen corn, canned black beans, store-brand quinoa, and seasonal vegetables also help reduce the cost. Brown rice can replace quinoa for an even more economical option.
Storage & Meal Prep
Cooked chicken and quinoa can be refrigerated in airtight containers for up to 3–4 days.
For meal prep, portion the quinoa, chicken, black beans, and corn into individual containers.
Keep the avocado, tomatoes, greens, lime wedges, and creamy cilantro-lime sauce separate until serving for the best texture.
Add freshly cut avocado shortly before eating to minimize browning.
To reheat, warm the chicken, quinoa, beans, and corn until thoroughly hot. Add the cold vegetables, avocado, and sauce after reheating.
The cooked chicken and quinoa can be frozen separately in freezer-safe containers for up to 2–3 months. Do not freeze the completely assembled bowls with avocado, greens, tomatoes, or yogurt sauce.
Thaw frozen components overnight in the refrigerator before reheating.
Do not leave cooked chicken or prepared bowls at room temperature for more than 2 hours, or more than 1 hour when temperatures are above 90°F.
Nutrition Information
Estimated Nutrition Per Serving (1 bowl):
Calories: approximately 510
Protein: approximately 43 g
Carbohydrates: approximately 55 g
Fiber: approximately 12 g
Fat: approximately 16 g
Nutrition values are estimates and may vary depending on ingredients, brands, toppings, sauce amounts, and serving sizes.
Why You’ll Love It
High Protein
Fiber-Rich
Fresh & Flavorful
Colorful & Satisfying
Meal Prep Friendly
Naturally Filling
Easy to Customize
Great for Work Lunches
Gluten-Free Friendly
Budget-Friendly Swap
Spinach Tuna Crunch Wrap
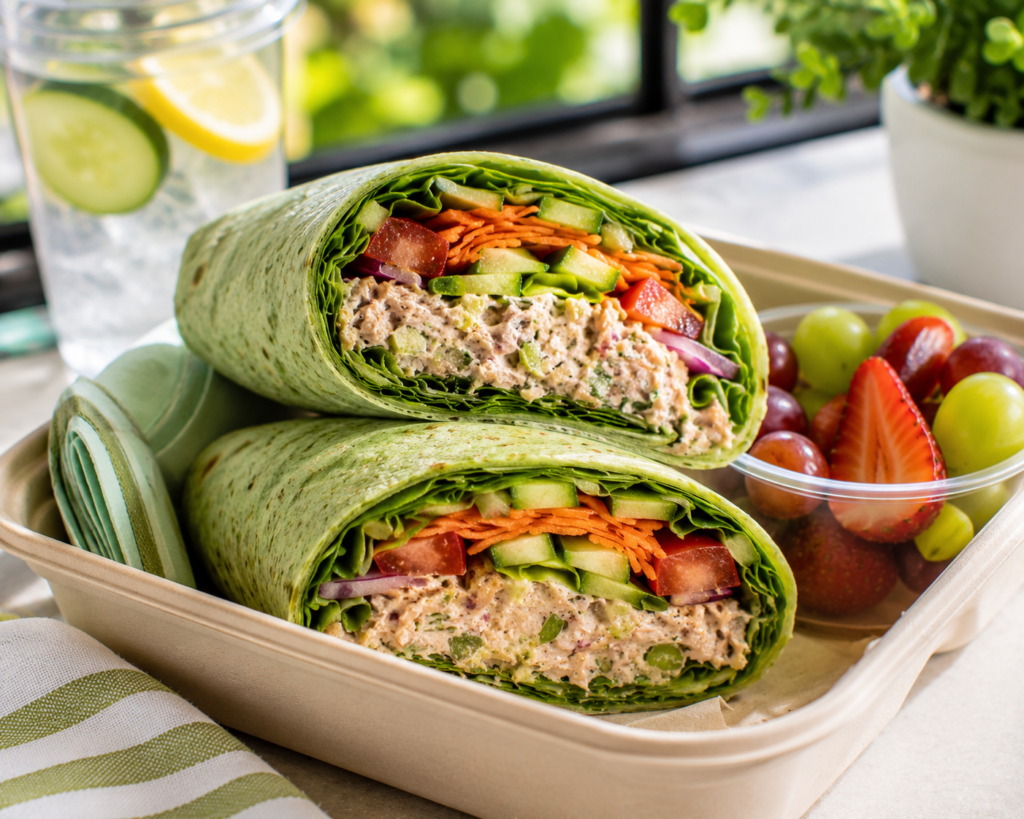
Fresh, creamy, crunchy, and easy to pack, this Spinach Tuna Crunch Wrap turns a simple tuna lunch into something you’ll actually look forward to eating. A spinach tortilla is filled with a lighter Greek-yogurt tuna mixture, crisp romaine, juicy tomato, cucumber, shredded carrots, and red onion for plenty of texture and fresh flavor. Inspired by the classic deli-style tuna wrap, this version is high in protein, quick to prepare, and perfect for busy workdays when you need a satisfying lunch without cooking.
Prep Time: 15 minutes
Cook Time: 0 minutes
Total Time: 15 minutes
Servings: 4 wraps
Ingredients
2 5-ounce cans tuna packed in water, drained well
1/3 cup plain Greek yogurt
2 tablespoons light mayonnaise
1 tablespoon Dijon mustard
1 tablespoon fresh lemon juice
1 celery stalk, finely diced
2 tablespoons finely diced red onion
1 tablespoon sweet pickle relish, optional
1/2 teaspoon garlic powder
1/4 teaspoon black pepper
Salt, to taste
4 large spinach tortillas
2 cups shredded romaine lettuce
1 medium tomato, thinly sliced
1 small cucumber, thinly sliced
1 cup shredded carrots
1/4 cup thinly sliced red onion
Optional:
Sliced avocado
Baby spinach
Sliced pickles
Hot sauce
Fresh lemon wedges
Directions
- Place the well-drained tuna in a medium bowl and break it apart with a fork.
- Add the Greek yogurt, mayonnaise, Dijon mustard, lemon juice, diced celery, diced red onion, pickle relish if using, garlic powder, black pepper, and a small amount of salt.
- Stir until the tuna mixture is creamy and evenly combined. Taste and adjust the lemon, mustard, salt, or pepper as desired.
- Lay the spinach tortillas flat on a clean work surface.
- Place approximately 1/2 cup shredded romaine across the center of each tortilla, leaving space around the edges for folding.
- Divide the tuna mixture evenly among the four tortillas.
- Top the tuna with tomato slices, cucumber, shredded carrots, and thinly sliced red onion.
- Add avocado, baby spinach, pickles, or hot sauce if desired.
- Fold the left and right sides of each tortilla inward over the filling, then tightly roll from the bottom to form a secure wrap.
- Slice each wrap diagonally in half and serve immediately, or wrap tightly and refrigerate until lunchtime.
Make It Your Way
Avocado Tuna: Add sliced or mashed avocado for extra creaminess and healthy fats.
Southern-Style Touch: Add a small spoonful of sweet pickle relish and finely chopped hard-boiled egg for a familiar Southern-inspired tuna flavor.
Extra Crunch: Add diced bell pepper, additional celery, shredded cabbage, or sliced pickles.
Make It Spicy: Add hot sauce, cayenne pepper, sliced jalapeños, or a little spicy mustard.
Cheese Option: Add a thin slice of cheddar, provolone, or pepper Jack.
Lower-Carb Option: Skip the tortilla and serve the tuna mixture inside large romaine or butter-lettuce leaves.
Tortilla Swap: Use a whole-wheat, high-fiber, or other flavored tortilla instead of spinach.
Budget-Friendly Swap: Use store-brand canned tuna, tortillas, and Greek yogurt. Shredded cabbage can replace some or all of the romaine because it is inexpensive, stays crunchy longer, and works especially well for meal prep.
Storage & Meal Prep
Prepared tuna mixture can be stored in an airtight container in the refrigerator for up to 3–4 days.
For the best meal-prep results, prepare the tuna filling ahead but keep the tortillas and fresh vegetables separate until you’re ready to assemble the wraps.
Drain the tuna thoroughly and pat sliced tomatoes and cucumbers dry to reduce excess moisture that could make the tortilla soggy.
If preparing a wrap the night before work, place the lettuce between the tortilla and the wetter ingredients to create a moisture barrier.
Wrap assembled sandwiches tightly in parchment paper, foil, or food-safe wrap and keep refrigerated until ready to eat.
Pack work lunches in an insulated lunch bag with an ice pack when refrigeration is unavailable.
Freezing is not recommended because the fresh vegetables, Greek-yogurt tuna mixture, and tortilla will lose their best texture after thawing.
Do not leave tuna wraps at room temperature for more than 2 hours, or more than 1 hour when temperatures are above 90°F.
Nutrition Information
Estimated Nutrition Per Serving (1 wrap):
Calories: approximately 350
Protein: approximately 30 g
Carbohydrates: approximately 39 g
Fiber: approximately 7 g
Fat: approximately 10 g
Nutrition values are estimates and may vary depending on ingredients, brands, toppings, tortilla size, and serving sizes.
Why You’ll Love It
High Protein
Ready in 15 Minutes
No Cooking Required
Fresh & Crunchy
Great for Work Lunches
Meal Prep Friendly
Easy to Customize
Grab & Go
Familiar Deli-Style Flavor
Budget-Friendly Swap
Southern Chicken & Veggie Flatbread
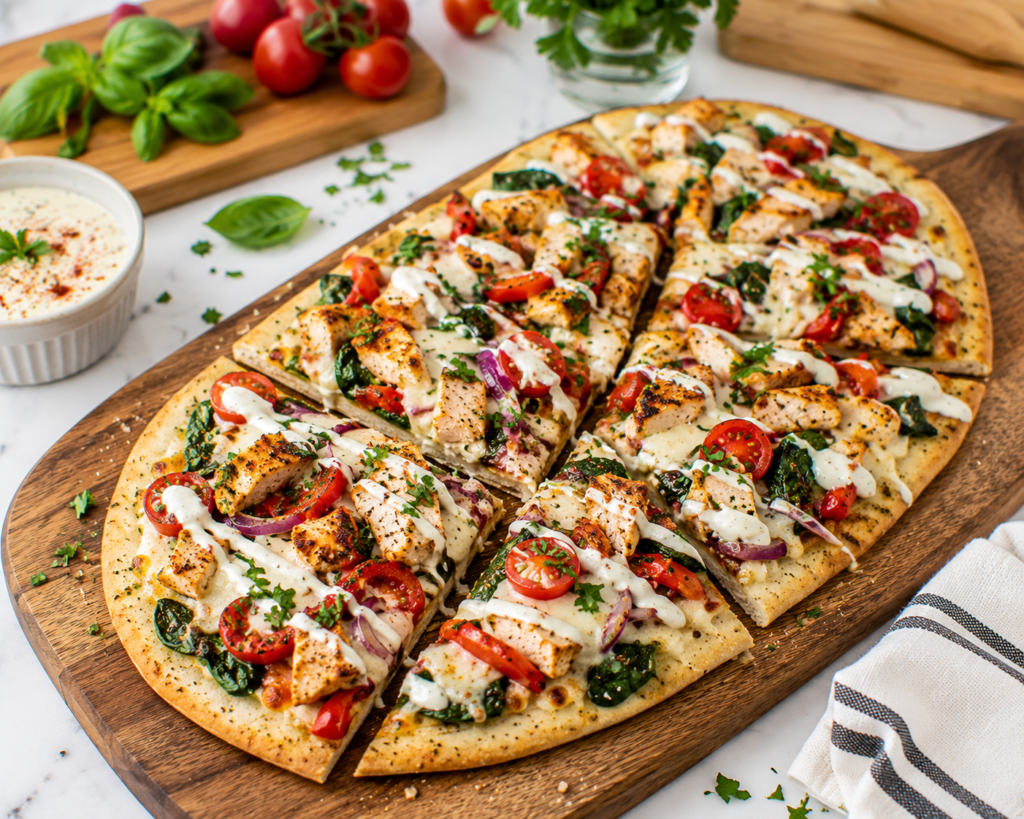
This Southern Chicken & Veggie Flatbread delivers the comfort of a warm, cheesy flatbread while keeping lunch colorful, balanced, and packed with flavor. Tender seasoned chicken is layered over whole-grain flatbread with spinach, roasted red peppers, sweet red onion, tomatoes, and just enough mozzarella to bring everything together. A light smoky Greek-yogurt drizzle adds a creamy Southern-inspired finish. Cut it into wedges and you have an easy lunch that feels closer to pizza than “health food.”
Prep Time: 15 minutes
Cook Time: 15 minutes
Total Time: 30 minutes
Servings: 4
Serving Size: 1/2 flatbread
Ingredients
2 large whole-grain flatbreads or naan-style whole-grain breads
2 cups cooked chicken breast, sliced or chopped
1 teaspoon smoked paprika
1/2 teaspoon garlic powder
1/2 teaspoon onion powder
1/4 teaspoon black pepper
1 tablespoon olive oil, divided
2 cups fresh baby spinach
1 cup cherry tomatoes, halved
1 cup sliced roasted red peppers, drained
1/2 small red onion, thinly sliced
1 1/2 cups shredded part-skim mozzarella cheese
2 tablespoons chopped fresh parsley or basil
For the Smoky Greek-Yogurt Drizzle:
1/2 cup plain Greek yogurt
1 tablespoon fresh lemon juice
1 teaspoon Dijon mustard
1/2 teaspoon honey
1/4 teaspoon smoked paprika
1/4 teaspoon garlic powder
Pinch of salt
1–2 tablespoons water, as needed
Directions
- Preheat the oven to 425°F. Place the flatbreads on a large baking sheet.
- Toss the cooked chicken with smoked paprika, garlic powder, onion powder, black pepper, and 1 teaspoon of the olive oil.
- Brush the flatbreads lightly with the remaining olive oil.
- Divide the spinach evenly between the two flatbreads.
- Arrange the seasoned chicken, cherry tomatoes, roasted red peppers, and red onion evenly over the spinach.
- Sprinkle the mozzarella evenly over the toppings.
- Bake for approximately 10–12 minutes, or until the cheese is melted and bubbling and the edges of the flatbread are golden and crisp.
- While the flatbreads bake, prepare the smoky Greek-yogurt drizzle. Whisk together the Greek yogurt, lemon juice, Dijon mustard, honey, smoked paprika, garlic powder, and salt.
- Add water 1 tablespoon at a time until the sauce is thin enough to drizzle.
- Remove the flatbreads from the oven and allow them to rest for 2–3 minutes.
- Drizzle lightly with the smoky Greek-yogurt sauce and sprinkle with fresh parsley or basil.
- Slice each flatbread into wedges and serve warm.
Make It Your Way
Make It Spicy: Add crushed red pepper flakes, sliced jalapeños, or a drizzle of hot sauce.
BBQ Twist: Replace the Greek-yogurt drizzle with a light drizzle of your favorite barbecue sauce for a smoky BBQ chicken flatbread.
Extra Veggies: Add mushrooms, zucchini, bell peppers, broccoli, or artichoke hearts.
Cheese Swap: Use provolone, Monterey Jack, feta, or a combination of mozzarella and sharp cheddar.
Rotisserie Shortcut: Use leftover or rotisserie chicken to have the flatbread ready even faster.
Pesto Option: Spread a thin layer of pesto over the flatbread before adding the toppings.
Vegetarian Version: Replace the chicken with white beans or seasoned chickpeas and add extra vegetables.
Budget-Friendly Swap: Use store-brand whole-wheat flatbread, leftover cooked chicken, frozen spinach that has been thawed and thoroughly squeezed dry, and whichever vegetables are already in your refrigerator.
Storage & Meal Prep
Refrigerate leftover flatbread in an airtight container for up to 3–4 days.
For the best texture, reheat the flatbread in a 375°F oven, toaster oven, or air fryer until the cheese is hot and the crust becomes crisp again.
Microwaving is convenient but will result in a softer crust.
The chicken and vegetables can be prepared ahead and refrigerated separately, allowing you to assemble and bake the flatbread quickly at lunchtime.
Store the smoky Greek-yogurt drizzle separately in the refrigerator and add it after reheating.
Individual flatbread wedges can be packed for work lunches. Keep refrigerated or use an insulated lunch bag with an ice pack.
The baked flatbread can be frozen, although fresh tomatoes and spinach may become softer after thawing. For best results, freeze tightly wrapped individual portions for up to 1–2 months.
Do not leave cooked chicken or prepared flatbread at room temperature for more than 2 hours, or more than 1 hour when temperatures are above 90°F.
Nutrition Information
Estimated Nutrition Per Serving (1/2 flatbread):
Calories: approximately 430
Protein: approximately 38 g
Carbohydrates: approximately 39 g
Fiber: approximately 6 g
Fat: approximately 15 g
Nutrition values are estimates and may vary depending on ingredients, brands, toppings, flatbread size, and serving sizes.
Why You’ll Love It
High Protein
Ready in About 30 Minutes
Pizza-Inspired Lunch
Vegetable-Packed
Crispy & Cheesy
Family Friendly
Great for Leftover Chicken
Easy to Customize
Meal Prep Friendly
Budget-Friendly Swap
Garlic Parmesan Chicken & Broccoli Pasta
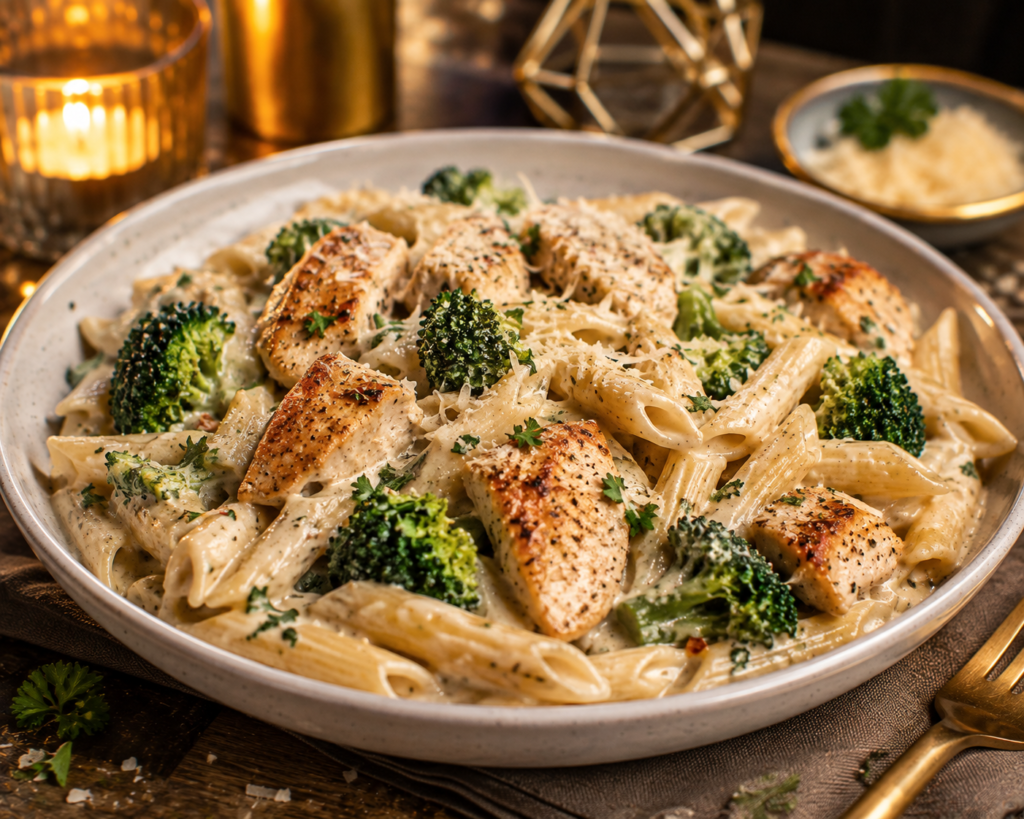
Creamy, garlicky, cheesy, and satisfying, this Garlic Parmesan Chicken & Broccoli Pasta brings comfort-food flavor to lunchtime without requiring a heavy cream sauce. Tender seasoned chicken, broccoli, and whole-grain pasta are tossed in a light Parmesan garlic sauce made with milk, chicken broth, and freshly grated Parmesan. It’s warm and filling enough to satisfy a pasta craving while adding plenty of protein and vegetables, making it a practical choice for family lunches, leftovers, or meal prep.
Prep Time: 15 minutes
Cook Time: 25 minutes
Total Time: 40 minutes
Servings: 6
Ingredients
12 ounces whole-grain penne or rotini pasta
1 pound boneless, skinless chicken breasts, cut into bite-size pieces
1 tablespoon olive oil
1 teaspoon Italian seasoning
1/2 teaspoon garlic powder
1/2 teaspoon onion powder
1/2 teaspoon salt, divided
1/4 teaspoon black pepper
4 cups fresh broccoli florets
3 cloves garlic, minced
1 tablespoon unsalted butter
2 tablespoons all-purpose flour
1 cup low-sodium chicken broth
1 1/2 cups 2% milk
3/4 cup freshly grated Parmesan cheese
1/4 teaspoon crushed red pepper flakes, optional
2 tablespoons chopped fresh parsley
Freshly grated Parmesan, optional for serving
Directions
- Bring a large pot of lightly salted water to a boil. Cook the pasta according to package directions until al dente.
- During the final 3 minutes of pasta cooking time, add the broccoli florets directly to the pasta water.
- Reserve approximately 1/2 cup of pasta water, then drain the pasta and broccoli and set aside.
- While the pasta cooks, season the chicken with Italian seasoning, garlic powder, onion powder, 1/4 teaspoon salt, and black pepper.
- Heat the olive oil in a large skillet over medium-high heat.
- Add the chicken and cook for approximately 5–7 minutes, stirring occasionally, until browned and the thickest pieces reach an internal temperature of 165°F. Transfer the cooked chicken to a clean plate.
- Reduce the heat to medium. Add the butter and minced garlic to the same skillet and cook for approximately 30 seconds, just until fragrant.
- Sprinkle in the flour and whisk continuously for about 1 minute.
- Slowly whisk in the chicken broth, followed by the milk. Continue stirring until the sauce begins to thicken, approximately 3–5 minutes.
- Reduce the heat to low. Add the Parmesan cheese and remaining 1/4 teaspoon salt. Stir until the cheese melts and the sauce becomes smooth.
- Add the cooked pasta, broccoli, and chicken to the skillet. Toss gently until everything is evenly coated in the garlic Parmesan sauce.
- If the sauce is thicker than desired, stir in a small amount of the reserved pasta water until it reaches your preferred consistency.
- Add crushed red pepper flakes if desired.
- Finish with fresh parsley and additional Parmesan before serving.
Make It Your Way
Extra Veggies: Add mushrooms, spinach, asparagus, peas, zucchini, or roasted red peppers.
Pasta Swap: Use whole-wheat rotini, penne, bow ties, chickpea pasta, or another short pasta.
More Protein: Chickpea or lentil pasta can increase both protein and fiber.
Lemon Garlic Twist: Add fresh lemon zest and a squeeze of lemon juice immediately before serving.
Make It Spicy: Add extra crushed red pepper flakes or a small amount of cayenne.
Cheese Swap: Add a little mozzarella for extra creaminess or use Pecorino Romano for a sharper flavor.
Rotisserie Shortcut: Skip cooking raw chicken and stir in shredded rotisserie chicken near the end.
Budget-Friendly Swap: Use frozen broccoli instead of fresh broccoli, store-brand whole-grain pasta, and leftover cooked chicken. Chicken thighs can also replace chicken breasts when they are less expensive.
Storage & Meal Prep
Allow leftovers to cool slightly before transferring them to airtight containers.
Refrigerate for up to 3–4 days.
For meal prep, divide the pasta into individual microwave-safe containers after cooking.
The sauce will naturally thicken during refrigeration. Add a tablespoon or two of milk, broth, or water before reheating to loosen the sauce.
Reheat gently in the microwave, stirring midway through heating, or warm in a skillet over medium-low heat.
Avoid overheating because excessive heat can cause the Parmesan sauce to become oily or separate.
For best quality, this pasta is recommended fresh or refrigerated rather than frozen. Creamy dairy-based sauces may change texture after freezing and thawing.
If freezing is necessary, freeze individual portions in airtight freezer-safe containers for up to 1–2 months and thaw overnight in the refrigerator before gently reheating.
Do not leave cooked chicken pasta at room temperature for more than 2 hours, or more than 1 hour when temperatures are above 90°F.
Nutrition Information
Estimated Nutrition Per Serving:
Calories: approximately 430
Protein: approximately 35 g
Carbohydrates: approximately 49 g
Fiber: approximately 7 g
Fat: approximately 12 g
Nutrition values are estimates and may vary depending on ingredients, brands, toppings, pasta choice, and serving sizes.
Why You’ll Love It
High Protein
Vegetable-Packed
Lighter Comfort Food
Creamy Without Heavy Cream
Family Friendly
Meal Prep Friendly
Easy to Customize
Great for Leftovers
Pasta-Lover Approved
Budget-Friendly Swap
Southern Turkey Meatloaf Muffins with Garlic Mashed Cauliflower
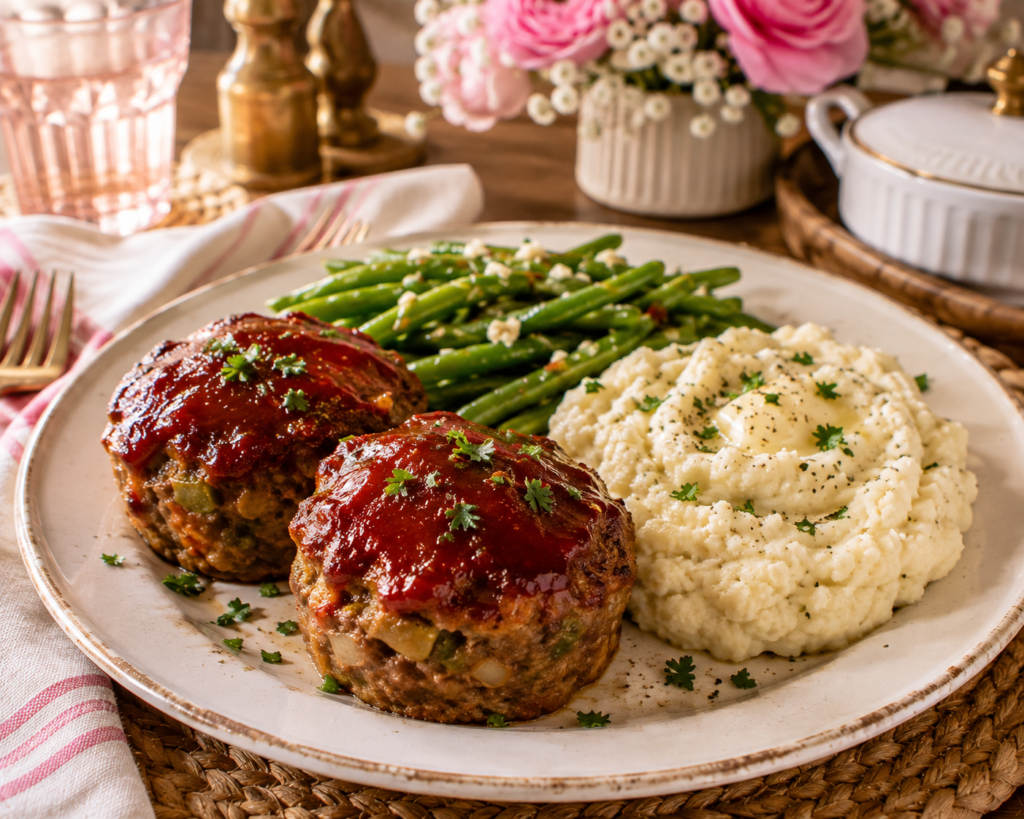
Classic Southern comfort food gets a lighter lunchtime makeover with these Southern Turkey Meatloaf Muffins. Lean ground turkey is seasoned with onion, bell pepper, garlic, herbs, and a sweet-and-tangy glaze, then baked in individual portions until tender and flavorful. Paired with creamy garlic mashed cauliflower and green beans, they make a satisfying homestyle meal that is easy to portion, pack, and reheat—without feeling like another sandwich, salad, or bowl.
Prep Time: 20 minutes
Cook Time: 25 minutes
Total Time: 45 minutes
Servings: 6
Serving Size: 2 meatloaf muffins with mashed cauliflower
Ingredients
For the Turkey Meatloaf Muffins:
1 1/2 pounds lean ground turkey
1 tablespoon olive oil
1/2 cup finely diced yellow onion
1/3 cup finely diced green bell pepper
2 cloves garlic, minced
1 large egg
1/2 cup quick oats
1/4 cup low-sodium chicken broth
1 tablespoon Worcestershire sauce
1 teaspoon Dijon mustard
1 teaspoon smoked paprika
1 teaspoon dried parsley
1/2 teaspoon dried thyme
1/2 teaspoon garlic powder
1/2 teaspoon salt
1/4 teaspoon black pepper
For the Glaze:
1/3 cup ketchup
1 tablespoon Dijon mustard
1 tablespoon honey
1 teaspoon Worcestershire sauce
1/4 teaspoon smoked paprika
For the Garlic Mashed Cauliflower:
1 large head cauliflower, cut into florets
2 cloves garlic
1 tablespoon unsalted butter
1/3 cup plain Greek yogurt
1/4 cup grated Parmesan cheese
1/4 teaspoon salt
Black pepper, to taste
Optional Side:
3 cups steamed or roasted green beans
Directions
- Preheat the oven to 375°F. Lightly coat a 12-cup muffin pan with cooking spray.
- Heat the olive oil in a small skillet over medium heat. Add the onion and green bell pepper and cook for 3–4 minutes until softened.
- Add the garlic and cook for approximately 30 seconds. Remove the vegetables from the heat and allow them to cool slightly.
- In a large bowl, combine the ground turkey, cooked vegetables, egg, oats, chicken broth, Worcestershire sauce, Dijon mustard, smoked paprika, parsley, thyme, garlic powder, salt, and black pepper.
- Gently mix until the ingredients are combined. Avoid overmixing, which can make the meatloaf muffins dense.
- Divide the turkey mixture evenly among the 12 muffin cups.
- In a small bowl, stir together the ketchup, Dijon mustard, honey, Worcestershire sauce, and smoked paprika.
- Spoon a thin layer of glaze over each meatloaf muffin.
- Bake for approximately 20–25 minutes, or until the centers of the meatloaf muffins reach an internal temperature of 165°F.
- While the meatloaf cooks, steam or boil the cauliflower and garlic until very tender, approximately 10–12 minutes.
- Drain the cauliflower thoroughly and allow excess steam to escape for 1–2 minutes.
- Transfer the cauliflower and garlic to a food processor. Add the butter, Greek yogurt, Parmesan, salt, and black pepper.
- Blend until creamy and smooth. Taste and adjust the seasoning as needed.
- Allow the meatloaf muffins to rest for approximately 5 minutes after removing them from the oven.
- Serve 2 meatloaf muffins with garlic mashed cauliflower and green beans, if desired.
Make It Your Way
Southern-Style Flavor: Add a small pinch of cayenne or extra smoked paprika for a little more Southern warmth.
Veggie Boost: Add finely grated carrot, zucchini, or mushrooms to the turkey mixture.
Mashed Potato Option: Serve with a small portion of traditional mashed potatoes or a half-potato, half-cauliflower mash.
BBQ Glaze: Replace the ketchup glaze with your favorite lower-sugar barbecue sauce for a smoky variation.
Extra Herbs: Fresh parsley, thyme, or chives work beautifully in both the meatloaf and cauliflower.
No Food Processor: Mash the cooked cauliflower thoroughly with a potato masher. The texture will be more rustic but still delicious.
Breadcrumb Option: Substitute 1/2 cup whole-wheat breadcrumbs for the quick oats.
Budget-Friendly Swap: Buy ground turkey when it is on sale and use frozen cauliflower and frozen green beans instead of fresh. Store-brand oats, ketchup, and seasonings work perfectly for this recipe.
Storage & Meal Prep
Allow the meatloaf muffins and mashed cauliflower to cool slightly before transferring them to airtight containers.
Refrigerate cooked meatloaf muffins for up to 3–4 days.
Refrigerate the mashed cauliflower separately or in divided meal-prep containers for up to 3–4 days.
For work lunches, portion 2 meatloaf muffins with mashed cauliflower and green beans into microwave-safe containers.
Reheat until thoroughly hot. Add a teaspoon of milk or broth to the mashed cauliflower before reheating if it becomes too thick.
The cooked meatloaf muffins freeze especially well. Cool completely, wrap individually, and freeze in a freezer-safe container for up to 2–3 months.
Thaw frozen meatloaf muffins overnight in the refrigerator before reheating.
Mashed cauliflower can also be frozen, although it may release a little moisture after thawing. Stir thoroughly while reheating to restore the texture.
Do not leave cooked turkey or prepared meals at room temperature for more than 2 hours, or more than 1 hour when temperatures are above 90°F.
Nutrition Information
Estimated Nutrition Per Serving (2 meatloaf muffins with garlic mashed cauliflower):
Calories: approximately 390
Protein: approximately 34 g
Carbohydrates: approximately 27 g
Fiber: approximately 7 g
Fat: approximately 17 g
Nutrition values are estimates and may vary depending on ingredients, brands, toppings, side dishes, and serving sizes.
Why You’ll Love It
High Protein
Southern-Inspired
Lighter Comfort Food
Perfectly Portioned
Vegetable-Packed
Meal Prep Friendly
Freezer Friendly
Family Friendly
Great for Work Lunches
Budget-Friendly Swap
Honey Mustard Chicken Sliders with Crunchy Apple Slaw
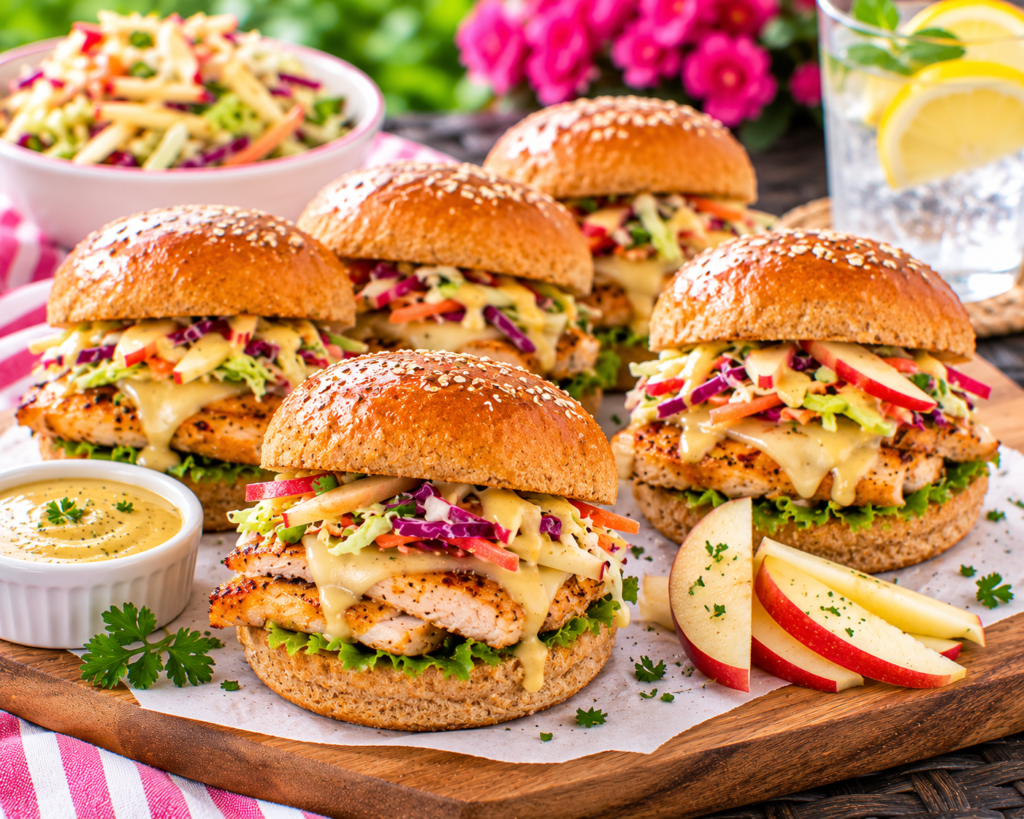
Sweet, tangy, crunchy, and satisfying, these Honey Mustard Chicken Sliders turn an easy handheld lunch into something worth looking forward to. Tender seasoned chicken is layered onto soft whole-grain slider buns with melted cheese and a crisp apple-cabbage slaw, then finished with a creamy homemade honey mustard sauce. They’re perfect when you want something more fun than an everyday sandwich, and the smaller slider size makes them easy to portion for lunch, gatherings, or meal prep.
Prep Time: 20 minutes
Cook Time: 20 minutes
Total Time: 40 minutes
Servings: 6
Serving Size: 2 sliders
Yield: 12 sliders
Ingredients
For the Chicken:
1 1/2 pounds boneless, skinless chicken breasts
1 tablespoon olive oil
1 teaspoon garlic powder
1 teaspoon smoked paprika
1/2 teaspoon onion powder
1/2 teaspoon salt
1/4 teaspoon black pepper
For the Honey Mustard Sauce:
1/2 cup plain Greek yogurt
3 tablespoons Dijon mustard
2 tablespoons honey
1 tablespoon fresh lemon juice
1/4 teaspoon garlic powder
Pinch of salt
Black pepper, to taste
For the Apple Slaw:
2 cups finely shredded green cabbage
1 cup finely shredded red cabbage
1 medium crisp apple, cut into thin matchsticks
1/2 cup shredded carrots
2 tablespoons chopped green onions
2 tablespoons plain Greek yogurt
1 tablespoon apple cider vinegar
1 teaspoon honey
Pinch of salt
Black pepper, to taste
For the Sliders:
12 whole-grain slider buns
6 slices provolone or sharp cheddar cheese, halved
1 tablespoon melted butter or olive oil, optional
Fresh lettuce, optional
Directions
- Preheat the oven to 375°F.
- Pat the chicken dry and season both sides with garlic powder, smoked paprika, onion powder, salt, and black pepper.
- Heat the olive oil in a large skillet over medium heat.
- Add the chicken and cook for approximately 5–7 minutes per side, depending on thickness, until golden brown and the thickest portion reaches an internal temperature of 165°F.
- Transfer the chicken to a clean cutting board and allow it to rest for 5 minutes before slicing thinly.
- While the chicken rests, prepare the honey mustard sauce. Whisk together the Greek yogurt, Dijon mustard, honey, lemon juice, garlic powder, salt, and black pepper until smooth.
- Prepare the apple slaw by combining the green cabbage, red cabbage, apple, carrots, and green onions in a bowl.
- In a separate small bowl, stir together the Greek yogurt, apple cider vinegar, honey, salt, and black pepper. Pour over the cabbage mixture and toss lightly until coated.
- Separate the slider buns and arrange the bottom halves in a baking dish or on a baking sheet.
- Layer sliced chicken over each bun and top with a half slice of cheese.
- Bake uncovered for approximately 4–5 minutes, just until the cheese begins to melt and the buns are warm.
- Remove from the oven. Spoon a small amount of honey mustard sauce over the chicken.
- Add crunchy apple slaw and lettuce, if using, then place the top half of each bun over the filling.
- Lightly brush the tops with melted butter or olive oil if desired.
- Serve warm with additional honey mustard sauce on the side.
Make It Your Way
Make It Spicy: Add cayenne to the chicken seasoning or stir hot sauce into the honey mustard.
Rotisserie Shortcut: Use shredded or sliced rotisserie chicken to reduce preparation time.
Cheese Swap: Try Swiss, pepper Jack, mozzarella, or reduced-fat cheddar.
Apple Options: Honeycrisp, Gala, Fuji, or Granny Smith apples all work well. Choose a crisp variety so the slaw stays crunchy.
Extra Veggies: Add thinly sliced cucumber, spinach, or roasted peppers.
No Slaw: Replace the apple slaw with lettuce, tomato, and thinly sliced apple for an even quicker version.
Full-Size Sandwich: Use whole-grain sandwich buns instead of slider buns and serve one sandwich per person.
Budget-Friendly Swap: Use store-brand slider buns, cabbage, carrots, and Greek yogurt. Cabbage is inexpensive and stretches far, and leftover cooked chicken can replace freshly cooked chicken.
Storage & Meal Prep
Cooked chicken can be refrigerated in an airtight container for up to 3–4 days.
The honey mustard sauce can be prepared ahead and refrigerated in a covered container for up to 3–4 days.
For the best texture, prepare the apple slaw no more than 1 day ahead because the apple and cabbage will gradually soften.
Store the buns, chicken, sauce, and slaw separately when meal prepping and assemble shortly before eating.
If taking the sliders to work, pack the slaw and honey mustard separately and add them after reheating the chicken and bun.
Fully assembled sliders are best eaten the same day because the sauce and slaw can soften the bread during storage.
Freezing fully assembled sliders with slaw is not recommended. The cooked chicken can be frozen separately for up to 2–3 months.
Keep chicken and prepared slaw refrigerated and do not leave them at room temperature for more than 2 hours, or more than 1 hour when temperatures are above 90°F.
Nutrition Information
Estimated Nutrition Per Serving (2 sliders):
Calories: approximately 440
Protein: approximately 35 g
Carbohydrates: approximately 48 g
Fiber: approximately 6 g
Fat: approximately 13 g
Nutrition values are estimates and may vary depending on ingredients, brands, toppings, bun size, cheese, sauce amounts, and serving sizes.
Why You’ll Love It
High Protein
Sweet & Savory
Crunchy & Creamy
Fun Handheld Lunch
Family Friendly
Great for Work Lunches
Easy to Customize
Meal Prep Friendly
Party Friendly
Budget-Friendly Swap
Crispy Salmon Cakes with Lemon-Dill Yogurt Sauce
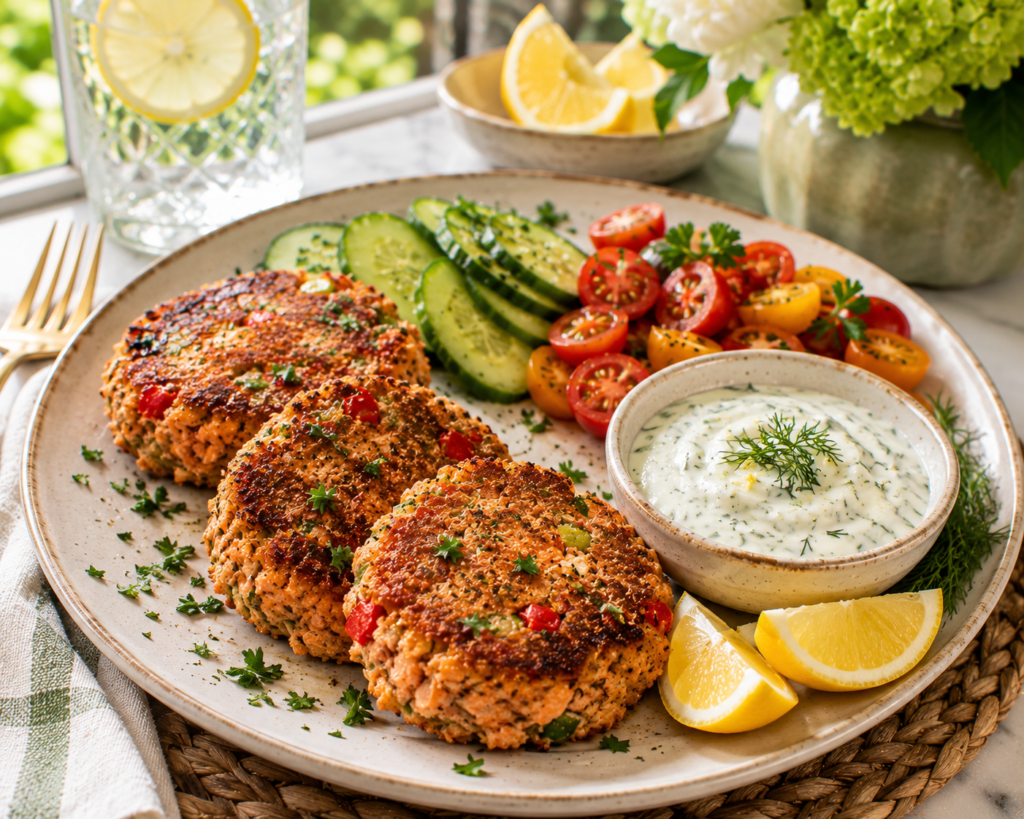
Golden and crisp on the outside, tender and flavorful on the inside, these Crispy Salmon Cakes turn simple ingredients into a lunch that feels a little special. Flaked salmon is combined with bell pepper, green onion, Dijon mustard, lemon, herbs, and whole-wheat breadcrumbs, then pan-seared until beautifully browned. A cool lemon-dill Greek-yogurt sauce adds a fresh, creamy finish. Serve them with roasted vegetables, fresh cucumber and tomato, or your favorite light side for an easy protein-packed meal.
Prep Time: 20 minutes
Chill Time: 15 minutes
Cook Time: 12 minutes
Total Time: 47 minutes
Servings: 4
Serving Size: 2 salmon cakes
Yield: 8 salmon cakes
Ingredients
For the Salmon Cakes:
2 5-ounce cans salmon, drained well and flaked
1 large egg
1/2 cup whole-wheat breadcrumbs
1/3 cup finely diced red bell pepper
1/4 cup thinly sliced green onions
2 tablespoons plain Greek yogurt
1 tablespoon Dijon mustard
1 tablespoon fresh lemon juice
1 teaspoon lemon zest
1 teaspoon Old Bay seasoning
1/2 teaspoon garlic powder
1/2 teaspoon smoked paprika
1/4 teaspoon black pepper
2 tablespoons chopped fresh parsley
1 tablespoon olive oil, plus more if needed for cooking
For the Lemon-Dill Yogurt Sauce:
3/4 cup plain Greek yogurt
1 tablespoon fresh lemon juice
1 teaspoon Dijon mustard
1 tablespoon chopped fresh dill
1 teaspoon honey
1/4 teaspoon garlic powder
Pinch of salt
Black pepper, to taste
For Serving:
Fresh lemon wedges
Sliced cucumber
Cherry tomatoes
Fresh greens or roasted vegetables, optional
Directions
- Place the drained salmon in a large mixing bowl and break it apart with a fork.
- Add the egg, breadcrumbs, red bell pepper, green onions, Greek yogurt, Dijon mustard, lemon juice, lemon zest, Old Bay seasoning, garlic powder, smoked paprika, black pepper, and parsley.
- Gently mix until everything is evenly combined.
- Divide the mixture into 8 equal portions and shape each portion into a compact patty approximately 1/2-inch thick.
- Place the salmon cakes on a plate or parchment-lined tray and refrigerate for 15 minutes. Chilling helps the cakes hold their shape during cooking.
- While the salmon cakes chill, prepare the lemon-dill yogurt sauce. Stir together the Greek yogurt, lemon juice, Dijon mustard, dill, honey, garlic powder, salt, and black pepper. Refrigerate until serving.
- Heat 1 tablespoon olive oil in a large nonstick skillet over medium heat.
- Add the salmon cakes without overcrowding the skillet. Cook in batches if necessary.
- Cook for approximately 3 minutes per side, or until golden brown, crisp on the outside, and heated through.
- Transfer the cooked salmon cakes to a clean plate.
- Serve 2 salmon cakes per person with lemon-dill yogurt sauce and fresh lemon wedges.
- Add cucumber, tomatoes, greens, or roasted vegetables on the side for a complete light meal.
Make It Your Way
Fresh Salmon Option: Substitute approximately 12 ounces of cooked, flaked fresh salmon for the canned salmon.
Make It Spicy: Add cayenne pepper, crushed red pepper flakes, hot sauce, or finely diced jalapeño.
Southern-Inspired Twist: Add a little extra Old Bay or Cajun seasoning and serve with a cool yogurt-based remoulade.
Extra Veggies: Add finely chopped celery, spinach, or additional bell pepper.
Breadcrumb Swap: Use panko for an extra-crispy exterior or gluten-free breadcrumbs if needed.
Air Fryer Option: Lightly spray the salmon cakes with cooking oil and air fry at 375°F until golden and heated through, flipping carefully halfway through cooking. Air-fryer models vary, so monitor closely.
Salmon Cake Sandwich: Serve one or two cakes on a whole-grain bun with lettuce, tomato, and lemon-dill sauce.
Budget-Friendly Swap: Canned salmon is considerably more economical than fresh salmon and works especially well for salmon cakes. Store-brand canned salmon, breadcrumbs, and Greek yogurt can keep this meal affordable.
Storage & Meal Prep
Cooked salmon cakes can be refrigerated in an airtight container for up to 3–4 days.
Store the lemon-dill yogurt sauce separately in a covered container in the refrigerator for up to 3–4 days.
For meal prep, portion two salmon cakes into each container with cooked vegetables or another reheatable side. Pack cucumber, tomatoes, greens, lemon wedges, and yogurt sauce separately.
Reheat salmon cakes in a skillet, toaster oven, or air fryer until thoroughly hot and crisp. They may also be microwaved, although the exterior will become softer.
Uncooked formed salmon cakes can be prepared up to 1 day ahead and kept covered in the refrigerator until ready to cook.
For freezing, place cooked and cooled salmon cakes in a single layer until firm, then transfer them to a freezer-safe container with parchment between layers. Freeze for up to 2–3 months.
Thaw overnight in the refrigerator before reheating.
Do not leave cooked salmon cakes or yogurt sauce at room temperature for more than 2 hours, or more than 1 hour when temperatures are above 90°F.
Nutrition Information
Estimated Nutrition Per Serving (2 salmon cakes with lemon-dill yogurt sauce):
Calories: approximately 330
Protein: approximately 31 g
Carbohydrates: approximately 19 g
Fiber: approximately 3 g
Fat: approximately 15 g
Nutrition values are estimates and may vary depending on ingredients, brands, toppings, sauce amounts, and serving sizes.
Why You’ll Love It
High Protein
Omega-3 Rich
Crispy & Flavorful
Southern-Inspired Option
Meal Prep Friendly
Freezer Friendly
Easy to Customize
Great Alternative to Chicken
Budget-Friendly Swap
Light but Satisfying
Southern Shrimp & Cheesy Grits Bowl
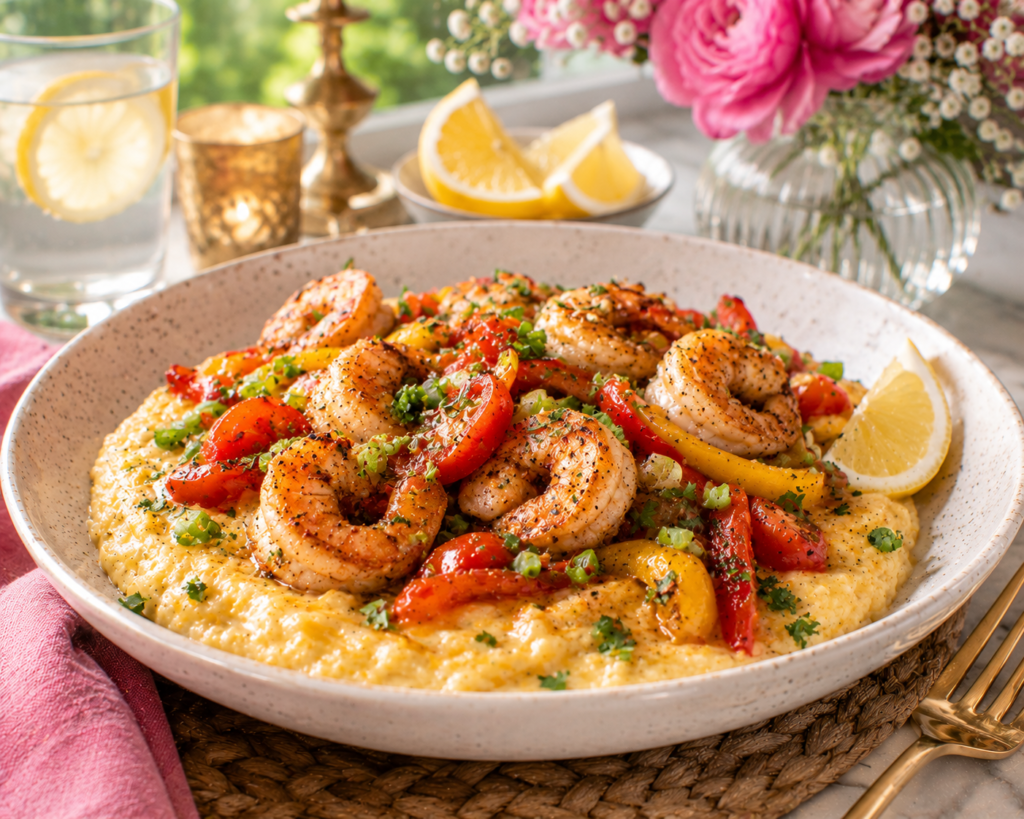
Southern comfort meets a lighter lunchtime approach in this Southern Shrimp & Cheesy Grits Bowl. Juicy Cajun-seasoned shrimp are served over creamy stone-ground grits made with broth, milk, and sharp cheddar, then finished with sautéed bell peppers, tomatoes, green onions, and a squeeze of fresh lemon. It has the rich, familiar flavor of classic shrimp and grits while keeping the ingredients balanced enough for a satisfying lunch or light meal. It’s colorful, comforting, and a fitting Southern-inspired finish to the Lunch & Light Meals collection.
Prep Time: 15 minutes
Cook Time: 25 minutes
Total Time: 40 minutes
Servings: 4
Ingredients
For the Cheesy Grits:
1 cup stone-ground yellow or white grits
2 cups low-sodium chicken broth
2 cups 2% milk
1/2 teaspoon garlic powder
1/4 teaspoon salt
1/4 teaspoon black pepper
3/4 cup shredded sharp cheddar cheese
1 tablespoon unsalted butter
For the Cajun Shrimp:
1 pound large shrimp, peeled and deveined
1 tablespoon olive oil
1 teaspoon Cajun seasoning
1/2 teaspoon smoked paprika
1/2 teaspoon garlic powder
1/4 teaspoon black pepper
1 red bell pepper, diced
1/2 yellow bell pepper, diced
1 cup cherry tomatoes, halved
2 cloves garlic, minced
2 tablespoons fresh lemon juice
For Serving:
3 green onions, thinly sliced
2 tablespoons chopped fresh parsley
Fresh lemon wedges
Hot sauce, optional
Directions
- Bring the chicken broth and milk to a gentle simmer in a medium saucepan over medium heat.
- Slowly whisk in the grits. Add the garlic powder, salt, and black pepper.
- Reduce the heat to low and cook according to the grits package directions, stirring frequently to prevent sticking. Stone-ground grits generally require approximately 20–25 minutes.
- Once the grits are tender and creamy, remove them from the heat. Stir in the cheddar cheese and butter until melted and smooth. Cover and keep warm.
- While the grits cook, pat the shrimp dry with paper towels.
- Place the shrimp in a bowl and season with Cajun seasoning, smoked paprika, garlic powder, and black pepper. Toss until evenly coated.
- Heat the olive oil in a large skillet over medium-high heat.
- Add the red and yellow bell peppers and cook for approximately 3 minutes, stirring occasionally.
- Add the cherry tomatoes and garlic and cook for another 1–2 minutes.
- Push the vegetables toward the edges of the skillet and add the seasoned shrimp.
- Cook the shrimp for approximately 2–3 minutes per side, or until they are opaque, curled, and reach an internal temperature of 145°F.
- Add the lemon juice and gently toss the shrimp and vegetables together.
- Divide the warm cheesy grits among four shallow bowls.
- Spoon the Cajun shrimp and sautéed vegetables over the grits.
- Finish with sliced green onions, fresh parsley, and a squeeze of lemon. Add hot sauce if desired and serve immediately.
Make It Your Way
Make It Spicy: Increase the Cajun seasoning or add cayenne pepper, crushed red pepper, or your favorite hot sauce.
Extra Veggies: Add spinach, mushrooms, zucchini, okra, or additional bell peppers.
Cheese Swap: Try reduced-fat sharp cheddar, smoked Gouda, pepper Jack, or a combination of cheeses.
Creamier Grits: Stir in an extra spoonful of plain Greek yogurt after removing the grits from the heat.
Lower-Sodium Option: Choose salt-free Cajun seasoning and low-sodium broth, then season the finished dish to taste.
Protein Swap: Replace the shrimp with seasoned chicken when preferred.
Southern Twist: Add sliced okra or a small amount of turkey sausage for an occasional heartier variation.
Budget-Friendly Swap: Use frozen shrimp when it is less expensive than fresh shrimp. Store-brand grits, frozen bell peppers, and canned diced tomatoes that have been thoroughly drained can also reduce the cost.
Storage & Meal Prep
Refrigerate cooked shrimp and grits in airtight containers for up to 3 days.
For meal prep, store the shrimp and vegetable mixture separately from the grits when possible.
Grits naturally thicken considerably after refrigeration. When reheating, stir in a small amount of milk, broth, or water until they return to a creamy consistency.
Reheat the grits gently on the stovetop or in the microwave, stirring occasionally.
Reheat shrimp only until thoroughly hot. Excessive reheating can make shrimp tough and rubbery.
For best quality and texture, this complete dish is not recommended for freezing. If necessary, cooked grits may be frozen separately, but their texture may change after thawing.
Keep cooked shrimp refrigerated and do not leave the prepared meal at room temperature for more than 2 hours, or more than 1 hour when temperatures are above 90°F.
Nutrition Information
Estimated Nutrition Per Serving:
Calories: approximately 440
Protein: approximately 34 g
Carbohydrates: approximately 46 g
Fiber: approximately 5 g
Fat: approximately 14 g
Nutrition values are estimates and may vary depending on ingredients, brands, toppings, cheese amounts, and serving sizes.
Why You’ll Love It
High Protein
Southern-Inspired
Lighter Comfort Food
Creamy & Satisfying
Ready in About 40 Minutes
Colorful & Flavorful
Easy to Customize
Great for Lunch or Light Dinner
Family Friendly
Budget-Friendly Swap