Our Approach to Healthy Eating
At Carter Cre8tive Studio, we believe healthier eating should still feel satisfying, flavorful, and realistic. You don’t have to give up the foods you enjoy or make every meal look like “diet food.” Thoughtful ingredient choices, balanced portions, plenty of flavor, and foods you genuinely enjoy can all have a place in a healthier lifestyle.
Our recipes are designed to give you a practical starting point while leaving room to make them your own. Choose the ingredients and portions that work best for you, your family, your preferences, and your individual nutrition needs.
A Note About Nutrition
Nutrition information provided with each recipe is an estimate based on the ingredients, preparation method, and recommended serving size listed. When a complete meal includes recommended sides, the nutrition estimate reflects the full serving shown in the recipe.
Actual nutrition may vary depending on the brands and ingredients you use, substitutions you make, cooking methods, and your individual portion size. Increasing or decreasing the recommended serving size will also change the calories and nutritional values.
Fudgy Dark Chocolate Black Bean Brownies
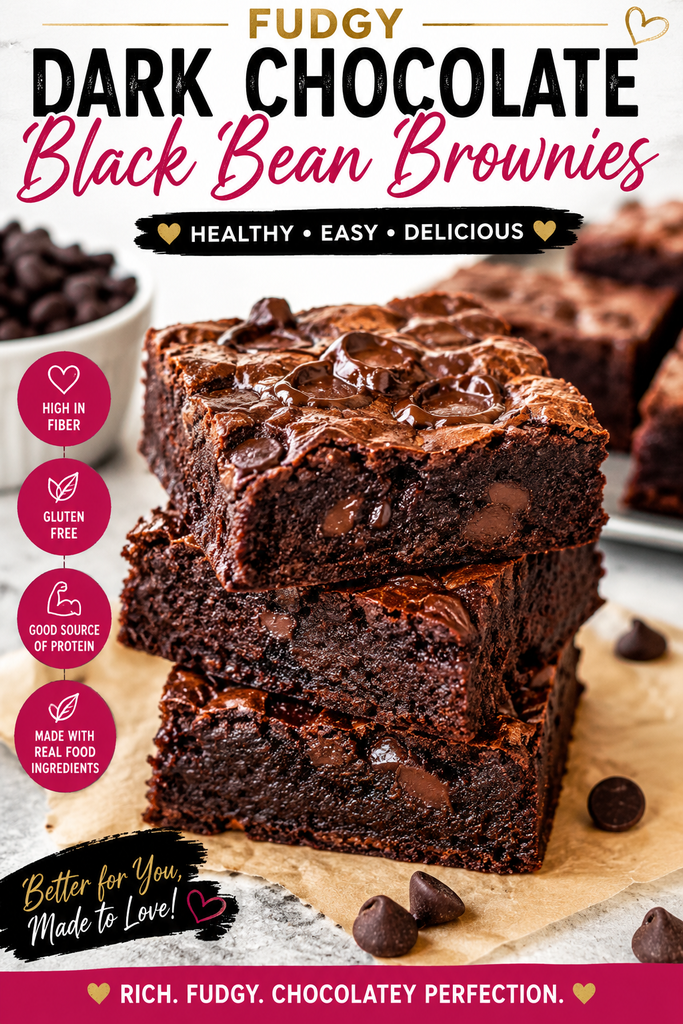
Rich, chocolatey, and irresistibly fudgy, these Dark Chocolate Black Bean Brownies prove that a better-for-you dessert can still taste like the real thing. Black beans create a moist, dense texture while cocoa powder and dark chocolate chips deliver plenty of deep chocolate flavor.
Everything comes together quickly in a blender or food processor, making these brownies an easy choice when a chocolate craving hits. They’re naturally flourless, simple to prepare, and delicious enough that no one needs to know the secret ingredient!
Prep Time: 10 minutes
Cook Time: 22–25 minutes
Cooling Time: 20 minutes
Total Time: About 55 minutes
Servings: 12 brownies
Serving Size: 1 brownie
Difficulty: Easy
Budget Level: $
Best For: Chocolate cravings, easy healthier desserts, family treats, make-ahead desserts, and portion-controlled sweets
Ingredients
- 1 (15-ounce) can black beans, drained and rinsed very well
- 2 large eggs
- 1/2 cup unsweetened cocoa powder
- 1/3 cup pure maple syrup
- 1/2 cup dark chocolate chips, divided
Directions
- Preheat oven to 350°F. Line an 8-inch square baking pan with parchment paper or lightly coat it with nonstick cooking spray.
- Add the rinsed black beans, eggs, cocoa powder, and maple syrup to a food processor or high-powered blender.
- Blend until completely smooth, stopping to scrape down the sides as needed. Take your time with this step—a smooth batter gives the brownies their best texture.
- Stir about 1/3 cup of the dark chocolate chips into the batter.
- Spread the batter evenly into the prepared pan. Sprinkle the remaining chocolate chips over the top.
- Bake for 22–25 minutes, or until the edges are set and the center is just cooked through. Avoid overbaking so the brownies stay moist and fudgy.
- Cool in the pan for at least 20 minutes before slicing into 12 brownies. For an even fudgier texture, allow them to cool completely before serving.
Make It Your Way
Extra Chocolatey: Add a few extra dark chocolate chips over the top before baking.
Nutty Crunch: Stir in a small handful of chopped walnuts or pecans.
Sweeter Brownies: If you prefer a sweeter dessert, use semisweet chocolate chips instead of darker chocolate.
Lower-Cost Option: Honey can be substituted for pure maple syrup if it is less expensive in your area. The flavor will be slightly different but still delicious.
Dairy-Free: Choose dairy-free dark chocolate chips.
Gluten-Free: The basic recipe contains no flour, but check the labels on your cocoa powder and chocolate chips if you need the recipe to be certified gluten-free.
Budget-Friendly Tip: Store-brand canned black beans and cocoa powder work perfectly here. There is no need to purchase premium brands for delicious brownies.
Storage & Meal Prep
Allow the brownies to cool completely before storing.
Refrigerator: Store in an airtight container for up to 5 days. Chilling them also makes the texture even denser and fudgier.
Freezer: Individually wrap cooled brownies and freeze in an airtight freezer-safe container for up to 2 months. Thaw overnight in the refrigerator or at room temperature.
Meal Prep Tip: Cut the entire pan into individual portions once cooled. This makes it easy to grab one brownie when you want something sweet without having to portion the dessert each time.
For a warm brownie, microwave one serving for approximately 10–15 seconds.
Nutrition Information
ESTIMATED NUTRITION PER SERVING (1 brownie):
Calories: Approximately 120
Protein: Approximately 4 g
Carbohydrates: Approximately 21 g
Fiber: Approximately 4 g
Total Fat: Approximately 4 g
Saturated Fat: Approximately 2 g
Sodium: Approximately 70 mg
Nutrition information is an estimate only. Actual values will vary depending on the brands and specific ingredients used, preparation methods, substitutions, and individual portion sizes.
Why You’ll Love It
- Rich, fudgy texture that feels like a real chocolate dessert
- Only 5 main ingredients
- Just 10 minutes of hands-on prep
- Easy blender or food-processor preparation
- Black beans add fiber and plant-based nutrition
- Naturally flourless
- Made with simple grocery-store ingredients
- Easy to make dairy-free or gluten-free when needed
- Freezer-friendly and great for make-ahead portions
- An affordable way to satisfy a serious chocolate craving
Gooey Chocolate Chip Chickpea Blondies
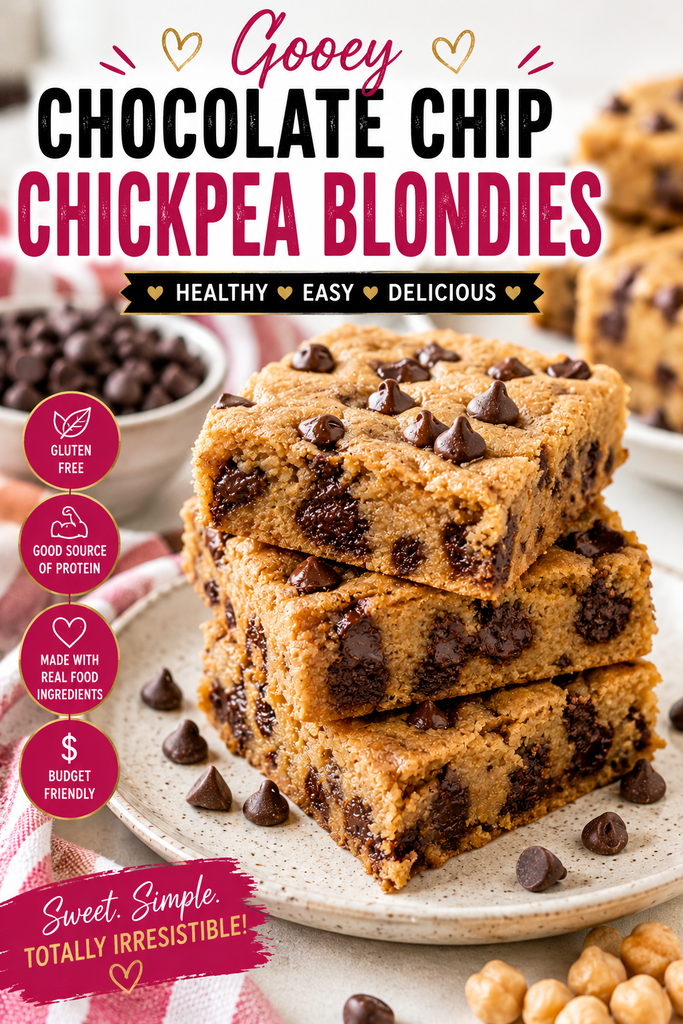
Soft, gooey, and loaded with melty chocolate chips, these Chickpea Blondies turn simple pantry ingredients into a dessert that tastes far more indulgent than you might expect. Chickpeas create a naturally moist, dense center while peanut butter adds richness and maple syrup provides just enough sweetness.
Everything comes together in a food processor or high-powered blender, so prep is quick and cleanup stays simple. Serve them slightly warm for extra-melty chocolate, or chill them for an even denser, fudgier texture.
Prep Time: 10 minutes
Cook Time: 22–25 minutes
Cooling Time: 20 minutes
Total Time: About 55 minutes
Servings: 12 blondies
Serving Size: 1 blondie
Difficulty: Easy
Budget Level: $
Best For: Easy healthier desserts, chocolate cravings, family treats, make-ahead desserts, and portion-controlled sweets
Ingredients
- 1 (15-ounce) can chickpeas, drained and rinsed very well
- 1/2 cup creamy peanut butter
- 1/3 cup pure maple syrup
- 1 teaspoon vanilla extract
- 1/2 cup dark or semisweet chocolate chips, divided
Directions
- Preheat oven to 350°F. Line an 8-inch square baking pan with parchment paper or lightly coat it with nonstick cooking spray.
- Add the chickpeas, peanut butter, maple syrup, and vanilla to a food processor or high-powered blender.
- Blend until very smooth and creamy, stopping to scrape down the sides as needed. Blending thoroughly is important for creating the best blondie texture.
- Stir about 1/3 cup of the chocolate chips into the batter.
- Spread the batter evenly into the prepared pan. Sprinkle the remaining chocolate chips over the top.
- Bake for 22–25 minutes, until the edges are lightly golden and the center is set but still soft.
- Allow the blondies to cool in the pan for at least 20 minutes before slicing into 12 pieces. They will continue to firm as they cool.
- Enjoy at room temperature, slightly warm for gooey chocolate, or chilled for a firmer, fudgier texture.
Make It Your Way
Nut-Free Option: Replace the peanut butter with sunflower seed butter. The flavor and color may vary slightly.
Different Nut Butter: Almond or cashew butter can be used for a different flavor.
Extra Chocolatey: Sprinkle a few additional chocolate chips over the blondies immediately after baking.
Dairy-Free: Choose dairy-free chocolate chips.
Gluten-Free: The basic recipe contains no flour. If needed, check all ingredient labels to make sure they are certified gluten-free.
Less Sweet: Reduce the chocolate chips slightly or choose a higher-percentage dark chocolate.
Budget-Friendly Tip: Store-brand canned chickpeas and peanut butter work well and help keep this dessert inexpensive. If pure maple syrup is outside your budget, honey can be substituted for a similar amount.
Storage & Meal Prep
Allow the blondies to cool completely before storing.
Refrigerator: Store in an airtight container for up to 5 days. Refrigeration gives them an especially dense and fudgy texture.
Freezer: Wrap individual blondies and freeze in a freezer-safe container for up to 2 months. Thaw overnight in the refrigerator or for a short time at room temperature.
Meal Prep Tip: Slice the entire batch into 12 individual portions after cooling so you have ready-to-grab desserts throughout the week.
For a warm, gooey blondie, microwave one serving for approximately 10–15 seconds before enjoying.
Nutrition Information
ESTIMATED NUTRITION PER SERVING (1 blondie):
Calories: Approximately 170
Protein: Approximately 5 g
Carbohydrates: Approximately 20 g
Fiber: Approximately 3 g
Total Fat: Approximately 9 g
Saturated Fat: Approximately 3 g
Sodium: Approximately 80 mg
Nutrition information is an estimate only. Actual values will vary depending on the brands and specific ingredients used, preparation methods, substitutions, and individual portion sizes.
Why You’ll Love It
- Soft, gooey texture with plenty of chocolate
- Only 5 main ingredients
- About 10 minutes of hands-on preparation
- Easy food-processor or blender method
- Made with affordable pantry staples
- Chickpeas add fiber and plant-based protein
- Naturally flourless
- Easy to customize for different dietary needs
- Freezer-friendly and convenient for make-ahead portions
- Tastes like dessert—not “diet food”
Soft & Chewy Almond Flour Chocolate Chip Cookies
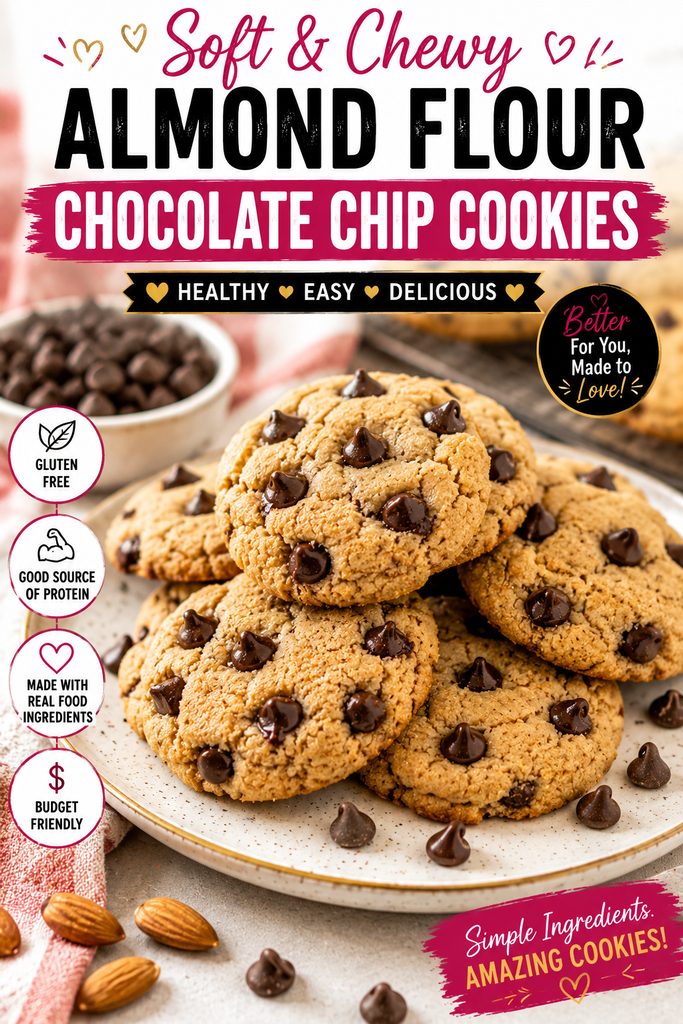
Golden around the edges, soft in the center, and packed with melty chocolate chips, these Almond Flour Chocolate Chip Cookies deliver everything you want from a homemade cookie with a simple, better-for-you twist.
Almond flour gives the cookies a naturally rich, tender texture, while maple syrup adds just enough sweetness. With only a handful of ingredients and one bowl, they’re an easy dessert you can have in the oven in minutes—no complicated steps or long ingredient list required.
Prep Time: 10 minutes
Cook Time: 10–12 minutes
Cooling Time: 10 minutes
Total Time: About 30 minutes
Servings: 12 cookies
Serving Size: 1 cookie
Difficulty: Easy
Budget Level: $$
Best For: Quick desserts, healthier cookie cravings, small-batch baking, family treats, and gluten-free dessert options
Ingredients
- 2 cups fine almond flour
- 1/3 cup pure maple syrup
- 1/4 cup melted coconut oil or unsalted butter
- 1 teaspoon vanilla extract
- 1/2 cup dark or semisweet chocolate chips
Directions
- Preheat oven to 350°F. Line a baking sheet with parchment paper.
- Add the almond flour, maple syrup, melted coconut oil or butter, and vanilla to a medium bowl. Stir until a soft cookie dough forms.
- Fold in the chocolate chips until evenly distributed.
- Scoop the dough into 12 portions and place them approximately 2 inches apart on the prepared baking sheet.
- Gently flatten each portion with your fingertips or the back of a spoon. Almond flour cookies do not spread as much as traditional cookies, so shaping them before baking helps create the classic cookie shape.
- Bake for 10–12 minutes, until the edges are lightly golden and the centers still look slightly soft.
- Allow the cookies to cool on the baking sheet for at least 10 minutes. They will firm as they cool while remaining soft and chewy in the center.
Make It Your Way
Extra Chocolate: Press a few additional chocolate chips into the tops of the cookies before baking.
Nutty Crunch: Add a small handful of chopped pecans or walnuts.
Coconut Twist: Add a spoonful of unsweetened shredded coconut for extra texture.
Dairy-Free: Use melted coconut oil and dairy-free chocolate chips.
Gluten-Free: Almond flour is naturally gluten-free. If needed, verify that your remaining packaged ingredients are certified gluten-free.
Butter Option: If you don’t normally buy coconut oil, use melted unsalted butter instead.
Budget-Friendly Tip: Almond flour is more expensive than traditional flour, so look for store brands or larger bags with a lower price per ounce. Store leftover almond flour in the refrigerator or freezer to keep it fresh for future recipes.
Storage & Meal Prep
Room Temperature: Once completely cooled, store the cookies in an airtight container for up to 3 days.
Refrigerator: Store for up to 1 week for longer freshness. Allow chilled cookies to sit at room temperature briefly before serving for a softer texture.
Freezer: Freeze baked cookies in a freezer-safe container for up to 2 months. Thaw at room temperature when ready to enjoy.
Make-Ahead Tip: Portion the unbaked cookie dough onto a parchment-lined tray and freeze until firm. Transfer the portions to a freezer-safe container so you can bake a few cookies whenever you want a fresh dessert.
For that just-baked experience, warm a cookie in the microwave for approximately 8–10 seconds before serving.
Nutrition Information
ESTIMATED NUTRITION PER SERVING (1 cookie):
Calories: Approximately 190
Protein: Approximately 4 g
Carbohydrates: Approximately 15 g
Fiber: Approximately 3 g
Total Fat: Approximately 14 g
Saturated Fat: Approximately 5 g
Sodium: Approximately 20 mg
Nutrition information is an estimate only. Actual values will vary depending on the brands and specific ingredients used, preparation methods, substitutions, and individual portion sizes.
Why You’ll Love It
- Soft and chewy in the center with lightly golden edges
- Only 5 main ingredients
- About 10 minutes of hands-on prep
- No mixer required
- No complicated baking techniques
- Naturally made with almond flour
- Easy to make dairy-free when needed
- Plenty of chocolate in every bite
- Freezer-friendly for future dessert cravings
- A simple homemade cookie that still tastes like a real treat
Healthy & Moist Carrot Cake with Cream Cheese Frosting
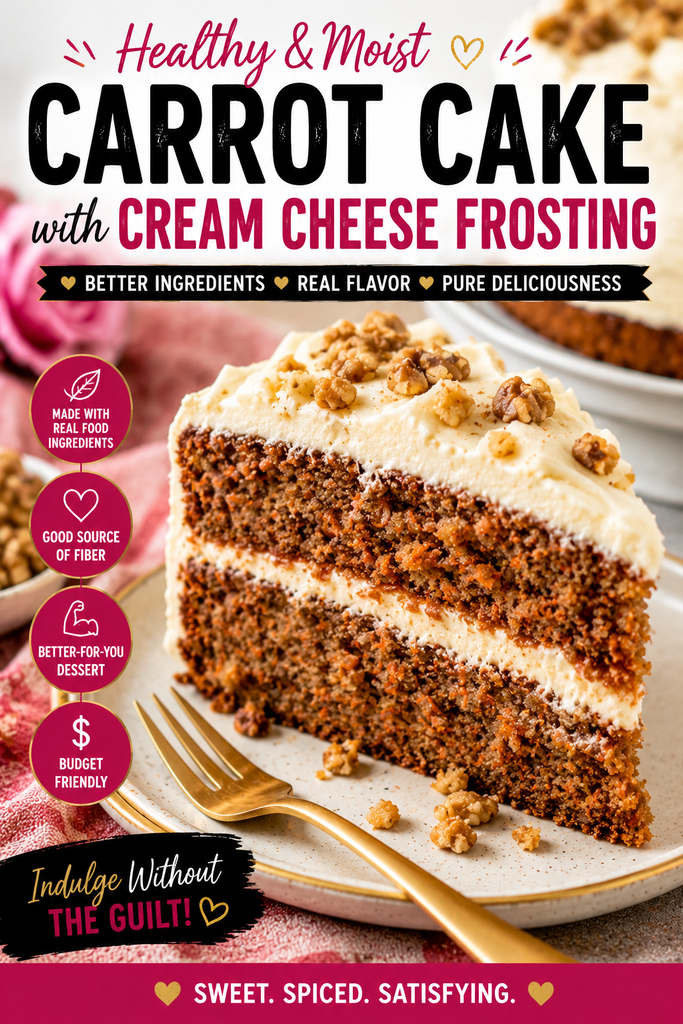
Moist, warmly spiced, and topped with creamy frosting, this healthier Carrot Cake delivers the classic flavor you expect from a real slice of carrot cake without making dessert unnecessarily complicated.
Fresh carrots provide natural sweetness and moisture, while unsweetened applesauce helps keep the cake tender with less added fat. A simple Greek-yogurt cream cheese frosting finishes it with that rich, tangy flavor carrot cake lovers expect. It’s an approachable one-bowl dessert that’s perfect for family dinners, celebrations, holidays, or anytime you’re craving a comforting homemade cake.
Prep Time: 15 minutes
Cook Time: 28–32 minutes
Cooling Time: 30 minutes
Total Time: About 1 hour 15 minutes
Servings: 12 slices
Serving Size: 1 slice
Difficulty: Easy
Budget Level: $
Best For: Family desserts, celebrations, holidays, spring gatherings, Easter, and warm spiced dessert cravings
Ingredients
FOR THE CAKE:
- 2 cups finely grated carrots
- 2 cups white whole-wheat flour or all-purpose flour
- 2 teaspoons ground cinnamon
- 2 teaspoons baking powder
- 2 large eggs
- 1/2 cup unsweetened applesauce
- 1/2 cup pure maple syrup
FOR THE FROSTING:
- 4 ounces reduced-fat cream cheese, softened
- 1/2 cup plain Greek yogurt
- 2 tablespoons pure maple syrup
OPTIONAL TOPPING:
- 1/4 cup chopped walnuts or pecans
Directions
- Preheat oven to 350°F. Lightly coat an 8-inch square baking pan with nonstick cooking spray or line it with parchment paper.
- In a large bowl, whisk together the eggs, applesauce, and maple syrup until well combined.
- Stir in the grated carrots.
- Add the flour, cinnamon, and baking powder. Gently stir just until everything is combined. Avoid overmixing.
- Spread the batter evenly into the prepared baking pan.
- Bake for 28–32 minutes, or until the center is set and a toothpick inserted near the middle comes out with only a few moist crumbs.
- Allow the cake to cool completely before frosting.
- To make the frosting, beat or whisk the softened cream cheese, Greek yogurt, and maple syrup until smooth and creamy.
- Spread the frosting evenly over the cooled cake.
- Sprinkle with chopped walnuts or pecans, if desired. Slice into 12 portions and serve.
Make It Your Way
Keep It Simple: Skip the nuts and serve the cake with just the creamy frosting.
Add Raisins: Stir a small handful of raisins into the batter for extra natural sweetness and classic carrot-cake flavor.
Add Some Crunch: Top with chopped walnuts or pecans, or stir a small amount directly into the batter.
Extra Spice: Add a pinch of nutmeg or ginger along with the cinnamon.
Flour Option: Regular all-purpose flour works perfectly if you don’t keep white whole-wheat flour at home.
Individual Treats: Divide the batter among lined muffin cups and bake as carrot cake cupcakes. Begin checking for doneness around 18 minutes.
Budget-Friendly Tip: Regular all-purpose flour, store-brand carrots, applesauce, cream cheese, and Greek yogurt keep this cake affordable. Nuts are completely optional, so leave them out when keeping costs as low as possible.
Storage & Meal Prep
Because the cake contains cream cheese and Greek yogurt frosting, store leftovers covered in the refrigerator.
Refrigerator: Keep in an airtight container for up to 4 days.
Freezer: For best results, freeze individual unfrosted cake slices for up to 2 months. Thaw overnight in the refrigerator and add fresh frosting before serving.
Make-Ahead Tip: Bake the cake one day ahead, cool completely, cover, and refrigerate. Prepare and add the frosting before serving.
For the best texture and flavor, allow a refrigerated slice to sit at room temperature for approximately 10–15 minutes before enjoying.
Nutrition Information
ESTIMATED NUTRITION PER SERVING (1 of 12 slices, including frosting):
Calories: Approximately 190
Protein: Approximately 6 g
Carbohydrates: Approximately 32 g
Fiber: Approximately 3 g
Total Fat: Approximately 5 g
Saturated Fat: Approximately 2 g
Sodium: Approximately 160 mg
Nutrition information is an estimate only. Actual values will vary depending on the brands and specific ingredients used, optional toppings, substitutions, preparation methods, and individual portion sizes.
Why You’ll Love It
- Moist and tender with classic carrot cake flavor
- Warm cinnamon spice in every bite
- Creamy Greek-yogurt cream cheese frosting
- Uses applesauce to add moisture with less added fat
- Made with simple grocery-store ingredients
- Easy enough for beginner bakers
- Only about 15 minutes of hands-on prep
- Affordable and family-friendly
- Easy to turn into individual cupcakes
- Delicious enough for a celebration but simple enough for an everyday dessert
Creamy Peanut Butter Banana Nice Cream
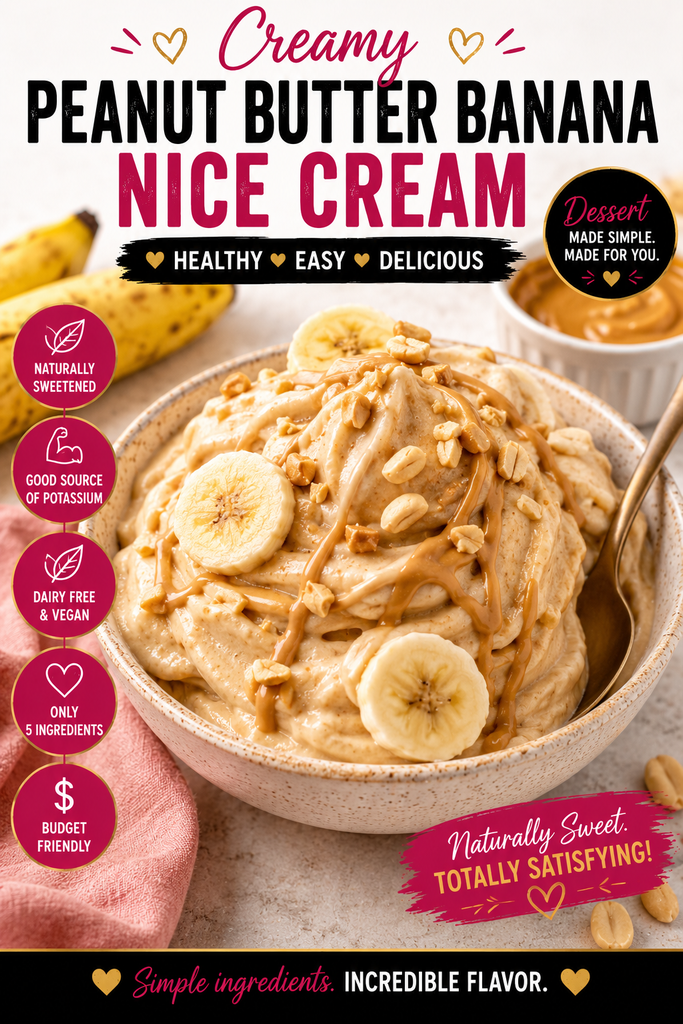
Cold, creamy, naturally sweet, and full of peanut butter flavor, this Peanut Butter Banana Nice Cream turns a few everyday ingredients into a frozen dessert that feels surprisingly indulgent.
Frozen bananas create the smooth, soft-serve texture without the need for an ice cream maker, while peanut butter adds richness and staying power. It’s quick, affordable, and easy enough to make whenever you’re craving something cold and sweet.
Prep Time: 5 minutes
Freeze Time: 2–3 hours for bananas, if not already frozen
Optional Firming Time: 30–60 minutes
Total Time: 5 minutes with pre-frozen bananas
Servings: 4
Serving Size: Approximately 1/2 cup
Difficulty: Very Easy
Budget Level: $
Best For: Quick frozen desserts, summer treats, banana lovers, dairy-free desserts, and easy family treats
Ingredients
- 4 ripe bananas, sliced and frozen
- 1/4 cup creamy peanut butter
- 1 teaspoon vanilla extract
- 2–4 tablespoons unsweetened almond milk or milk of choice, as needed
- 2 tablespoons chopped peanuts, optional for topping
Directions
- Peel and slice the bananas, then freeze them in a single layer until completely firm, about 2–3 hours or overnight.
- Place the frozen banana slices, peanut butter, and vanilla in a food processor or high-powered blender.
- Blend until thick and creamy, stopping several times to scrape down the sides.
- If needed, add milk 1 tablespoon at a time just until the mixture blends smoothly. Avoid adding too much or the nice cream may become thin.
- For a soft-serve texture, divide into bowls and enjoy immediately.
- For firmer, scoopable nice cream, transfer the mixture to a freezer-safe container and freeze for an additional 30–60 minutes.
- Top with chopped peanuts, banana slices, or a small drizzle of warmed peanut butter, if desired.
Make It Your Way
Chocolate Peanut Butter: Blend in 1–2 tablespoons of unsweetened cocoa powder.
Chocolate Chip: Fold in a small amount of dark chocolate chips after blending.
Nut-Free: Substitute sunflower seed butter for the peanut butter and skip the chopped peanuts.
Extra Crunch: Top with chopped peanuts, walnuts, or a small sprinkle of granola.
Dairy-Free & Vegan: Use unsweetened plant-based milk and check that any optional toppings are dairy-free.
No Added Sugar: The ripe bananas provide plenty of natural sweetness, so no added sweetener is necessary.
Budget-Friendly Tip: Don’t throw away overripe bananas. Peel, slice, and freeze them before they spoil. They’re perfect for this recipe and can help reduce food waste.
Storage & Meal Prep
Freezer: Store leftover nice cream in a tightly covered freezer-safe container for up to 1 week for the best texture and flavor.
After longer freezing, the nice cream will become much firmer than traditional soft serve. Allow it to sit at room temperature for approximately 10–15 minutes before scooping.
Meal Prep Tip: Keep sliced ripe bananas in the freezer so this dessert can be made in about 5 minutes whenever you want something sweet.
For individual portions, divide freshly blended nice cream among small freezer-safe containers before freezing.
Nutrition Information
ESTIMATED NUTRITION PER SERVING (approximately 1/2 cup, without optional toppings):
Calories: Approximately 180
Protein: Approximately 4 g
Carbohydrates: Approximately 31 g
Fiber: Approximately 4 g
Total Fat: Approximately 7 g
Saturated Fat: Approximately 1.5 g
Sodium: Approximately 75 mg
Nutrition information is an estimate only. Actual values will vary depending on the brands and specific ingredients used, preparation methods, optional toppings, substitutions, and individual portion sizes.
Why You’ll Love It
- Creamy enough to satisfy an ice cream craving
- Made with only a few simple ingredients
- Just 5 minutes of active preparation
- No ice cream maker required
- Naturally sweetened with ripe bananas
- Easy to make dairy-free and vegan
- Uses inexpensive grocery-store staples
- Great way to use overripe bananas
- Easy to customize with chocolate, nuts, or other toppings
- Cold, creamy, sweet, and satisfying enough to feel like a real dessert
Rich & Moist Chocolate Zucchini Cake
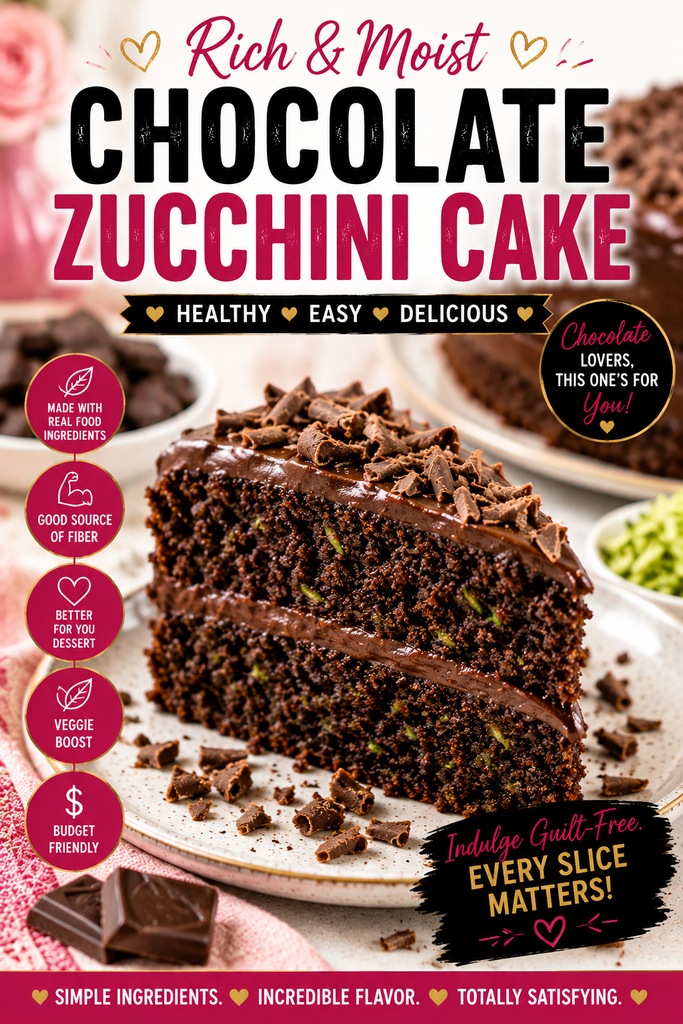
Deeply chocolatey, incredibly moist, and surprisingly simple, this Chocolate Zucchini Cake is proof that adding vegetables to dessert doesn’t mean sacrificing flavor. Fresh zucchini practically disappears into the cake as it bakes, adding moisture and tenderness without leaving a strong vegetable taste.
Unsweetened cocoa powder brings the rich chocolate flavor, while applesauce helps keep the cake moist with less added fat. Finish it with a simple dark chocolate topping for an easy dessert that feels decadent enough for chocolate lovers but still uses everyday ingredients.
Prep Time: 15 minutes
Cook Time: 28–32 minutes
Cooling Time: 30 minutes
Total Time: About 1 hour 15 minutes
Servings: 12 slices
Serving Size: 1 slice
Difficulty: Easy
Budget Level: $
Best For: Chocolate cravings, family desserts, using extra zucchini, celebrations, and easy make-ahead treats
Ingredients
- 2 cups finely shredded zucchini
- 1 1/2 cups all-purpose flour
- 1/2 cup unsweetened cocoa powder
- 2 large eggs
- 1/2 cup unsweetened applesauce
- 1/2 cup pure maple syrup
- 1 teaspoon baking soda
- 1/2 cup dark or semisweet chocolate chips, divided
Directions
- Preheat oven to 350°F. Line an 8-inch square baking pan with parchment paper or lightly coat it with nonstick cooking spray.
- Finely shred the zucchini. If it is extremely wet, gently blot away some excess moisture with a clean kitchen towel, but do not squeeze it completely dry.
- In a large bowl, whisk together the eggs, applesauce, and maple syrup.
- Stir in the shredded zucchini.
- Add the flour, cocoa powder, and baking soda. Stir just until combined.
- Fold about half of the chocolate chips into the batter.
- Spread the batter evenly into the prepared pan and sprinkle the remaining chocolate chips over the top.
- Bake for 28–32 minutes, or until the center is set and a toothpick inserted near the middle comes out with a few moist crumbs.
- Allow the cake to cool for at least 30 minutes before slicing. The chocolate flavor and moist texture become even better as the cake cools.
Make It Your Way
Extra Chocolatey: Add a few additional dark chocolate chips to the top while the cake is still warm.
Simple Chocolate Topping: Melt a small handful of dark chocolate chips with a splash of milk and drizzle or spread a thin layer over the cooled cake.
Add Some Crunch: Fold chopped walnuts or pecans into the batter.
Flour Option: White whole-wheat flour can replace all-purpose flour for additional whole-grain goodness.
Individual Desserts: Divide the batter among lined muffin cups for easy chocolate zucchini cupcakes. Begin checking them around 18 minutes.
Dairy-Free: Use dairy-free chocolate chips.
Budget-Friendly Tip: This is a great recipe for inexpensive summer zucchini or zucchini that needs to be used before it spoils. Store-brand cocoa powder, flour, applesauce, and chocolate chips work perfectly.
Storage & Meal Prep
Room Temperature: Store the completely cooled cake in an airtight container for up to 2 days.
Refrigerator: Refrigerate for up to 5 days. The cake stays especially moist when chilled.
Freezer: Wrap individual slices and freeze in a freezer-safe container for up to 2 months. Thaw overnight in the refrigerator or at room temperature.
Meal Prep Tip: Slice the cooled cake into 12 portions before storing so individual desserts are ready whenever you want something sweet.
For a warm chocolate dessert, microwave one slice for approximately 10–15 seconds before serving.
Nutrition Information
ESTIMATED NUTRITION PER SERVING (1 of 12 slices):
Calories: Approximately 175
Protein: Approximately 4 g
Carbohydrates: Approximately 32 g
Fiber: Approximately 3 g
Total Fat: Approximately 5 g
Saturated Fat: Approximately 2 g
Sodium: Approximately 120 mg
Nutrition information is an estimate only. Actual values will vary depending on the brands and specific ingredients used, optional toppings, substitutions, preparation methods, and individual portion sizes.
Why You’ll Love It
- Rich chocolate flavor that tastes like real dessert
- Moist and tender without a complicated recipe
- Zucchini adds moisture, fiber, and a veggie boost
- Applesauce helps reduce the amount of added fat
- About 15 minutes of hands-on preparation
- Made with familiar grocery-store ingredients
- Easy enough for beginner bakers
- Affordable and family-friendly
- Freezer-friendly for make-ahead desserts
- A delicious way to use extra zucchini—even for people who aren’t vegetable fans
Light & Zesty Lemon Oat Dream Bars
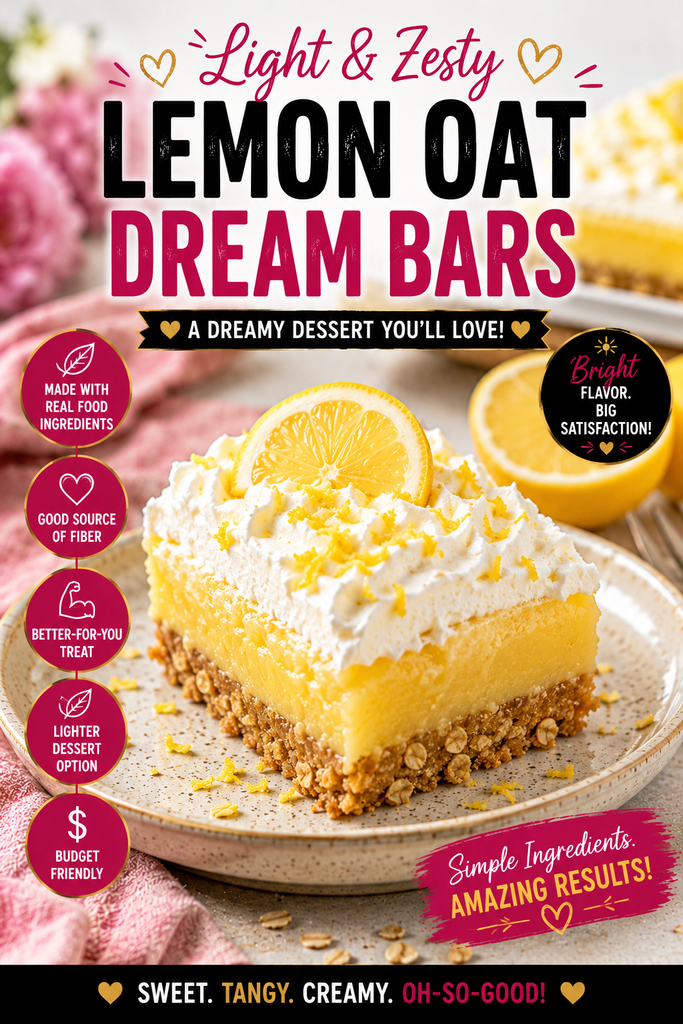
Bright, creamy, and bursting with fresh lemon flavor, these Lemon Oat Dream Bars combine a lightly sweet oat crust with a smooth, tangy lemon filling for a refreshing dessert that feels both comforting and fresh.
The simple oat base adds a little whole-grain goodness and satisfying texture, while fresh lemon juice keeps the creamy filling vibrant without requiring a long list of ingredients. Served chilled, these easy bars are especially delicious when you want something sweet that isn’t chocolate-heavy or overly rich.
Prep Time: 15 minutes
Cook Time: 25 minutes
Chill Time: 2 hours
Total Time: About 2 hours 40 minutes
Servings: 12 bars
Serving Size: 1 bar
Difficulty: Easy
Budget Level: $
Best For: Spring and summer desserts, family gatherings, make-ahead treats, lemon lovers, and lighter dessert cravings
Ingredients
- 1 1/2 cups old-fashioned rolled oats
- 3 tablespoons melted butter or coconut oil
- 1/4 cup pure maple syrup, divided
- 2 cups plain Greek yogurt
- 1/3 cup fresh lemon juice
- 2 large eggs
- Zest of 1 lemon
Directions
- Preheat oven to 350°F. Line an 8-inch square baking pan with parchment paper.
- Pulse the oats in a blender or food processor until they resemble coarse flour.
- Combine the ground oats, melted butter, and 2 tablespoons of the maple syrup. Stir until the mixture is evenly moistened.
- Press the oat mixture firmly and evenly into the bottom of the prepared pan.
- Bake the crust for 8 minutes, then remove it from the oven.
- In a bowl, whisk together the Greek yogurt, lemon juice, eggs, lemon zest, and remaining maple syrup until smooth.
- Pour the lemon mixture over the warm crust and spread evenly.
- Return the pan to the oven and bake for 15–17 minutes, until the edges are set and the center has only a slight jiggle.
- Allow the bars to cool to room temperature, then refrigerate for at least 2 hours.
- Once completely chilled, lift from the pan using the parchment paper and cut into 12 bars.
Make It Your Way
Extra Lemon Flavor: Add additional fresh lemon zest to the filling or sprinkle a little over the top before serving.
Creamy Topping: Add a small spoonful of lightly whipped cream or Greek yogurt immediately before serving.
Berry Lemon Bars: Top each chilled bar with fresh blueberries, raspberries, or sliced strawberries.
Sweeter Version: Add an additional tablespoon of maple syrup to the filling if you prefer a sweeter lemon dessert.
Coconut Twist: Use melted coconut oil in the crust and sprinkle a small amount of unsweetened shredded coconut over the finished bars.
Budget-Friendly Tip: Buy lemons by the bag when they’re on sale and use both the juice and zest so nothing goes to waste. Store-brand oats and Greek yogurt work perfectly for this recipe.
Storage & Meal Prep
Refrigerator: Store the bars in an airtight container in the refrigerator for up to 4 days.
Freezer: Freeze individual bars in a freezer-safe container for up to 1 month. Thaw overnight in the refrigerator before serving.
Make-Ahead Tip: These bars actually benefit from chilling, making them an excellent dessert to prepare the night before you need them.
For clean slices, chill completely and wipe the knife between cuts.
Keep the bars refrigerated until shortly before serving because of the creamy Greek yogurt filling.
Nutrition Information
ESTIMATED NUTRITION PER SERVING (1 of 12 bars):
Calories: Approximately 120
Protein: Approximately 6 g
Carbohydrates: Approximately 15 g
Fiber: Approximately 1.5 g
Total Fat: Approximately 4 g
Saturated Fat: Approximately 2 g
Sodium: Approximately 40 mg
Nutrition information is an estimate only. Actual values will vary depending on the brands and specific ingredients used, optional toppings, substitutions, preparation methods, and individual portion sizes.
Why You’ll Love It
- Bright, fresh lemon flavor
- Creamy filling with a lightly chewy oat crust
- Made with affordable everyday ingredients
- Greek yogurt adds creaminess and protein
- Oats provide whole-grain goodness
- Only about 15 minutes of hands-on preparation
- Easy enough for beginner bakers
- Perfect for making ahead
- Refreshing alternative to heavier chocolate desserts
- Sweet, creamy, tangy, and satisfying enough to feel like a real dessert
Warm & Cozy Healthy Apple Crisp
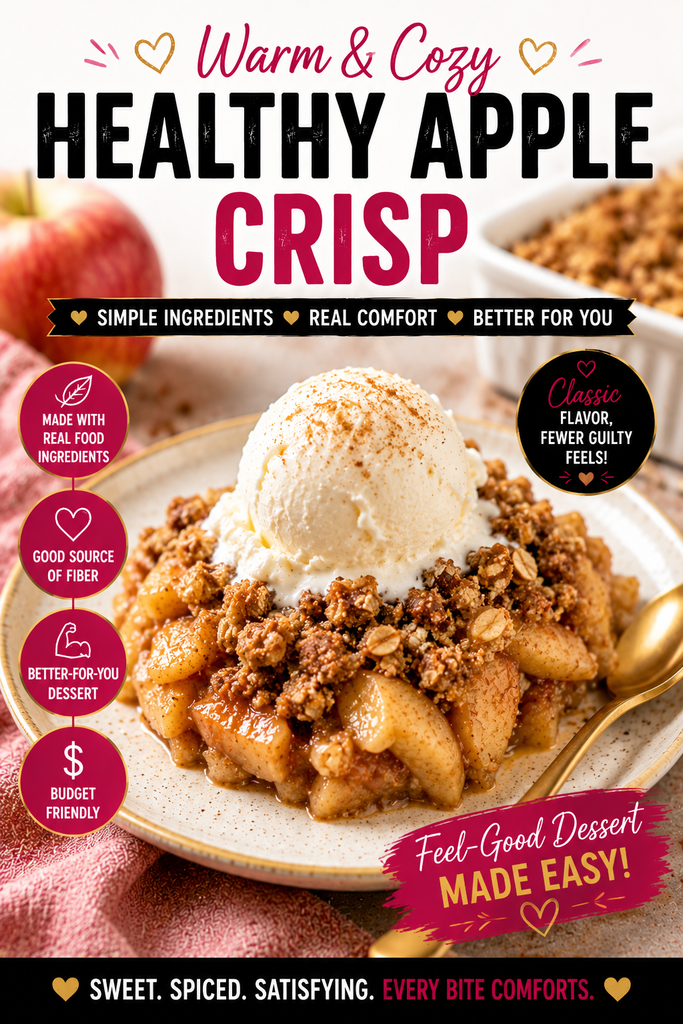
Warm cinnamon-spiced apples tucked beneath a golden, crunchy oat topping make this Healthy Apple Crisp pure comfort in a bowl. It has all the cozy flavor of a traditional apple dessert while keeping the ingredient list simple and letting naturally sweet apples do most of the work.
With just a few minutes of preparation and everyday pantry ingredients, this is an easy dessert for weeknights, family dinners, holidays, or chilly evenings. Enjoy it warm on its own or add a small scoop of vanilla frozen yogurt or ice cream for the classic apple-crisp experience.
Prep Time: 10 minutes
Cook Time: 30–35 minutes
Cooling Time: 10 minutes
Total Time: About 50–55 minutes
Servings: 8
Serving Size: Approximately 3/4 cup
Difficulty: Easy
Budget Level: $
Best For: Warm comfort desserts, fall treats, family dinners, holidays, easy entertaining, and using fresh apples
Ingredients
- 5 medium apples, peeled, cored, and thinly sliced
- 1 1/2 teaspoons ground cinnamon
- 2 tablespoons pure maple syrup
- 1 cup old-fashioned rolled oats
- 1/3 cup chopped pecans or walnuts
- 3 tablespoons melted butter or coconut oil
Directions
- Preheat oven to 350°F. Lightly coat an 8-inch square baking dish with nonstick cooking spray.
- Place the sliced apples in the baking dish. Add the cinnamon and 1 tablespoon of the maple syrup, then toss until the apples are evenly coated.
- In a small bowl, combine the oats, chopped nuts, melted butter or coconut oil, and remaining tablespoon of maple syrup.
- Sprinkle the oat mixture evenly over the apples.
- Bake uncovered for 30–35 minutes, until the apples are tender and bubbling around the edges and the oat topping is golden brown.
- Allow the crisp to cool for approximately 10 minutes before serving.
- Serve warm as is, or add a small scoop of vanilla frozen yogurt, Greek yogurt, or your favorite vanilla ice cream for an extra-special dessert.
Make It Your Way
Apple-Pear Crisp: Replace half of the apples with ripe pears.
Berry Apple Crisp: Add 1 cup of fresh or frozen blueberries or raspberries to the apples before baking.
Nut-Free: Leave out the nuts and add an extra 1/3 cup of rolled oats to the topping.
Extra Spice: Add a pinch of nutmeg or ginger along with the cinnamon.
Dairy-Free: Use coconut oil or another suitable plant-based butter instead of dairy butter.
Sweeter Crisp: If your apples are especially tart, drizzle an additional tablespoon of maple syrup over the fruit.
Budget-Friendly Tip: Use whichever firm baking apples are on sale rather than buying a particular premium variety. Leaving out the optional nuts also reduces the cost without sacrificing the cozy apple-cinnamon flavor.
Storage & Meal Prep
Refrigerator: Allow leftover apple crisp to cool completely, then cover and refrigerate for up to 4 days.
Freezer: Freeze individual portions in airtight freezer-safe containers for up to 2 months. Thaw overnight in the refrigerator before reheating.
Reheating: Warm individual portions in the microwave for approximately 30–45 seconds. For a crisper topping, reheat in a 350°F oven or air fryer until warmed through.
Make-Ahead Tip: Slice the apples and prepare the oat topping ahead of time, but store them separately in the refrigerator. Assemble and bake when you’re ready for a fresh, warm dessert.
Nutrition Information
ESTIMATED NUTRITION PER SERVING (approximately 3/4 cup, without optional ice cream or yogurt):
Calories: Approximately 180
Protein: Approximately 3 g
Carbohydrates: Approximately 30 g
Fiber: Approximately 5 g
Total Fat: Approximately 7 g
Saturated Fat: Approximately 2 g
Sodium: Approximately 25 mg
Nutrition information is an estimate only. Actual values will vary depending on the brands and specific ingredients used, apple variety, optional toppings, substitutions, preparation methods, and individual portion sizes.
Why You’ll Love It
- Warm, cinnamon-spiced comfort in every bite
- Simple, familiar grocery-store ingredients
- Only about 10 minutes of hands-on preparation
- Naturally sweet apples provide most of the sweetness
- Oats add whole-grain goodness and satisfying texture
- Easy one-dish preparation with minimal cleanup
- Affordable enough for an everyday family dessert
- Easy to make dairy-free or nut-free
- Delicious warm on its own or topped with a small scoop of something creamy
- Classic dessert flavor without making the recipe complicated
Silky & Satisfying Chocolate Chia Pudding
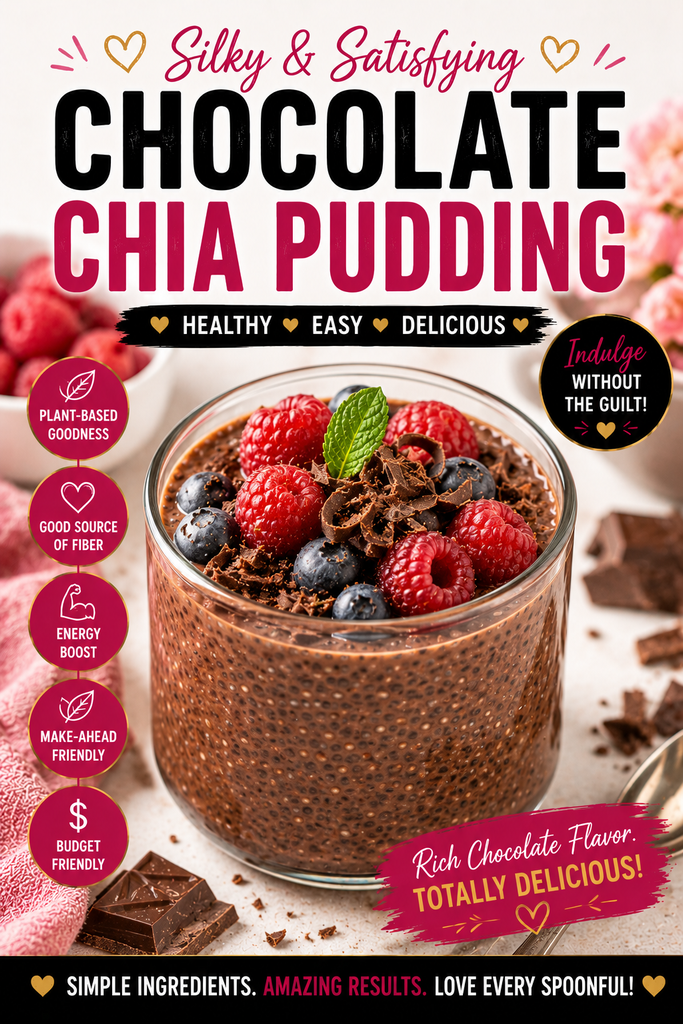
Rich chocolate flavor meets creamy, spoonable goodness in this easy Chocolate Chia Pudding. Made with just a handful of simple ingredients, it takes only minutes to mix before the refrigerator does the rest of the work.
Chia seeds naturally thicken the pudding while adding fiber, and unsweetened cocoa powder delivers the deep chocolate flavor that makes this feel like dessert. Make it the night before for an effortless chilled treat, then add fresh berries or a little dark chocolate when you’re ready to serve.
Prep Time: 5 minutes
Chill Time: 2 hours
Total Time: About 2 hours 5 minutes
Servings: 4
Serving Size: Approximately 1/2 cup
Difficulty: Very Easy
Budget Level: $
Best For: No-bake desserts, chocolate cravings, make-ahead treats, warm-weather desserts, and easy individual portions
Ingredients
- 2 cups unsweetened milk of choice
- 1/2 cup chia seeds
- 1/4 cup unsweetened cocoa powder
- 3 tablespoons pure maple syrup or honey
- 1 teaspoon vanilla extract
Directions
- Add the milk, chia seeds, cocoa powder, maple syrup, and vanilla to a medium bowl or large jar.
- Whisk thoroughly until the cocoa powder is incorporated and no large clumps remain.
- Let the mixture rest for 5 minutes, then whisk again. This second mixing helps prevent the chia seeds from settling or clumping together.
- Cover and refrigerate for at least 2 hours or overnight, until thick and pudding-like.
- Stir well before serving. If the pudding is thicker than you prefer, stir in a small splash of milk.
- Divide among four small bowls or dessert glasses.
- Serve chilled as is, or top with fresh berries, sliced banana, or a small sprinkle of dark chocolate.
Make It Your Way
Extra Silky: After chilling, blend the pudding until completely smooth for a texture closer to traditional chocolate pudding.
Chocolate-Banana: Top with sliced banana or blend half a ripe banana into the mixture before chilling.
Berry Chocolate: Add strawberries, raspberries, or blueberries immediately before serving.
Peanut Butter Chocolate: Swirl 1 teaspoon of peanut butter into each serving.
Dairy-Free & Vegan: Use unsweetened almond, oat, soy, or coconut milk and maple syrup.
Sweeter Pudding: Add another tablespoon of maple syrup or honey if you prefer a sweeter dessert.
Budget-Friendly Tip: Chia seeds can cost more upfront, but a bag makes several batches. Store brands or larger packages usually offer a better price per ounce. Use whichever unsweetened milk is already in your refrigerator rather than buying something specifically for this recipe.
Storage & Meal Prep
Refrigerator: Store covered in individual containers or one airtight container for up to 5 days.
Freezer: Freezing is not recommended for the best pudding texture.
Meal Prep Tip: Divide the pudding among four small jars or containers immediately after mixing. Once chilled, you’ll have individually portioned desserts ready to grab throughout the week.
Wait until serving to add fresh fruit, nuts, or chocolate toppings so they maintain their best texture.
Nutrition Information
ESTIMATED NUTRITION PER SERVING (approximately 1/2 cup, made with unsweetened almond milk and without optional toppings):
Calories: Approximately 180
Protein: Approximately 6 g
Carbohydrates: Approximately 23 g
Fiber: Approximately 9 g
Total Fat: Approximately 8 g
Saturated Fat: Approximately 1 g
Sodium: Approximately 90 mg
Nutrition information is an estimate only. Actual values will vary depending on the brands and specific ingredients used, choice of milk and sweetener, optional toppings, substitutions, preparation methods, and individual portion sizes.
Why You’ll Love It
- Rich chocolate flavor with a creamy pudding texture
- Only 5 main ingredients
- Just 5 minutes of hands-on preparation
- No baking or cooking required
- Chia seeds provide plenty of fiber
- Easy to make dairy-free and vegan
- Naturally portion-friendly
- Perfect for preparing ahead
- Easy to customize with fruit, peanut butter, or dark chocolate
- A cold, chocolatey dessert that’s simple enough to make anytime
Silky Chocolate Avocado Mousse
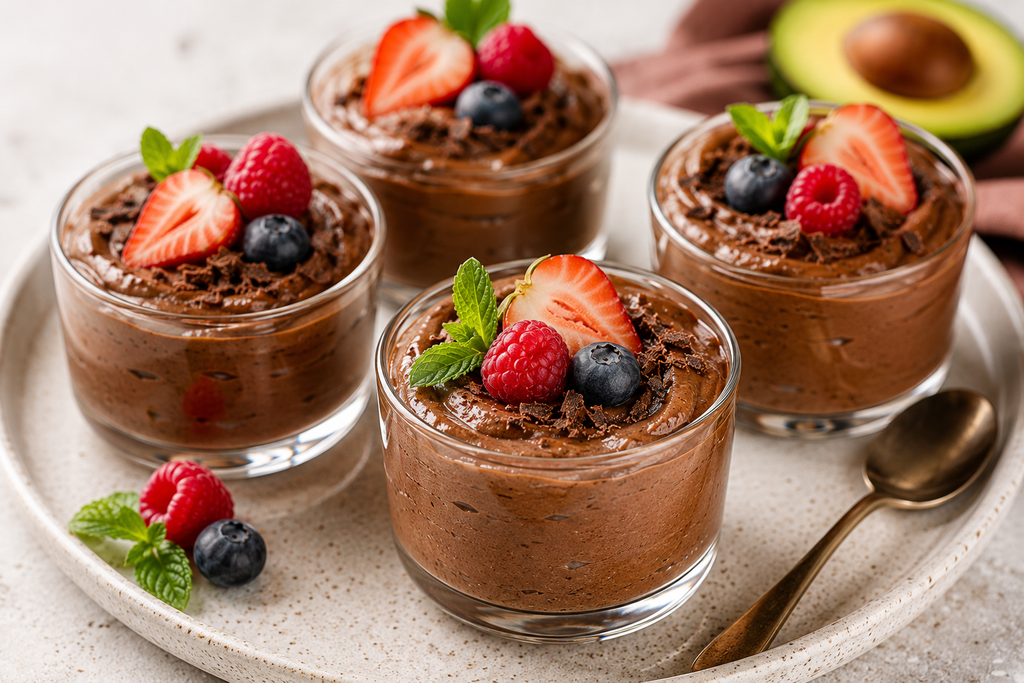
Rich, silky, and deeply chocolatey, this Chocolate Avocado Mousse turns ripe avocado into an incredibly creamy no-bake dessert. Cocoa powder provides the chocolate flavor while a touch of maple syrup adds sweetness. It takes only minutes to blend, uses just five simple ingredients, and can be enjoyed immediately or chilled for an even thicker, richer texture.
Prep Time: 10 minutes
Cook Time: None
Blend Time: About 2 minutes
Optional Chill Time: 30 minutes
Total Time: 10 minutes, plus optional chilling
Servings: 4
Serving Size: About 1/2 cup
Difficulty: Very Easy
Budget Level: $
Best For: Quick dessert, chocolate lovers, no-bake dessert, make-ahead treat
Ingredients
- 2 ripe avocados, peeled and pitted
- 1/2 cup unsweetened cocoa powder
- 1/3 cup pure maple syrup or honey
- 1 teaspoon vanilla extract
- 1/4 cup unsweetened milk of choice
Directions
- Add the avocados, cocoa powder, maple syrup or honey, vanilla extract, and milk to a high-powered blender or food processor.
- Blend until completely smooth and creamy, stopping to scrape down the sides as necessary.
- Taste and adjust the sweetness if desired. If the mousse is thicker than you prefer, blend in additional milk 1 tablespoon at a time.
- Divide the mousse evenly among 4 small serving dishes or glasses.
- Serve immediately for a soft, creamy mousse or refrigerate for about 30 minutes for a cooler, slightly firmer texture.
- Add optional fresh berries, mint, or a small amount of dark chocolate shavings just before serving.
Make It Your Way
- Chocolate Strawberry: Top each serving with sliced fresh strawberries.
- Mint Chocolate: Add 1/4 teaspoon peppermint extract and garnish with fresh mint.
- Chocolate Orange: Add 1 teaspoon fresh orange zest for a chocolate-citrus twist.
- Extra Creamy: Add 1–2 tablespoons additional milk while blending.
- Dairy-Free/Vegan: Use plant-based milk and maple syrup.
- Sweeter Version: Add an additional tablespoon of maple syrup or honey after tasting.
- Budget-Friendly Tip: Buy avocados when they’re on sale or choose ripe individual avocados rather than packaged specialty varieties. Store-brand unsweetened cocoa powder works perfectly, and optional berries or chocolate garnishes can be skipped to keep the cost down.
Storage & Meal Prep
Transfer the mousse to airtight containers or cover the individual serving dishes and refrigerate for up to 3 days.
For easy make-ahead desserts, divide the mousse into individual containers immediately after blending and refrigerate until needed.
Stir gently before serving if the mousse has been refrigerated overnight. Add fresh fruit or other toppings immediately before serving for the best appearance and texture.
Nutrition Information
Estimated per serving:
Calories: 220
Protein: 4g
Carbohydrates: 29g
Fiber: 8g
Total Fat: 13g
Saturated Fat: 2g
Sodium: 25mg
Optional berries, chocolate shavings, nuts, and other toppings are not included in the estimate.
Nutrition information is an estimate and may vary depending on the specific brands, ingredients, milk choice, preparation method, substitutions, and serving size used.
Why You’ll Love It
- Only 5 simple ingredients
- Ready in about 10 minutes
- No baking or cooking required
- Rich, creamy chocolate flavor
- Avocado creates a naturally smooth texture
- Easy dairy-free and vegan option
- Can be prepared ahead of time
- Uses familiar grocery-store ingredients
- Budget-friendly substitutions included
- An easy way to make a chocolate dessert feel extra special
Creamy Strawberry Nice Cream
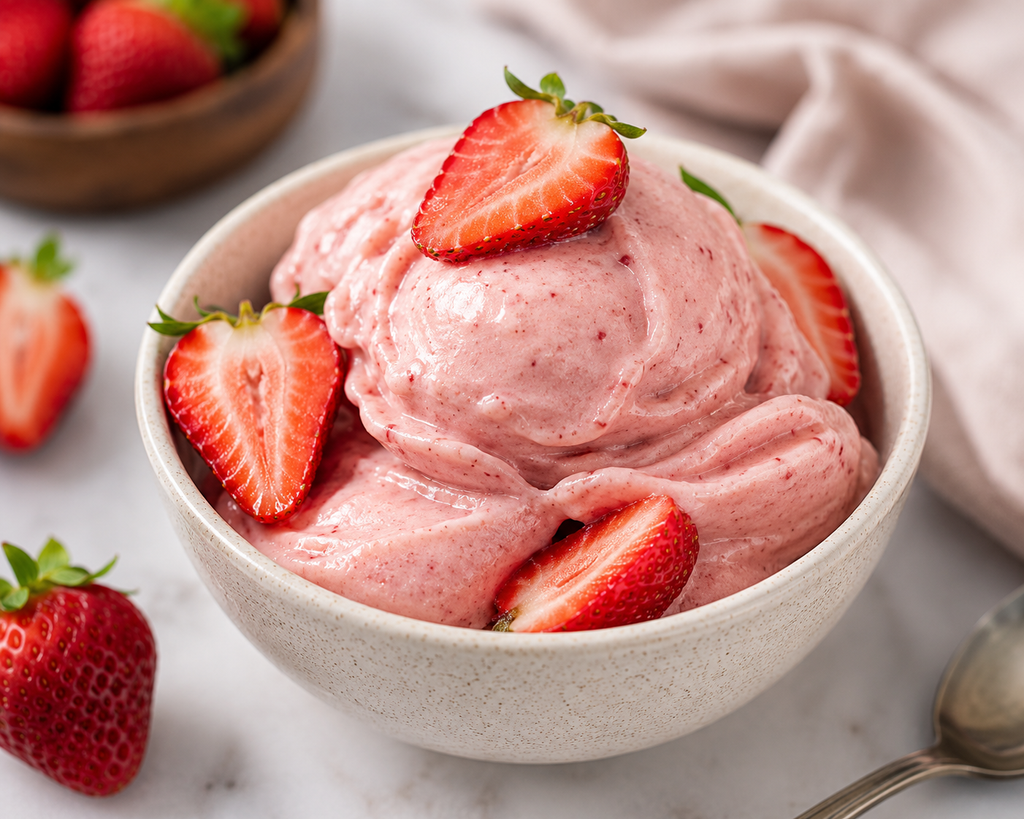
Cool, creamy, fruity, and naturally sweet, this Strawberry Nice Cream turns frozen strawberries and ripe banana into a refreshing homemade frozen dessert in just minutes. The banana creates a smooth, ice-cream-like texture without heavy cream, while strawberries provide plenty of fresh berry flavor. With only three simple ingredients and no ice cream maker required, it’s an easy, budget-friendly treat that’s especially perfect for hot days.
Prep Time: 5 minutes
Cook Time: None
Freeze Time: 2–3 hours if freezing fresh fruit
Optional Firming Time: 30–60 minutes
Total Time: 5 minutes with pre-frozen fruit
Servings: 4
Serving Size: About 1/2 cup
Difficulty: Very Easy
Budget Level: $
Best For: Summer dessert, quick dessert, fruit lovers, family treat
Ingredients
- 3 cups frozen strawberries
- 1 large ripe banana, sliced and frozen
- 1/4 cup unsweetened milk of choice
Directions
- Add the frozen strawberries and frozen banana to a high-powered blender or food processor.
- Pour in the milk.
- Blend until thick, smooth, and creamy, stopping occasionally to scrape down the sides.
- If necessary, add additional milk 1 tablespoon at a time, using only enough to help the fruit blend smoothly.
- Serve immediately for a creamy soft-serve consistency.
- For firmer, scoopable nice cream, transfer to a freezer-safe container and freeze for 30–60 minutes before serving.
Make It Your Way
- Sweeter Strawberry: If your strawberries are tart, add 1–2 teaspoons of honey or maple syrup.
- Strawberry-Lemon: Add 1–2 teaspoons of fresh lemon juice for a bright citrus twist.
- Extra Berry: Stir finely chopped fresh strawberries into the nice cream after blending.
- Extra Creamy: Use unsweetened oat milk or light coconut milk.
- Chocolate Strawberry: Top with a small sprinkle of mini dark chocolate chips or dark chocolate shavings.
- Dairy-Free/Vegan: Use almond, oat, soy, or coconut milk. Choose maple syrup instead of honey if adding optional sweetener.
- Budget-Friendly Tip: Store-brand frozen strawberries are often less expensive than fresh berries, especially outside strawberry season. Freeze very ripe bananas instead of throwing them away—they’re naturally sweeter and perfect for nice cream.
Storage & Meal Prep
Store leftover Strawberry Nice Cream in an airtight freezer-safe container for up to 1 week.
Because homemade nice cream becomes firmer than traditional ice cream after freezing, allow it to sit at room temperature for about 5–10 minutes before scooping.
For quick desserts later, slice and freeze ripe bananas ahead of time and keep a bag of frozen strawberries in the freezer. Once the fruit is frozen, the dessert takes only about 5 minutes to prepare.
Nutrition Information
Estimated per serving:
Calories: 90
Protein: 2g
Carbohydrates: 21g
Fiber: 4g
Total Fat: 1g
Saturated Fat: 0g
Sodium: 25mg
Optional sweeteners, chocolate, and other toppings are not included in the estimate.
Nutrition information is an estimate and may vary depending on the specific brands, ingredients, milk choice, preparation method, substitutions, and serving size used.
Why You’ll Love It
- Only 3 simple ingredients
- Ready in about 5 minutes with frozen fruit
- No ice cream maker required
- Cool, creamy, and full of strawberry flavor
- Naturally sweetened with fruit
- Easy dairy-free and vegan option
- Uses affordable grocery-store ingredients
- Great way to use ripe bananas
- Minimal preparation and cleanup
- Perfect for hot summer days
Tropical Creamy Mango Nice Cream
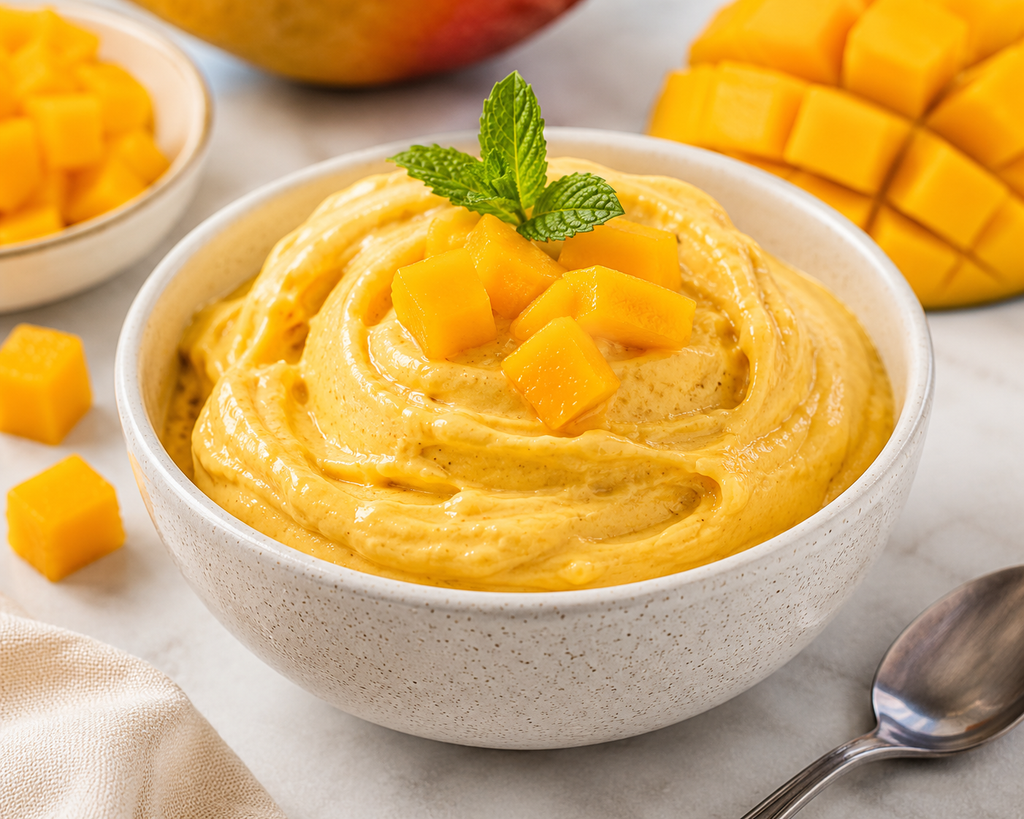
Cool, creamy, and bursting with tropical mango flavor, this Mango Nice Cream transforms frozen fruit into a refreshing homemade dessert in just minutes. Ripe banana adds natural sweetness and helps create a smooth, ice-cream-like texture without heavy cream. With only 3–4 simple ingredients and no ice cream maker required, it’s an easy, budget-friendly treat that’s perfect for hot days.
Prep Time: 5 minutes
Cook Time: None
Freeze Time: 2–3 hours if freezing fresh fruit
Optional Firming Time: 30–60 minutes
Total Time: 5 minutes with pre-frozen fruit
Servings: 4
Serving Size: About 1/2 cup
Difficulty: Very Easy
Budget Level: $
Best For: Summer dessert, quick dessert, tropical fruit lovers, family treat
Ingredients
- 3 cups frozen mango chunks
- 1 large ripe banana, sliced and frozen
- 1/4 cup unsweetened milk of choice
- 1 teaspoon honey or maple syrup, optional
Directions
- Add the frozen mango chunks and frozen banana to a high-powered blender or food processor.
- Pour in the milk.
- Blend until thick, smooth, and creamy, stopping occasionally to scrape down the sides.
- If necessary, add additional milk 1 tablespoon at a time, using only enough to help the fruit blend smoothly.
- Taste and add the optional honey or maple syrup if you prefer a sweeter dessert.
- Serve immediately for a creamy soft-serve consistency.
- For firmer, scoopable nice cream, transfer to a freezer-safe container and freeze for 30–60 minutes before serving.
Make It Your Way
- Mango-Lime: Add 1 teaspoon fresh lime juice and a little lime zest for a bright tropical flavor.
- Creamy Coconut: Use light coconut milk and add a small sprinkle of unsweetened shredded coconut on top.
- Pineapple-Mango: Replace 1 cup of the frozen mango with frozen pineapple.
- No Added Sweetener: Use a very ripe banana and naturally sweet mango and leave out the optional honey or maple syrup.
- Dairy-Free/Vegan: Use almond, oat, soy, or coconut milk and choose maple syrup instead of honey if additional sweetness is needed.
- Extra Mango: Top each serving with a few fresh or thawed mango chunks.
- Budget-Friendly Tip: Store-brand frozen mango is usually more economical than buying several fresh mangoes. If mango is expensive, replace 1 cup of the mango with an additional frozen ripe banana to stretch the recipe while keeping it naturally sweet and creamy.
Storage & Meal Prep
Store leftover Mango Nice Cream in an airtight freezer-safe container for up to 1 week.
Homemade nice cream becomes firmer after freezing. Allow it to sit at room temperature for about 5–10 minutes before scooping.
For quick desserts later, slice and freeze ripe bananas ahead of time and keep frozen mango in the freezer. Once the fruit is frozen, this dessert takes only about 5 minutes to prepare.
Nutrition Information
Estimated per serving:
Calories: 120
Protein: 2g
Carbohydrates: 28g
Fiber: 3g
Total Fat: 1g
Saturated Fat: 0g
Sodium: 25mg
Optional sweetener, coconut, and other toppings are not included in the estimate.
Nutrition information is an estimate and may vary depending on the specific brands, ingredients, milk choice, preparation method, substitutions, and serving size used.
Why You’ll Love It
- Only 3–4 simple ingredients
- Ready in about 5 minutes with frozen fruit
- No ice cream maker required
- Cool, creamy, and full of tropical mango flavor
- Naturally sweetened with fruit
- Easy dairy-free and vegan option
- Uses easy-to-find grocery-store ingredients
- Budget-friendly substitutions included
- Minimal preparation and cleanup
- Perfect for hot summer days
Easy Blueberry Oat Crisp
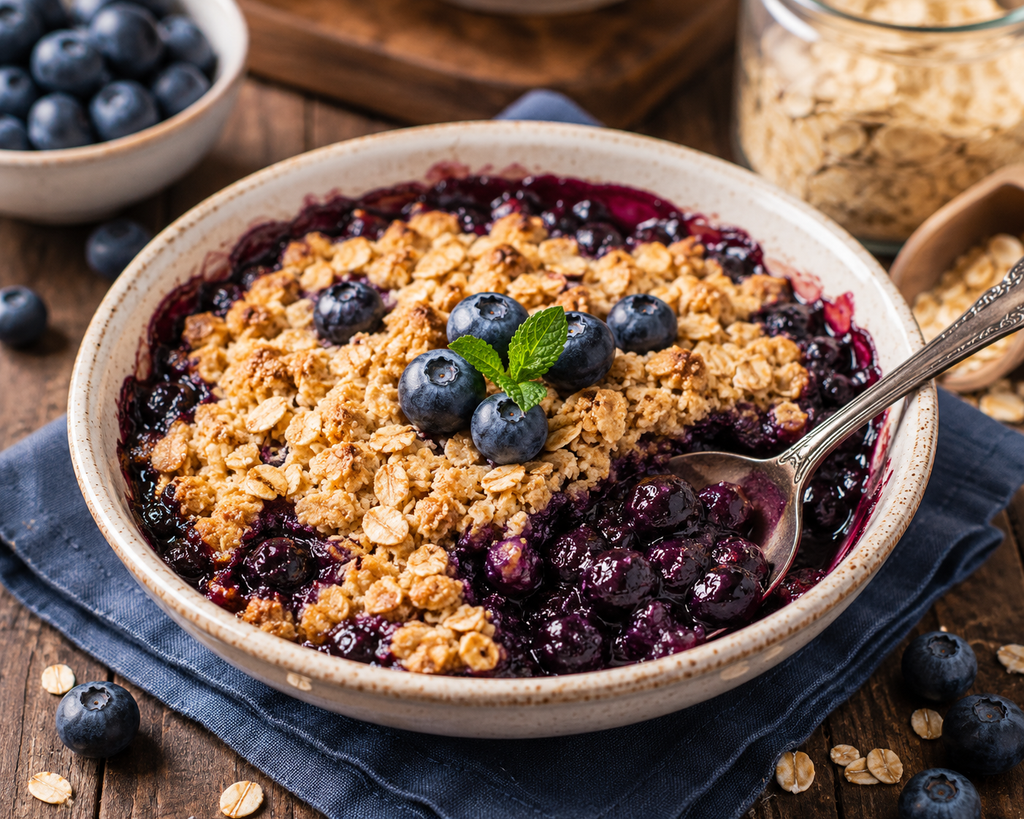
Sweet, juicy blueberries bubble beneath a golden, lightly crisp oat topping in this easy Blueberry Oat Crisp. It delivers the warm, comforting flavor of a classic fruit dessert without the work of making a pie crust. Fresh or frozen blueberries work beautifully, so this simple dessert can be enjoyed year-round without stretching the grocery budget.
Prep Time: 10 minutes
Cook Time: 30–35 minutes
Cooling Time: 10 minutes
Total Time: 50–55 minutes
Servings: 8
Serving Size: About 1/2 cup
Difficulty: Easy
Budget Level: $
Best For: Family dessert, summer gatherings, make-ahead dessert, fruit lovers, warm comfort dessert
Ingredients
- 4 cups fresh or frozen blueberries
- 2 tablespoons maple syrup or honey
- 1 tablespoon fresh lemon juice
- 1 tablespoon cornstarch
- 1/2 cup old-fashioned rolled oats
- 1/4 cup whole-wheat or all-purpose flour
- 2 tablespoons brown sugar
- 1/4 teaspoon ground cinnamon
- 2 tablespoons melted butter or coconut oil
- Pinch of salt
Directions
- Preheat the oven to 350°F. Lightly grease an 8-inch square or similar-size baking dish.
- Add the blueberries, maple syrup or honey, lemon juice, and cornstarch to the baking dish. Gently stir until the blueberries are evenly coated.
- In a separate bowl, combine the rolled oats, flour, brown sugar, cinnamon, and salt.
- Pour the melted butter or coconut oil over the oat mixture. Stir until evenly moistened and crumbly.
- Sprinkle the oat topping evenly over the blueberries.
- Bake for 30–35 minutes, or until the blueberry filling is bubbling around the edges and the oat topping is golden brown.
- Remove from the oven and allow the crisp to cool for about 10 minutes before serving.
- Serve warm on its own or add your favorite optional topping.
Make It Your Way
- Mixed Berry Crisp: Replace up to half of the blueberries with strawberries, raspberries, or blackberries.
- Extra Crunch: Add 2 tablespoons chopped walnuts or pecans to the oat topping.
- Gluten-Free: Use certified gluten-free rolled oats and a 1:1 gluten-free flour blend.
- Dairy-Free/Vegan: Use melted coconut oil or plant-based butter and maple syrup.
- Less Added Sugar: Reduce or omit the brown sugar in the topping when using especially sweet blueberries.
- Warm & Spiced: Add a pinch of nutmeg along with the cinnamon.
- Budget-Friendly Tip: Store-brand frozen blueberries work beautifully and are often considerably less expensive than fresh blueberries when berries are out of season. There is no need to thaw them first; simply add a few extra minutes of baking time if necessary.
Storage & Meal Prep
Allow the Blueberry Oat Crisp to cool completely before storing.
Cover the baking dish or transfer individual portions to airtight containers and refrigerate for up to 4 days.
Reheat individual servings in the microwave for about 20–30 seconds, or warm a larger portion in a 325°F oven until heated through.
For meal prep, divide the cooled crisp into individual containers so you have ready-to-serve dessert portions throughout the week.
Nutrition Information
Estimated per serving:
Calories: 140
Protein: 2g
Carbohydrates: 26g
Fiber: 4g
Total Fat: 4g
Saturated Fat: 2g
Sodium: 25mg
Optional ice cream, yogurt, whipped topping, nuts, or other garnishes are not included in the estimate.
Nutrition information is an estimate and may vary depending on the specific brands, ingredients, preparation method, substitutions, and serving size used.
Why You’ll Love It
- Made with simple, familiar ingredients
- Works with fresh or frozen blueberries
- Sweet, juicy fruit with a golden oat topping
- No pie crust or complicated baking required
- Only about 10 minutes of hands-on preparation
- Budget-friendly frozen-fruit option
- Delicious served warm or chilled
- Easy dairy-free and gluten-free adaptations
- Great for making ahead
- A comforting fruit dessert the whole family can enjoy
No-Bake Berry Cheesecake Cups
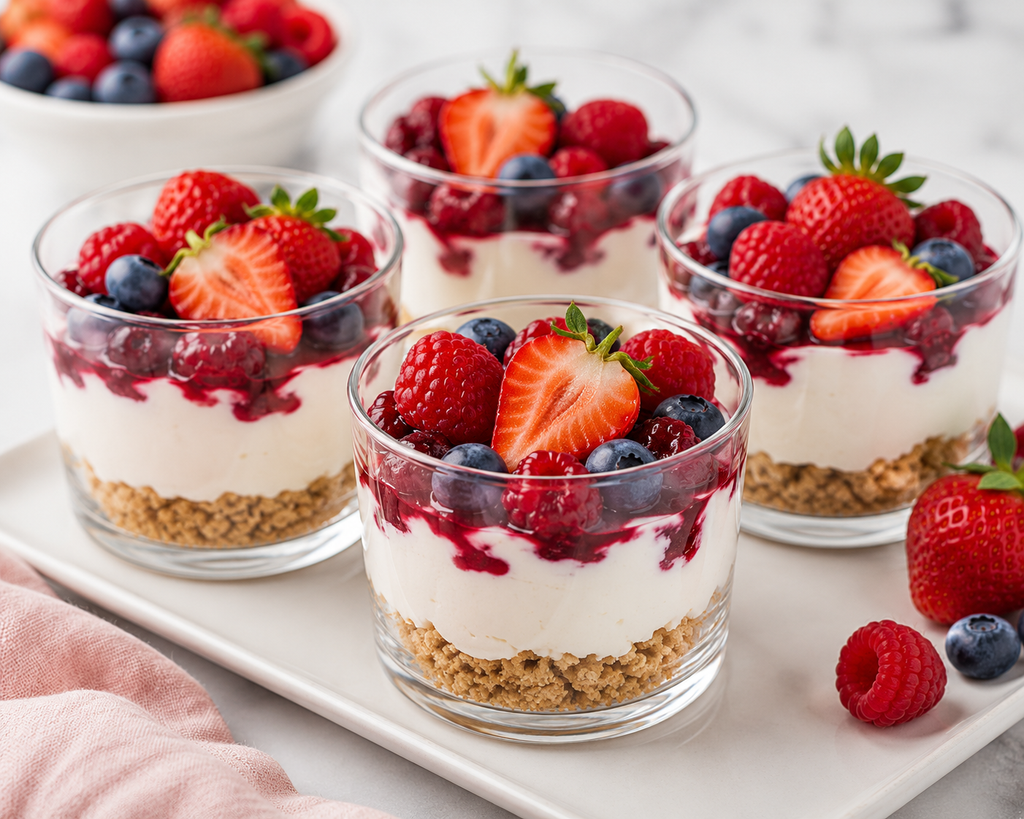
Creamy cheesecake filling, a lightly sweet graham cracker crust, and colorful fresh berries come together in these easy No-Bake Berry Cheesecake Cups. Each individual serving delivers the flavor of cheesecake without the work of baking a traditional cheesecake. They’re cool, creamy, refreshing, and easy enough for an everyday dessert while still looking beautiful for summer gatherings, parties, or special occasions.
Prep Time: 15 minutes
Cook Time: None
Chill Time: At least 2 hours
Total Time: 2 hours 15 minutes
Servings: 6
Serving Size: 1 cheesecake cup
Difficulty: Very Easy
Budget Level: $
Best For: Summer dessert, parties, family dessert, make-ahead treats, special occasions
Ingredients
- 3/4 cup graham cracker crumbs
- 2 tablespoons melted butter
- 8 ounces reduced-fat cream cheese, softened
- 1/2 cup plain Greek yogurt
- 3 tablespoons honey or maple syrup, divided
- 1 teaspoon vanilla extract
- 1 tablespoon fresh lemon juice
- 1 cup mixed strawberries, blueberries, and raspberries
Directions
- In a small bowl, combine the graham cracker crumbs, melted butter, and 1 tablespoon of the honey or maple syrup. Stir until the crumbs are evenly moistened.
- Divide the graham cracker mixture evenly among 6 small glasses, jars, or dessert cups. Gently press the crumbs into the bottom of each cup.
- In a medium bowl, beat the softened cream cheese until smooth and creamy.
- Add the Greek yogurt, remaining 2 tablespoons honey or maple syrup, vanilla extract, and lemon juice. Mix until smooth and well combined.
- Divide the cheesecake filling evenly among the prepared cups and smooth the tops.
- Cover and refrigerate for at least 2 hours, or until thoroughly chilled and slightly firm.
- Top each cheesecake cup with fresh strawberries, blueberries, and raspberries just before serving.
Make It Your Way
- Strawberry Cheesecake: Use only sliced strawberries for a simple strawberry version.
- Blueberry Cheesecake: Top with fresh blueberries or lightly mashed blueberries.
- Berry Swirl: Mash a small handful of berries and swirl them through the cheesecake filling before chilling.
- Lemon Berry: Add 1 teaspoon fresh lemon zest to the cheesecake filling.
- Chocolate Berry: Add a small sprinkle of dark chocolate shavings before serving.
- Dairy-Free: Use dairy-free cream cheese, plant-based yogurt, and plant-based butter.
- Budget-Friendly Tip: You don’t need three different types of berries to make this dessert. Use whichever fresh fruit is on sale, or make all six cups with one affordable berry. Thawed frozen berries can also be lightly mashed and used as a simple fruit topping when fresh berries are expensive.
Storage & Meal Prep
Cover the cheesecake cups individually or place them in an airtight container and refrigerate for up to 4 days.
For the freshest appearance and texture, prepare the cheesecake cups ahead of time but wait to add the fresh berries until shortly before serving.
These individual desserts are excellent for meal prep because they can be assembled in small jars or containers, chilled overnight, and served straight from the refrigerator.
Nutrition Information
Estimated per serving:
Calories: 200
Protein: 6g
Carbohydrates: 22g
Fiber: 1g
Total Fat: 10g
Saturated Fat: 5g
Sodium: 180mg
Nutrition information is an estimate and may vary depending on the specific brands, ingredients, fruit choices, preparation method, substitutions, and serving size used.
Why You’ll Love It
- No baking required
- Cool and creamy cheesecake flavor
- Easy individual portions
- Made with familiar grocery-store ingredients
- Fresh berries add natural sweetness and color
- Lighter than many traditional cheesecake recipes
- Easy to prepare ahead of time
- Simple to customize with whatever fruit is affordable
- Perfect for warm-weather entertaining
- Pretty enough for parties and special occasions
Bright & Creamy Lemon Layered Parfaits
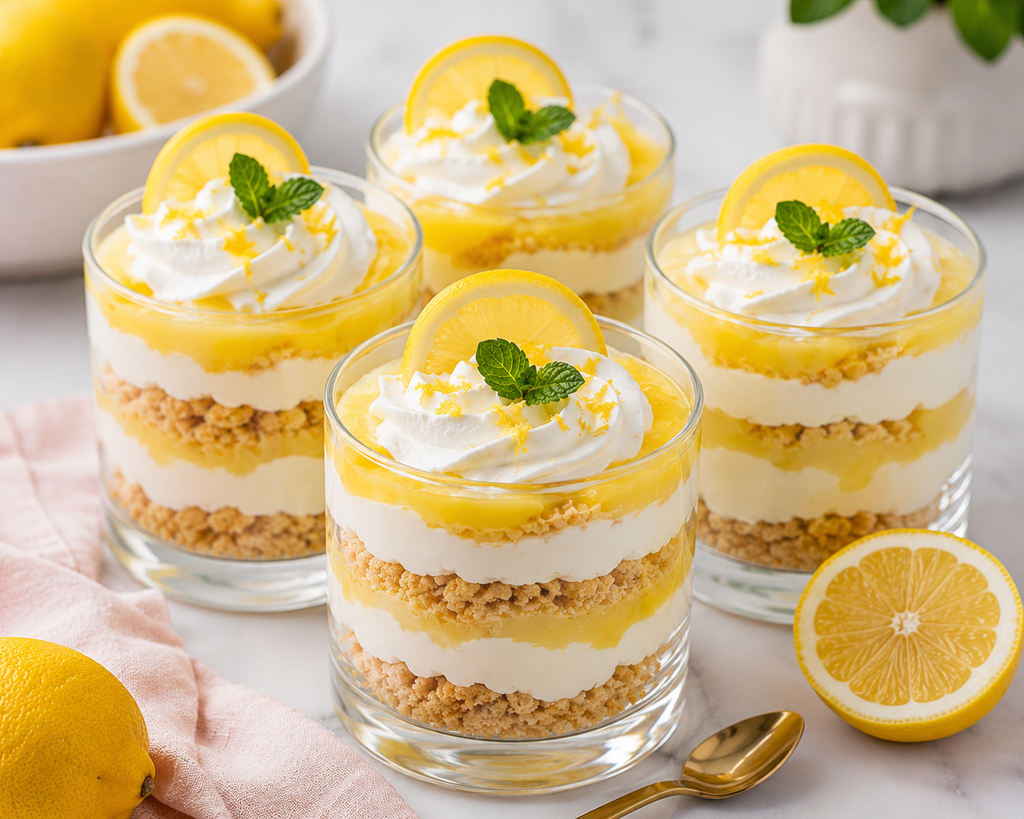
Bright, creamy, tangy, and lightly sweet, these Lemon Layered Parfaits bring refreshing lemon-dessert flavor to every spoonful. Crunchy graham cracker crumbs are layered with creamy Greek yogurt and a smooth lemon filling for an easy no-bake dessert that looks impressive without complicated preparation. Serve them cold for a refreshing warm-weather treat or prepare them ahead for family gatherings and special occasions.
Prep Time: 15 minutes
Cook Time: None
Chill Time: At least 2 hours
Total Time: 2 hours 15 minutes
Servings: 6
Serving Size: 1 parfait
Difficulty: Very Easy
Budget Level: $
Best For: Summer dessert, lemon lovers, family gatherings, entertaining, make-ahead dessert
Ingredients
- 3/4 cup graham cracker crumbs
- 2 tablespoons melted butter
- 3 tablespoons honey or maple syrup, divided
- 2 cups plain Greek yogurt, divided
- 1/2 cup lemon curd
- 1 tablespoon fresh lemon juice
- 1 teaspoon fresh lemon zest, plus more for garnish
- 1/2 teaspoon vanilla extract
Directions
- In a small bowl, combine the graham cracker crumbs, melted butter, and 1 tablespoon of the honey or maple syrup. Stir until the crumbs are evenly moistened.
- Spoon a layer of the graham cracker mixture into the bottom of 6 small glasses, jars, or dessert cups.
- In a medium bowl, combine 1 cup of the Greek yogurt with the lemon curd, fresh lemon juice, and lemon zest. Stir until smooth and creamy.
- In a separate bowl, combine the remaining 1 cup Greek yogurt, remaining 2 tablespoons honey or maple syrup, and vanilla extract.
- Build the parfaits by alternating layers of graham cracker crumbs, sweetened Greek yogurt, and the creamy lemon mixture.
- Finish each parfait with a small amount of graham cracker crumbs or lemon mixture on top.
- Cover and refrigerate for at least 2 hours to thoroughly chill and allow the flavors to come together.
- Garnish with additional lemon zest, a thin lemon slice, or fresh mint just before serving, if desired.
Make It Your Way
- Berry Lemon: Add fresh blueberries, strawberries, or raspberries between the layers.
- Extra Lemon: Add additional fresh lemon zest for a stronger citrus flavor.
- Extra Creamy: Use whole-milk Greek yogurt for a richer texture.
- Gluten-Free: Use gluten-free graham-style crackers.
- Dairy-Free: Use thick dairy-free yogurt, plant-based butter, and dairy-free lemon curd.
- Mini Parfaits: Divide the ingredients among 8 smaller glasses for party-size portions.
- Budget-Friendly Tip: Store-brand graham crackers, Greek yogurt, and lemon curd work perfectly in this recipe. You can also purchase a larger container of plain Greek yogurt instead of individual cups, which is usually less expensive per serving.
Storage & Meal Prep
Cover the parfaits individually or place them in an airtight container and refrigerate for up to 4 days.
For the freshest appearance, wait to add optional lemon slices, fresh mint, berries, or other garnishes until shortly before serving.
These parfaits are ideal for making ahead. Assemble them the night before, refrigerate overnight, and serve chilled the following day.
Nutrition Information
Estimated per serving:
Calories: 190
Protein: 7g
Carbohydrates: 25g
Fiber: 1g
Total Fat: 7g
Saturated Fat: 4g
Sodium: 100mg
Optional whipped topping, fruit, and other garnishes are not included in the estimate.
Nutrition information is an estimate and may vary depending on the specific brands, ingredients, yogurt, lemon curd, preparation method, substitutions, and serving size used.
Why You’ll Love It
- No baking required
- Bright and refreshing lemon flavor
- Creamy layers with a crunchy graham cracker contrast
- Uses simple grocery-store ingredients
- Easy individual portions
- Perfect for making ahead
- Budget-friendly ingredient options
- Great for warm-weather entertaining
- Easy to customize with fresh fruit
- Looks impressive without complicated preparation
Frozen Chocolate-Covered Banana Bites
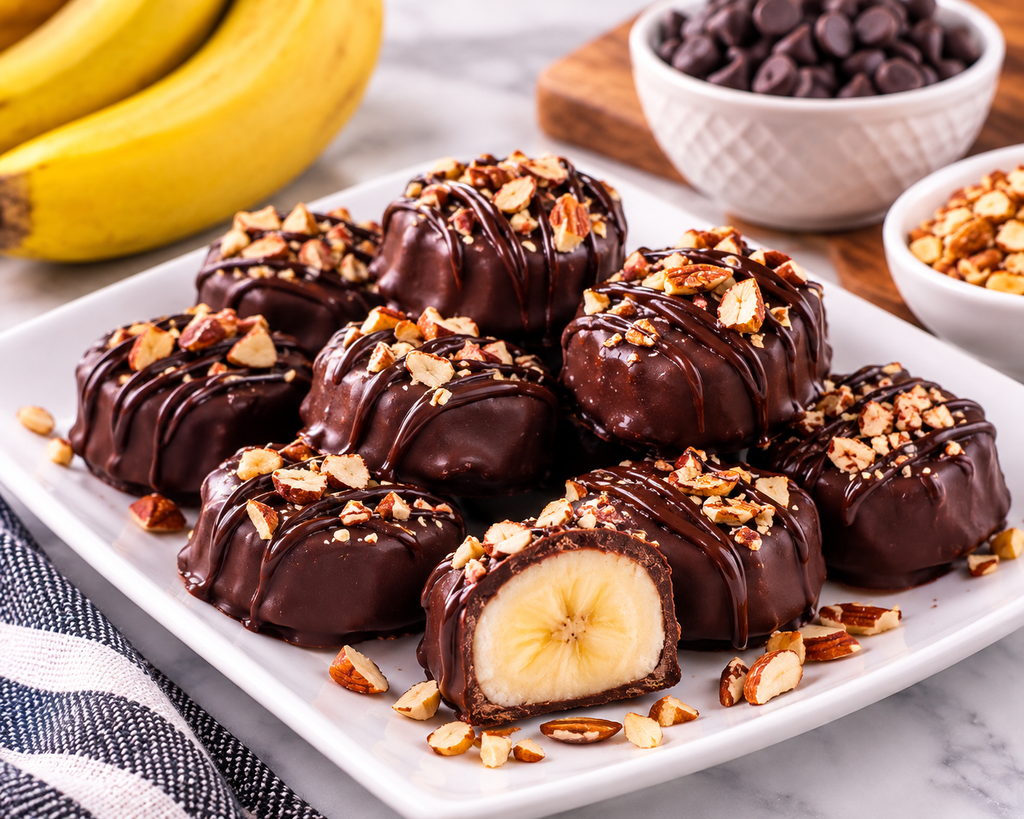
Cold, creamy banana centers wrapped in a crisp dark chocolate shell make these Frozen Chocolate-Covered Banana Bites an easy dessert that feels much more indulgent than the ingredient list suggests. They require just a handful of everyday ingredients, no baking, and only a few minutes of hands-on preparation. Keep a batch in the freezer for a cool, chocolatey treat that’s especially good on hot days.
Prep Time: 10 minutes
Cook Time: None
Freeze Time: 1 hour 30 minutes
Total Time: About 1 hour 40 minutes
Servings: 6
Serving Size: 2 banana bites
Difficulty: Very Easy
Budget Level: $
Best For: Summer dessert, chocolate cravings, family treats, make-ahead dessert
Ingredients
- 3 medium bananas
- 1 cup dark or semisweet chocolate chips
- 1 teaspoon coconut oil
- 1/4 cup chopped peanuts, almonds, or pecans, optional
Directions
- Line a baking sheet or large plate with parchment paper.
- Peel the bananas and cut each banana into approximately 4 thick pieces for a total of about 12 bites.
- Arrange the banana pieces on the prepared baking sheet and freeze for about 1 hour, or until firm.
- Place the chocolate chips and coconut oil in a microwave-safe bowl. Microwave in 20-second intervals, stirring between each interval, until smooth and completely melted.
- Using a fork, dip each frozen banana piece into the melted chocolate until completely coated. Allow the excess chocolate to drip back into the bowl.
- Return each chocolate-covered banana bite to the parchment-lined baking sheet.
- Immediately sprinkle with chopped nuts, if using, before the chocolate hardens.
- Freeze for another 20–30 minutes, or until the chocolate shell is completely firm.
- Enjoy directly from the freezer or allow the bites to soften for 2–3 minutes before eating.
Make It Your Way
- Peanut Butter Banana: Spread a thin layer of peanut butter over the frozen banana pieces before dipping them in chocolate.
- Coconut Crunch: Sprinkle unsweetened shredded coconut over the chocolate before it sets.
- Nut-Free: Skip the chopped nuts or use crushed graham crackers as a topping.
- Extra Chocolate: Drizzle a small amount of remaining melted chocolate over the finished bites.
- Dairy-Free/Vegan: Use dairy-free dark or semisweet chocolate chips.
- Smaller Bites: Slice the bananas into rounds instead of thick chunks for mini bite-size portions.
- Budget-Friendly Tip: Store-brand semisweet chocolate chips are usually less expensive than specialty dark chocolate and work perfectly for this recipe. Bananas are already one of the most budget-friendly fruits, and the chopped-nut topping is completely optional.
Storage & Meal Prep
Once the chocolate has completely hardened, transfer the banana bites to an airtight freezer-safe container or freezer bag.
Store in the freezer for up to 2 weeks for the best flavor and texture.
Place parchment paper between layers to prevent the bites from sticking together.
For a softer banana center, allow the frozen bites to sit at room temperature for 2–5 minutes before serving.
Nutrition Information
Estimated per serving:
Calories: 180
Protein: 3g
Carbohydrates: 27g
Fiber: 3g
Total Fat: 8g
Saturated Fat: 4g
Sodium: 15mg
Estimate is based on 2 bites per serving and may vary depending on the chocolate used. Optional nuts and additional toppings may change the nutrition values.
Nutrition information is an estimate and may vary depending on the specific brands, ingredients, preparation method, substitutions, and serving size used.
Why You’ll Love It
- Only 3 main ingredients
- No baking required
- Creamy frozen banana with a crisp chocolate shell
- Easy to make ahead and keep in the freezer
- Perfect for warm-weather dessert cravings
- Uses inexpensive, easy-to-find ingredients
- Simple to customize with different toppings
- Kid- and family-friendly
- Naturally portioned into individual bites
- Tastes indulgent without a complicated recipe
Mixed Berry Greek Yogurt Crunch Parfaits
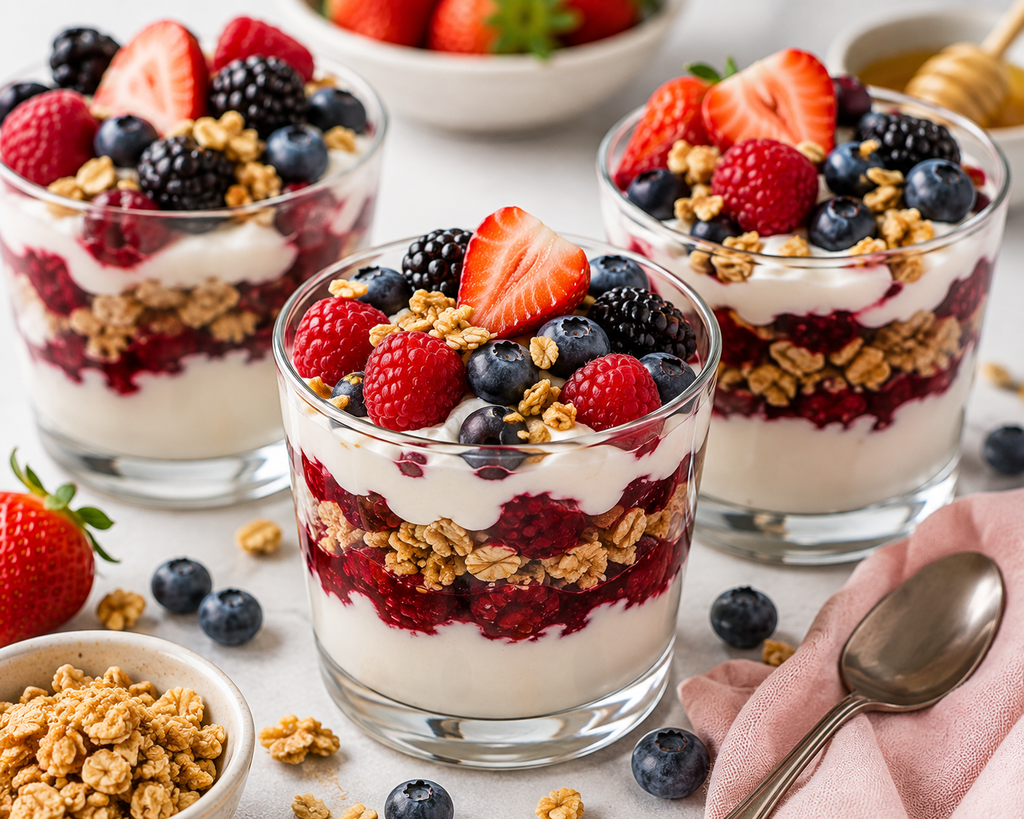
Creamy Greek yogurt, juicy mixed berries, and crunchy granola come together in these colorful Mixed Berry Greek Yogurt Crunch Parfaits. A quick homemade berry layer gives them a sweeter, more dessert-like flavor while keeping the recipe simple and fresh. With no baking required and only a handful of familiar ingredients, these individual parfaits are an easy, budget-friendly dessert that can be assembled in minutes and chilled until serving.
Prep Time: 10 minutes
Cook Time: 5 minutes
Cooling Time: 10 minutes
Total Time: 25 minutes
Servings: 4
Serving Size: 1 parfait
Difficulty: Very Easy
Budget Level: $
Best For: Quick dessert, summer dessert, make-ahead treats, family dessert, berry lovers
Ingredients
- 2 cups plain Greek yogurt
- 2 cups mixed berries, fresh or frozen
- 3 tablespoons honey or maple syrup, divided
- 1 teaspoon vanilla extract
- 1 cup granola
- 1 teaspoon fresh lemon juice
Directions
- Add 1 cup of the mixed berries, 1 tablespoon of the honey or maple syrup, and the lemon juice to a small saucepan.
- Cook over medium-low heat for about 5 minutes, gently mashing some of the berries as they soften. Remove from the heat and allow the berry mixture to cool for about 10 minutes.
- In a medium bowl, stir together the Greek yogurt, remaining 2 tablespoons honey or maple syrup, and vanilla extract until smooth and creamy.
- Divide a portion of the yogurt mixture among 4 small glasses, jars, or dessert cups.
- Add a layer of the cooled berry mixture followed by a layer of granola.
- Repeat the layers until the glasses are filled.
- Top each parfait with the remaining fresh berries and a small sprinkle of granola.
- Serve immediately for maximum crunch, or refrigerate until ready to serve.
Make It Your Way
- Strawberry Only: Use strawberries for both the fruit sauce and fresh fruit layers.
- Blueberry Version: Use fresh or frozen blueberries for an easy single-fruit variation.
- Chocolate Berry: Sprinkle a small amount of mini dark chocolate chips or dark chocolate shavings over the top.
- Extra Creamy: Use whole-milk Greek yogurt for a richer dessert texture.
- Dairy-Free: Substitute a thick plant-based Greek-style yogurt.
- Lower Added Sugar: Use naturally sweet berries and reduce the honey or maple syrup to taste.
- Nut-Free: Choose a nut-free granola if needed.
- Budget-Friendly Tip: You do not need to purchase several containers of fresh berries. A store-brand frozen mixed-berry blend works perfectly for the cooked fruit layer and is often considerably less expensive. Use whichever single fresh berry is on sale for the garnish, or simply use thawed frozen berries throughout the entire recipe.
Storage & Meal Prep
Store assembled parfaits covered in the refrigerator for up to 3 days.
For the best crunchy texture, prepare the yogurt and berry mixture ahead of time and store them separately. Assemble the parfaits with granola shortly before serving.
The berry mixture can be prepared up to 4 days ahead and refrigerated in an airtight container.
For easy individual portions, prepare the parfaits in small jars with lids and keep the granola in a separate container until serving.
Nutrition Information
Estimated per serving:
Calories: 250
Protein: 13g
Carbohydrates: 42g
Fiber: 5g
Total Fat: 5g
Saturated Fat: 1g
Sodium: 75mg
Nutrition information is an estimate and may vary depending on the specific Greek yogurt, granola, berries, sweetener, preparation method, substitutions, and serving size used.
Why You’ll Love It
- Made with only 6 simple ingredients
- Creamy, fruity, and crunchy in every serving
- Uses fresh or frozen berries
- Easy to prepare in about 25 minutes
- No oven required
- Individual portions make serving easy
- Great make-ahead dessert option
- Easy dairy-free adaptation
- Frozen fruit keeps the recipe budget-friendly
- Colorful enough for entertaining but simple enough for an everyday dessert
Mixed Berry Frozen Yogurt Crunch Bark
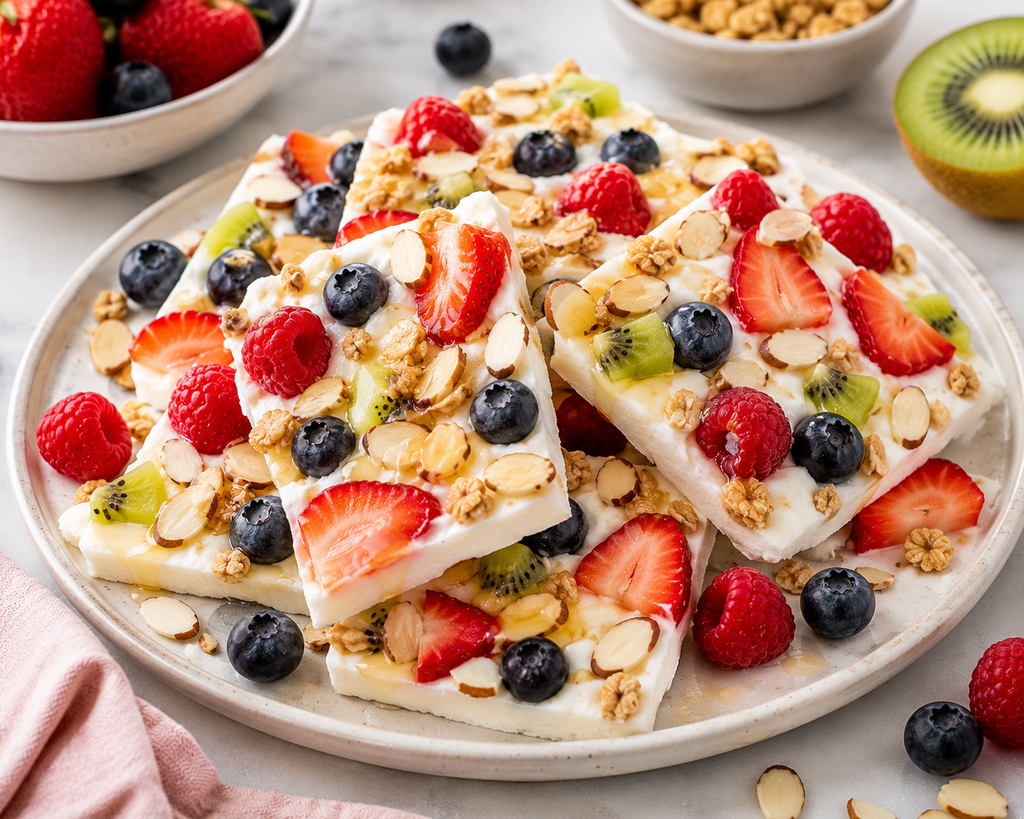
Cool, creamy, fruity, and crunchy, this Mixed Berry Frozen Yogurt Bark turns simple Greek yogurt and fresh fruit into an easy freezer dessert. Strawberries, blueberries, raspberries, and kiwi add plenty of color and fresh flavor, while a little granola and sliced almonds provide a satisfying crunch. There’s no baking required, and the recipe is easy to customize with whatever fruit you already have on hand.
Prep Time: 10 minutes
Cook Time: None
Freeze Time: 3–4 hours
Total Time: 3 hours 10 minutes to 4 hours 10 minutes
Servings: 8
Serving Size: About 2 pieces
Difficulty: Very Easy
Budget Level: $
Best For: Summer dessert, freezer treats, fruit lovers, family dessert, make-ahead treats
Ingredients
- 2 cups plain Greek yogurt
- 2 tablespoons honey or maple syrup
- 1 teaspoon vanilla extract
- 1 cup mixed fresh or frozen berries, chopped as needed
- 1 kiwi, peeled and chopped
- 1/4 cup granola
- 2 tablespoons sliced almonds, optional
Directions
- Line a baking sheet or large freezer-safe tray with parchment paper.
- In a medium bowl, stir together the Greek yogurt, honey or maple syrup, and vanilla extract until smooth.
- Spread the yogurt mixture onto the prepared baking sheet in an even layer about 1/4 to 1/2 inch thick.
- Scatter the berries and chopped kiwi evenly over the yogurt.
- Sprinkle the granola and optional sliced almonds over the fruit. Gently press the toppings into the yogurt so they stay in place after freezing.
- Place the tray in the freezer for 3–4 hours, or until the yogurt is completely frozen and firm.
- Remove the frozen yogurt from the tray and break or cut it into approximately 16 pieces.
- Serve immediately or transfer the pieces to a freezer-safe container for later.
Make It Your Way
- Strawberry Banana: Use sliced strawberries and thin banana slices instead of mixed berries and kiwi.
- Tropical Bark: Use chopped mango and pineapple for a tropical version.
- Chocolate Berry: Add a light sprinkle of mini dark chocolate chips before freezing.
- Nut-Free: Leave out the almonds and choose a nut-free granola.
- Dairy-Free: Substitute a thick plant-based Greek-style yogurt.
- Extra Crunch: Add a little additional granola just before serving.
- Budget-Friendly Tip: You don’t need to buy several different packages of fresh fruit. Use a store-brand frozen mixed-berry blend or whichever fruit is currently on sale. The almonds are completely optional, and inexpensive store-brand granola works perfectly.
Storage & Meal Prep
Once completely frozen, transfer the bark pieces to an airtight freezer-safe container or freezer bag.
Place parchment paper between layers to help prevent the pieces from sticking together.
Store in the freezer for up to 2 weeks for the best flavor and texture.
Serve directly from the freezer. If the bark is extremely firm, allow it to sit at room temperature for 1–2 minutes before eating.
Nutrition Information
Estimated per serving:
Calories: 110
Protein: 6g
Carbohydrates: 15g
Fiber: 2g
Total Fat: 3g
Saturated Fat: 1g
Sodium: 35mg
Estimate includes the sliced almonds and is based on approximately 2 pieces per serving.
Nutrition information is an estimate and may vary depending on the specific yogurt, granola, fruit, sweetener, toppings, preparation method, substitutions, and serving size used.
Why You’ll Love It
- Only 7 simple ingredients
- No baking required
- Cool and refreshing for hot days
- Creamy, fruity, and crunchy
- Easy to customize with different fruits
- Fresh or frozen berries can be used
- Simple dairy-free and nut-free adaptations
- Easy to prepare ahead and keep in the freezer
- Budget-friendly substitutions included
- Colorful enough for entertaining but easy enough for an everyday dessert
Mini Strawberry Greek Yogurt Cheesecakes
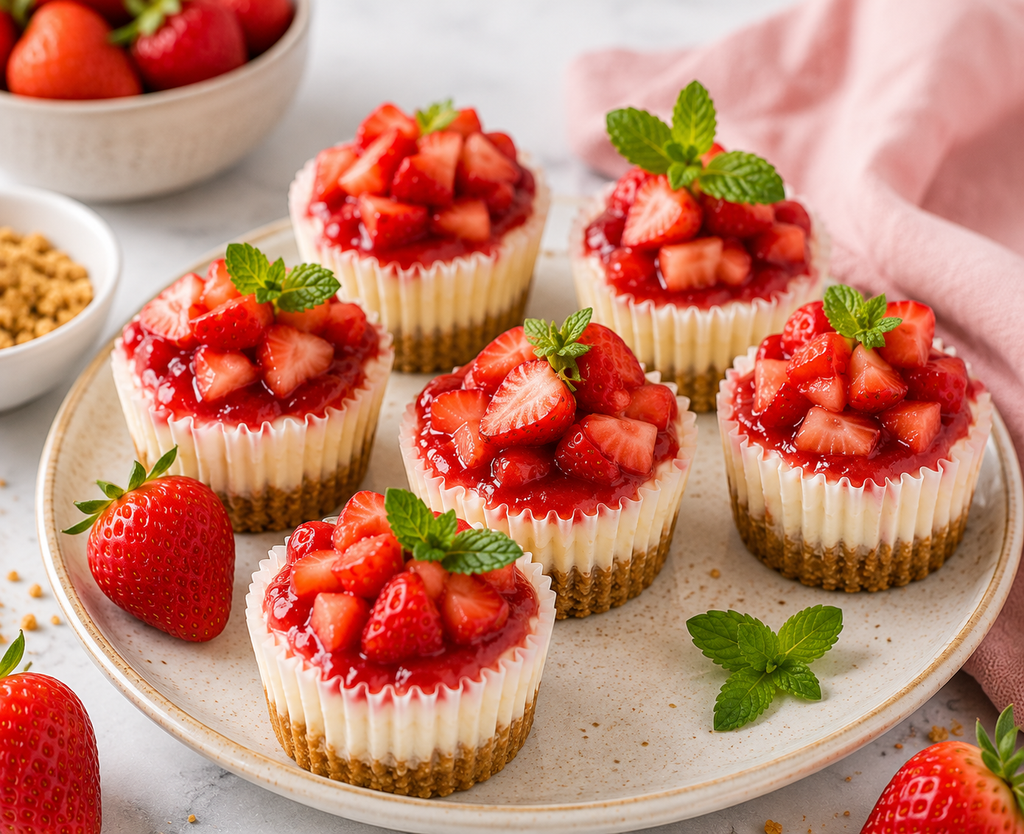
Creamy cheesecake filling, a crunchy graham cracker crust, and juicy strawberries come together in these perfectly portioned Mini Strawberry Cheesecakes. Greek yogurt lightens up the creamy filling while still delivering that rich cheesecake flavor everyone loves. They’re easy to make with familiar ingredients, naturally portion-controlled, and beautiful enough for parties while still being simple enough for an everyday dessert.
Prep Time: 15 minutes
Cook Time: 18–20 minutes
Cooling Time: 30 minutes
Chill Time: At least 2 hours
Total Time: About 3 hours 5 minutes
Servings: 12
Serving Size: 1 mini cheesecake
Difficulty: Easy
Budget Level: $
Best For: Summer dessert, parties, family treats, portion-controlled desserts, make-ahead dessert
Ingredients
- 1 cup graham cracker crumbs
- 3 tablespoons melted butter
- 8 ounces reduced-fat cream cheese, softened
- 1 cup plain Greek yogurt
- 1/3 cup honey or maple syrup
- 1 large egg
- 1 teaspoon vanilla extract
- 1 1/2 cups fresh strawberries, chopped
Directions
- Preheat the oven to 325°F. Line a 12-cup muffin pan with paper liners.
- In a small bowl, combine the graham cracker crumbs and melted butter. Stir until the crumbs are evenly moistened.
- Divide the crumb mixture evenly among the 12 muffin cups and gently press it into the bottom of each liner.
- In a medium bowl, beat the softened cream cheese until smooth.
- Add the Greek yogurt, honey or maple syrup, egg, and vanilla extract. Mix just until smooth and combined. Avoid overmixing.
- Divide the cheesecake filling evenly among the prepared muffin cups.
- Bake for 18–20 minutes, or until the edges are set and the centers still have a slight jiggle.
- Remove from the oven and allow the cheesecakes to cool in the pan for about 30 minutes.
- Transfer to the refrigerator and chill for at least 2 hours.
- Top each chilled cheesecake with chopped fresh strawberries just before serving.
Make It Your Way
- Strawberry Sauce: Mash 1/2 cup of the strawberries and simmer them for 3–5 minutes to create a quick strawberry topping.
- Mixed Berry: Replace the strawberries with blueberries, raspberries, or a combination of berries.
- Lemon Strawberry: Add 1 teaspoon fresh lemon zest to the cheesecake filling.
- Chocolate Strawberry: Sprinkle a small amount of dark chocolate shavings over the strawberries before serving.
- Gluten-Free: Use gluten-free graham-style crackers for the crust.
- Extra Creamy: Use whole-milk Greek yogurt instead of nonfat or low-fat yogurt.
- Budget-Friendly Tip: Buy store-brand cream cheese, Greek yogurt, and graham crackers. When fresh strawberries are expensive, use thawed frozen strawberries to make a simple strawberry sauce instead of purchasing fresh berries for the topping.
Storage & Meal Prep
Store the mini cheesecakes in an airtight container in the refrigerator for up to 4 days.
For the freshest appearance, refrigerate the cheesecakes without the strawberry topping and add the fruit shortly before serving.
The cheesecakes can also be frozen without the strawberry topping for up to 1 month. Thaw overnight in the refrigerator before serving.
Their individual portions make them especially convenient for preparing ahead for parties, family gatherings, or desserts throughout the week.
Nutrition Information
Estimated per serving:
Calories: 150
Protein: 5g
Carbohydrates: 17g
Fiber: 1g
Total Fat: 7g
Saturated Fat: 4g
Sodium: 130mg
Nutrition information is an estimate and may vary depending on the specific brands, ingredients, Greek yogurt, sweetener, preparation method, substitutions, toppings, and serving size used.
Why You’ll Love It
- Creamy cheesecake flavor in individual portions
- Made with simple grocery-store ingredients
- Greek yogurt adds creaminess and protein
- Fresh strawberries add bright, fruity flavor
- Easy to prepare ahead of time
- Naturally portioned into individual servings
- Freezer-friendly without the fruit topping
- Easy to customize with different fruits
- Budget-friendly substitutions included
- Pretty enough for entertaining but simple enough for an everyday dessert
Dark Chocolate-Covered Strawberries
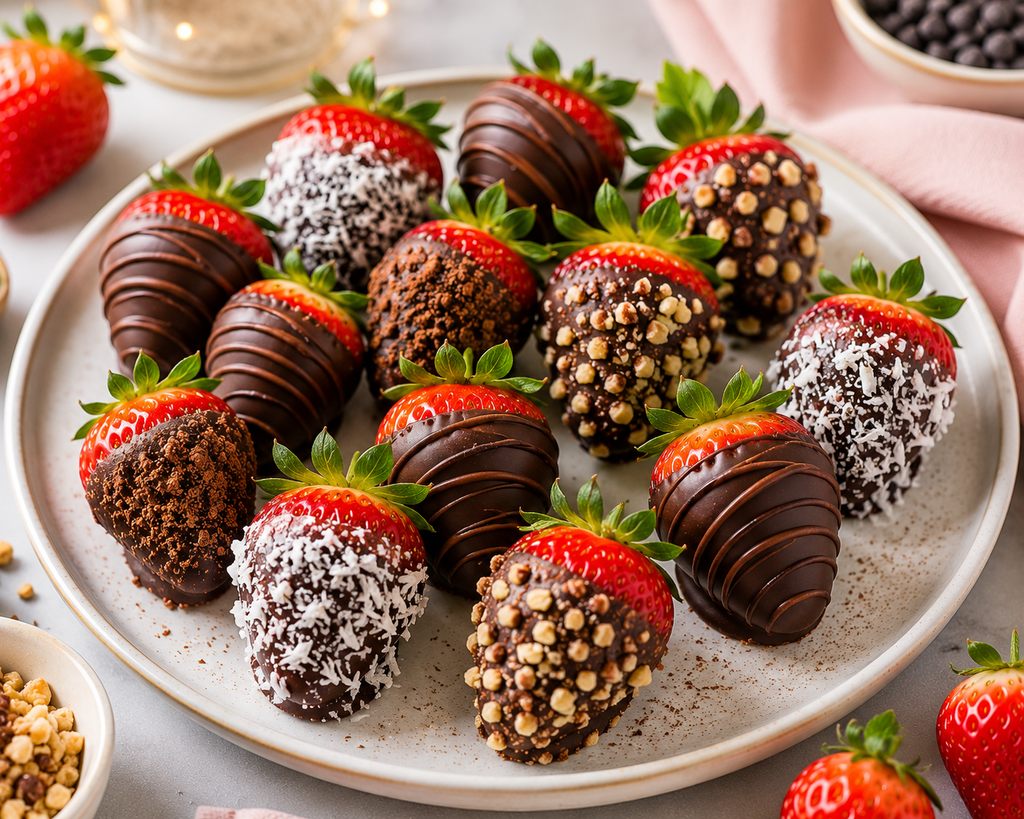
Juicy fresh strawberries dipped in rich dark chocolate make a simple dessert that feels special without requiring a complicated recipe. These Dark Chocolate-Covered Strawberries use just three main ingredients and can be customized with inexpensive toppings for extra crunch and flavor. They’re quick, colorful, naturally portioned, and perfect when you want an easy chocolate dessert without turning on the oven.
Prep Time: 15 minutes
Cook Time: None
Setting Time: 20–30 minutes
Total Time: 35–45 minutes
Servings: 6
Serving Size: 2 chocolate-covered strawberries
Difficulty: Very Easy
Budget Level: $
Best For: Quick dessert, summer treats, parties, date night, special occasions
Ingredients
- 12 large fresh strawberries
- 1 cup dark or semisweet chocolate chips
- 1 teaspoon coconut oil
- 2 tablespoons chopped peanuts, almonds, or pecans, optional
- 2 tablespoons unsweetened shredded coconut, optional
Directions
- Line a baking sheet, tray, or large plate with parchment paper.
- Wash the strawberries and dry them thoroughly. The strawberries must be completely dry so the melted chocolate will stick properly.
- Place the chocolate chips and coconut oil in a microwave-safe bowl.
- Microwave in 20-second intervals, stirring well after each interval, until the chocolate is completely melted and smooth.
- Hold each strawberry by the leafy top and dip it into the melted chocolate, turning gently until most of the berry is coated.
- Allow excess chocolate to drip back into the bowl, then place the strawberry on the parchment-lined tray.
- While the chocolate is still wet, sprinkle with chopped nuts or shredded coconut if desired.
- Repeat with the remaining strawberries.
- For a chocolate-drizzled finish, drizzle a small amount of remaining melted chocolate over the dipped strawberries.
- Refrigerate for approximately 20–30 minutes, or until the chocolate has completely set.
Make It Your Way
- Coconut Crunch: Sprinkle unsweetened shredded coconut over the freshly dipped strawberries.
- Nutty Chocolate: Add finely chopped peanuts, almonds, or pecans before the chocolate sets.
- Double Chocolate: Allow the first chocolate layer to set, then drizzle a small amount of additional melted chocolate over the berries.
- Simple Version: Skip all toppings and enjoy the strawberries with only the chocolate coating.
- Dairy-Free/Vegan: Choose dairy-free dark or semisweet chocolate chips.
- Smaller Portions: Use medium-size strawberries and serve 2–3 berries per person.
- Budget-Friendly Tip: Use store-brand semisweet chocolate chips instead of specialty dark chocolate. Buy strawberries when they’re in season or on sale, and skip the optional toppings for an easy three-ingredient dessert.
Storage & Meal Prep
Chocolate-covered strawberries are best enjoyed the day they are prepared.
Store leftovers in a single layer in a covered container in the refrigerator for up to 2 days.
Avoid freezing because strawberries release moisture as they thaw, which can affect both the fruit and chocolate coating.
For the best texture, wash and thoroughly dry the strawberries ahead of time, but wait to dip them in chocolate until the day you plan to serve them.
Nutrition Information
Estimated per serving:
Calories: 150
Protein: 2g
Carbohydrates: 20g
Fiber: 3g
Total Fat: 8g
Saturated Fat: 5g
Sodium: 10mg
Estimate is based on 2 chocolate-covered strawberries per serving without optional nuts, coconut, or additional toppings.
Nutrition information is an estimate and may vary depending on the size of the strawberries, specific chocolate used, brands, preparation method, toppings, substitutions, and serving size.
Why You’ll Love It
- Only 3 main ingredients
- No baking required
- Ready with about 15 minutes of hands-on preparation
- Fresh fruit paired with rich chocolate
- Easy to customize with inexpensive toppings
- Naturally portioned into individual treats
- Simple dairy-free and vegan option
- Beautiful enough for special occasions
- Budget-friendly when strawberries are in season
- An easy dessert that still feels indulgent
Frozen Peanut Butter Chocolate Banana Bites
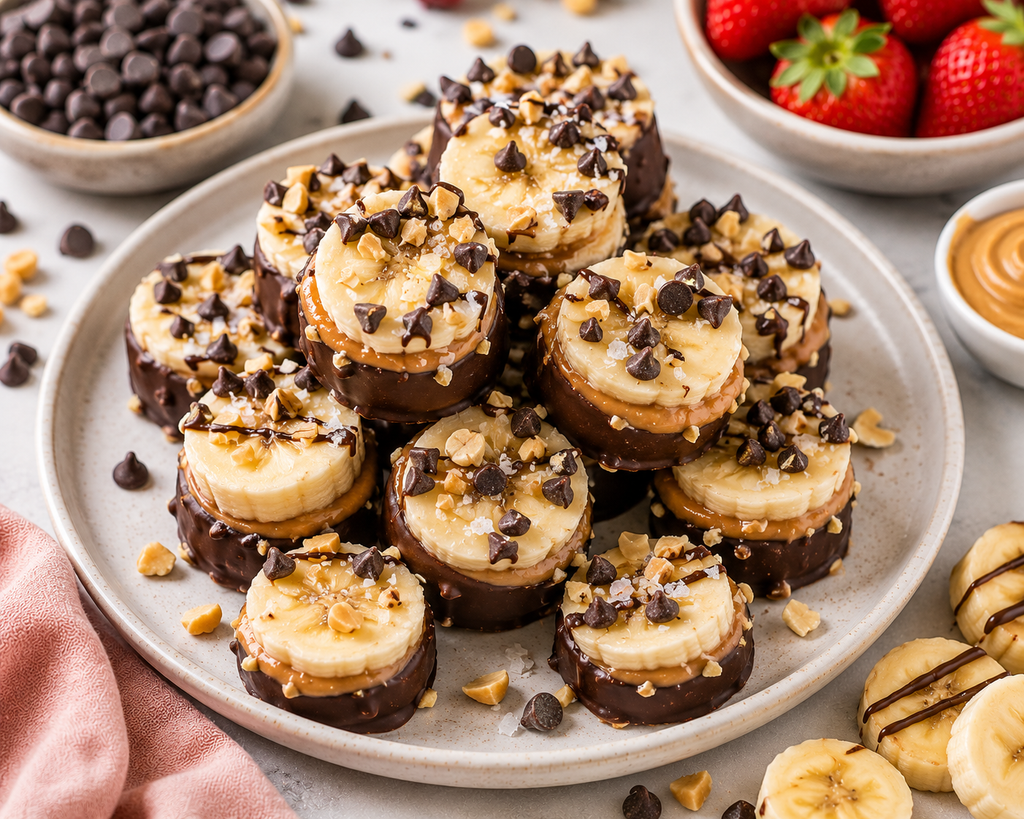
Creamy peanut butter, naturally sweet banana, and rich chocolate come together in these easy Frozen Peanut Butter Chocolate Banana Bites. Each bite has a cool banana center, a layer of creamy peanut butter, and a crisp chocolate coating for a satisfying frozen dessert. With only a few simple ingredients and no baking required, they’re an affordable make-ahead treat that’s especially perfect for hot days.
Prep Time: 15 minutes
Cook Time: None
Freeze Time: 1 hour 30 minutes
Total Time: About 1 hour 45 minutes
Servings: 6
Serving Size: 2 banana bites
Difficulty: Very Easy
Budget Level: $
Best For: Summer dessert, freezer treats, chocolate cravings, family dessert, make-ahead treats
Ingredients
- 3 medium bananas
- 1/3 cup creamy peanut butter
- 3/4 cup dark or semisweet chocolate chips
- 1 teaspoon coconut oil
- 2 tablespoons chopped peanuts, optional
- 1 tablespoon mini chocolate chips, optional
Directions
- Line a baking sheet or large freezer-safe plate with parchment paper.
- Peel the bananas and slice them into approximately 24 rounds.
- Spread about 1 teaspoon of peanut butter onto 12 banana rounds.
- Top each with another banana round and gently press together to create 12 small banana sandwiches.
- Arrange the banana bites on the prepared tray and freeze for about 1 hour, or until firm.
- Place the chocolate chips and coconut oil in a microwave-safe bowl. Microwave in 20-second intervals, stirring after each interval, until completely melted and smooth.
- Dip the bottom half of each frozen banana bite into the melted chocolate, or coat more of the bite if desired.
- Return the bites to the parchment-lined tray and immediately sprinkle with optional chopped peanuts or mini chocolate chips.
- Freeze for another 20–30 minutes, or until the chocolate is firm.
- Serve directly from the freezer, allowing the bites to soften for 2–3 minutes first if desired.
Make It Your Way
- Fully Chocolate-Covered: Dip each frozen banana sandwich completely in melted chocolate instead of coating only the bottom.
- Chocolate Drizzle: Drizzle a little additional melted chocolate over the finished bites before the final freeze.
- Nut-Free: Replace peanut butter with sunflower seed butter and leave off the chopped peanuts.
- Almond Butter: Substitute creamy almond butter for the peanut butter.
- Extra Crunch: Sprinkle finely chopped peanuts over the chocolate before it sets.
- Dairy-Free/Vegan: Use dairy-free chocolate chips and a plant-based peanut butter.
- Budget-Friendly Tip: Bananas and store-brand peanut butter keep this dessert inexpensive. Store-brand semisweet chocolate chips are usually cheaper than specialty dark chocolate and work just as well. The chopped peanuts and mini chocolate chips are optional and can be left off to reduce the cost even further.
Storage & Meal Prep
Once completely frozen, transfer the banana bites to an airtight freezer-safe container or freezer bag.
Place parchment paper between layers to prevent the bites from sticking together.
Store in the freezer for up to 2 weeks for the best flavor and texture.
For easier eating, allow the frozen bites to sit at room temperature for about 2–5 minutes before serving.
These are excellent for making ahead because the entire batch can be prepared at once and kept frozen for quick individual desserts.
Nutrition Information
Estimated per serving:
Calories: 210
Protein: 5g
Carbohydrates: 25g
Fiber: 3g
Total Fat: 12g
Saturated Fat: 5g
Sodium: 55mg
Estimate is based on 2 banana bites per serving. Optional chopped peanuts, mini chocolate chips, additional chocolate drizzle, and other toppings may change the nutrition values.
Nutrition information is an estimate and may vary depending on the specific brands, ingredients, preparation method, substitutions, and serving size used.
Why You’ll Love It
- Made with only 4 main ingredients
- No baking required
- Creamy peanut butter and naturally sweet banana
- Crisp chocolate coating
- Easy to prepare ahead and freeze
- Uses inexpensive, familiar ingredients
- Naturally portioned into individual bites
- Easy nut-free and dairy-free adaptations
- Minimal hands-on preparation
- A cool, satisfying dessert for hot days
Frozen Berry Yogurt Granola Cups
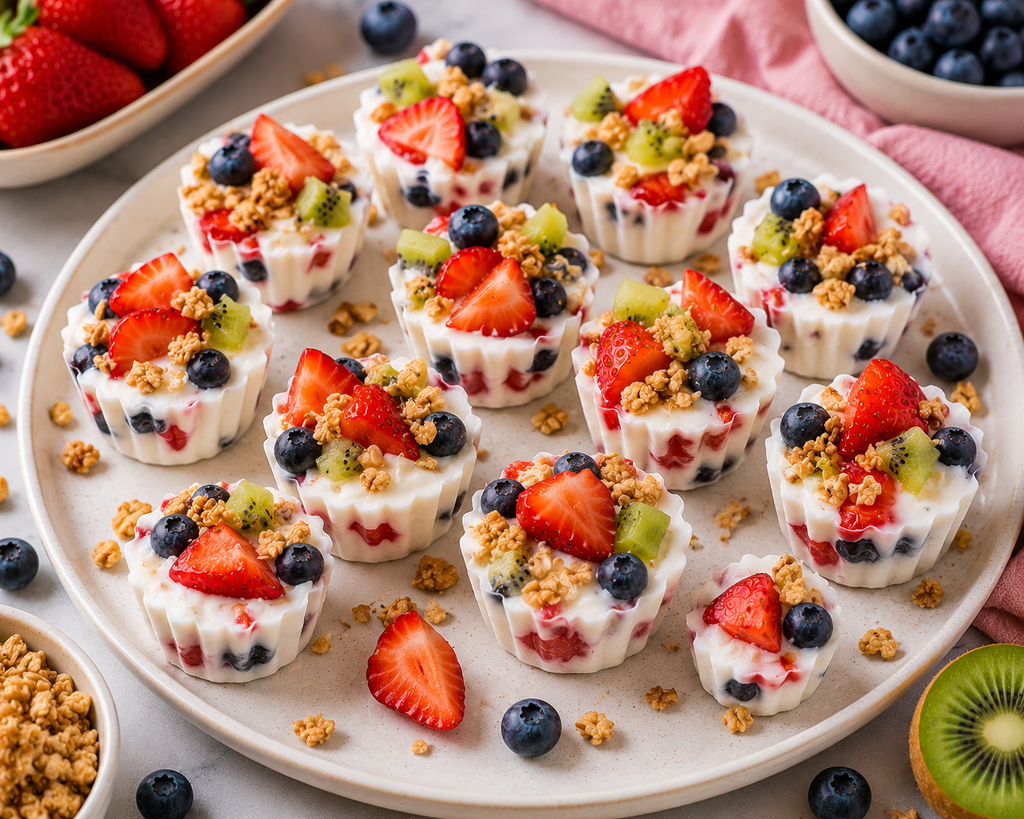
Cool, creamy, fruity, and crunchy, these Frozen Berry Yogurt Granola Cups turn simple Greek yogurt, colorful fruit, and granola into an easy bite-size frozen dessert. Strawberries, blueberries, and kiwi add naturally sweet, fresh flavor while granola gives each little cup a satisfying crunch. With no baking and only a handful of ingredients, they’re an affordable make-ahead dessert that’s perfect for warm days.
Prep Time: 10 minutes
Cook Time: None
Freeze Time: 3–4 hours
Total Time: 3 hours 10 minutes to 4 hours 10 minutes
Servings: 6
Serving Size: 2 frozen yogurt cups
Difficulty: Very Easy
Budget Level: $
Best For: Summer dessert, freezer treats, family dessert, make-ahead treats, fruit lovers
Ingredients
- 2 cups plain Greek yogurt
- 2 tablespoons honey or maple syrup
- 1 teaspoon vanilla extract
- 1/2 cup chopped strawberries
- 1/2 cup blueberries
- 1 kiwi, peeled and finely chopped
- 1/2 cup granola
Directions
- Line a 12-cup muffin pan with silicone or paper liners.
- In a medium bowl, stir together the Greek yogurt, honey or maple syrup, and vanilla extract until smooth and creamy.
- Spoon a small amount of the yogurt mixture into each muffin cup.
- Divide some of the strawberries, blueberries, and kiwi among the cups.
- Add the remaining yogurt mixture, filling each cup almost to the top.
- Sprinkle the remaining fruit and granola over each cup. Gently press the toppings into the yogurt so they stay in place after freezing.
- Freeze for 3–4 hours, or until completely firm.
- Remove the frozen yogurt cups from the muffin pan and peel away the liners.
- Serve immediately or transfer to a freezer-safe container for later.
Make It Your Way
- Strawberry Banana: Replace the blueberries and kiwi with chopped strawberries and thinly sliced banana.
- Tropical Cups: Use mango and pineapple instead of berries.
- Chocolate Berry: Add a small sprinkle of mini dark chocolate chips before freezing.
- Nut-Free: Choose a nut-free granola.
- Dairy-Free: Use a thick plant-based Greek-style yogurt.
- No Granola: Leave out the granola for an even simpler fruit-and-yogurt version.
- Budget-Friendly Tip: Use whichever fruit is currently on sale instead of buying several different varieties. Store-brand frozen berries can also be thawed, drained well, and chopped before using. Store-brand Greek yogurt and granola help keep the cost low.
Storage & Meal Prep
Once completely frozen, transfer the yogurt cups to an airtight freezer-safe container or freezer bag.
Place parchment paper between layers if stacking.
Store in the freezer for up to 2 weeks for the best flavor and texture.
Allow the cups to sit at room temperature for about 2–5 minutes before eating if they are too firm straight from the freezer.
These are ideal for making ahead because individual portions can be kept frozen and removed only when needed.
Nutrition Information
Estimated per serving:
Calories: 140
Protein: 8g
Carbohydrates: 23g
Fiber: 2g
Total Fat: 3g
Saturated Fat: 1g
Sodium: 45mg
Estimate is based on 2 frozen yogurt cups per serving.
Nutrition information is an estimate and may vary depending on the specific yogurt, granola, fruit, sweetener, preparation method, substitutions, and serving size used.
Why You’ll Love It
- Only 7 simple ingredients
- No baking required
- Cool and refreshing for hot days
- Creamy yogurt with fresh fruit and crunchy granola
- Naturally portioned into individual servings
- Easy to prepare ahead and freeze
- Simple dairy-free adaptation
- Easy to customize with seasonal fruit
- Budget-friendly substitutions included
- A colorful, family-friendly frozen dessert
Homemade Dark Chocolate Peanut Butter Cups
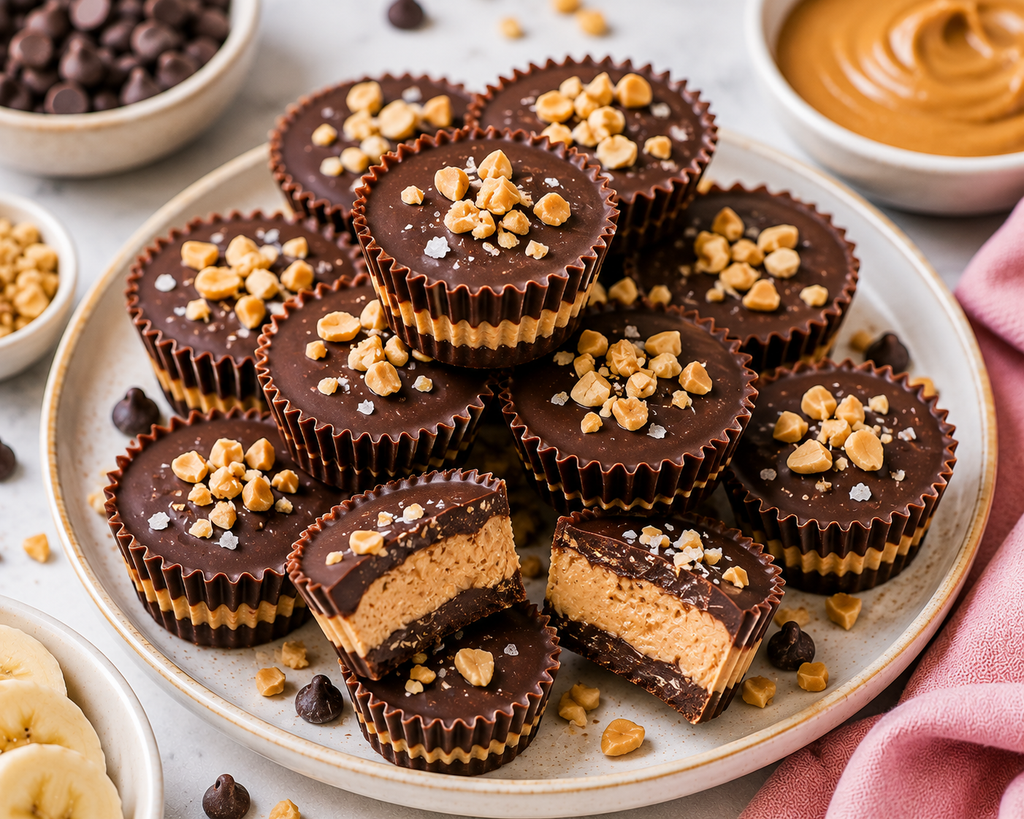
Rich dark chocolate and creamy peanut butter come together in these easy homemade peanut butter cups. With a smooth peanut butter center tucked between layers of chocolate, they deliver the classic sweet-and-salty combination without a long ingredient list or complicated preparation. They’re no-bake, freezer-friendly, and made with just a few inexpensive ingredients you can find at almost any grocery store.
Prep Time: 15 minutes
Cook Time: None
Chill Time: 45–60 minutes
Total Time: About 1 hour 15 minutes
Servings: 12
Serving Size: 1 peanut butter cup
Difficulty: Very Easy
Budget Level: $
Best For: Chocolate cravings, no-bake dessert, make-ahead treats, portion-controlled dessert
Ingredients
- 1 1/2 cups dark or semisweet chocolate chips
- 1 teaspoon coconut oil
- 3/4 cup creamy peanut butter
- 1 tablespoon honey or maple syrup
- 1/2 teaspoon vanilla extract
- 2 tablespoons chopped peanuts, optional
- Pinch of flaky sea salt, optional
Directions
- Line a 12-cup mini muffin pan with paper or silicone liners.
- Place the chocolate chips and coconut oil in a microwave-safe bowl. Microwave in 20-second intervals, stirring after each interval, until completely melted and smooth.
- Spoon approximately 1 teaspoon of melted chocolate into the bottom of each muffin liner. Gently spread the chocolate so it covers the bottom.
- Place the pan in the freezer for about 10 minutes, or until the chocolate begins to firm.
- In a small bowl, stir together the peanut butter, honey or maple syrup, and vanilla extract until smooth.
- Divide the peanut butter mixture evenly among the cups, placing a small spoonful in the center of each chocolate layer. Gently flatten the peanut butter without spreading it completely to the edges.
- Spoon the remaining melted chocolate over the peanut butter until completely covered.
- Sprinkle the tops with chopped peanuts and a tiny pinch of flaky sea salt, if desired.
- Refrigerate for 30–45 minutes, or freeze for approximately 20 minutes, until completely firm.
- Remove from the liners and enjoy chilled or allow to soften for a few minutes before serving.
Make It Your Way
- Extra Crunchy: Use crunchy peanut butter or add chopped peanuts to the filling.
- Almond Butter Cups: Substitute almond butter for the peanut butter.
- Nut-Free: Use sunflower seed butter and leave off the chopped peanuts.
- Darker Chocolate: Choose a higher-percentage dark chocolate for a richer, less-sweet flavor.
- Dairy-Free/Vegan: Use dairy-free chocolate chips and maple syrup.
- Mini Version: Make these in a mini muffin pan for smaller bite-size portions.
- Budget-Friendly Tip: Store-brand creamy peanut butter and semisweet chocolate chips work perfectly and are usually less expensive than specialty natural peanut butter and premium dark chocolate. The chopped peanuts and flaky sea salt are optional, so leave them off if you want to keep the recipe as inexpensive as possible.
Storage & Meal Prep
Store the peanut butter cups in an airtight container in the refrigerator for up to 2 weeks.
For longer storage, place them in a freezer-safe container with parchment paper between the layers and freeze for up to 2 months.
Frozen cups can be enjoyed directly from the freezer for a firmer texture or allowed to sit at room temperature for about 5 minutes before eating.
Because they store well, these are an easy dessert to prepare in advance and keep on hand for individual treats.
Nutrition Information
Estimated per serving:
Calories: 210
Protein: 5g
Carbohydrates: 18g
Fiber: 2g
Total Fat: 15g
Saturated Fat: 7g
Sodium: 75mg
Estimate is based on 1 peanut butter cup per serving. Optional chopped peanuts and additional toppings may change the nutrition values.
Nutrition information is an estimate and may vary depending on the specific chocolate, peanut butter, sweetener, brands, preparation method, substitutions, and serving size used.
Why You’ll Love It
- Only 5 main ingredients
- No baking required
- Rich chocolate and creamy peanut butter combination
- Simple grocery-store ingredients
- Naturally portioned into individual treats
- Easy to make ahead
- Refrigerator- and freezer-friendly
- Simple dairy-free and nut-free adaptations
- Budget-friendly alternatives included
- Homemade candy flavor without a complicated recipe
Frozen Banana Berry Yogurt Bites
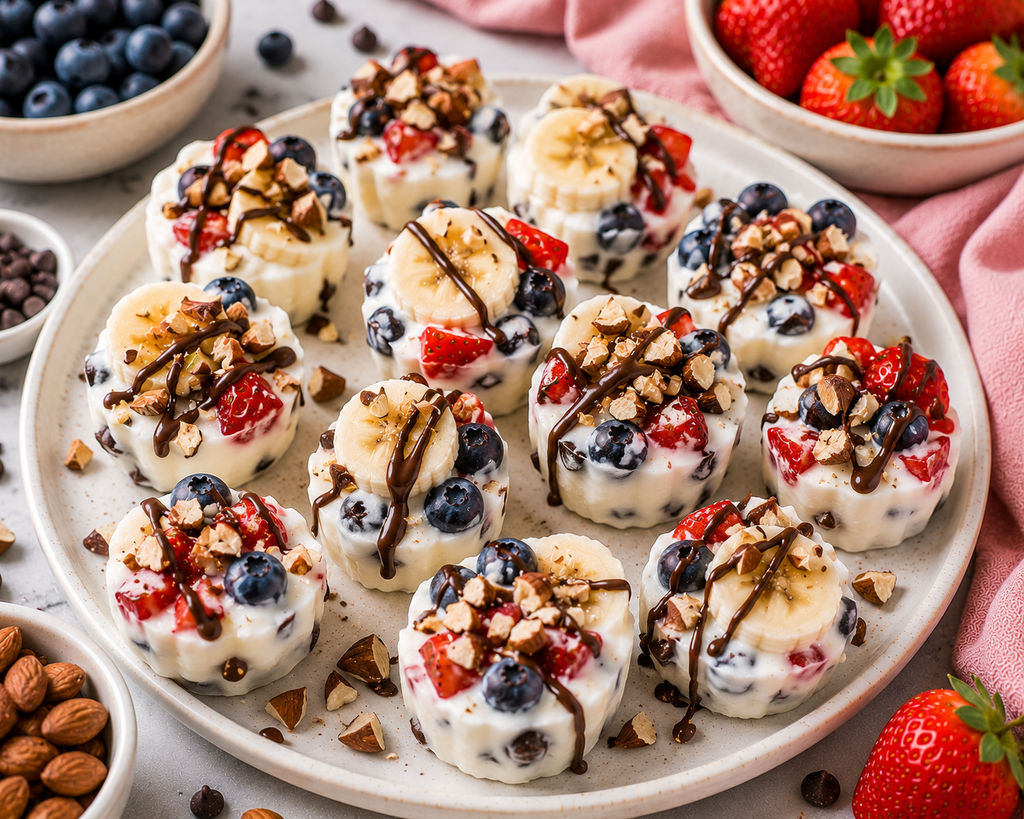
Cool, creamy, fruity, and just a little chocolatey, these Frozen Banana Berry Yogurt Bites are an easy warm-weather dessert made with simple everyday ingredients. Greek yogurt is combined with naturally sweet banana, strawberries, and blueberries, then finished with a light chocolate drizzle and optional crunchy almonds. They’re easy to portion, require no baking, and can be kept in the freezer for a refreshing grab-and-go dessert.
Prep Time: 15 minutes
Cook Time: None
Freeze Time: 3–4 hours
Total Time: 3 hours 15 minutes to 4 hours 15 minutes
Servings: 6
Serving Size: 2 frozen yogurt bites
Difficulty: Very Easy
Budget Level: $
Best For: Summer dessert, freezer treats, family dessert, fruit lovers, make-ahead treats
Ingredients
- 2 cups plain Greek yogurt
- 1 large ripe banana, sliced
- 1/2 cup chopped strawberries
- 1/2 cup blueberries
- 2 tablespoons honey or maple syrup
- 1/4 cup dark or semisweet chocolate chips
- 2 tablespoons chopped almonds, optional
Directions
- Place 12 silicone muffin liners on a freezer-safe tray or line a 12-cup muffin pan with paper or silicone liners.
- In a medium bowl, stir together the Greek yogurt and honey or maple syrup until smooth.
- Gently fold about half of the chopped strawberries and blueberries into the yogurt mixture.
- Divide the yogurt mixture evenly among the 12 prepared muffin cups.
- Top each cup with the remaining strawberries and blueberries. Add a banana slice to the top of each bite.
- Sprinkle with the optional chopped almonds.
- Freeze for 3–4 hours, or until completely firm.
- Place the chocolate chips in a microwave-safe bowl and microwave in 20-second intervals, stirring between each interval, until smooth.
- Remove the frozen yogurt bites from their liners and drizzle lightly with the melted chocolate.
- Return the bites to the freezer for about 5 minutes, or until the chocolate has set. Serve frozen.
Make It Your Way
- Chocolate-Free: Skip the chocolate drizzle for an even simpler fruit-and-yogurt dessert.
- Strawberry Banana: Leave out the blueberries and use additional strawberries and banana.
- Mixed Berry: Replace the strawberries with raspberries or blackberries.
- Extra Crunch: Add a small sprinkle of granola or chopped almonds before freezing.
- Nut-Free: Leave out the almonds completely.
- Dairy-Free: Substitute a thick plant-based Greek-style yogurt.
- Different Chocolate: Semisweet chocolate chips are an inexpensive alternative to specialty dark chocolate.
- Budget-Friendly Tip: You don’t need to purchase multiple expensive packages of fresh berries. Use whichever fruit is on sale, or use store-brand frozen berries that have been thawed and drained well. Bananas are inexpensive and can also be increased slightly to stretch the recipe further.
Storage & Meal Prep
Transfer the completely frozen yogurt bites to an airtight freezer-safe container or freezer bag.
Place parchment paper between layers if stacking.
Store in the freezer for up to 2 weeks for the best flavor and texture.
Allow the bites to sit at room temperature for about 2–5 minutes before eating if they are too firm straight from the freezer.
These are especially convenient for meal prep because they are already divided into individual portions and can be removed from the freezer as needed.
Nutrition Information
Estimated per serving:
Calories: 160
Protein: 9g
Carbohydrates: 24g
Fiber: 3g
Total Fat: 5g
Saturated Fat: 2g
Sodium: 45mg
Estimate is based on 2 frozen yogurt bites per serving and includes a light chocolate drizzle. Optional almonds or additional toppings may change the nutrition values.
Nutrition information is an estimate and may vary depending on the specific yogurt, fruit, chocolate, sweetener, brands, preparation method, substitutions, and serving size used.
Why You’ll Love It
- No baking required
- Made with simple grocery-store ingredients
- Creamy Greek yogurt with naturally sweet fruit
- A little chocolate makes them feel like dessert
- Perfect for hot summer days
- Naturally portioned into individual servings
- Easy to prepare ahead and freeze
- Simple nut-free and dairy-free adaptations
- Easy to customize with whatever fruit is affordable
- Budget-friendly and family-friendly
Chocolate Strawberry Frozen Yogurt Bites
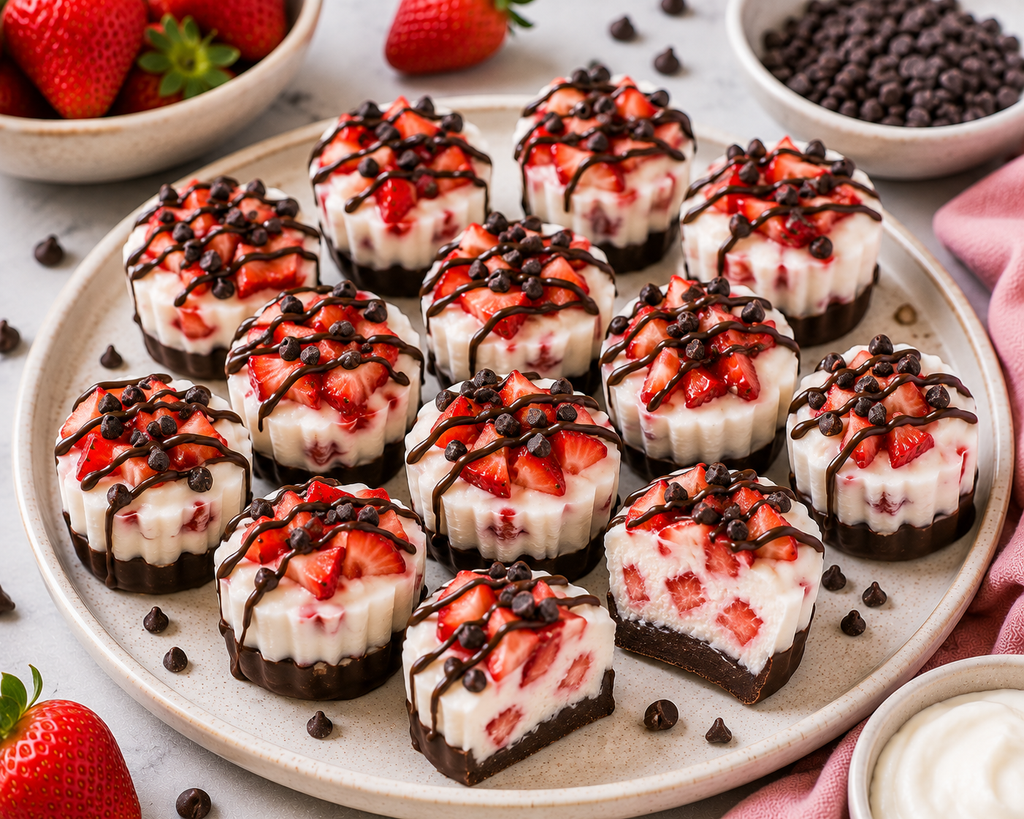
Creamy Greek yogurt, juicy strawberries, and rich chocolate come together in these easy Chocolate Strawberry Frozen Yogurt Bites. Each individual bite combines a cool strawberry-filled yogurt center with a thin chocolate base and chocolate drizzle for just the right amount of indulgence. They require no baking, use only a handful of familiar ingredients, and can be stored in the freezer for an easy warm-weather dessert.
Prep Time: 15 minutes
Cook Time: None
Freeze Time: 3–4 hours
Total Time: 3 hours 15 minutes to 4 hours 15 minutes
Servings: 6
Serving Size: 2 frozen yogurt bites
Difficulty: Very Easy
Budget Level: $
Best For: Summer dessert, freezer treats, chocolate cravings, family dessert, make-ahead treats
Ingredients
- 2 cups plain Greek yogurt
- 1 1/2 cups finely chopped strawberries
- 2 tablespoons honey or maple syrup
- 1 teaspoon vanilla extract
- 3/4 cup dark or semisweet chocolate chips
- 1 teaspoon coconut oil
- 2 tablespoons mini chocolate chips, optional
Directions
- Line a 12-cup muffin pan with silicone or paper liners.
- Place 1/2 cup of the chocolate chips and the coconut oil in a microwave-safe bowl. Microwave in 20-second intervals, stirring after each interval, until completely melted and smooth.
- Spoon a thin layer of melted chocolate into the bottom of each prepared muffin cup.
- Place the pan in the freezer for about 10 minutes, or until the chocolate begins to firm.
- In a medium bowl, stir together the Greek yogurt, honey or maple syrup, and vanilla extract.
- Gently fold 1 cup of the chopped strawberries into the yogurt mixture.
- Divide the strawberry-yogurt mixture evenly among the 12 cups, spooning it over the chocolate bases.
- Top each cup with the remaining chopped strawberries.
- Freeze for 3–4 hours, or until completely firm.
- Melt the remaining 1/4 cup chocolate chips and lightly drizzle the chocolate over the frozen bites. Sprinkle with optional mini chocolate chips.
- Return to the freezer for about 5 minutes, or until the chocolate drizzle has set.
- Remove the bites from their liners and serve frozen.
Make It Your Way
- Chocolate-Free: Skip the chocolate base and drizzle for simple strawberry frozen yogurt bites.
- Mixed Berry: Replace part of the strawberries with blueberries or raspberries.
- Strawberry Banana: Replace 1/2 cup of the strawberries with finely chopped banana.
- Extra Chocolate: Dip the bottom of each frozen bite into additional melted chocolate after removing it from the liner.
- Dairy-Free: Use a thick plant-based Greek-style yogurt and dairy-free chocolate chips.
- Lower Added Sugar: Reduce the honey or maple syrup when using very ripe, naturally sweet strawberries.
- Budget-Friendly Tip: Buy strawberries when they’re in season or on sale. Thawed frozen strawberries can also be chopped and used after draining away excess liquid. Store-brand Greek yogurt and semisweet chocolate chips are usually less expensive than specialty yogurt and premium dark chocolate.
Storage & Meal Prep
Once completely frozen, transfer the yogurt bites to an airtight freezer-safe container or freezer bag.
Place parchment paper between layers to prevent the chocolate from sticking.
Store in the freezer for up to 2 weeks for the best flavor and texture.
Allow the bites to sit at room temperature for about 2–5 minutes before eating if they are too firm directly from the freezer.
These bites are ideal for making ahead because they are already divided into individual servings and can be taken from the freezer as needed.
Nutrition Information
Estimated per serving:
Calories: 180
Protein: 8g
Carbohydrates: 25g
Fiber: 2g
Total Fat: 7g
Saturated Fat: 4g
Sodium: 45mg
Estimate is based on 2 frozen yogurt bites per serving. Optional mini chocolate chips and additional chocolate coatings may change the nutrition values.
Nutrition information is an estimate and may vary depending on the specific yogurt, strawberries, chocolate, sweetener, brands, preparation method, substitutions, and serving size used.
Why You’ll Love It
- Only 6 main ingredients
- No baking required
- Creamy strawberry and chocolate combination
- Cool and refreshing for hot days
- Made with familiar grocery-store ingredients
- Naturally portioned into individual servings
- Easy to prepare ahead and freeze
- Simple dairy-free adaptation
- Budget-friendly alternatives included
- Tastes like a frozen chocolate-covered strawberry dessert
Frozen Blueberry Banana Yogurt Crunch Bites
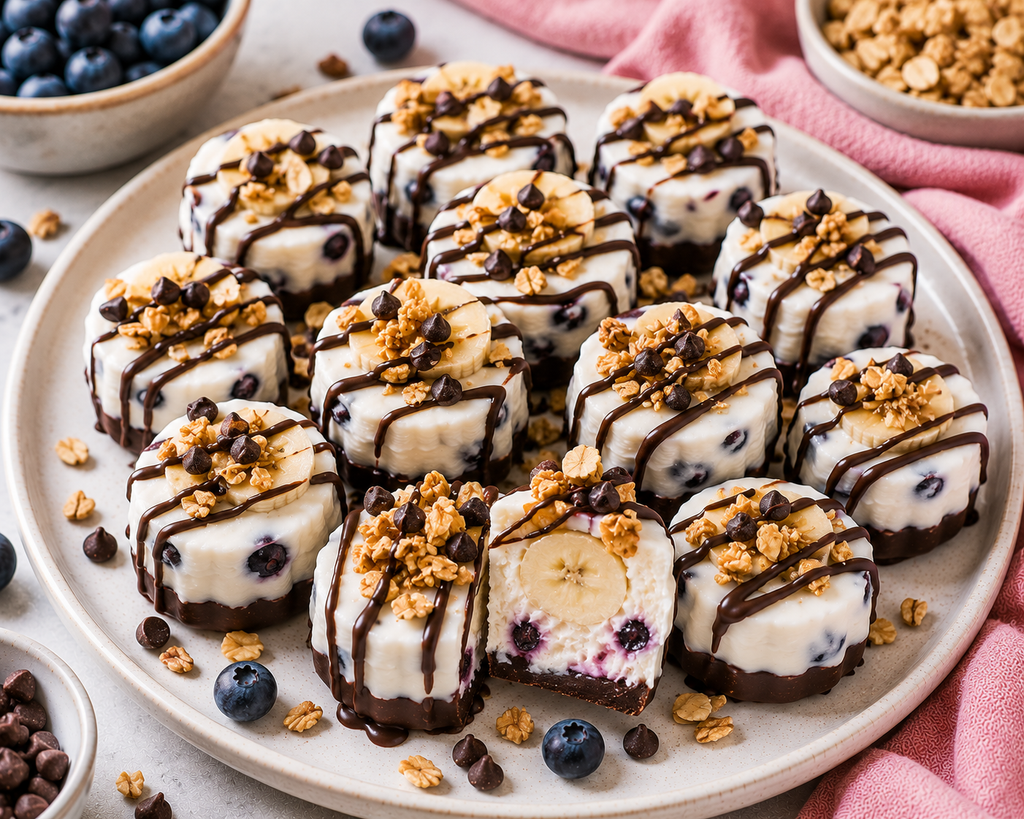
Creamy yogurt, naturally sweet banana, juicy blueberries, crunchy granola, and a touch of chocolate come together in these Frozen Blueberry Banana Yogurt Crunch Bites. Each little dessert has a cool fruit-filled yogurt center, a thin chocolate base, and a crunchy granola topping. They’re colorful, easy to make, and perfect for keeping in the freezer when you want a refreshing dessert without turning on the oven.
Prep Time: 15 minutes
Cook Time: None
Freeze Time: 3–4 hours
Total Time: 3 hours 15 minutes to 4 hours 15 minutes
Servings: 6
Serving Size: 2 frozen yogurt bites
Difficulty: Very Easy
Budget Level: $
Best For: Summer dessert, freezer treats, fruit lovers, family dessert, make-ahead treats
Ingredients
- 2 cups plain Greek yogurt
- 1 large ripe banana
- 3/4 cup blueberries, fresh or frozen
- 2 tablespoons honey or maple syrup
- 1/2 cup dark or semisweet chocolate chips
- 1/3 cup granola
- 1 teaspoon coconut oil
Directions
- Line a 12-cup muffin pan with silicone or paper liners.
- Place the chocolate chips and coconut oil in a microwave-safe bowl. Microwave in 20-second intervals, stirring between each interval, until melted and smooth.
- Spoon a thin layer of melted chocolate into the bottom of each muffin cup. Reserve a small amount of chocolate for drizzling later.
- Freeze the chocolate bases for about 10 minutes, or until firm.
- In a medium bowl, stir together the Greek yogurt and honey or maple syrup.
- Gently fold the blueberries into the yogurt mixture.
- Slice the banana into 12 thick rounds.
- Divide the blueberry-yogurt mixture evenly among the muffin cups. Place one banana slice into the center or on top of each cup.
- Sprinkle each bite with a small amount of granola.
- Freeze for 3–4 hours, or until completely firm.
- Remove the frozen bites from their liners and drizzle with the reserved melted chocolate.
- Return to the freezer for about 5 minutes to set the chocolate before serving.
Make It Your Way
- Extra Blueberry: Mash a few blueberries before folding them into the yogurt for more blueberry flavor throughout each bite.
- Strawberry Banana: Replace the blueberries with finely chopped strawberries.
- Chocolate-Free: Skip the chocolate base and drizzle for a simpler fruit-and-yogurt version.
- Extra Crunch: Add a little additional granola just before serving.
- Nut-Free: Choose a nut-free granola.
- Dairy-Free: Use a thick plant-based Greek-style yogurt and dairy-free chocolate chips.
- No Added Sweetener: If your banana and blueberries are naturally sweet, leave out the honey or maple syrup.
- Budget-Friendly Tip: Bananas are inexpensive and help stretch the more costly berries. Store-brand frozen blueberries work well and are often cheaper than fresh berries. Store-brand Greek yogurt, granola, and semisweet chocolate chips can also keep the cost down.
Storage & Meal Prep
Transfer the completely frozen yogurt bites to an airtight freezer-safe container or freezer bag.
Place parchment paper between layers if stacking.
Store in the freezer for up to 2 weeks for the best flavor and texture.
Allow the bites to sit at room temperature for about 2–5 minutes before eating if they are very firm.
These are easy to prepare in advance and keep frozen in individual portions for quick desserts throughout the week.
Nutrition Information
Estimated per serving:
Calories: 180
Protein: 8g
Carbohydrates: 28g
Fiber: 3g
Total Fat: 6g
Saturated Fat: 3g
Sodium: 50mg
Estimate is based on 2 frozen yogurt bites per serving.
Nutrition information is an estimate and may vary depending on the specific yogurt, granola, chocolate, fruit, sweetener, brands, preparation method, substitutions, and serving size used.
Why You’ll Love It
- Made with only 7 simple ingredients
- No baking required
- Naturally sweet banana and juicy blueberries
- Creamy, crunchy, fruity, and chocolatey
- Perfect for hot-weather dessert cravings
- Easy individual portions
- Freezer-friendly and make-ahead
- Uses affordable everyday ingredients
- Easy dairy-free and chocolate-free variations
- A fun frozen dessert that looks as good as it tastes
Peanut Butter Banana Chocolate Chip Oatmeal Bars
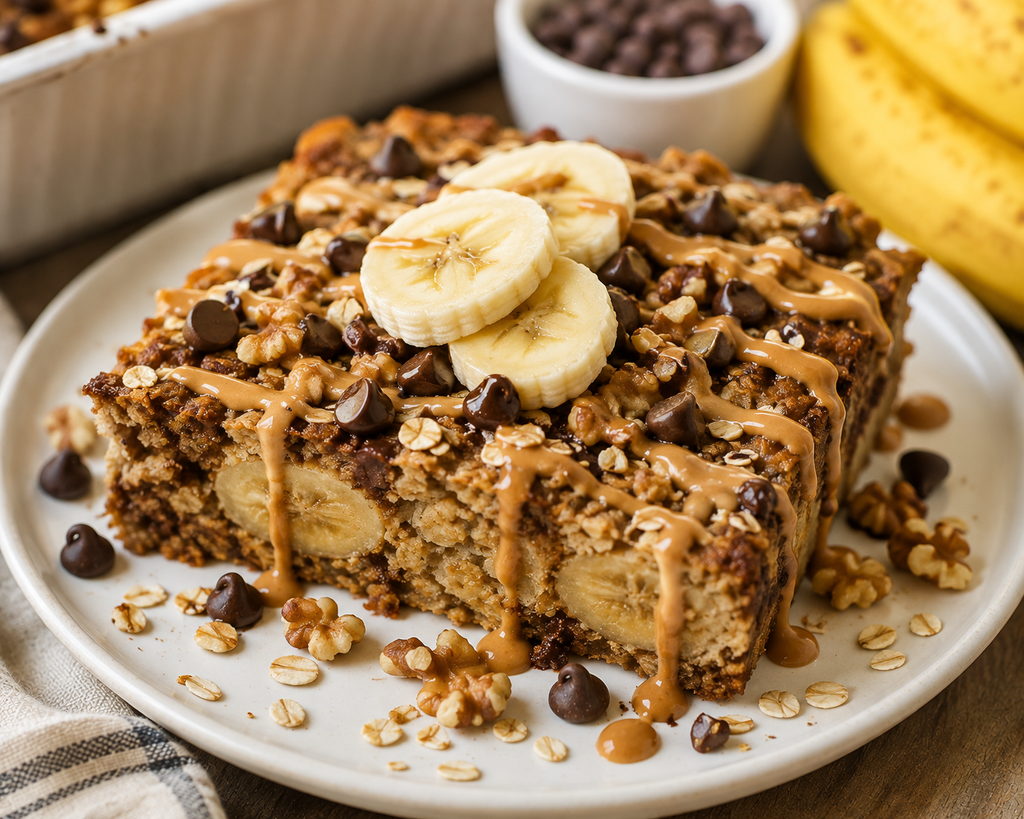
Soft, chewy, and naturally sweet, these Peanut Butter Banana Chocolate Chip Oatmeal Bars turn simple pantry staples into a dessert that feels indulgent without being overly heavy. Ripe bananas add moisture and sweetness, hearty oats give every bite satisfying texture, and peanut butter and chocolate chips make these bars taste like a real treat.
They’re easy to mix in one bowl, budget-friendly, and delicious warm from the oven or chilled for later.
Prep Time: 10 minutes
Cook Time: 25–30 minutes
Cooling Time: 15 minutes
Total Time: 50–55 minutes
Servings: 9 bars
Serving Size: 1 bar
Difficulty: Easy
Budget Level: $
Best For: Easy dessert, family treat, meal prep, or healthier sweet craving
Ingredients
- 3 ripe bananas, mashed
- 2 cups old-fashioned rolled oats
- 1/2 cup creamy peanut butter
- 1/4 cup pure maple syrup or honey
- 1 teaspoon vanilla extract
- 1/2 teaspoon ground cinnamon
- 1/3 cup semi-sweet or dark chocolate chips
- 1/4 cup chopped walnuts, optional
Directions
- Preheat oven to 350°F. Lightly grease or line an 8-inch square baking pan with parchment paper.
- In a large bowl, mash the bananas until mostly smooth.
- Stir in the peanut butter, maple syrup or honey, vanilla, and cinnamon until well combined.
- Fold in the rolled oats, chocolate chips, and walnuts, if using.
- Spread the mixture evenly into the prepared baking pan and gently press it into the corners.
- Sprinkle a few additional chocolate chips on top, if desired.
- Bake for 25–30 minutes, or until the top is lightly golden and the center is set.
- Cool in the pan for about 15 minutes before slicing into 9 bars.
- For serving, add fresh banana slices and a light drizzle of warmed peanut butter if desired.
Make It Your Way
- Nut-Free: Use sunflower seed butter and omit the walnuts.
- Extra Chocolatey: Add 1–2 tablespoons unsweetened cocoa powder to the batter.
- Crunchy: Add chopped pecans, walnuts, or peanuts.
- Lower Added Sugar: Skip the maple syrup if your bananas are very ripe and naturally sweet.
- Dairy-Free: Choose dairy-free chocolate chips.
- Gluten-Free: Use certified gluten-free rolled oats.
Budget-Friendly Tip: Use store-brand oats, peanut butter, and chocolate chips. Very ripe bananas are ideal for this recipe, so it’s also a great way to use bananas that might otherwise go to waste.
Storage & Meal Prep
Allow the bars to cool completely before storing.
Refrigerator: Store in an airtight container for up to 5 days.
Freezer: Wrap individual bars and freeze in a freezer-safe container for up to 2 months. Thaw overnight in the refrigerator or at room temperature.
Meal Prep Tip: Slice the entire batch after cooling and store individual portions so you have an easy grab-and-go dessert ready throughout the week.
Nutrition Information
ESTIMATED PER SERVING:
Calories: 240
Protein: 7g
Carbohydrates: 34g
Fiber: 5g
Total Fat: 10g
Saturated Fat: 2.5g
Sodium: 75mg
Nutrition information is an estimate and may vary depending on the specific brands, ingredient amounts, substitutions, toppings, and serving sizes used.
Why You’ll Love It
- Made with simple, easy-to-find ingredients
- Only about 10 minutes of hands-on prep
- Naturally sweetened primarily with ripe bananas
- Soft, chewy, and packed with peanut butter-chocolate flavor
- Easy one-bowl preparation means less cleanup
- Budget-friendly and freezer-friendly
- Delicious enough for dessert while still incorporating wholesome oats and fruit
Cinnamon Apple Oat Crumble Bake
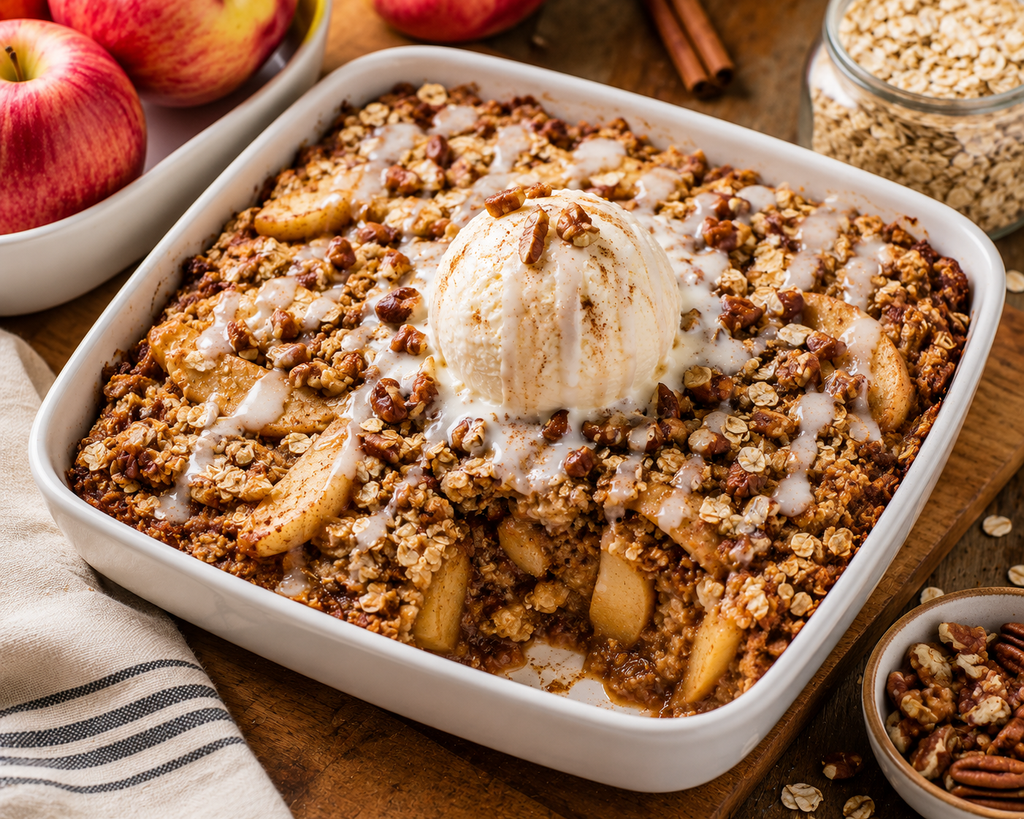
Warm cinnamon-spiced apples, a golden oat-and-pecan topping, and a creamy vanilla finish make this easy dessert feel extra special without requiring complicated ingredients.
This cozy apple crumble bake comes together with everyday pantry staples and plenty of fresh fruit. Serve it warm on its own or add a small scoop of vanilla frozen yogurt for an irresistible finish.
Prep Time: 10 minutes
Cook Time: 30–35 minutes
Cooling Time: 10 minutes
Total Time: 50–55 minutes
Servings: 8
Serving Size: 1/8 of baking dish
Difficulty: Easy
Budget Level: $
Best For: Family dessert, fall gatherings, holidays, or a warm healthier sweet treat
Ingredients
- 5 medium apples, peeled, cored, and sliced
- 1 teaspoon ground cinnamon, divided
- 2 tablespoons pure maple syrup or honey, divided
- 1 1/2 cups old-fashioned rolled oats
- 1/3 cup chopped pecans
- 3 tablespoons melted butter or coconut oil
- 1 teaspoon vanilla extract
- Pinch of salt
- Optional for serving: vanilla Greek yogurt or vanilla frozen yogurt
Directions
- Preheat oven to 350°F. Lightly grease an 8-inch square baking dish.
- Add the sliced apples to the baking dish. Toss with 1/2 teaspoon cinnamon and 1 tablespoon maple syrup or honey.
- In a bowl, combine the oats, pecans, remaining 1/2 teaspoon cinnamon, and a pinch of salt.
- Stir in the melted butter or coconut oil, remaining 1 tablespoon maple syrup or honey, and vanilla until the oat mixture is evenly coated.
- Sprinkle the oat mixture evenly over the apples.
- Bake for 30–35 minutes, or until the apples are tender and bubbling and the oat topping is golden brown.
- Allow the crumble to cool for about 10 minutes before serving.
- Serve warm as-is or top each portion with a small scoop of vanilla Greek yogurt or frozen yogurt.
Make It Your Way
- Nut-Free: Leave out the pecans and add a few extra tablespoons of oats.
- Different Fruit: Replace part of the apples with fresh pears for an apple-pear version.
- Extra Cozy: Add a pinch of nutmeg or apple pie spice.
- Dairy-Free: Use coconut oil instead of butter and choose a dairy-free topping.
- Gluten-Free: Use certified gluten-free rolled oats.
- Sweeter Dessert: Drizzle individual servings with a small amount of maple syrup before serving.
Budget-Friendly Tip: Use whichever apples are on sale rather than buying a specialty variety. Store-brand rolled oats work perfectly, and the pecans can be omitted to lower the cost even further.
Storage & Meal Prep
Refrigerator: Cover the cooled crumble or transfer individual portions to airtight containers. Refrigerate for up to 4 days.
Freezer: Freeze individual portions in freezer-safe containers for up to 2 months. Thaw overnight in the refrigerator.
Reheating: Warm individual portions in the microwave for 30–60 seconds, or reheat several portions in a 325°F oven until warmed through.
Meal Prep Tip: Prepare the apple filling and oat topping separately up to 1 day ahead. Refrigerate, then assemble and bake when ready to serve.
Nutrition Information
ESTIMATED PER SERVING:
Calories: 210
Protein: 3g
Carbohydrates: 35g
Fiber: 5g
Total Fat: 8g
Saturated Fat: 2g
Sodium: 45mg
Nutrition information is an estimate and does not include optional frozen yogurt or other serving toppings. Actual nutrition may vary depending on ingredient brands, substitutions, portion sizes, and toppings used.
Why You’ll Love It
- Uses affordable, easy-to-find ingredients
- Only about 10 minutes of hands-on preparation
- Filled with naturally sweet apples and hearty oats
- Warm cinnamon flavor makes it taste like a classic comfort dessert
- No complicated crust, dough, or special equipment required
- Easy to make dairy-free, gluten-free, or nut-free
- Delicious warm from the oven and just as good reheated the next day