Our Approach to Healthy Eating
At Carter Cre8tive Studio, we believe healthier eating should still feel satisfying, flavorful, and realistic. You don’t have to give up the foods you enjoy or make every meal look like “diet food.” Thoughtful ingredient choices, balanced portions, plenty of flavor, and foods you genuinely enjoy can all have a place in a healthier lifestyle.
Our recipes are designed to give you a practical starting point while leaving room to make them your own. Choose the ingredients and portions that work best for you, your family, your preferences, and your individual nutrition needs.
A Note About Nutrition
Nutrition information provided with each recipe is an estimate based on the ingredients, preparation method, and recommended serving size listed. When a complete meal includes recommended sides, the nutrition estimate reflects the full serving shown in the recipe.
Actual nutrition may vary depending on the brands and ingredients you use, substitutions you make, cooking methods, and your individual portion size. Increasing or decreasing the recommended serving size will also change the calories and nutritional values.
Southern Peach Cobbler Overnight Oats
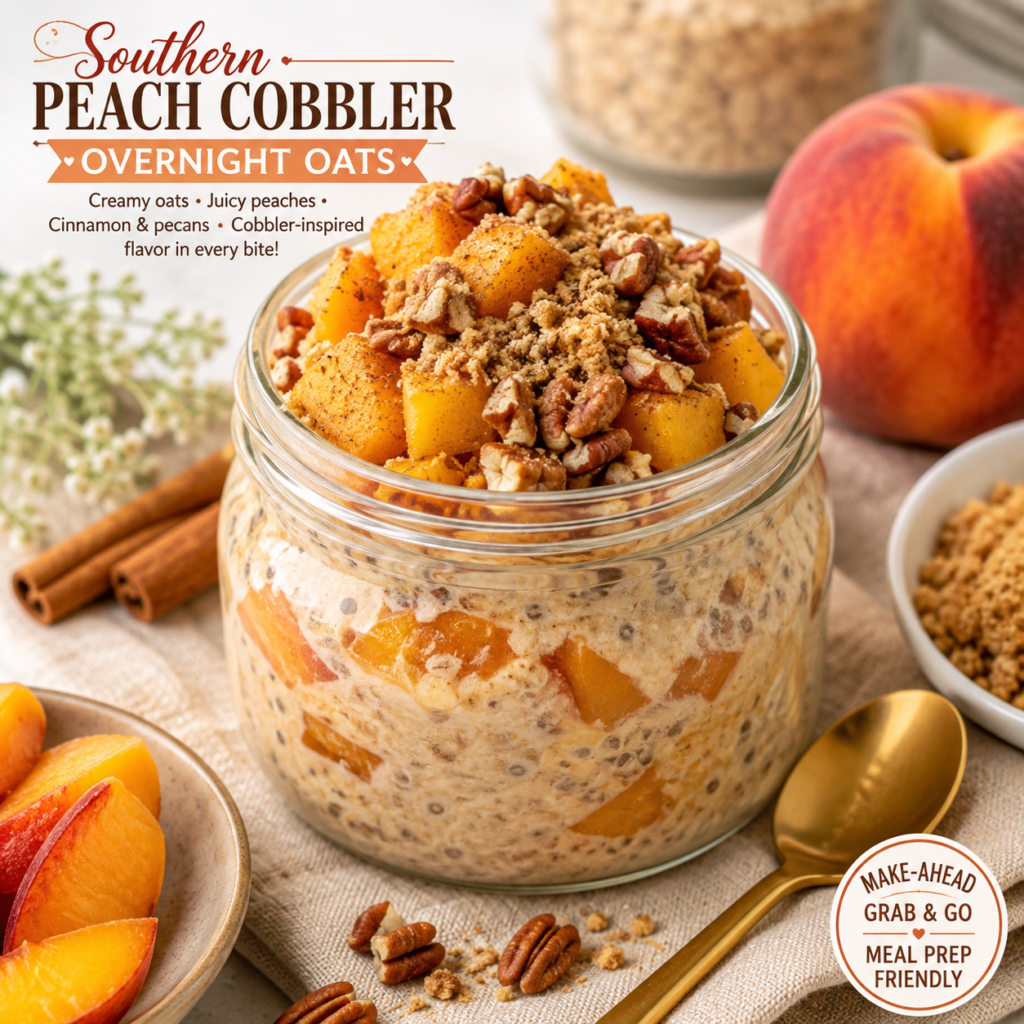
Juicy peaches, warm cinnamon, and creamy oats come together in this Southern-inspired breakfast that tastes like peach cobbler without the heavy start to your day. Prep it the night before for an easy, satisfying breakfast that’s ready when you are.
Prep Time: 10 minutes
Chill Time: 6–8 hours or overnight
Servings: 1
Ingredients
½ cup old-fashioned rolled oats
½ cup unsweetened almond milk or milk of choice
¼ cup plain Greek yogurt
½ cup diced peaches, fresh or frozen and thawed
1 tablespoon chia seeds
1–2 teaspoons pure maple syrup or honey
½ teaspoon vanilla extract
½ teaspoon ground cinnamon
Pinch of nutmeg
Pinch of salt
1 tablespoon chopped pecans
1 tablespoon crushed whole-grain graham cracker, for the cobbler-style topping
Directions
- Add the rolled oats, almond milk, Greek yogurt, chia seeds, maple syrup or honey, vanilla, cinnamon, nutmeg, and salt to a jar or container.
- Stir until everything is well combined.
- Gently fold in most of the diced peaches, saving a few pieces for the topping.
- Cover and refrigerate for at least 6 hours, preferably overnight.
- In the morning, stir the oats. If they are thicker than you prefer, add a small splash of milk.
- Top with the remaining peaches, chopped pecans, and crushed graham cracker just before serving for that peach-cobbler-inspired finish.
- Enjoy cold, or warm briefly in the microwave if you prefer cozy, warm overnight oats.
Make It Your Way
Want more protein? Use a higher-protein Greek yogurt or add a small amount of vanilla protein powder, adding a splash more milk if needed.
Prefer it dairy-free? Use your favorite unsweetened plant-based milk and dairy-free yogurt.
No fresh peaches? Frozen peaches work beautifully—just thaw and drain them first.
For less added sugar, reduce or skip the maple syrup or honey when your peaches are naturally sweet.
Budget-Friendly Swap: Use frozen or canned peaches packed in juice instead of fresh peaches when they are more economical. Drain canned peaches well before using.
Storage & Meal Prep
Store covered in the refrigerator for up to 3 days. For the best texture, keep the pecans and graham-cracker topping separate and add them just before serving. You can prepare several jars at once for an easy grab-and-go breakfast throughout the week.
Nutrition Information
Estimated per serving: approximately 380 calories • 15g protein • 53g carbohydrates • 10g fiber • 13g fat
Nutrition values are estimates and may vary depending on the specific brands, milk, yogurt, sweetener, and toppings used.
Why You’ll Love It
Make-ahead • Grab & Go • Meal Prep Friendly • Budget-Friendly Swap
Strawberry Cheesecake Protein Smoothie
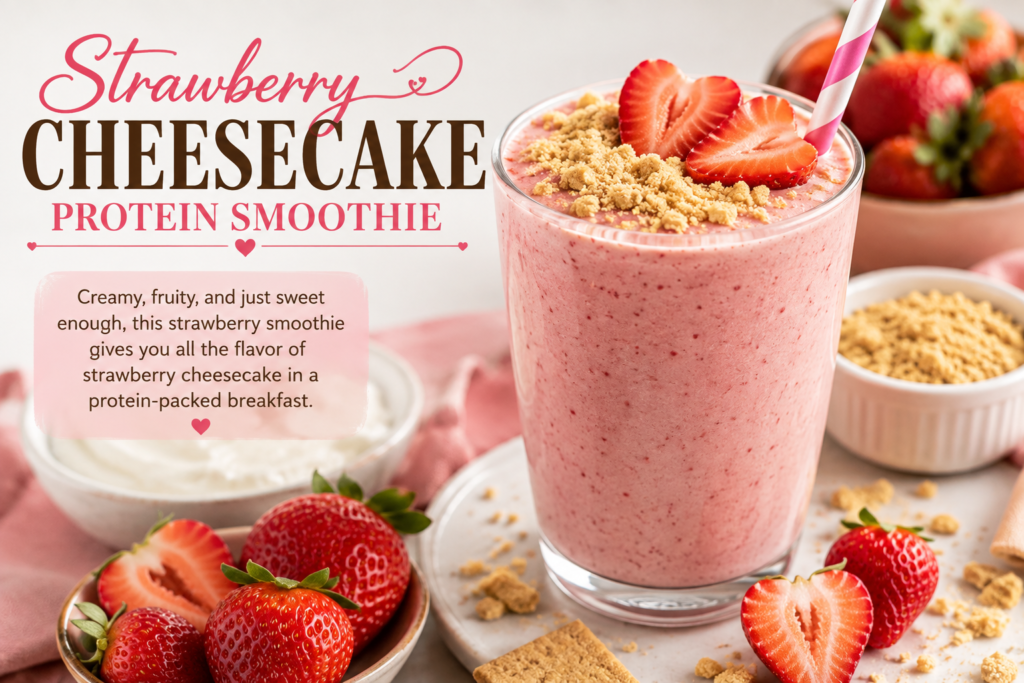
Creamy, fruity, and just sweet enough, this strawberry smoothie gives you all the flavor of strawberry cheesecake in a protein-packed breakfast. Greek yogurt and strawberries make it thick and creamy, while a touch of vanilla and graham cracker gives it that cheesecake-inspired twist.
Prep Time: 5 minutes
Total Time: 5 minutes
Servings: 1
Ingredients
1 cup frozen strawberries
½ frozen banana
¾ cup plain Greek yogurt
½ cup unsweetened almond milk or milk of choice
1 scoop vanilla protein powder
½ teaspoon vanilla extract
1 teaspoon maple syrup or honey, optional
1 tablespoon chia seeds
1 tablespoon crushed graham crackers
2–3 ice cubes, optional for a thicker smoothie
Directions
Add the frozen strawberries, banana, Greek yogurt, milk, protein powder, vanilla extract, maple syrup or honey (if using), and chia seeds to a blender.
Blend on high until smooth and creamy. Add 2–3 ice cubes if you prefer a thicker, frostier smoothie.
If the smoothie is too thick, add a splash of milk and blend again until it reaches your preferred consistency.
Pour into a glass and sprinkle the crushed graham crackers over the top for that strawberry-cheesecake-inspired finish.
Serve immediately and enjoy.
Make It Your Way
Want even more protein? Use a higher-protein Greek yogurt or choose a protein powder that fits your nutrition goals.
Prefer it dairy-free? Use plant-based yogurt, plant-based milk, and a dairy-free protein powder.
Want less added sugar? Skip the honey or maple syrup. A ripe banana and sweet strawberries may provide plenty of sweetness on their own.
No chia seeds? Ground flaxseed is an easy alternative.
Budget-Friendly Swap: Frozen strawberries are usually economical, convenient, and available year-round. Store-brand frozen fruit works perfectly here—there’s no need to buy premium fresh berries for a blended smoothie.
Storage & Meal Prep
Smoothies are best enjoyed immediately after blending. For faster mornings, portion the strawberries, banana, and chia seeds into a freezer-safe bag or container ahead of time. When you’re ready to eat, add the prepared ingredients to the blender with the Greek yogurt, milk, protein powder, and vanilla.
If you have leftover smoothie, refrigerate it in a tightly covered container and use within 24 hours. Stir or blend again before drinking because separation is normal.
Nutrition Information
Estimated per serving: approximately 430 calories • 42g protein • 49g carbohydrates • 9g fiber • 10g fat
Nutrition values are estimates and may vary depending on the specific protein powder, yogurt, milk, sweetener, and graham crackers used.
Why You’ll Love It
5 Minutes • High Protein • Grab & Go • Meal Prep Friendly • Budget-Friendly Swap
Banana Pecan Pie Baked Oatmeal
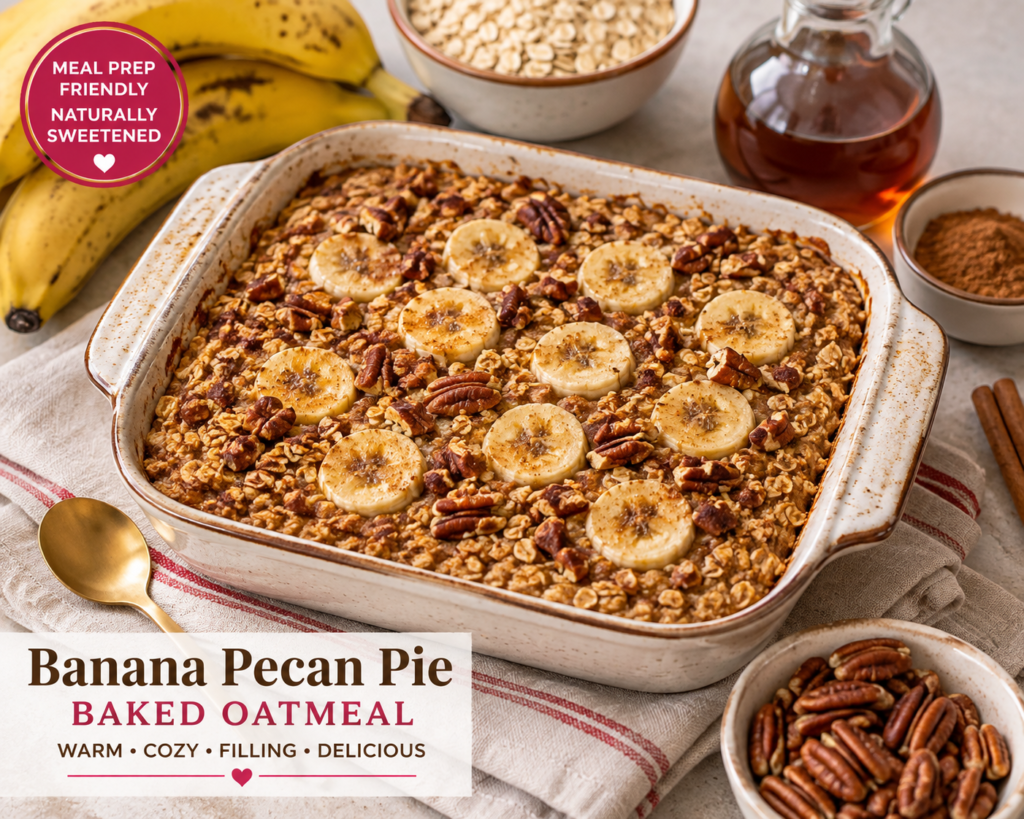
Sweet ripe bananas, warm cinnamon, vanilla, and toasted pecans turn simple baked oatmeal into a cozy breakfast inspired by Southern pecan pie. It’s naturally sweetened, filling, and easy to prepare ahead for busy mornings—without the heaviness of traditional pecan pie.
Prep Time: 10 minutes
Bake Time: 30–35 minutes
Total Time: 40–45 minutes
Servings: 6
Ingredients
2 cups old-fashioned rolled oats
1 teaspoon baking powder
1½ teaspoons ground cinnamon
¼ teaspoon ground nutmeg
¼ teaspoon salt
2 ripe bananas, mashed
1 large egg
1¾ cups unsweetened almond milk or milk of choice
2 teaspoons vanilla extract
3 tablespoons pure maple syrup
2 tablespoons melted butter or coconut oil
½ cup chopped pecans, divided
1 tablespoon chia seeds, optional
½ banana, sliced for topping, optional
Directions
Preheat the oven to 350°F. Lightly grease an 8×8-inch baking dish.
In a large bowl, combine the rolled oats, baking powder, cinnamon, nutmeg, and salt.
In a separate bowl, whisk together the mashed bananas, egg, milk, vanilla, maple syrup, and melted butter or coconut oil.
Pour the wet ingredients into the oat mixture and stir until evenly combined. Fold in half of the chopped pecans and the chia seeds, if using.
Pour the mixture into the prepared baking dish and spread it evenly. Arrange the optional banana slices over the top and sprinkle with the remaining pecans.
Bake for 30–35 minutes, or until the center is set and the top is lightly golden.
Allow the baked oatmeal to cool for 5–10 minutes before slicing. Serve warm as-is or with a spoonful of Greek yogurt and a light drizzle of maple syrup.
Make It Your Way
Want more protein? Serve each portion with plain Greek yogurt or add your preferred protein powder to the oatmeal mixture. If adding protein powder, you may need a small splash of additional milk.
Prefer it dairy-free? Use plant-based milk and melted coconut oil or another dairy-free butter alternative.
Want less added sugar? Reduce the maple syrup or leave it out completely when your bananas are very ripe.
Nut-Free Option: Leave out the pecans and use pumpkin or sunflower seeds for crunch.
Budget-Friendly Swap: Buy ripe or marked-down bananas and freeze any extras for future oatmeal and smoothies. Store-brand rolled oats and pecans work just as well as premium brands.
Storage & Meal Prep
Allow the baked oatmeal to cool completely before storing. Refrigerate individual portions in an airtight container for up to 4 days.
For easy meal prep, divide the oatmeal into individual servings after baking. Reheat a portion in the microwave until warmed through, adding a small splash of milk if desired.
Individual portions can also be frozen in freezer-safe containers. Thaw overnight in the refrigerator before reheating.
Nutrition Information
Estimated per serving: approximately 310 calories • 7g protein • 43g carbohydrates • 6g fiber • 13g fat
Nutrition values are estimates and may vary depending on the specific milk, sweetener, pecans, toppings, and other ingredients used.
Why You’ll Love It
Make-Ahead • Meal Prep Friendly • Naturally Sweetened • Freezer Friendly • Budget-Friendly Swap
Blueberry Lemon Cream Cheese Protein Pancakes
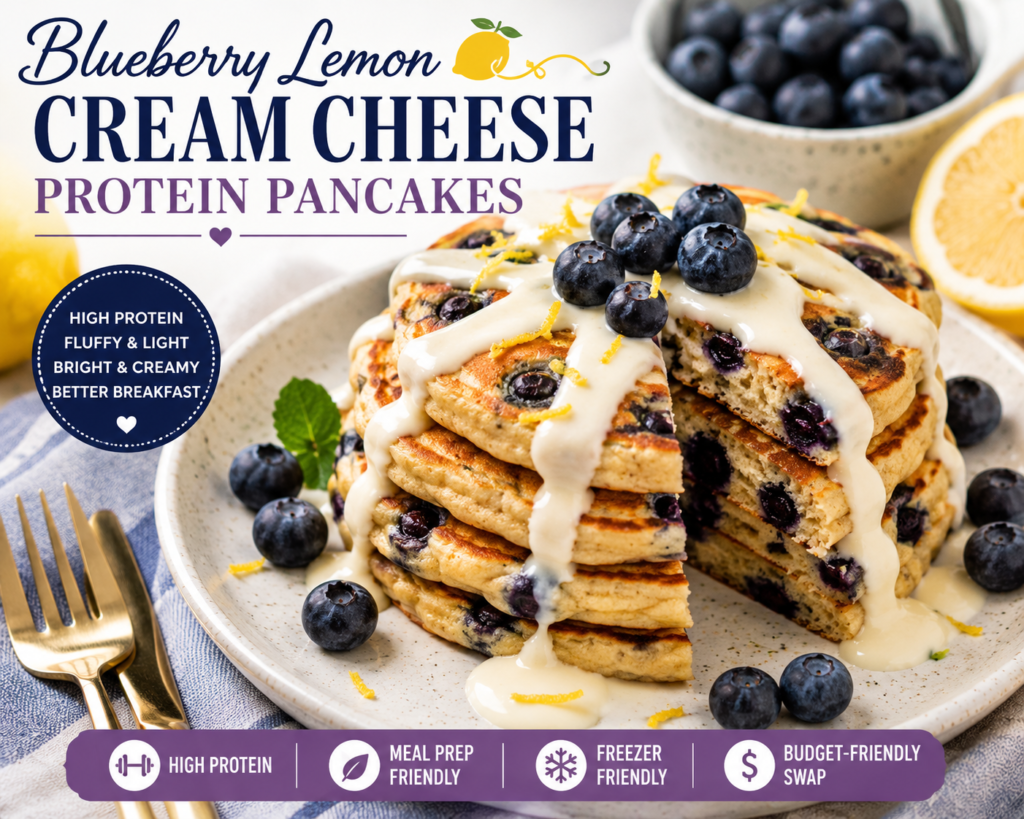
Fluffy blueberry pancakes get a bright, creamy upgrade with fresh lemon and a light cream cheese drizzle. These protein-packed pancakes feel like a weekend treat while still making a satisfying, balanced breakfast that’s easy enough for an ordinary morning.
Prep Time: 10 minutes
Cook Time: 15 minutes
Total Time: 25 minutes
Servings: 4
Ingredients
1½ cups old-fashioned rolled oats
1 teaspoon baking powder
½ teaspoon ground cinnamon
¼ teaspoon salt
2 large eggs
1 cup plain Greek yogurt
½ cup milk of choice
1 teaspoon vanilla extract
1 tablespoon pure maple syrup or honey
1 tablespoon fresh lemon juice
1 teaspoon finely grated lemon zest
1 scoop vanilla protein powder
1 cup fresh or frozen blueberries
Cooking spray or a small amount of butter for the skillet
For the Light Cream Cheese Drizzle:
2 ounces reduced-fat cream cheese, softened
2 tablespoons plain Greek yogurt
1 teaspoon maple syrup or honey
1–2 tablespoons milk
½ teaspoon vanilla extract
½ teaspoon fresh lemon juice
Directions
Add the rolled oats to a blender and blend until they reach a flour-like consistency.
Add the baking powder, cinnamon, salt, eggs, Greek yogurt, milk, vanilla, maple syrup or honey, lemon juice, lemon zest, and protein powder. Blend just until smooth.
Gently fold the blueberries into the batter rather than blending them.
Heat a nonstick skillet or griddle over medium-low heat and lightly coat it with cooking spray or butter.
Pour approximately ¼ cup of batter onto the skillet for each pancake. Cook until bubbles begin forming on the surface and the edges look set, about 2–3 minutes.
Flip carefully and cook for another 1–2 minutes, or until the pancakes are cooked through and lightly golden.
For the drizzle, whisk the softened cream cheese, Greek yogurt, maple syrup or honey, milk, vanilla, and lemon juice until smooth. Add another splash of milk if you prefer a thinner consistency.
Serve the pancakes warm with fresh blueberries and a light drizzle of the lemon cream cheese mixture.
Make It Your Way
Want even more protein? Serve the pancakes with additional Greek yogurt or adjust the protein powder according to the product directions.
No fresh blueberries? Frozen blueberries work beautifully. Add them directly from the freezer and allow slightly more cooking time if needed.
Prefer dairy-free? Use plant-based yogurt, milk, cream cheese, and a dairy-free protein powder.
Want less added sugar? Skip the maple syrup or honey in the pancake batter and sweeten only the drizzle if needed.
Budget-Friendly Swap: Frozen store-brand blueberries are an excellent year-round alternative to fresh berries, especially when blueberries are out of season.
Storage & Meal Prep
Allow leftover pancakes to cool completely, then refrigerate them in an airtight container for up to 4 days. Store the cream cheese drizzle separately in the refrigerator.
For meal prep, place parchment paper between pancakes so they are easy to separate. Reheat them in the microwave, toaster, or skillet until warmed through.
The pancakes can also be frozen for up to 2 months. Freeze them in individual portions and thaw overnight in the refrigerator or reheat directly from frozen.
Nutrition Information
Estimated per serving: approximately 350 calories • 24g protein • 43g carbohydrates • 6g fiber • 10g fat
Nutrition values are estimates and may vary depending on the specific protein powder, yogurt, milk, sweetener, cream cheese, serving size, and toppings used.
Why You’ll Love It
High Protein • Meal Prep Friendly • Freezer Friendly • Family-Friendly • Budget-Friendly Swap
Cinnamon Roll Apple Protein French Toast Bake
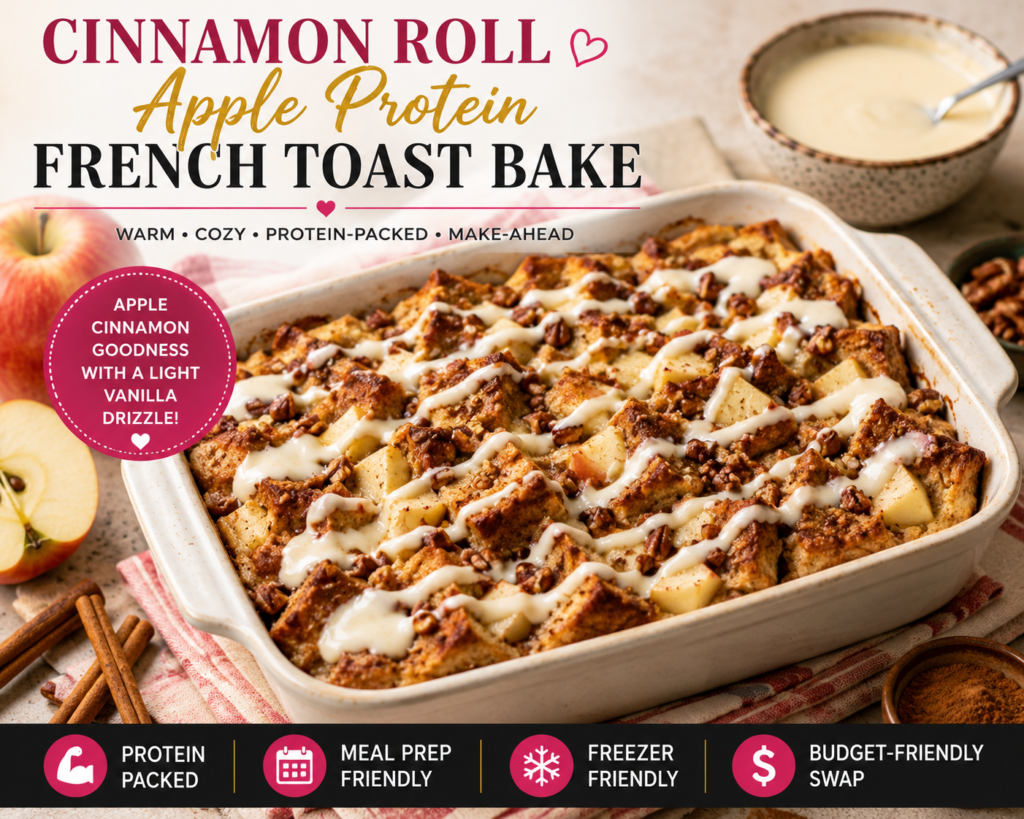
Warm cinnamon apples, soft baked French toast, and a light vanilla drizzle come together in this cozy breakfast inspired by an apple cinnamon roll. Greek yogurt and eggs add protein, while whole-grain bread makes it satisfying enough for breakfast without turning it into an overly sweet dessert.
Prep Time: 15 minutes
Bake Time: 35–40 minutes
Total Time: 50–55 minutes
Servings: 6
Ingredients
8 slices whole-grain bread, cut into 1-inch cubes
2 medium apples, peeled and diced
6 large eggs
1 cup unsweetened almond milk or milk of choice
¾ cup plain Greek yogurt
2 tablespoons pure maple syrup
2 teaspoons vanilla extract
2 teaspoons ground cinnamon
¼ teaspoon ground nutmeg
¼ teaspoon salt
1 tablespoon melted butter or coconut oil
¼ cup chopped pecans, optional
For the Light Vanilla Drizzle:
½ cup plain Greek yogurt
1 tablespoon softened reduced-fat cream cheese
1 teaspoon pure maple syrup or honey
½ teaspoon vanilla extract
1–2 tablespoons milk, as needed
Directions
Preheat the oven to 350°F. Lightly grease an 8×8-inch or similar baking dish.
Place the bread cubes and diced apples into the prepared baking dish and gently toss to distribute the apples throughout.
In a large bowl, whisk together the eggs, milk, Greek yogurt, maple syrup, vanilla, cinnamon, nutmeg, salt, and melted butter or coconut oil until well combined.
Pour the egg mixture evenly over the bread and apples. Gently press the bread into the liquid so each piece has a chance to absorb the mixture.
Sprinkle the chopped pecans over the top, if using. Let the mixture rest for 5–10 minutes before baking.
Bake for 35–40 minutes, or until the center is set and the top is lightly golden.
While the French toast bake cools slightly, whisk together the Greek yogurt, cream cheese, maple syrup or honey, vanilla, and enough milk to create a light drizzle.
Let the French toast bake rest for 5–10 minutes, then drizzle lightly with the vanilla mixture before serving.
Make It Your Way
Want more protein? Use a higher-protein bread or serve each portion with additional Greek yogurt.
Prefer dairy-free? Use plant-based milk, plant-based yogurt, and dairy-free cream cheese.
Want less added sugar? Reduce or skip the maple syrup in the French toast mixture. Naturally sweet apples and vanilla still provide plenty of flavor.
No pecans? Leave them out or substitute pumpkin or sunflower seeds for a nut-free crunch.
Budget-Friendly Swap: Use slightly stale bread instead of throwing it away. This recipe is an excellent way to turn leftover bread and economical seasonal apples into several breakfasts.
Storage & Meal Prep
Allow the French toast bake to cool completely before storing. Refrigerate individual portions in an airtight container for up to 4 days. Keep the vanilla drizzle refrigerated separately and add it after reheating.
For meal prep, divide the cooled bake into individual portions so breakfast is ready to grab throughout the week. Reheat in the microwave or oven until warmed through.
Individual portions can also be frozen for up to 2 months. Thaw overnight in the refrigerator before reheating for the best texture.
Nutrition Information
Estimated per serving: approximately 320 calories • 18g protein • 39g carbohydrates • 6g fiber • 11g fat
Nutrition values are estimates and may vary depending on the bread, milk, yogurt, cream cheese, sweetener, pecans, serving size, and other ingredients used.
Why You’ll Love It
Make-Ahead • Protein-Packed • Meal Prep Friendly • Freezer Friendly • Budget-Friendly Swap
Loaded Southwest Breakfast Quesadilla
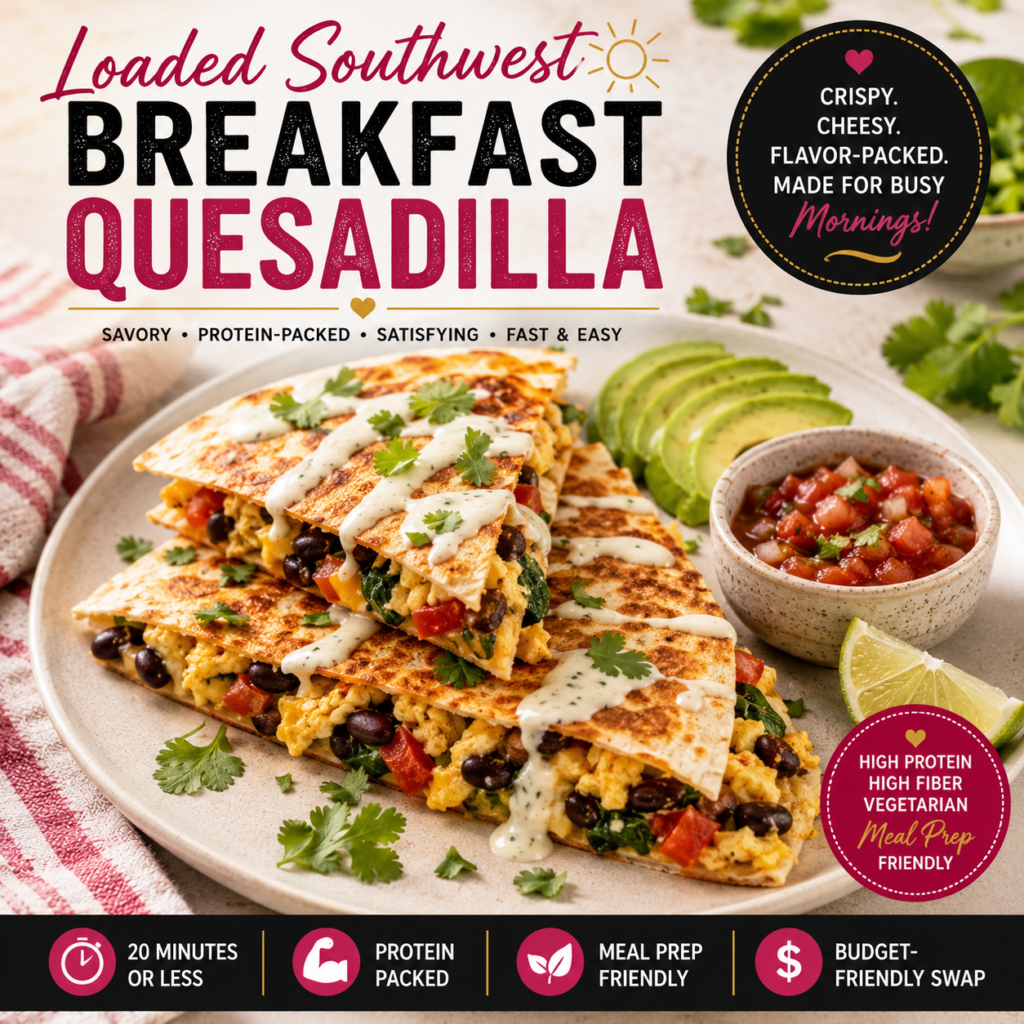
Crispy on the outside and loaded with flavor on the inside, this Southwest breakfast quesadilla combines fluffy eggs, black beans, colorful vegetables, melted cheese, and a creamy avocado-lime finish. It’s a satisfying, protein-packed breakfast that feels indulgent while giving you a balanced way to start the day.
Prep Time: 10 minutes
Cook Time: 10 minutes
Total Time: 20 minutes
Servings: 2
Ingredients
2 large whole-grain tortillas
4 large eggs
½ cup black beans, rinsed and drained
½ cup diced bell pepper
¼ cup diced red onion
1 cup fresh baby spinach, roughly chopped
½ cup shredded reduced-fat Mexican-blend or cheddar cheese
¼ teaspoon ground cumin
¼ teaspoon smoked paprika
⅛ teaspoon garlic powder
Pinch of salt
Black pepper to taste
½ small avocado, sliced
¼ cup salsa
Cooking spray or 1 teaspoon olive oil
For the Creamy Lime Drizzle:
¼ cup plain Greek yogurt
1 teaspoon fresh lime juice
¼ teaspoon lime zest
Pinch of cumin
1–2 teaspoons water, as needed
Directions
Heat a large nonstick skillet over medium heat and lightly coat it with cooking spray or olive oil.
Add the bell pepper and red onion. Cook for 2–3 minutes until they begin to soften.
Add the spinach and cook just until wilted.
Whisk the eggs with the cumin, smoked paprika, garlic powder, salt, and black pepper. Pour the eggs into the skillet with the vegetables and gently scramble until just set.
Stir the black beans into the egg mixture and remove the filling from the skillet.
Place one tortilla in the skillet. Sprinkle half of the cheese over one side, add half of the egg-and-bean mixture, and fold the tortilla in half.
Cook for 2–3 minutes per side, or until the tortilla is golden and crisp and the cheese has melted. Repeat with the second tortilla.
Whisk together the Greek yogurt, lime juice, lime zest, cumin, and enough water to create a light drizzle.
Slice each quesadilla into wedges and serve with avocado, salsa, and the creamy lime drizzle.
Make It Your Way
Want more protein? Add extra egg whites or increase the black beans.
Like some heat? Add diced jalapeño, crushed red pepper, or your favorite hot sauce.
Prefer meat? Add a small amount of cooked lean turkey sausage or shredded chicken.
Want it vegetarian? It already is—black beans and eggs provide plenty of substance without requiring meat.
Need it dairy-free? Use your favorite dairy-free cheese and plant-based unsweetened yogurt.
Budget-Friendly Swap: Black beans are an inexpensive way to add protein, fiber, and bulk. Store-brand canned beans, frozen spinach, and frozen bell peppers can also help keep the cost down without sacrificing the flavor.
Storage & Meal Prep
For meal prep, prepare the egg, vegetable, and black bean filling ahead of time and refrigerate it in an airtight container for up to 3 days. Assemble and toast the quesadilla when you’re ready to eat for the crispiest texture.
Fully cooked quesadillas can also be refrigerated for up to 3 days. Reheat them in a skillet, air fryer, or toaster oven rather than the microwave when possible to help restore the crisp exterior.
Keep the avocado, salsa, and creamy lime drizzle separate until serving.
Nutrition Information
Estimated per serving: approximately 480 calories • 27g protein • 47g carbohydrates • 12g fiber • 22g fat
Nutrition values are estimates and may vary depending on the tortillas, cheese, yogurt, avocado, cooking oil, toppings, and specific ingredient brands used.
Why You’ll Love It
20 Minutes or Less • High Protein • High Fiber • Vegetarian • Meal Prep Friendly • Budget-Friendly Swap
Southern Sweet Potato Pie Breakfast Bowl
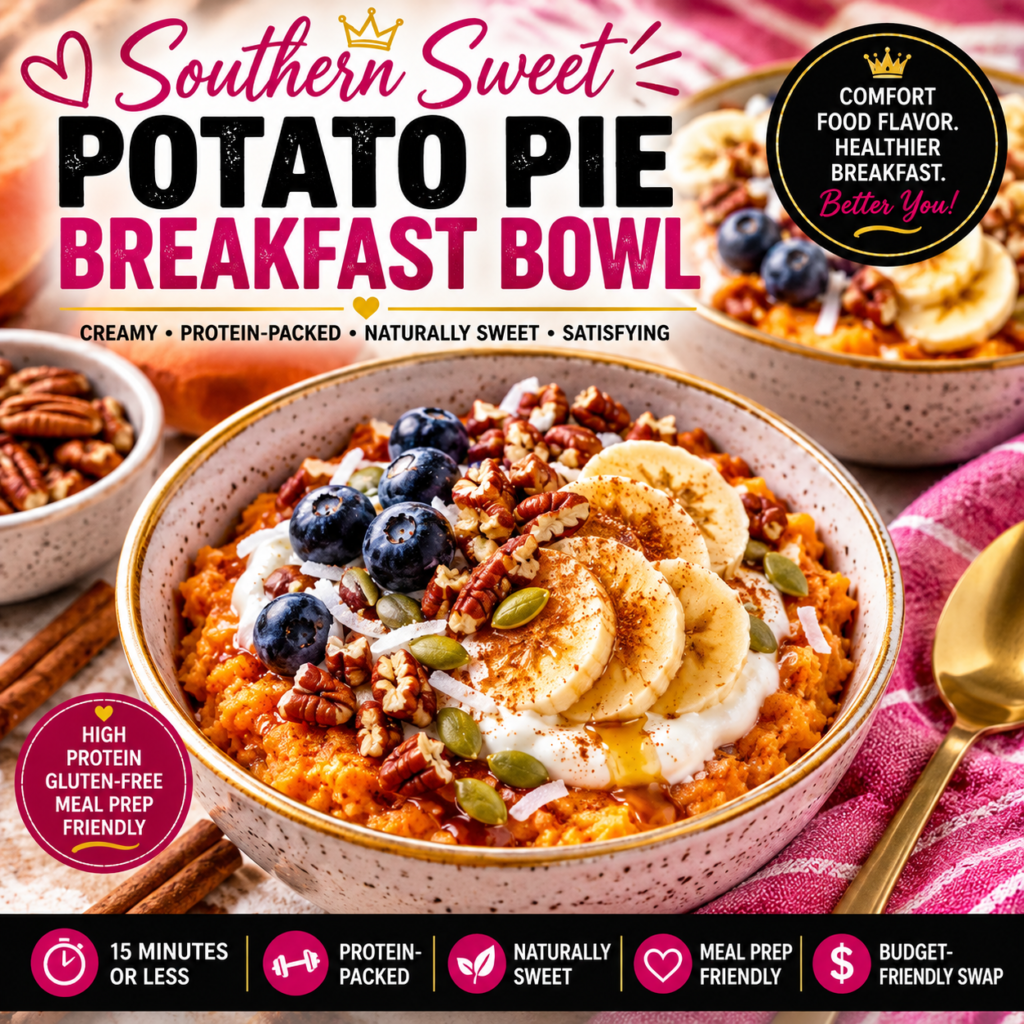
Creamy sweet potato, warm cinnamon and nutmeg, vanilla, toasted pecans, and a touch of maple bring the comforting flavor of Southern sweet potato pie straight to the breakfast table. Greek yogurt adds creaminess and protein, creating a satisfying breakfast that tastes indulgent without starting the morning with dessert.
Prep Time: 10 minutes
Cook Time: 5 minutes
Total Time: 15 minutes
Servings: 2
Ingredients
1 large cooked sweet potato, skin removed
1 cup plain Greek yogurt, divided
½ teaspoon ground cinnamon
⅛ teaspoon ground nutmeg
½ teaspoon vanilla extract
1–2 teaspoons pure maple syrup, optional
2 tablespoons milk of choice
2 tablespoons chopped pecans
1 tablespoon pumpkin seeds
1 tablespoon unsweetened coconut flakes, optional
½ banana, sliced
2 tablespoons fresh blueberries or pomegranate seeds, optional
Pinch of cinnamon for serving
Directions
Place the cooked sweet potato in a bowl and mash until smooth.
Stir in ½ cup of the Greek yogurt, cinnamon, nutmeg, vanilla, maple syrup if using, and enough milk to create a creamy consistency.
Divide the sweet potato mixture between two serving bowls.
Top each bowl with the remaining Greek yogurt, sliced banana, chopped pecans, pumpkin seeds, and optional coconut flakes.
Add blueberries or pomegranate seeds if desired for a fresh burst of flavor and color.
Finish with a light sprinkle of cinnamon and serve warm or chilled.
Make It Your Way
Want more protein? Use a higher-protein Greek yogurt or stir a small amount of vanilla protein powder into the sweet potato mixture.
Prefer dairy-free? Use a thick unsweetened plant-based yogurt and your favorite plant-based milk.
Want less added sugar? Skip the maple syrup. A naturally sweet sweet potato and ripe banana may provide all the sweetness you need.
Nut-Free Option: Leave out the pecans and add extra pumpkin or sunflower seeds for crunch.
Budget-Friendly Swap: Sweet potatoes and bananas are inexpensive staples that can create several breakfasts for very little cost. Bake multiple sweet potatoes at once while preparing another meal and refrigerate them for quick breakfasts later in the week.
Storage & Meal Prep
Prepare the sweet potato mixture ahead and refrigerate it in an airtight container for up to 4 days. Store the yogurt, fruit, nuts, and seeds separately for the best texture.
For an easy grab-and-go breakfast, portion the sweet potato mixture into individual containers. Add the toppings just before eating.
The sweet potato base can be enjoyed chilled or reheated until warm before adding the yogurt and toppings.
Nutrition Information
Estimated per serving: approximately 330 calories • 16g protein • 46g carbohydrates • 7g fiber • 11g fat
Nutrition values are estimates and may vary depending on the yogurt, milk, sweetener, fruit, nuts, seeds, serving size, and other ingredients used.
Why You’ll Love It
15 Minutes or Less • Protein-Packed • Naturally Sweet • Meal Prep Friendly • Gluten-Free • Budget-Friendly Swap
Strawberry Banana Cheesecake Stuffed French Toast
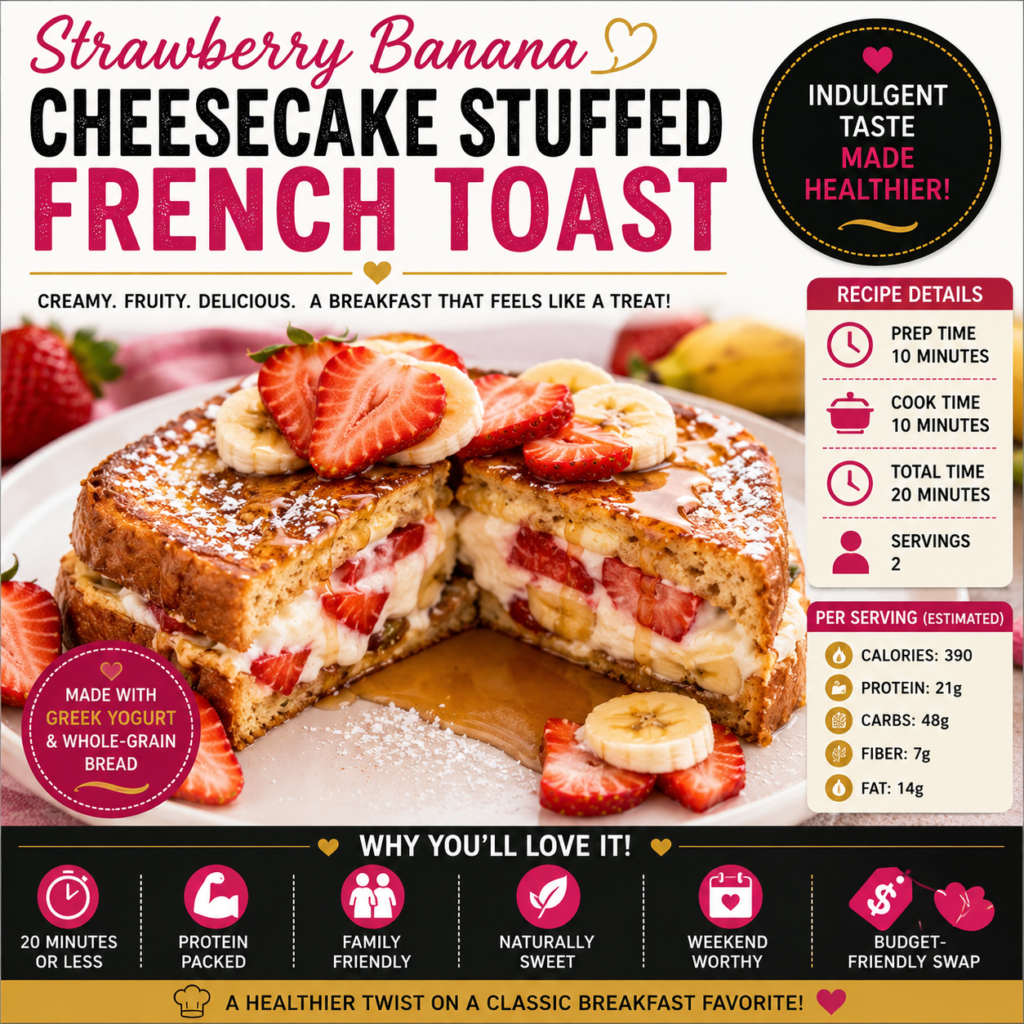
Golden French toast filled with creamy vanilla cheesecake-inspired goodness, fresh strawberries, and sweet banana makes breakfast feel like a special treat. Greek yogurt and reduced-fat cream cheese lighten up the filling while eggs and whole-grain bread help make this indulgent-tasting breakfast more satisfying and balanced.
Prep Time: 10 minutes
Cook Time: 10 minutes
Total Time: 20 minutes
Servings: 2
Ingredients
4 slices whole-grain bread
2 large eggs
¼ cup milk of choice
½ teaspoon ground cinnamon
1 teaspoon vanilla extract
½ cup sliced fresh strawberries
½ medium banana, thinly sliced
Cooking spray or 1 teaspoon butter for the skillet
For the Cheesecake-Inspired Filling:
¼ cup plain Greek yogurt
2 ounces reduced-fat cream cheese, softened
½ teaspoon vanilla extract
1 teaspoon pure maple syrup or honey, optional
½ teaspoon fresh lemon juice
For Serving:
Additional fresh strawberries and banana, optional
Light sprinkle of cinnamon
1 teaspoon pure maple syrup, optional
Directions
In a small bowl, mix the Greek yogurt, softened cream cheese, vanilla, maple syrup or honey if using, and lemon juice until smooth and creamy.
Spread the cheesecake-inspired mixture over two slices of bread. Arrange sliced strawberries and banana over the filling, then top each with another slice of bread to create two sandwiches.
In a shallow bowl, whisk together the eggs, milk, cinnamon, and vanilla.
Carefully dip each stuffed sandwich into the egg mixture, coating both sides without soaking the bread for too long.
Heat a nonstick skillet over medium-low heat and lightly coat it with cooking spray or butter.
Cook each stuffed French toast sandwich for approximately 3–4 minutes per side, or until golden brown and the center is warmed through.
Remove from the skillet and allow to rest for 1–2 minutes before slicing.
Serve warm with additional strawberries and banana, a sprinkle of cinnamon, and an optional light drizzle of maple syrup.
Make It Your Way
Want more protein? Use higher-protein bread and a higher-protein Greek yogurt, or serve additional Greek yogurt on the side.
Prefer blueberries or peaches? Swap the strawberries for your favorite fresh fruit while keeping the creamy cheesecake-inspired filling.
Want less added sugar? Skip the maple syrup or honey in the filling and topping. Ripe strawberries and banana add natural sweetness.
Prefer dairy-free? Use plant-based yogurt, dairy-free cream cheese, and your favorite plant-based milk.
Budget-Friendly Swap: Use whichever berries or seasonal fruit are currently on sale. Frozen strawberries can also work for the filling when fresh berries are expensive—thaw and drain them thoroughly first.
Storage & Meal Prep
Stuffed French toast is best enjoyed freshly cooked, but leftovers can be refrigerated in an airtight container for up to 3 days.
For easier mornings, prepare the cheesecake-inspired filling and slice the fruit the night before. Store them separately in the refrigerator, then assemble and cook the French toast in the morning.
Reheat leftovers in a skillet, toaster oven, or air fryer until warmed through. Because of the creamy filling, keep leftovers refrigerated and do not leave them sitting at room temperature for extended periods.
Nutrition Information
Estimated per serving: approximately 390 calories • 21g protein • 48g carbohydrates • 7g fiber • 14g fat
Nutrition values are estimates and may vary depending on the bread, milk, yogurt, cream cheese, fruit, sweetener, cooking fat, serving size, and specific ingredient brands used.
Why You’ll Love It
20 Minutes or Less • Protein-Packed • Family-Friendly • Naturally Sweet • Weekend-Worthy • Budget-Friendly Swap
Sausage, Egg & Cheese Breakfast Biscuit Cups
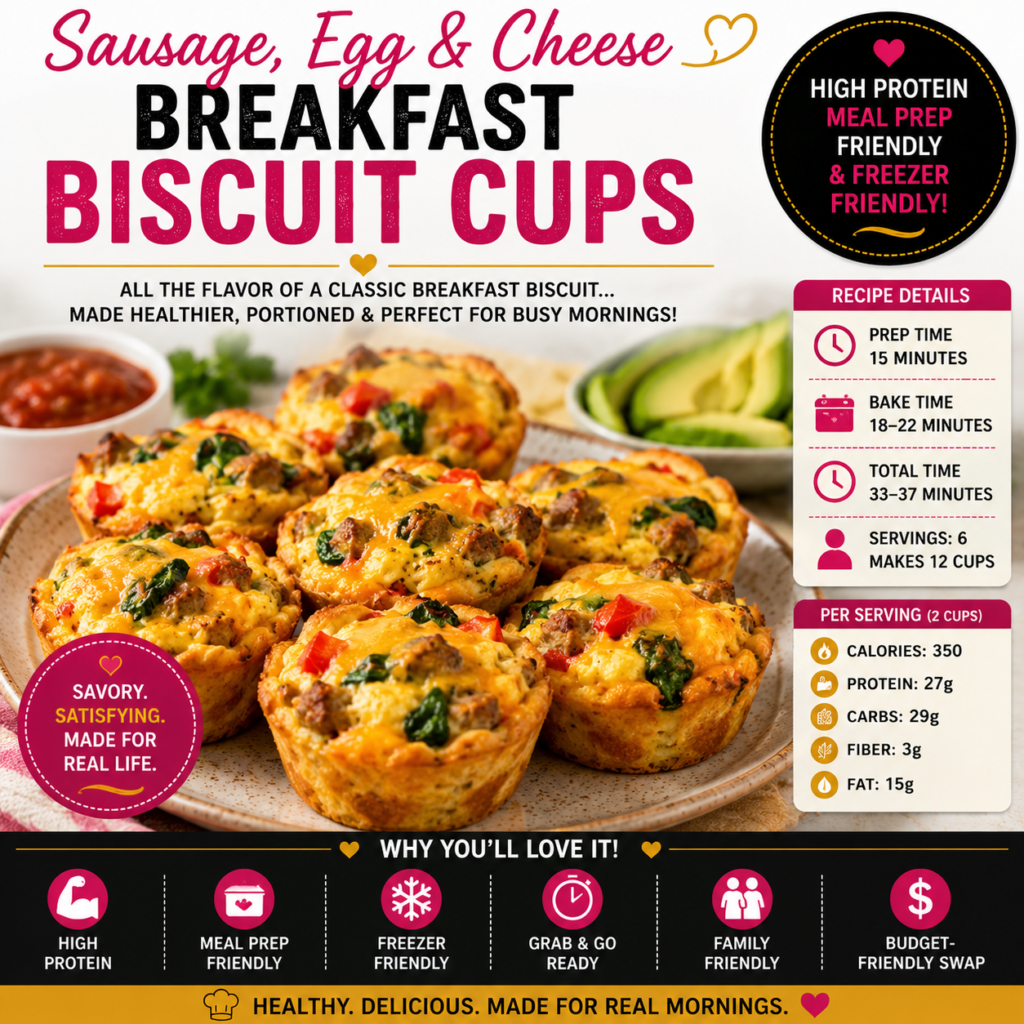
Everything you love about a classic sausage, egg, and cheese breakfast biscuit comes together in these easy grab-and-go breakfast cups. Fluffy eggs, savory turkey sausage, colorful vegetables, and melted cheese are tucked inside a golden whole-grain biscuit crust for a satisfying breakfast that’s perfect for busy mornings.
Prep Time: 15 minutes
Bake Time: 18–22 minutes
Total Time: 33–37 minutes
Servings: 6
Makes: 12 breakfast cups
Ingredients
6 whole-grain refrigerated biscuits, each separated into 2 thinner rounds
6 large eggs
½ cup liquid egg whites
8 ounces lean turkey breakfast sausage
½ cup finely diced bell pepper
¼ cup finely diced onion
1 cup baby spinach, chopped
¾ cup shredded reduced-fat cheddar cheese
¼ cup milk of choice
½ teaspoon garlic powder
¼ teaspoon smoked paprika
¼ teaspoon black pepper
Pinch of salt
Cooking spray
Optional for Serving:
Fresh salsa
Sliced avocado
Fresh fruit
Hot sauce
Directions
Preheat the oven to 375°F. Lightly coat a 12-cup muffin pan with cooking spray.
Cook the turkey sausage in a nonstick skillet over medium heat, breaking it into small crumbles as it cooks.
Add the bell pepper and onion and cook for 2–3 minutes until slightly softened. Stir in the spinach and cook just until wilted. Remove from the heat.
Separate each biscuit into two thinner rounds. Gently flatten each piece and press one into the bottom and slightly up the sides of each muffin cup.
In a large bowl, whisk together the eggs, egg whites, milk, garlic powder, smoked paprika, black pepper, and salt.
Divide the sausage and vegetable mixture evenly among the 12 biscuit cups.
Sprinkle most of the cheese over the sausage mixture, reserving a small amount for the tops.
Carefully pour the egg mixture into each cup, filling each approximately three-quarters full.
Sprinkle the remaining cheese over the tops.
Bake for 18–22 minutes, or until the eggs are set, the cheese is melted, and the biscuit edges are golden brown.
Allow the breakfast cups to cool in the pan for about 5 minutes before gently removing them. Serve warm with salsa, avocado, fresh fruit, or hot sauce if desired.
Make It Your Way
Want even more protein? Replace some of the whole eggs with additional egg whites or serve the cups with plain Greek yogurt and fresh fruit.
Prefer a different meat? Lean chicken breakfast sausage works well, or use a small amount of lean ham.
Want a meatless version? Skip the sausage and add mushrooms, extra spinach, peppers, or black beans.
Love spice? Add diced jalapeño, crushed red pepper, or a dash of hot sauce to the egg mixture.
Budget-Friendly Swap: Use whichever vegetables you already have in the refrigerator. Frozen peppers and spinach also work well and can reduce both food waste and cost.
Storage & Meal Prep
Allow the breakfast cups to cool completely before storing them. Refrigerate in an airtight container for up to 4 days.
For grab-and-go breakfasts, portion two cups into individual containers so they’re ready to take with you in the morning. Reheat until steaming hot throughout before eating.
The breakfast cups can also be frozen for up to 2 months. Wrap them individually or separate them with parchment paper before freezing. Thaw overnight in the refrigerator and reheat thoroughly before serving.
Nutrition Information
Estimated per serving of 2 breakfast cups: approximately 350 calories • 27g protein • 29g carbohydrates • 3g fiber • 15g fat
Nutrition values are estimates and may vary depending on the biscuits, sausage, cheese, milk, vegetables, serving size, and specific ingredient brands used.
Why You’ll Love It
High Protein • Grab & Go • Meal Prep Friendly • Freezer Friendly • Family-Friendly • Budget-Friendly Swap
Chicken & Waffle Breakfast Sliders
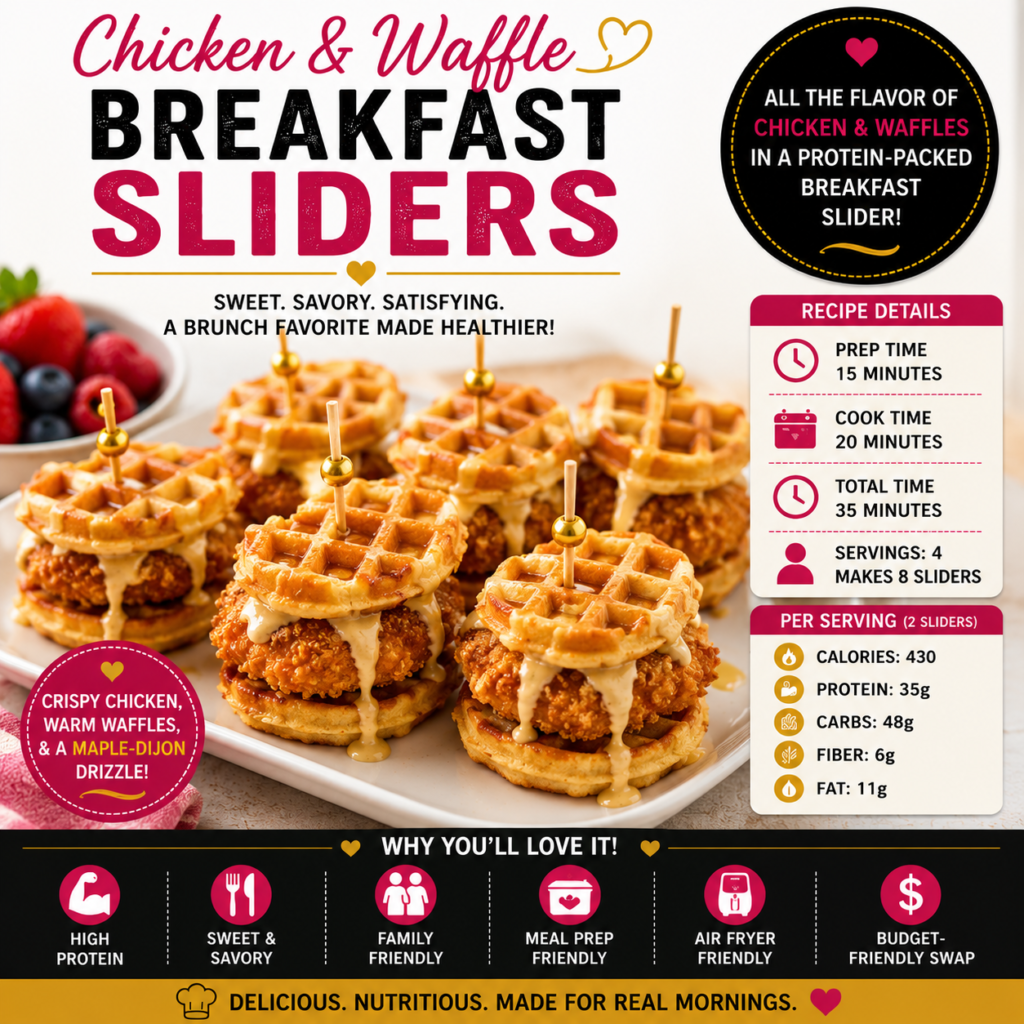
Crispy seasoned chicken tucked between warm whole-grain mini waffles gives you all the sweet-and-savory flavor of classic chicken and waffles in a fun breakfast slider. A light maple-Dijon drizzle adds just enough sweetness and tang to make every bite satisfying without drowning breakfast in syrup.
Prep Time: 15 minutes
Cook Time: 20 minutes
Total Time: 35 minutes
Servings: 4
Makes: 8 sliders
Ingredients
1 pound boneless, skinless chicken breast or chicken tenderloins
1 cup plain Greek yogurt
1 teaspoon smoked paprika
1 teaspoon garlic powder
½ teaspoon onion powder
½ teaspoon dried thyme
½ teaspoon black pepper
¼ teaspoon salt
1 cup crushed whole-grain cornflakes or whole-grain breadcrumbs
Cooking spray
16 mini whole-grain waffles
For the Maple-Dijon Drizzle:
2 tablespoons pure maple syrup
1 tablespoon Dijon mustard
2 tablespoons plain Greek yogurt
1 teaspoon fresh lemon juice
Pinch of smoked paprika
Optional for Serving:
Fresh berries
Sliced strawberries
Extra Greek yogurt
Thinly sliced avocado
Directions
Preheat the oven to 425°F or preheat an air fryer to 400°F.
Cut the chicken into 8 slider-size pieces of approximately equal thickness.
In a bowl, combine the Greek yogurt, smoked paprika, garlic powder, onion powder, thyme, black pepper, and salt.
Coat each chicken piece lightly in the seasoned Greek yogurt mixture, then press it into the crushed whole-grain cornflakes or breadcrumbs until evenly coated.
Arrange the chicken on a parchment-lined baking sheet and lightly spray the tops with cooking spray. Bake for approximately 18–20 minutes, turning once, until golden and the chicken reaches an internal temperature of 165°F. If using an air fryer, cook until crisp and the chicken reaches 165°F, following your appliance’s recommended timing.
Toast the mini waffles according to package directions until warm and lightly crisp.
In a small bowl, whisk together the maple syrup, Dijon mustard, Greek yogurt, lemon juice, and smoked paprika until smooth.
Place one cooked chicken piece onto a mini waffle. Add a small amount of maple-Dijon drizzle and top with another mini waffle. Repeat to make 8 sliders.
Serve warm with fresh berries or other desired sides.
Make I Your Way
Want even more protein? Choose higher-protein whole-grain waffles or serve the sliders with additional Greek yogurt on the side.
Want some heat? Add cayenne pepper to the chicken seasoning or a dash of hot sauce to the maple-Dijon drizzle for a sweet-and-spicy version.
Prefer homemade waffles? Use your favorite whole-grain or protein waffle batter and cook it in a mini waffle maker.
Want less added sugar? Reduce the maple syrup in the drizzle or replace part of it with additional Greek yogurt and Dijon mustard.
Budget-Friendly Swap: Chicken breast tenderloins are convenient, but buying larger chicken breasts when they’re on sale and cutting them into smaller portions yourself can cost less. Store-brand frozen whole-grain waffles also work perfectly.
Storage & Meal Prep
Allow the cooked chicken to cool completely before refrigerating it in an airtight container for up to 4 days. Store the waffles, chicken, and maple-Dijon drizzle separately so the waffles stay crisp.
For meal prep, portion the chicken and waffles into individual containers and refrigerate the drizzle separately. Reheat the chicken and waffles in an air fryer, toaster oven, or oven until thoroughly heated, then assemble the sliders just before eating.
The cooked chicken can also be frozen for up to 2 months. Thaw overnight in the refrigerator and reheat thoroughly before serving.
Nutrition Information
Estimated per serving of 2 sliders: approximately 430 calories • 35g protein • 48g carbohydrates • 6g fiber • 11g fat
Nutrition values are estimates and may vary depending on the chicken, waffles, coating, yogurt, maple syrup, serving size, cooking method, and specific ingredient brands used.
Why You’ll Love It
High Protein • Sweet & Savory • Family-Friendly • Meal Prep Friendly • Air Fryer Friendly • Budget-Friendly Swap
Loaded Veggie & Turkey Sausage Breakfast Hash
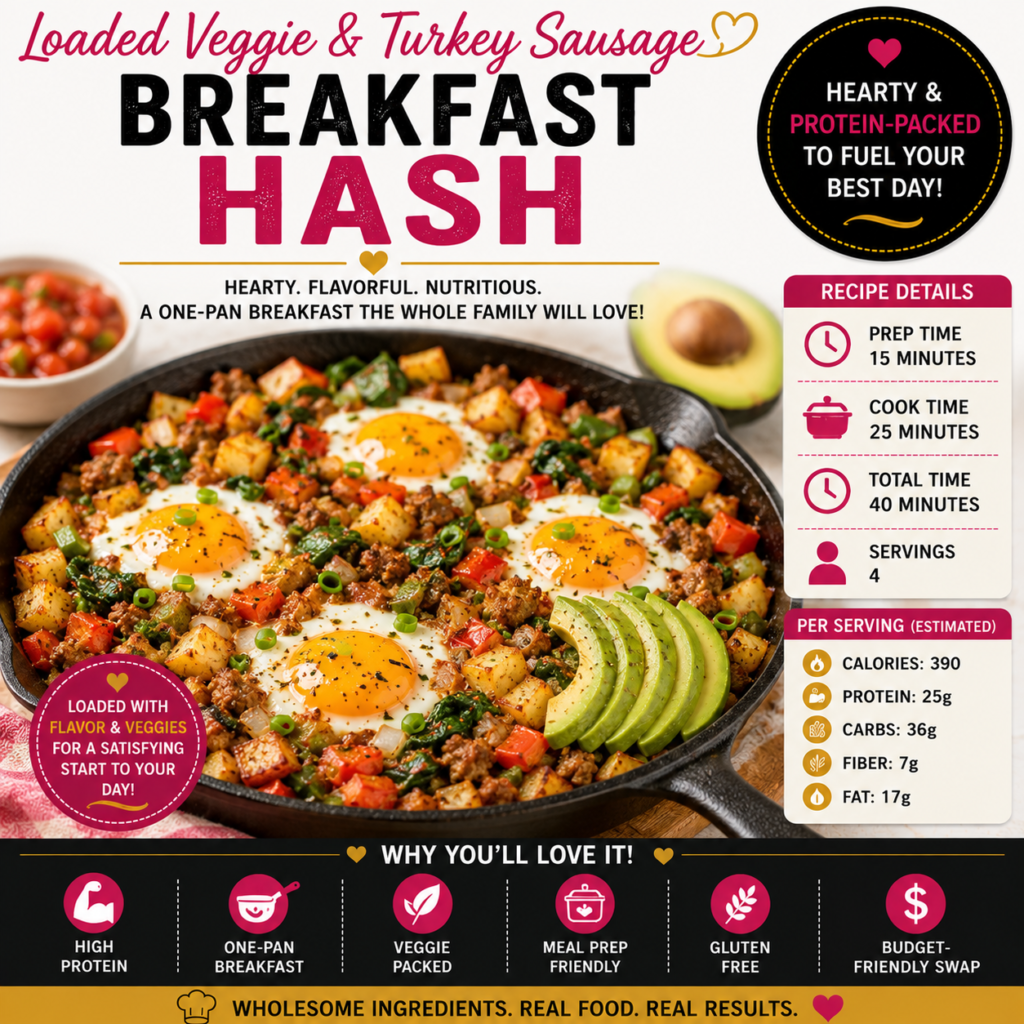
Crispy golden potatoes, savory turkey sausage, colorful vegetables, and perfectly cooked eggs come together in this hearty breakfast skillet. Finished with creamy avocado and a touch of smoky seasoning, it’s a filling, protein-packed breakfast that delivers classic breakfast-hash flavor with plenty of vegetables.
Prep Time: 15 minutes
Cook Time: 25 minutes
Total Time: 40 minutes
Servings: 4
Ingredients
1 pound baby potatoes or Yukon gold potatoes, cut into small cubes
8 ounces lean turkey breakfast sausage
4 large eggs
1 red bell pepper, diced
1 green bell pepper, diced
½ medium onion, diced
2 cups fresh baby spinach
1 tablespoon olive oil
1 teaspoon smoked paprika
½ teaspoon garlic powder
½ teaspoon onion powder
¼ teaspoon ground cumin
¼ teaspoon black pepper
¼ teaspoon salt
½ avocado, sliced
2 tablespoons chopped green onion
2 tablespoons fresh cilantro or parsley, optional
Optional for Serving:
Fresh salsa
Hot sauce
Plain Greek yogurt
Fresh fruit
Directions
Place the diced potatoes in a microwave-safe bowl with a tablespoon of water. Cover loosely and microwave for approximately 4–5 minutes, or until they begin to soften but are not completely cooked. Drain any remaining water.
Heat a large nonstick skillet over medium heat. Add the turkey sausage and cook, breaking it into crumbles, until browned and thoroughly cooked. Transfer the sausage to a plate and set aside.
Add the olive oil and partially cooked potatoes to the same skillet. Season with smoked paprika, garlic powder, onion powder, cumin, black pepper, and salt.
Cook the potatoes for approximately 8–10 minutes, stirring occasionally, until golden and crisp around the edges.
Add the bell peppers and onion. Cook for another 4–5 minutes until the vegetables are tender-crisp.
Return the cooked turkey sausage to the skillet and stir in the spinach. Cook just until the spinach wilts.
Create four small spaces in the hash and carefully crack one egg into each space.
Cover the skillet and cook for approximately 4–6 minutes, or until the egg whites are completely set and the yolks reach your preferred doneness.
Remove from the heat and top with sliced avocado, green onion, and cilantro or parsley if desired.
Serve warm with salsa, hot sauce, Greek yogurt, or fresh fruit.
Make It Your Way
Want more protein? Add additional egg whites or increase the amount of lean turkey sausage.
Prefer sweet potatoes? Replace some or all of the white potatoes with diced sweet potatoes for a naturally sweet and savory combination.
Want it vegetarian? Leave out the turkey sausage and add black beans, mushrooms, or additional vegetables.
Love spice? Add diced jalapeño, cayenne pepper, or your favorite hot sauce.
Want to stretch the vegetables? Zucchini, mushrooms, broccoli, kale, or leftover roasted vegetables can all be added.
Budget-Friendly Swap: Potatoes, eggs, onions, and frozen peppers are inexpensive breakfast staples. Use vegetables you already have on hand and purchase turkey sausage when it’s on sale, or leave it out and add beans for an economical meatless version.
Storage & Meal Prep
For meal prep, prepare the potato, sausage, and vegetable hash without the eggs and allow it to cool completely. Refrigerate in an airtight container for up to 4 days.
Reheat individual portions in a skillet, microwave, or air fryer until thoroughly heated. For the best texture, cook a fresh egg when you’re ready to eat and place it over the reheated hash.
If storing portions that already contain cooked eggs, refrigerate promptly and use within 3–4 days. Reheat until thoroughly heated before serving.
Keep avocado and other fresh toppings separate until you’re ready to eat.
Nutrition Information
Estimated per serving: approximately 390 calories • 25g protein • 36g carbohydrates • 7g fiber • 17g fat
Nutrition values are estimates and may vary depending on the potatoes, turkey sausage, eggs, avocado, cooking oil, serving size, toppings, and specific ingredient brands used.
Why You’ll Love It
High Protein • One-Pan Breakfast • Veggie-Packed • Meal Prep Friendly • Naturally Gluten-Free • Budget-Friendly Swap
Cinnamon Banana Nut Protein Waffles
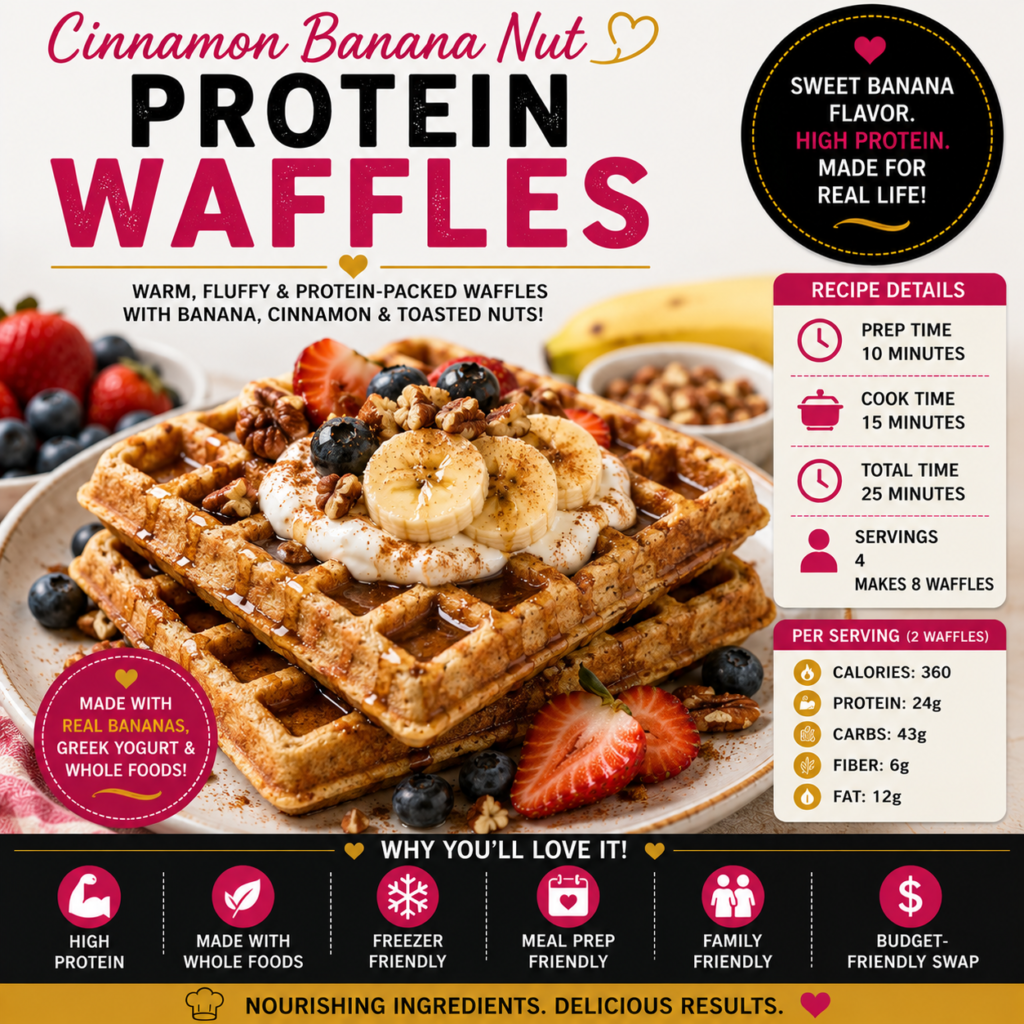
Crispy on the outside, fluffy on the inside, and filled with warm banana, cinnamon, and toasted pecan flavor, these protein waffles turn a classic breakfast favorite into something both satisfying and nourishing. They taste a little like warm banana nut bread fresh from the oven—but they’re made for breakfast and perfect for topping with fresh fruit and creamy Greek yogurt.
Prep Time: 10 minutes
Cook Time: 15 minutes
Total Time: 25 minutes
Servings: 4
Makes: Approximately 8 waffles
Ingredients
1½ cups old-fashioned rolled oats
1 scoop vanilla protein powder
1 teaspoon baking powder
1 teaspoon ground cinnamon
¼ teaspoon ground nutmeg
¼ teaspoon salt
1 large ripe banana
2 large eggs
¾ cup plain Greek yogurt
½ cup milk of choice
1 teaspoon vanilla extract
1 tablespoon pure maple syrup or honey, optional
¼ cup finely chopped pecans
Cooking spray for the waffle iron
For Serving:
Sliced banana
Fresh berries
Plain Greek yogurt
Chopped toasted pecans
Light drizzle of pure maple syrup, optional
Sprinkle of cinnamon
Directions
Preheat the waffle iron according to the manufacturer’s directions and lightly coat it with cooking spray.
Add the rolled oats to a blender and blend until they reach a flour-like consistency.
Add the protein powder, baking powder, cinnamon, nutmeg, and salt and pulse briefly to combine.
Add the banana, eggs, Greek yogurt, milk, vanilla, and maple syrup or honey if using. Blend until the batter is smooth.
Stir the chopped pecans into the batter by hand.
Allow the batter to rest for approximately 3–5 minutes while the waffle iron finishes heating.
Pour the appropriate amount of batter into the waffle iron without overfilling it.
Cook according to your waffle maker’s directions until the waffles are golden brown and crisp around the edges.
Transfer cooked waffles to a wire rack rather than stacking them so they remain crisp while the remaining waffles cook.
Serve warm with sliced banana, fresh berries, Greek yogurt, toasted pecans, cinnamon, and an optional light drizzle of maple syrup.
Make It Your Way
Want even more protein? Add a little extra Greek yogurt on top or use a higher-protein milk.
Love banana bread? Add an extra pinch of cinnamon and a small amount of chopped walnut or pecan to the top before serving.
Want chocolate? Add a small handful of dark chocolate chips to the batter for an occasional banana-chocolate variation.
Need a nut-free version? Leave out the pecans and add pumpkin or sunflower seeds for crunch.
Want less added sugar? Skip the maple syrup or honey in the batter. A very ripe banana provides plenty of natural sweetness.
Budget-Friendly Swap: Use overripe bananas that might otherwise be thrown away. Peel and freeze extra ripe bananas so they’re ready whenever you want to make waffles, pancakes, or smoothies.
Storage & Meal Prep
Allow leftover waffles to cool completely before storing them. Refrigerate in an airtight container for up to 4 days.
For meal prep, place parchment paper between the waffles and refrigerate or freeze them in individual portions. Reheat in a toaster, toaster oven, or air fryer to restore their crisp texture.
Waffles can be frozen for up to 2 months. Reheat directly from frozen for a quick breakfast on busy mornings.
Keep yogurt, fruit, syrup, and other toppings separate until serving.
Nutrition Information
Estimated per serving of 2 waffles: approximately 360 calories • 24g protein • 43g carbohydrates • 6g fiber • 12g fat
Nutrition values are estimates and may vary depending on the protein powder, yogurt, milk, pecans, sweetener, toppings, waffle size, and specific ingredient brands used.
Why You’ll Love It
High Protein • Naturally Sweet • Freezer Friendly • Meal Prep Friendly • Family-Friendly • Budget-Friendly Swap
Southern Shrimp & Cheesy Grits Breakfast Bowl
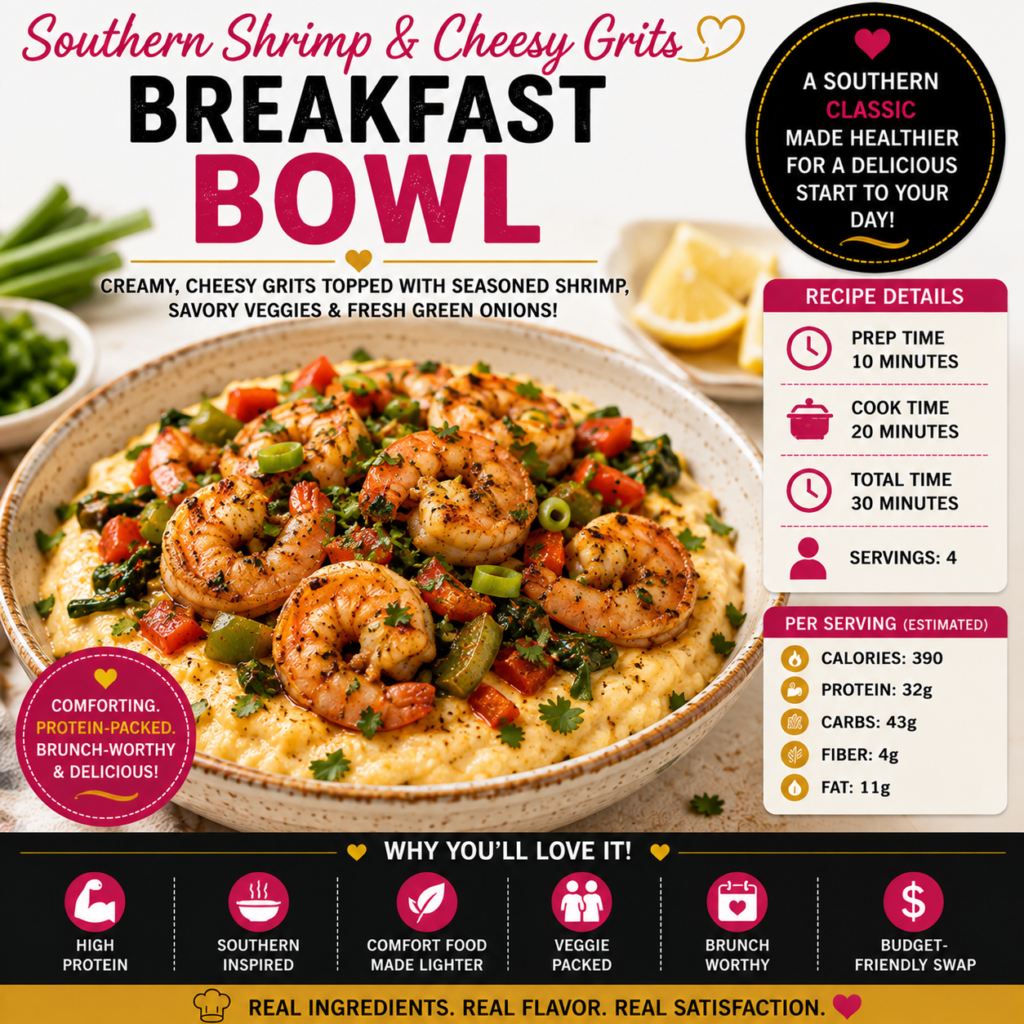
Creamy cheesy grits topped with juicy seasoned shrimp, sautéed peppers, spinach, and fresh green onion turn a Southern favorite into a satisfying breakfast bowl. This lighter version keeps the rich, comforting flavor of classic shrimp and grits while adding colorful vegetables and plenty of protein for a breakfast that feels special enough for brunch but easy enough to make at home.
Prep Time: 10 minutes
Cook Time: 20 minutes
Total Time: 30 minutes
Servings: 4
Ingredients
For the Cheesy Grits:
1 cup quick-cooking grits
2 cups low-sodium chicken or vegetable broth
1½ cups milk of choice
½ cup shredded reduced-fat sharp cheddar cheese
¼ cup plain Greek yogurt
¼ teaspoon garlic powder
¼ teaspoon black pepper
Pinch of salt, if needed
For the Shrimp:
1 pound large shrimp, peeled and deveined
1 teaspoon olive oil
1 teaspoon smoked paprika
½ teaspoon garlic powder
¼ teaspoon onion powder
¼ teaspoon black pepper
Pinch of cayenne pepper, optional
½ red bell pepper, diced
½ green bell pepper, diced
2 cups fresh baby spinach
2 green onions, thinly sliced
1 teaspoon fresh lemon juice
Optional for Serving:
Fresh chopped parsley
Extra green onion
Hot sauce
Lemon wedges
Directions
Bring the broth and milk to a gentle boil in a medium saucepan.
Slowly whisk in the grits. Reduce the heat and cook according to package directions, stirring frequently, until thick and creamy.
Remove the grits from the heat. Stir in the cheddar cheese, Greek yogurt, garlic powder, black pepper, and a small pinch of salt if needed. Cover and keep warm.
Pat the shrimp dry and season with smoked paprika, garlic powder, onion powder, black pepper, and cayenne pepper if using.
Heat the olive oil in a large nonstick skillet over medium-high heat.
Add the diced red and green bell peppers and cook for 2–3 minutes until they begin to soften.
Add the shrimp and cook for approximately 2 minutes per side, or until the shrimp are opaque, pink, and cooked through.
Add the spinach and cook just until wilted.
Remove the skillet from the heat and stir in the green onion and fresh lemon juice.
Divide the creamy cheesy grits among four bowls and spoon the shrimp and vegetable mixture over the top.
Finish with parsley, additional green onion, hot sauce, or a squeeze of fresh lemon if desired. Serve warm.
Make It Your Way
Want even more protein? Top each bowl with a cooked egg or add additional shrimp.
Love extra vegetables? Mushrooms, tomatoes, kale, zucchini, or additional peppers work beautifully in the shrimp mixture.
Prefer more heat? Increase the cayenne or finish the bowl with your favorite hot sauce.
Don’t eat shrimp? Replace it with seasoned chicken breast or lean turkey sausage for a completely different breakfast bowl.
Want extra-creamy grits? Stir in another spoonful of plain Greek yogurt just before serving.
Budget-Friendly Swap: Frozen shrimp can be considerably less expensive than fresh shrimp, especially when purchased on sale. Thaw only the amount you need. For an even lower-cost version, replace the shrimp with eggs, turkey sausage, or black beans.
Storage & Meal Prep
Refrigerate leftover grits and cooked shrimp separately in airtight containers and use within 3 days.
Grits naturally thicken as they cool. When reheating, stir in a splash of milk or broth until they return to a smooth, creamy consistency.
Reheat the shrimp gently and only until thoroughly heated to help prevent them from becoming tough or rubbery.
For meal prep, portion the grits into containers and keep the shrimp and vegetables in a separate compartment when possible. Add fresh garnishes after reheating.
Nutrition Information
Estimated per serving: approximately 390 calories • 32g protein • 43g carbohydrates • 4g fiber • 11g fat
Nutrition values are estimates and may vary depending on the shrimp, grits, milk, broth, cheese, yogurt, cooking oil, serving size, toppings, and specific ingredient brands used.
Why You’ll Love It
High Protein • Southern-Inspired • Comfort Food Made Lighter • Veggie-Packed • Brunch-Worthy • Budget-Friendly Swap
Avocado, Egg & Tomato Breakfast Toast
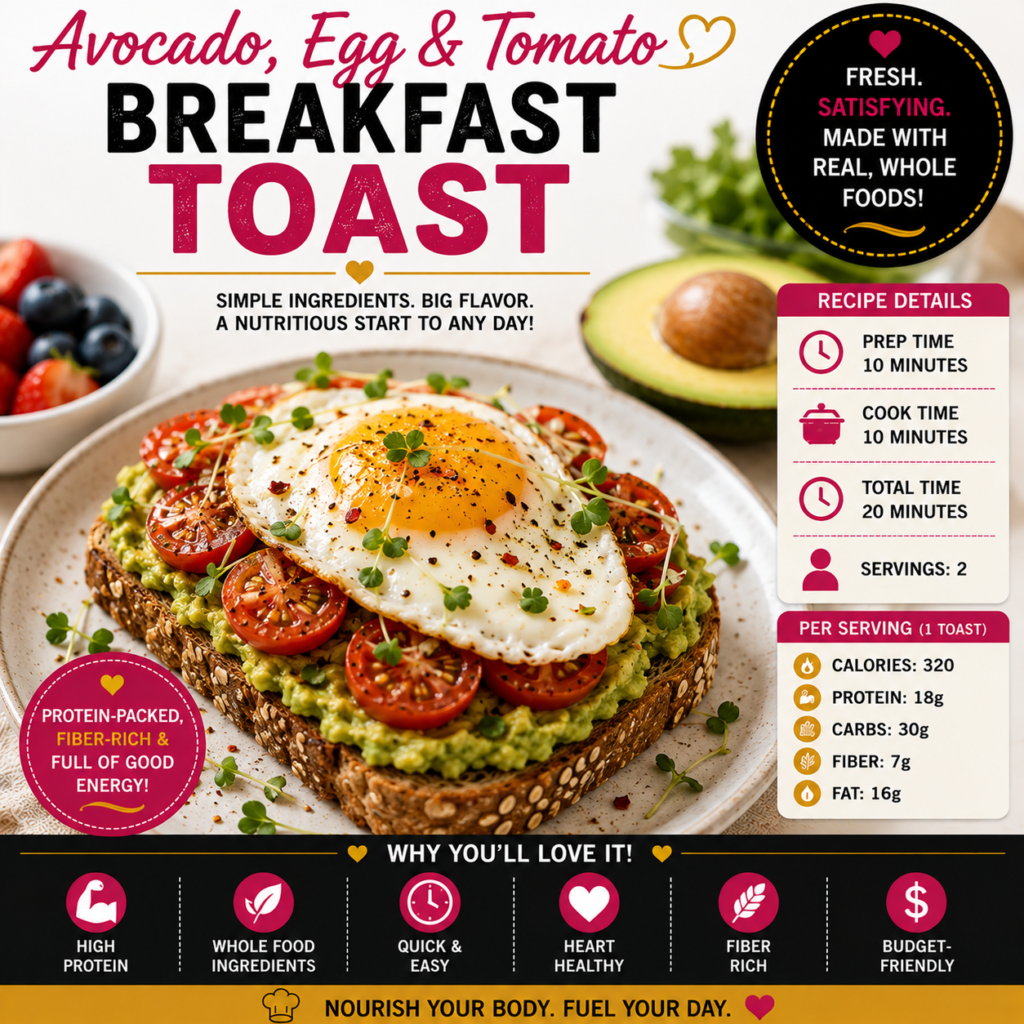
Creamy avocado, juicy tomatoes, and a perfectly cooked egg turn a simple piece of whole-grain toast into a satisfying breakfast packed with flavor. A touch of lemon, garlic, and crushed red pepper brings everything together for a fresh, savory breakfast that’s quick enough for busy mornings but delicious enough for a relaxed weekend brunch.
Prep Time: 10 minutes
Cook Time: 10 minutes
Total Time: 20 minutes
Servings: 2
Ingredients
2 large slices whole-grain or seeded bread
1 medium ripe avocado
2 large eggs
1 cup cherry or grape tomatoes, halved
1 teaspoon olive oil
1 teaspoon fresh lemon juice
¼ teaspoon garlic powder
¼ teaspoon black pepper
Pinch of salt
Pinch of crushed red pepper flakes, optional
1 tablespoon chopped fresh green onion or chives
1 tablespoon fresh microgreens or chopped parsley, optional
Optional for Serving:
Fresh berries or other fruit
Extra sliced tomatoes
Hot sauce
Everything bagel seasoning
Directions
Toast the whole-grain bread until golden and crisp.
Place the avocado in a small bowl. Add the lemon juice, garlic powder, a pinch of salt, and black pepper. Mash with a fork until creamy while leaving a little texture.
Heat the olive oil in a nonstick skillet over medium heat.
Add the halved tomatoes and cook for 2–3 minutes until warmed and lightly blistered. Transfer the tomatoes to a plate.
Using the same skillet, cook the eggs to your preferred doneness. For sunny-side-up eggs, cook until the whites are completely set and the yolks reach your desired consistency.
Divide the mashed avocado between the two pieces of toast and spread evenly.
Arrange the warm tomatoes over the avocado.
Place one cooked egg on top of each toast.
Finish with green onion or chives, crushed red pepper flakes, microgreens or parsley, and additional black pepper if desired.
Serve immediately with fresh fruit or another favorite breakfast side.
Make It Your Way
Want more protein? Add an additional egg, sprinkle the toast with hemp seeds, or serve it with plain Greek yogurt on the side.
Love cheese? Add a light sprinkle of feta, goat cheese, or reduced-fat shredded cheese.
Want even more vegetables? Add sautéed spinach, mushrooms, roasted peppers, or thinly sliced cucumber.
Prefer scrambled eggs? Scrambled or poached eggs work just as well as fried eggs.
Love spice? Add jalapeño, crushed red pepper, hot sauce, or a sprinkle of Cajun seasoning.
Budget-Friendly Swap: Avocados can vary greatly in price. When they’re expensive, use half an avocado and stretch the topping with mashed white beans or chickpeas. You’ll still get a creamy spread while adding extra fiber and protein.
Storage & Meal Prep
This breakfast is best assembled immediately before eating so the toast stays crisp.
To save time, wash and slice the tomatoes ahead and refrigerate them in an airtight container for up to 3 days.
The avocado mixture can be prepared several hours ahead. Press plastic wrap directly against the surface and refrigerate to help reduce browning.
For busy mornings, prepare the vegetables ahead of time, then toast the bread and cook the eggs fresh. Assemble just before serving for the best texture and flavor.
If taking this breakfast to work, pack the toast, avocado mixture, tomatoes, and cooked egg separately and assemble when ready to eat. Keep perishable ingredients refrigerated.
Nutrition Information
Estimated per serving of 1 toast: approximately 320 calories • 18g protein • 30g carbohydrates • 7g fiber • 16g fat
Nutrition values are estimates and may vary depending on the bread, avocado size, eggs, cooking oil, toppings, serving size, and specific ingredient brands used.
Why You’ll Love It
High Protein • Fiber-Rich • Whole Food Ingredients • Quick & Easy • Heart-Healthy Fats • Budget-Friendly Swap
Southwest Egg & Black Bean Breakfast Burrito
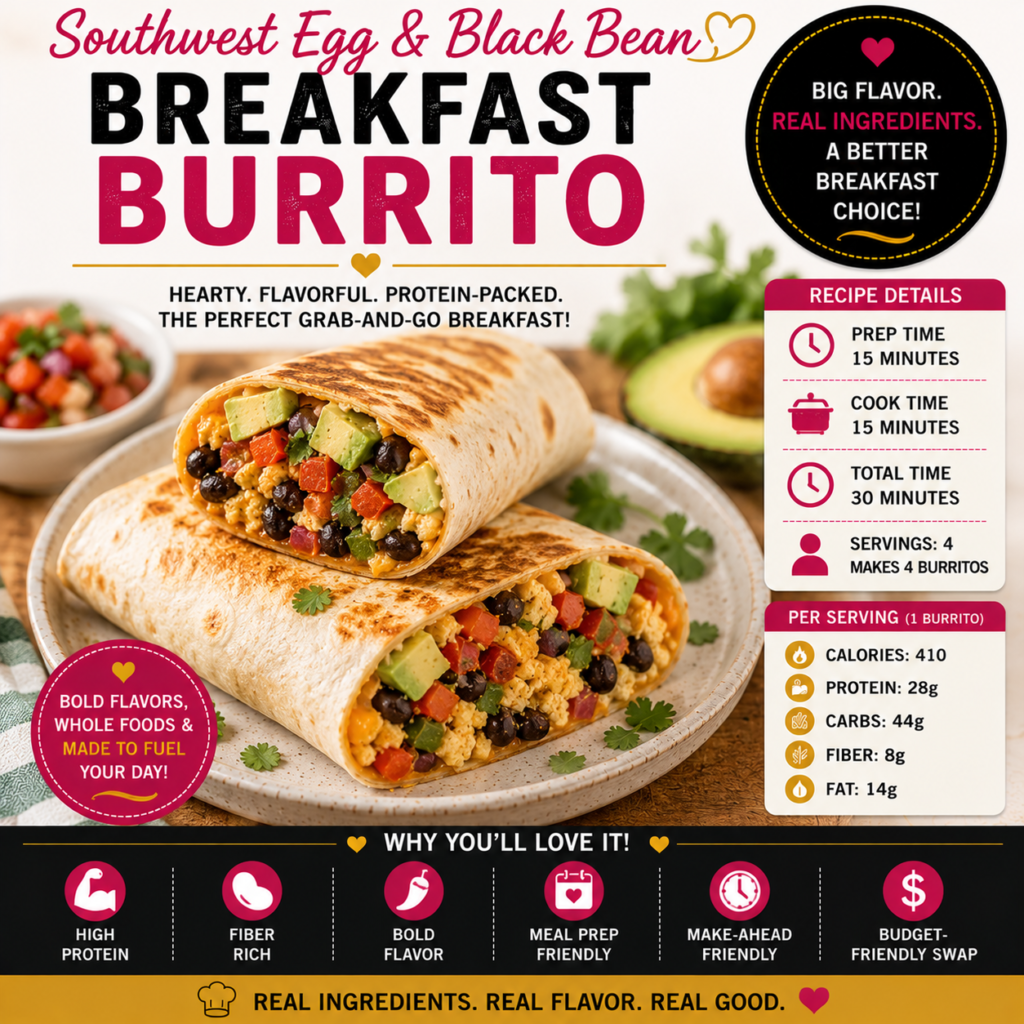
Fluffy seasoned eggs, hearty black beans, colorful peppers, melted cheese, and creamy avocado come together inside a warm whole-grain tortilla for a breakfast that’s big on flavor and built to satisfy. These Southwest breakfast burritos are protein-packed, fiber-rich, and perfect for making ahead when you need a filling grab-and-go breakfast.
Prep Time: 15 minutes
Cook Time: 15 minutes
Total Time: 30 minutes
Servings: 4
Makes: 4 breakfast burritos
Ingredients
4 large whole-grain tortillas
6 large eggs
½ cup liquid egg whites
1 cup black beans, rinsed and drained
1 red bell pepper, diced
½ green bell pepper, diced
½ small red onion, diced
1 cup fresh baby spinach, chopped
¾ cup shredded reduced-fat cheddar or Mexican-blend cheese
½ avocado, diced
1 teaspoon olive oil
½ teaspoon ground cumin
½ teaspoon smoked paprika
¼ teaspoon garlic powder
¼ teaspoon black pepper
Pinch of salt
¼ cup fresh salsa
2 tablespoons chopped fresh cilantro, optional
Optional for Serving:
Additional salsa
Plain Greek yogurt
Fresh lime wedges
Hot sauce
Fresh fruit
Directions
Heat the olive oil in a large nonstick skillet over medium heat.
Add the bell peppers and red onion and cook for 3–4 minutes, or until they begin to soften.
Add the spinach and black beans. Cook for another 1–2 minutes, just until the spinach wilts and the beans are warmed through. Transfer the mixture to a plate.
In a bowl, whisk together the eggs, egg whites, cumin, smoked paprika, garlic powder, black pepper, and salt.
Pour the egg mixture into the skillet and cook over medium-low heat, gently stirring until the eggs are fluffy and completely set.
Return the vegetable and black bean mixture to the skillet and gently combine with the eggs.
Warm the tortillas briefly so they are soft and easy to fold.
Divide the egg and bean mixture evenly among the four tortillas.
Top each with shredded cheese, diced avocado, salsa, and cilantro if using.
Fold the sides of each tortilla inward, then roll tightly from the bottom to form a burrito.
For a crisp exterior, place each burrito seam-side down in a clean skillet for 1–2 minutes per side until lightly golden.
Serve warm with additional salsa, Greek yogurt, lime, or hot sauce if desired.
Make It Your Way
Want even more protein? Add extra egg whites, lean turkey sausage, or shredded chicken.
Prefer a vegetarian breakfast? This recipe is already satisfying without meat thanks to the combination of eggs and black beans.
Love spice? Add diced jalapeño, cayenne pepper, chipotle seasoning, or your favorite hot sauce.
Want more vegetables? Mushrooms, tomatoes, corn, zucchini, or additional spinach all work well.
Need a dairy-free option? Leave out the cheese or use your favorite dairy-free alternative.
Budget-Friendly Swap: Eggs and black beans provide plenty of protein without requiring expensive breakfast meat. Frozen peppers and spinach can also be used instead of fresh vegetables when they’re less expensive.
Storage & Meal Prep
Allow the cooked filling to cool before assembling burritos for meal prep. Wrap each burrito individually and refrigerate for up to 4 days.
For longer storage, wrap the cooled burritos individually in parchment paper or freezer-safe wrap and freeze for up to 2 months.
For best results, leave the avocado and fresh salsa out of burritos that will be frozen. Add them after reheating.
Thaw frozen burritos overnight in the refrigerator when possible, then reheat until steaming hot throughout. For a crisp exterior, finish the reheated burrito in a skillet, toaster oven, or air fryer.
Nutrition Information
Estimated per serving of 1 burrito: approximately 410 calories • 28g protein • 44g carbohydrates • 8g fiber • 14g fat
Nutrition values are estimates and may vary depending on the tortillas, eggs, cheese, beans, avocado, cooking oil, toppings, serving size, and specific ingredient brands used.
Why You’ll Love It
High Protein • Fiber-Rich • Bold Flavor • Meal Prep Friendly • Make-Ahead Friendly • Budget-Friendly Swap
Berry Cheesecake Protein Smoothie
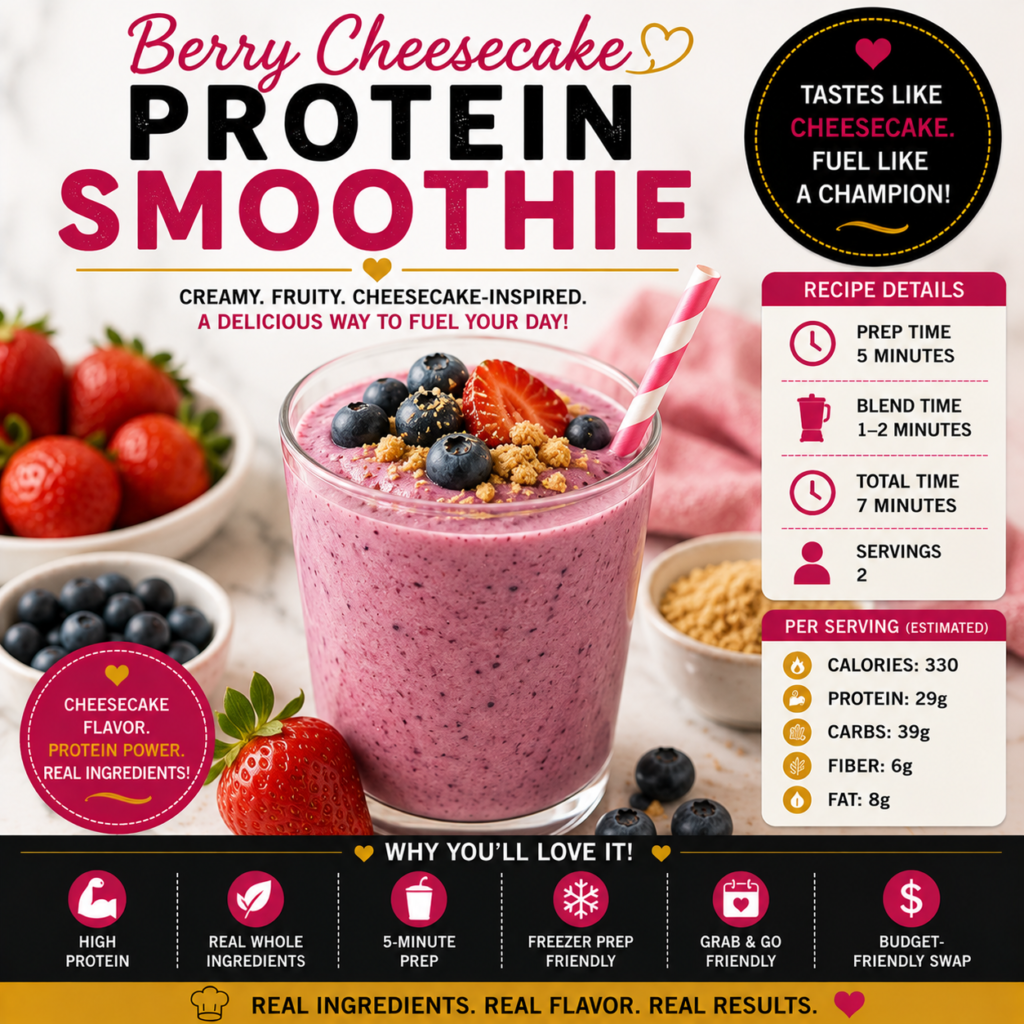
Creamy, fruity, and just a little decadent, this Berry Cheesecake Protein Smoothie blends strawberries, blueberries, banana, Greek yogurt, and a touch of cream cheese for that unmistakable cheesecake-inspired flavor. It’s a quick, protein-packed breakfast that tastes like a treat but is made with simple ingredients that can keep you satisfied through a busy morning.
Prep Time: 5 minutes
Blend Time: 1–2 minutes
Total Time: 7 minutes
Servings: 2
Ingredients
1 cup frozen strawberries
½ cup frozen blueberries
1 small frozen banana
1 cup plain Greek yogurt
1 cup unsweetened milk of choice
2 ounces reduced-fat cream cheese, softened
1 scoop vanilla protein powder
1 teaspoon vanilla extract
1 teaspoon fresh lemon juice
½ teaspoon lemon zest
½ teaspoon ground cinnamon, optional
1–2 teaspoons pure maple syrup or honey, optional
½–1 cup ice, as needed
Optional Cheesecake-Inspired Toppings:
Fresh strawberries
Fresh blueberries
1 tablespoon crushed graham cracker
Small spoonful of Greek yogurt
Light sprinkle of cinnamon
Directions
Add the milk to the blender first, followed by the Greek yogurt, cream cheese, vanilla protein powder, vanilla extract, lemon juice, and lemon zest.
Add the frozen strawberries, blueberries, banana, and cinnamon if using.
Blend on high until completely smooth and creamy.
If the smoothie is too thick, add a small splash of milk and blend again. For a thicker smoothie, add ice and blend until your desired consistency is reached.
Taste before adding sweetener. If the berries and banana are not sweet enough, add 1–2 teaspoons of maple syrup or honey and blend briefly.
Divide between two glasses.
Top with fresh berries, a small spoonful of Greek yogurt, and a light sprinkle of crushed graham cracker if desired.
Serve immediately while cold and creamy.
Make It Your Way
Want even more protein? Use a higher-protein Greek yogurt or add a little additional protein powder according to the product directions.
Want a strawberry-only cheesecake smoothie? Replace the blueberries with additional frozen strawberries.
Prefer a thicker smoothie bowl? Reduce the milk and blend until thick enough to eat with a spoon. Top with berries, nuts, seeds, or a small amount of granola.
Want less added sugar? Skip the maple syrup or honey and rely on a ripe banana and naturally sweet berries.
Need a dairy-free version? Use plant-based yogurt, dairy-free cream cheese, plant-based milk, and a dairy-free protein powder.
Budget-Friendly Swap: Frozen berries are often less expensive than fresh berries and work especially well in smoothies because they eliminate the need for as much ice. Store-brand frozen mixed berries can replace the separate strawberries and blueberries.
Storage & Meal Prep
Smoothies have the best texture immediately after blending, but you can prepare most of the ingredients ahead of time.
Create individual freezer packs containing the strawberries, blueberries, and banana. Store them in the freezer for up to 2 months.
When you’re ready for breakfast, empty one freezer pack into the blender and add the remaining refrigerated ingredients.
If you need to take the smoothie with you, pour it into an insulated bottle or cup and keep it cold until ready to drink.
For food safety and the best texture, refrigerate any leftover smoothie promptly and use within 24 hours. Stir or shake well before drinking.
Nutrition Information
Estimated per serving: approximately 330 calories • 29g protein • 39g carbohydrates • 6g fiber • 8g fat
Nutrition values are estimates and may vary depending on the protein powder, yogurt, milk, cream cheese, fruit, sweetener, toppings, serving size, and specific ingredient brands used.
Why You’ll Love It
5-Minute Prep • High Protein • Grab & Go • Freezer Prep Friendly • Cheesecake-Inspired Flavor • Budget-Friendly Swap
Apple Pie Protein Pancakes
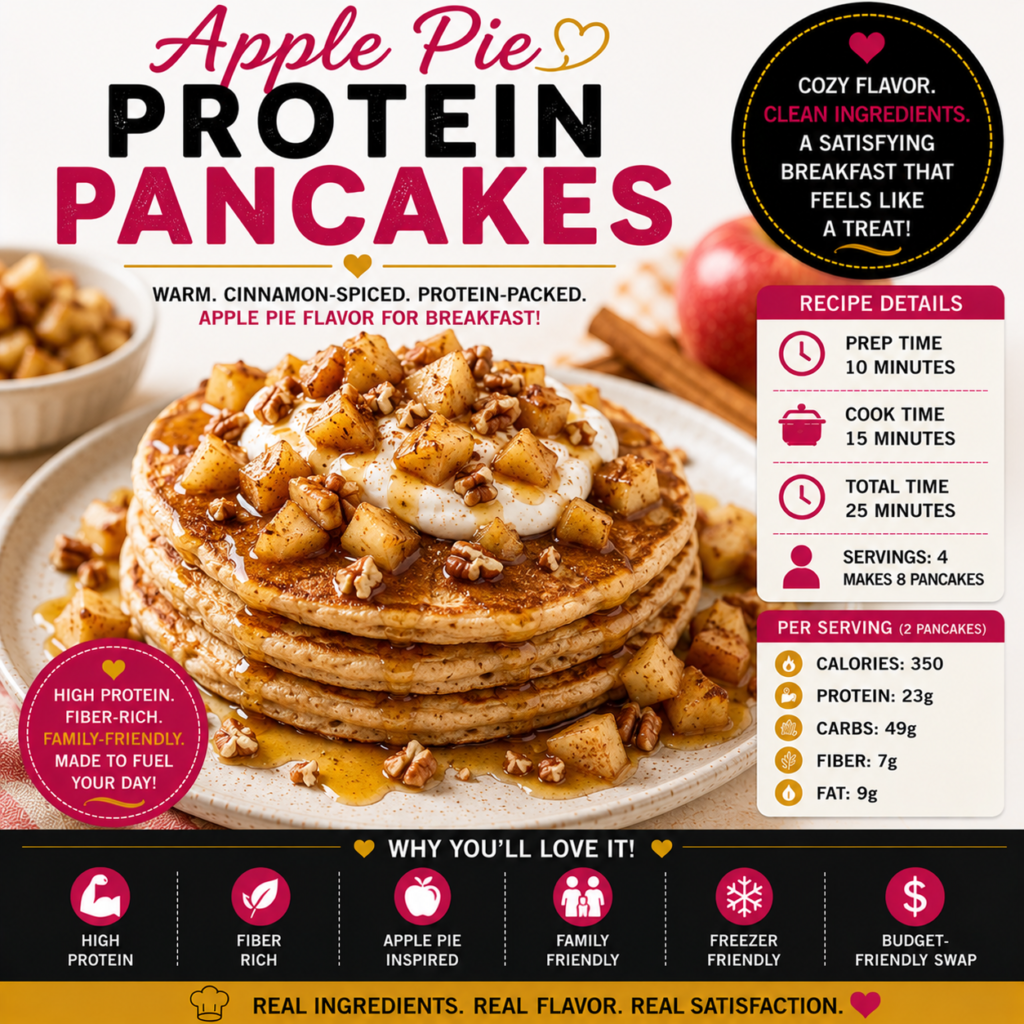
Fluffy cinnamon-spiced protein pancakes topped with warm, tender apples bring all the cozy flavor of homemade apple pie to the breakfast table. Greek yogurt, oats, eggs, and fresh apples create a satisfying breakfast with plenty of protein and fiber, while a touch of vanilla, cinnamon, and maple makes every bite feel like a special weekend treat.
Prep Time: 10 minutes
Cook Time: 15 minutes
Total Time: 25 minutes
Servings: 4
Makes: Approximately 8 pancakes
Ingredients
For the Protein Pancakes:
1½ cups old-fashioned rolled oats
1 scoop vanilla protein powder
1½ teaspoons baking powder
1 teaspoon ground cinnamon
¼ teaspoon ground nutmeg
Pinch of salt
2 large eggs
¾ cup plain Greek yogurt
½ cup milk of choice
1 teaspoon vanilla extract
1 tablespoon pure maple syrup, optional
Cooking spray or a small amount of butter for the skillet
For the Warm Apple Topping:
2 medium apples, peeled or unpeeled and diced
1 teaspoon butter or olive oil
1 teaspoon ground cinnamon
⅛ teaspoon ground nutmeg
1 teaspoon fresh lemon juice
1–2 teaspoons pure maple syrup, optional
2 tablespoons water
Optional for Serving:
Plain Greek yogurt
Chopped toasted pecans or walnuts
Light drizzle of pure maple syrup
Extra cinnamon
Fresh berries
Directions
Add the rolled oats to a blender and blend until they reach a flour-like consistency.
Add the protein powder, baking powder, cinnamon, nutmeg, and salt. Pulse briefly to combine.
Add the eggs, Greek yogurt, milk, vanilla extract, and maple syrup if using. Blend until smooth.
Allow the pancake batter to rest for approximately 5 minutes while you prepare the apple topping.
Heat the butter or olive oil in a small skillet over medium heat. Add the diced apples, cinnamon, nutmeg, lemon juice, maple syrup if using, and water.
Cook the apples for approximately 6–8 minutes, stirring occasionally, until tender and coated in the warm cinnamon mixture. Reduce the heat and keep warm.
Heat a large nonstick skillet or griddle over medium-low heat and lightly coat with cooking spray or butter.
Pour approximately ¼ cup of batter onto the skillet for each pancake.
Cook until bubbles begin forming on the surface and the edges appear set, approximately 2–3 minutes.
Flip carefully and cook for another 1–2 minutes, or until golden brown and cooked through.
Divide the pancakes among four plates and spoon the warm cinnamon apples over the top.
Finish with Greek yogurt, toasted pecans, additional cinnamon, or a light drizzle of maple syrup if desired.
Make It Your Way
Want even more protein? Serve the pancakes with additional Greek yogurt or use a higher-protein milk.
Love apple crisp? Sprinkle a tablespoon of toasted oats and chopped pecans over the warm apples for extra crunch.
Want less added sugar? Skip the maple syrup in both the batter and apple topping. Naturally sweet apples, vanilla, and cinnamon provide plenty of flavor.
Need a nut-free version? Leave off the pecans or walnuts and use pumpkin or sunflower seeds if you want additional crunch.
Want extra fruit? Add blueberries to the pancake batter or serve fresh berries alongside the warm apples.
Budget-Friendly Swap: Use whichever apples are on sale instead of buying a specific variety. Slightly soft apples that are no longer ideal for snacking are also perfect for cooking and help reduce food waste.
Storage & Meal Prep
Allow leftover pancakes and cooked apples to cool completely before storing them in separate airtight containers. Refrigerate for up to 4 days.
For meal prep, portion two pancakes into individual containers and store the apple topping separately when possible.
Reheat pancakes in a toaster, toaster oven, air fryer, skillet, or microwave until thoroughly heated. Warm the apple topping separately and spoon it over the pancakes just before serving.
The pancakes can also be frozen for up to 2 months. Place parchment paper between them before freezing so individual pancakes are easy to remove. Thaw overnight or reheat directly from frozen.
Nutrition Information
Estimated per serving of 2 pancakes with apple topping: approximately 350 calories • 23g protein • 49g carbohydrates • 7g fiber • 9g fat
Nutrition values are estimates and may vary depending on the protein powder, yogurt, milk, apples, sweetener, cooking fat, toppings, serving size, and specific ingredient brands used.
Why You’ll Love It
High Protein • Fiber-Rich • Apple Pie Inspired • Family-Friendly • Freezer Friendly • Budget-Friendly Swap
Açaí Berry Power Protein Bowl
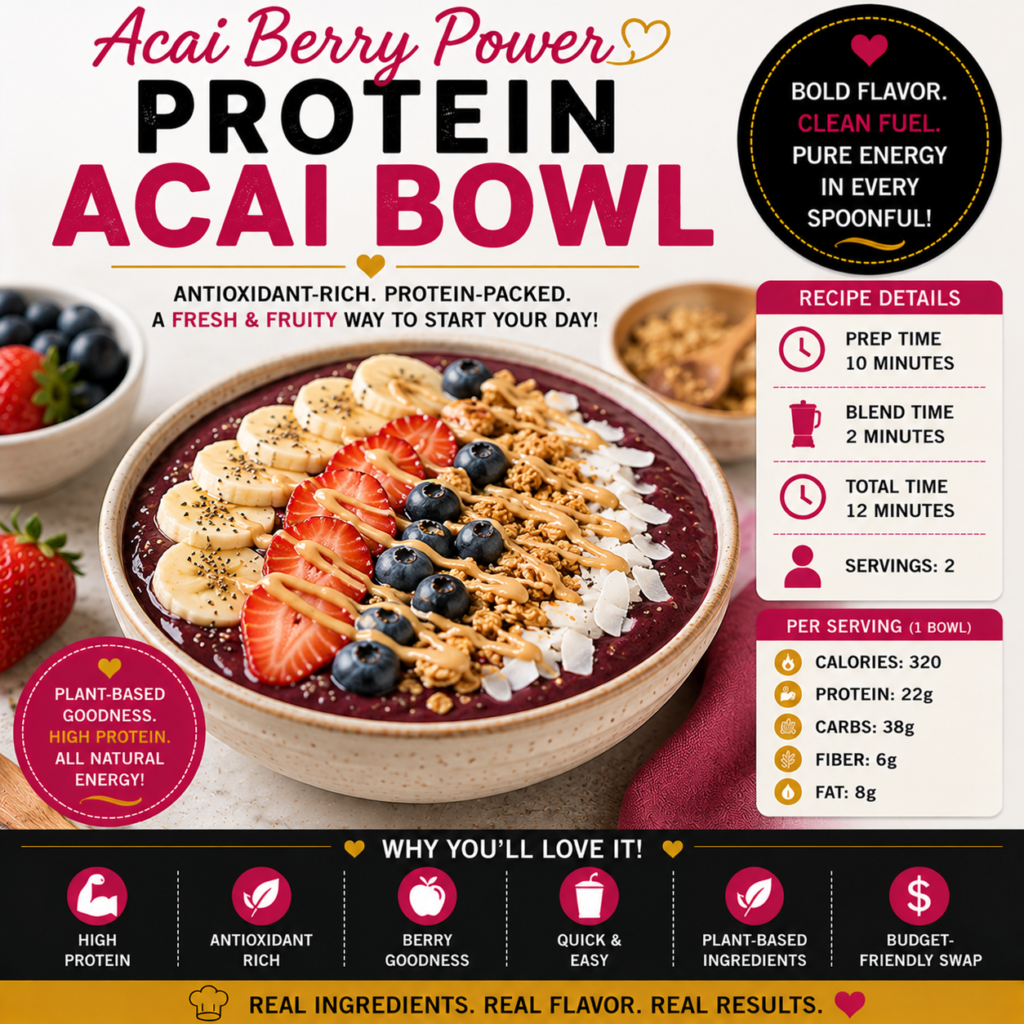
Thick, creamy açaí blended with berries and banana creates the base for this colorful breakfast bowl, while protein powder, chia seeds, fresh fruit, and a little nut or seed butter help turn it into a satisfying meal. It’s cold, fruity, refreshing, and loaded with texture—perfect when you want something that feels more exciting than an ordinary breakfast smoothie.
Prep Time: 10 minutes
Blend Time: 2 minutes
Total Time: 12 minutes
Servings: 2
Ingredients
For the Açaí Bowl:
2 unsweetened frozen açaí packets
1 frozen banana
1 cup frozen mixed berries
1 scoop vanilla or unflavored protein powder
½ cup plain Greek yogurt or unsweetened plant-based yogurt
¼–½ cup unsweetened milk of choice
1 tablespoon chia seeds
½ teaspoon vanilla extract
For the Toppings:
½ banana, sliced
½ cup sliced fresh strawberries
¼ cup fresh blueberries
¼ cup lower-sugar granola
1 tablespoon unsweetened coconut flakes
1 tablespoon natural peanut butter, almond butter, or sunflower seed butter
1 teaspoon chia seeds
Directions
Break the frozen açaí packets into smaller pieces before opening them to make blending easier.
Add the milk to a high-powered blender first, followed by the Greek yogurt, protein powder, chia seeds, vanilla, frozen banana, frozen berries, and açaí.
Blend until thick and smooth, stopping to scrape down the sides as necessary.
Add additional milk 1 tablespoon at a time only if needed. Keep the mixture thick enough to eat with a spoon rather than drink through a straw.
Divide the açaí mixture between two bowls.
Arrange the sliced banana, strawberries, blueberries, granola, coconut flakes, and chia seeds over the top.
Drizzle each bowl with a small amount of nut or seed butter.
Serve immediately while thick and cold.
Make It Your Way
Want even more protein? Add additional Greek yogurt or use a higher-protein milk.
Prefer a tropical bowl? Replace some of the berries with frozen mango or pineapple.
Want extra crunch? Add pumpkin seeds, chopped almonds, walnuts, or pecans.
Need a nut-free version? Use sunflower seed butter and pumpkin or sunflower seeds.
Want less added sugar? Choose unsweetened açaí packets, unsweetened coconut, and a lower-sugar granola. The fruit provides plenty of natural sweetness.
Budget-Friendly Swap: Açaí can be one of the more expensive ingredients in this collection. Stretch one açaí packet with additional frozen mixed berries, or occasionally make the bowl entirely with frozen berries and banana for a similar thick fruit bowl at a lower cost.
Storage & Meal Prep
Açaí bowls have the best texture immediately after blending and are not ideal for storing fully assembled.
For faster mornings, portion the açaí, banana, and frozen berries into individual freezer bags or containers.
Keep dry toppings such as granola, coconut, chia seeds, and nuts portioned separately so they’re ready to use.
When you’re ready to eat, blend one frozen fruit pack with the yogurt, protein powder, and milk, then add the prepared toppings.
Do not add granola or other crunchy toppings until serving, or they may become soggy.
Nutrition Information
Estimated per serving of 1 bowl: approximately 320 calories • 22g protein • 38g carbohydrates • 6g fiber • 8g fat
Nutrition values are estimates and may vary depending on the açaí, protein powder, yogurt, milk, fruit, granola, nut or seed butter, toppings, serving size, and specific ingredient brands used.
Why You’ll Love It
High Protein • Antioxidant-Rich • Berry Goodness • Quick & Easy • Plant-Based Option • Budget-Friendly Swap
Tropical Green Protein Smoothie
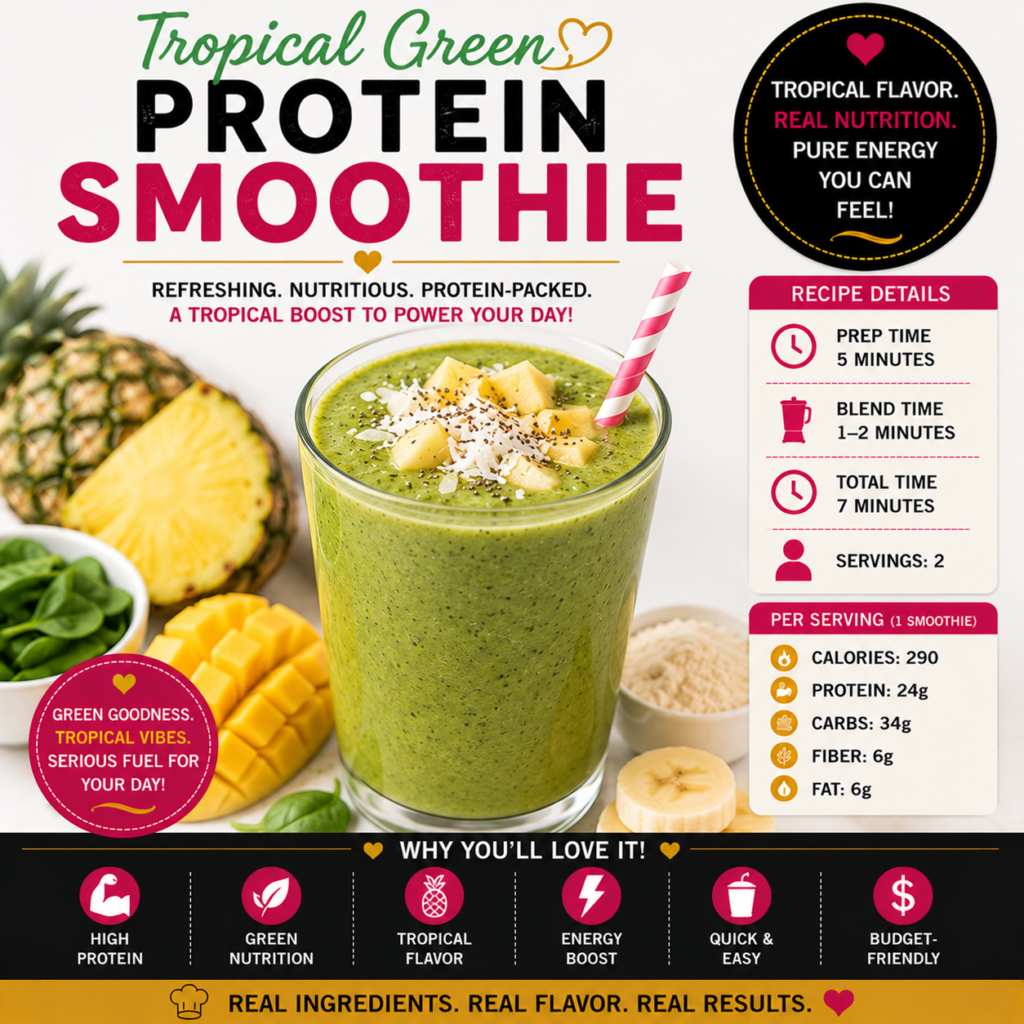
Sweet pineapple, juicy mango, creamy banana, and fresh spinach blend into a tropical smoothie that’s bright, refreshing, and surprisingly delicious. Vanilla protein, chia seeds, and Greek yogurt add staying power, while the naturally sweet tropical fruit helps make this an easy way to enjoy your greens without feeling like you’re drinking a salad.
Prep Time: 5 minutes
Blend Time: 1–2 minutes
Total Time: 7 minutes
Servings: 2
Ingredients
1 cup frozen pineapple chunks
1 cup frozen mango chunks
1 small frozen banana
2 packed cups fresh baby spinach
1 cup plain Greek yogurt
1 scoop vanilla protein powder
1 cup unsweetened milk of choice
1 tablespoon chia seeds
½ teaspoon vanilla extract
1 teaspoon fresh lime juice
¼ teaspoon ground ginger, optional
½ cup ice, optional
Optional for Serving:
Fresh pineapple
Unsweetened coconut flakes
Chia seeds
Fresh mint
Directions
Pour the milk into the blender first.
Add the Greek yogurt, protein powder, chia seeds, vanilla extract, lime juice, and ginger if using.
Add the spinach, followed by the frozen pineapple, mango, and banana.
Blend on high until completely smooth and creamy.
If the smoothie is too thick, add a small splash of milk and blend again.
For a thicker and colder smoothie, add ice and blend until your preferred consistency is reached.
Taste before adding any sweetener. The pineapple, mango, and ripe banana should provide plenty of natural sweetness.
Divide between two glasses.
Top with fresh pineapple, coconut flakes, chia seeds, or mint if desired and serve immediately.
Make It Your Way
Want even more protein? Use a higher-protein Greek yogurt or higher-protein milk.
Don’t love the taste of greens? Start with 1 cup of spinach instead of 2. The tropical fruit helps disguise the flavor, and you can gradually increase the spinach over time.
Want an extra-creamy tropical version? Add ¼ avocado. It creates a rich texture without making the smoothie taste like avocado.
Prefer kale? Replace some or all of the spinach with baby kale, although the flavor will be slightly stronger.
Need a dairy-free option? Use unsweetened plant-based yogurt, plant-based milk, and a dairy-free protein powder.
Budget-Friendly Swap: Frozen pineapple and mango are convenient and reduce food waste, but you can use whichever frozen tropical fruit blend is least expensive. Buy ripe bananas on sale, peel them, and freeze them for future smoothies.
Storage & Meal Prep
This smoothie has the best flavor and texture immediately after blending.
For quick morning preparation, portion the pineapple, mango, banana, and spinach into individual freezer bags or containers and freeze.
When you’re ready for breakfast, add the milk, Greek yogurt, protein powder, chia seeds, and other refrigerated ingredients to the blender, then add one prepared freezer pack.
If taking the smoothie to work or on the go, pour it into an insulated container and keep it cold until ready to drink.
Refrigerate any leftover smoothie promptly and use within 24 hours. Shake or stir well before drinking.
Nutrition Information
Estimated per serving: approximately 290 calories • 24g protein • 34g carbohydrates • 6g fiber • 6g fat
Nutrition values are estimates and may vary depending on the protein powder, yogurt, milk, fruit, chia seeds, toppings, serving size, and specific ingredient brands used.
Why You’ll Love It
High Protein • Green Nutrition • Tropical Flavor • Naturally Sweet • Quick & Easy • Budget-Friendly Swap
Peanut Butter Banana Protein Overnight Oats
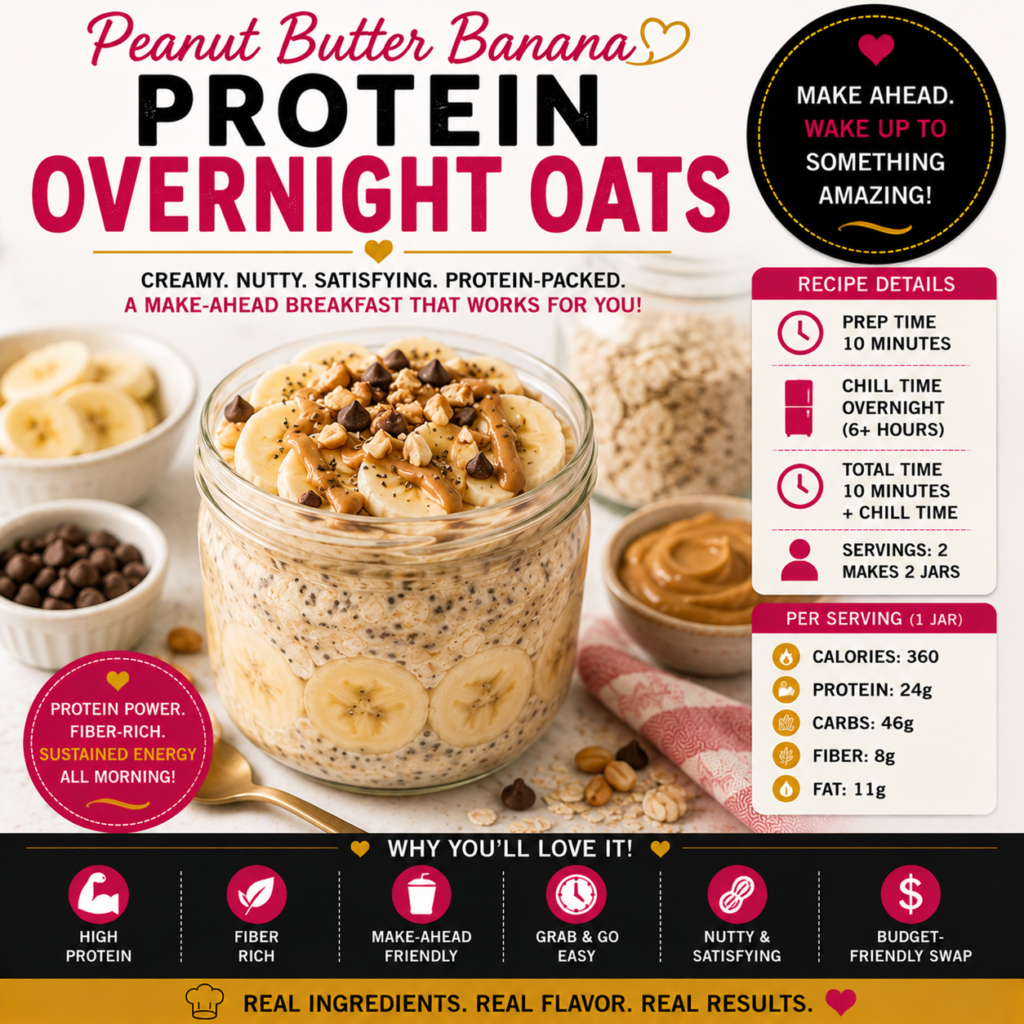
Creamy peanut butter, naturally sweet banana, vanilla, and a touch of cinnamon turn simple overnight oats into a rich and satisfying breakfast that tastes almost like a peanut butter banana treat. Greek yogurt, chia seeds, and protein powder add extra protein and staying power, making this an easy make-ahead breakfast you can grab straight from the refrigerator on a busy morning.
Prep Time: 10 minutes
Chill Time: 6–8 hours or overnight
Total Time: 10 minutes + chill time
Servings: 2
Makes: 2 jars
Ingredients
1 cup old-fashioned rolled oats
1 cup milk of choice
½ cup plain Greek yogurt
1 medium ripe banana, mashed
2 tablespoons natural peanut butter
1 scoop vanilla protein powder
1 tablespoon chia seeds
1 teaspoon vanilla extract
½ teaspoon ground cinnamon
Pinch of salt
1–2 teaspoons pure maple syrup or honey, optional
Optional Toppings:
Sliced banana
1 teaspoon peanut butter
Chopped peanuts
Chia seeds
Small sprinkle of dark chocolate chips
Cinnamon
Directions
Add the mashed banana, milk, Greek yogurt, peanut butter, vanilla extract, and maple syrup or honey if using to a medium bowl or large measuring cup.
Whisk until the peanut butter is well incorporated and the mixture is creamy.
Add the rolled oats, protein powder, chia seeds, cinnamon, and salt.
Stir thoroughly until all ingredients are evenly combined.
Divide the mixture between two jars or airtight containers.
Cover and refrigerate for at least 6 hours, preferably overnight, so the oats and chia seeds can soften and thicken.
In the morning, stir each serving well. If the oats are thicker than you prefer, add a splash of milk until they reach your desired consistency.
Top with fresh banana, a small drizzle of peanut butter, chopped peanuts, chia seeds, cinnamon, or a few dark chocolate chips if desired.
Enjoy chilled, or gently warm the oats if you prefer a hot breakfast.
Make It Your Way
Want even more protein? Use a higher-protein Greek yogurt or milk, or adjust the protein powder according to the product directions.
Love chocolate and peanut butter? Use chocolate protein powder or add a small amount of unsweetened cocoa powder.
Want more texture? Add chopped peanuts just before serving so they stay crunchy.
Need a nut-free version? Replace peanut butter with sunflower seed butter and leave off the peanuts.
Want less added sugar? Use a very ripe banana and skip the maple syrup or honey. The banana provides plenty of natural sweetness.
Don’t love the texture of traditional oatmeal? Blend the oats briefly before mixing them with the remaining ingredients. This creates a smoother, creamier texture while keeping the convenience of overnight oats.
Budget-Friendly Swap: Bananas and oats are inexpensive breakfast staples. Store-brand oats and peanut butter work perfectly, and overripe bananas are especially good in this recipe because they’re naturally sweeter.
Storage & Meal Prep
Store the overnight oats covered in the refrigerator for up to 4 days.
For meal prep, prepare several jars at once and keep fresh banana, peanuts, and other toppings separate until serving.
If using banana slices as a topping, add them just before eating for the freshest appearance and texture.
The oats will continue to thicken as they sit. Stir in a splash of milk before serving if you prefer a thinner consistency.
Keep the prepared oats refrigerated until ready to eat.
Nutrition Information
Estimated per serving of 1 jar: approximately 360 calories • 24g protein • 46g carbohydrates • 8g fiber • 11g fat
Nutrition values are estimates and may vary depending on the oats, milk, yogurt, protein powder, peanut butter, banana, sweetener, toppings, serving size, and specific ingredient brands used.
Why You’ll Love It
High Protein • Fiber-Rich • Make-Ahead Friendly • Grab & Go • Creamy & Satisfying • Budget-Friendly Swap
Avocado Egg Protein Breakfast Bowl
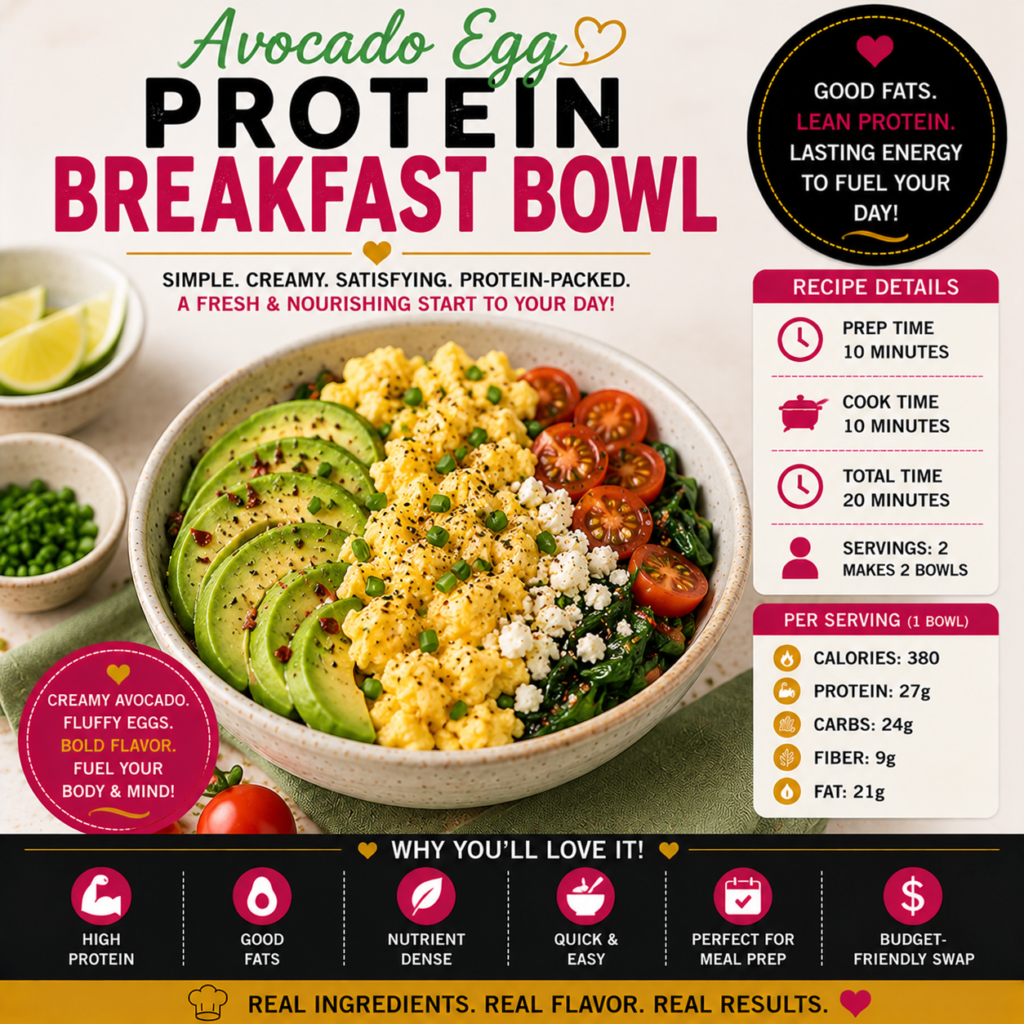
Creamy avocado, fluffy seasoned eggs, sautéed spinach, juicy tomatoes, and tangy feta come together in this colorful protein-packed breakfast bowl. It’s fresh, savory, and satisfying without being heavy, giving you a simple way to load your morning with protein, vegetables, fiber, and healthy fats in one delicious bowl.
Prep Time: 10 minutes
Cook Time: 10 minutes
Total Time: 20 minutes
Servings: 2
Makes: 2 breakfast bowls
Ingredients
4 large eggs
½ cup liquid egg whites
1 medium avocado, sliced
2 cups fresh baby spinach
1 cup cherry or grape tomatoes, halved
¼ cup crumbled feta cheese
2 green onions, thinly sliced
1 teaspoon olive oil
½ teaspoon garlic powder
¼ teaspoon smoked paprika
¼ teaspoon black pepper
Pinch of salt
Pinch of crushed red pepper flakes, optional
1 teaspoon fresh lemon or lime juice
Optional for Serving:
Fresh salsa
Hot sauce
Everything bagel seasoning
Fresh cilantro
Whole-grain toast
Fresh fruit
Directions
Heat the olive oil in a large nonstick skillet over medium heat.
Add the spinach and half of the tomatoes. Cook for approximately 2–3 minutes, or until the spinach is wilted and the tomatoes are slightly softened.
Transfer the vegetables to two serving bowls.
In a medium bowl, whisk together the eggs, egg whites, garlic powder, smoked paprika, black pepper, and a small pinch of salt.
Pour the egg mixture into the skillet and reduce the heat to medium-low.
Cook slowly, gently folding the eggs with a spatula until they are fluffy and completely set.
Divide the scrambled eggs between the two bowls.
Arrange the sliced avocado and remaining fresh tomatoes alongside the eggs and spinach.
Sprinkle each bowl with feta cheese, green onion, and crushed red pepper flakes if desired.
Finish the avocado with fresh lemon or lime juice.
Serve immediately with salsa, hot sauce, whole-grain toast, or fresh fruit if desired.
Make It Your Way
Want even more protein? Add extra egg whites, lean turkey sausage, grilled chicken, or a spoonful of cottage cheese.
Want some healthy carbohydrates? Add ½ cup of roasted sweet potatoes, quinoa, or brown rice to each bowl for an even heartier breakfast.
Don’t like feta? Try reduced-fat cheddar, mozzarella, goat cheese, or leave the cheese out completely.
Want more vegetables? Mushrooms, bell peppers, onions, zucchini, kale, and broccoli all work well.
Love Southwest flavors? Add black beans, corn, salsa, cilantro, cumin, and a squeeze of lime.
Budget-Friendly Swap: Avocado prices can vary considerably. When they’re expensive, use half an avocado and add black beans or roasted sweet potatoes to keep the bowl filling without increasing the cost.
Storage & Meal Prep
For meal prep, cook the eggs, spinach, and sautéed tomatoes and allow them to cool before dividing them into airtight containers.
Refrigerate the cooked components for up to 4 days.
Keep avocado, fresh tomatoes, feta, green onions, and other cold toppings separate until serving whenever possible.
Reheat the egg and vegetable mixture until thoroughly heated, then add the fresh toppings.
For the freshest color and texture, slice the avocado immediately before serving. If preparing it ahead, lightly coat it with lemon or lime juice and store it tightly covered in the refrigerator.
Nutrition Information
Estimated per serving of 1 bowl: approximately 380 calories • 27g protein • 24g carbohydrates • 9g fiber • 21g fat
Nutrition values are estimates and may vary depending on the eggs, avocado, feta cheese, vegetables, cooking oil, toppings, serving size, and specific ingredient brands used.
Why You’ll Love It
High Protein • Healthy Fats • Veggie-Packed • Fiber-Rich • Quick & Easy • Meal Prep Friendly • Budget-Friendly Swap
Mixed Berry Protein Smoothie
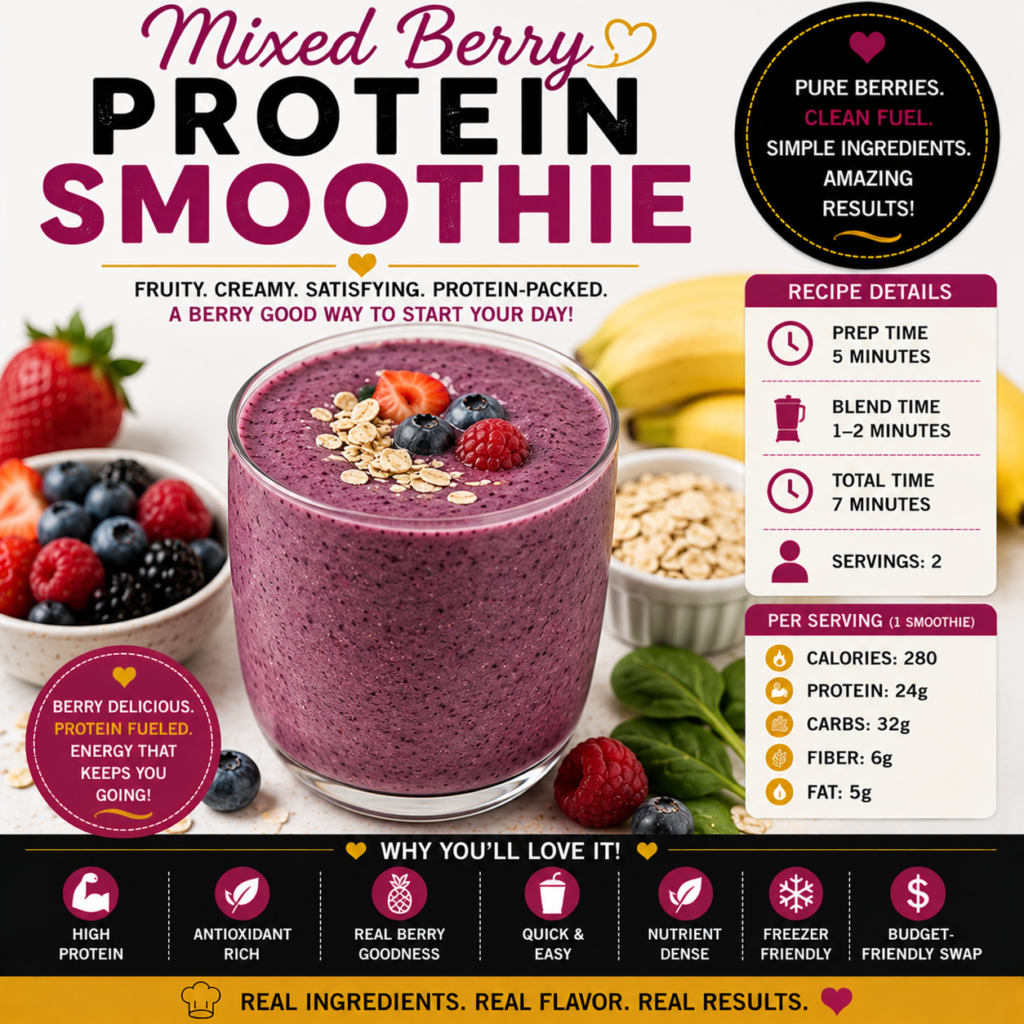
Sweet strawberries, blueberries, raspberries, and blackberries blend with creamy banana, Greek yogurt, and vanilla protein for a thick and refreshing breakfast smoothie. A handful of spinach adds extra greens without overpowering the berry flavor, while oats and chia seeds add fiber and help make this smoothie satisfying enough to carry you through a busy morning.
Prep Time: 5 minutes
Blend Time: 1–2 minutes
Total Time: 7 minutes
Servings: 2
Ingredients
1½ cups frozen mixed berries
1 small frozen banana
1 cup plain Greek yogurt
1 scoop vanilla protein powder
1 cup unsweetened milk of choice
1 cup fresh baby spinach
¼ cup old-fashioned rolled oats
1 tablespoon chia seeds
½ teaspoon vanilla extract
¼ teaspoon ground cinnamon, optional
½ cup ice, optional
Optional for Serving:
Fresh strawberries
Fresh blueberries
Fresh raspberries
Small sprinkle of rolled oats
Chia seeds
Directions
Pour the milk into the blender first.
Add the Greek yogurt, protein powder, rolled oats, chia seeds, vanilla extract, and cinnamon if using.
Add the spinach, frozen mixed berries, and frozen banana.
Blend on high until completely smooth and creamy.
If the smoothie is too thick, add a small splash of milk and blend again.
For an extra-thick and frosty smoothie, add ice and blend until your preferred consistency is reached.
Taste the smoothie before adding any sweetener. The berries and ripe banana should provide plenty of natural sweetness.
Divide between two glasses.
Top with a few fresh berries, rolled oats, or chia seeds if desired.
Serve immediately while cold and creamy.
Make It Your Way
Want even more protein? Use a higher-protein Greek yogurt or milk, or adjust the protein powder according to the product directions.
Don’t want spinach? Leave it out. The smoothie will still provide plenty of fruit and berry flavor.
Want more greens without changing the flavor much? Increase the spinach to 2 cups.
Prefer a smoothie bowl? Reduce the amount of milk and blend until thick enough to eat with a spoon. Top with berries, seeds, nuts, or a small amount of granola.
Need a dairy-free version? Use plant-based yogurt, plant-based milk, and dairy-free protein powder.
Want less natural sugar? Use half the banana and add a little more Greek yogurt or ice.
Budget-Friendly Swap: Frozen mixed berries are usually more economical than purchasing several varieties of fresh berries separately. Store-brand frozen berry blends work perfectly and also reduce food waste.
Storage & Meal Prep
This smoothie tastes best immediately after blending.
For easy meal prep, portion the frozen berries, banana, spinach, and oats into individual freezer bags or containers.
When you’re ready for breakfast, add the milk, Greek yogurt, protein powder, chia seeds, and vanilla to the blender, followed by one prepared freezer pack.
If taking the smoothie to work or on the go, pour it into an insulated container and keep it cold until ready to drink.
Refrigerate leftover smoothie promptly and use within 24 hours. Shake or stir thoroughly before drinking.
Nutrition Information
Estimated per serving: approximately 280 calories • 24g protein • 32g carbohydrates • 6g fiber • 5g fat
Nutrition values are estimates and may vary depending on the berries, banana, protein powder, yogurt, milk, oats, chia seeds, toppings, serving size, and specific ingredient brands used.
Why You’ll Love It
High Protein • Antioxidant-Rich • Berry-Packed • Quick & Easy • Freezer Prep Friendly • Budget-Friendly Swap
Southwest Protein Breakfast Wrap
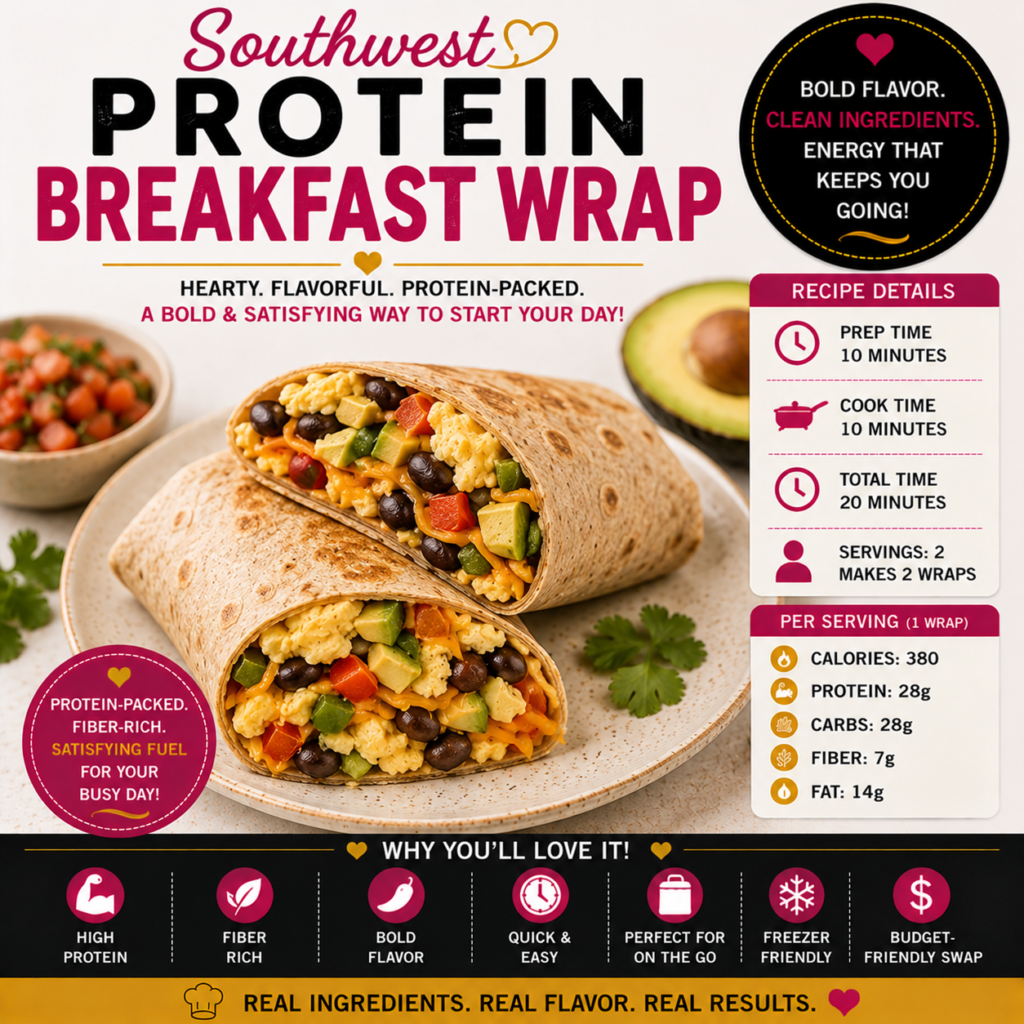
Fluffy eggs, hearty black beans, colorful peppers, creamy avocado, and melted cheese come together in a warm whole-grain wrap for a bold and satisfying breakfast. Southwest seasonings and fresh salsa give every bite plenty of flavor, while protein and fiber make this an easy breakfast to prepare ahead and take with you on busy mornings.
Prep Time: 10 minutes
Cook Time: 10 minutes
Total Time: 20 minutes
Servings: 2
Makes: 2 large wraps
Ingredients
2 large whole-grain tortillas
4 large eggs
½ cup liquid egg whites
¾ cup black beans, rinsed and drained
½ red bell pepper, diced
½ green bell pepper, diced
¼ small onion, diced
½ cup shredded reduced-fat cheddar or Mexican-blend cheese
½ avocado, diced
¼ cup fresh salsa
1 teaspoon olive oil
½ teaspoon ground cumin
½ teaspoon smoked paprika
¼ teaspoon garlic powder
¼ teaspoon black pepper
Pinch of salt
2 tablespoons chopped fresh cilantro, optional
Fresh lime juice, to taste
Optional for Serving:
Additional salsa
Plain Greek yogurt
Hot sauce
Fresh fruit
Directions
Heat the olive oil in a large nonstick skillet over medium heat.
Add the red and green bell peppers and onion. Cook for approximately 3–4 minutes until slightly softened.
Add the black beans, cumin, smoked paprika, and garlic powder. Cook for another 1–2 minutes until the beans are warmed through. Transfer the mixture to a plate.
In a bowl, whisk together the eggs, egg whites, black pepper, and a small pinch of salt.
Pour the egg mixture into the skillet and cook over medium-low heat, gently stirring until the eggs are fluffy and completely set.
Warm the tortillas briefly in a clean skillet or microwave until soft and flexible.
Divide the scrambled eggs between the two tortillas.
Top each with the seasoned black bean and pepper mixture, shredded cheese, diced avocado, salsa, and cilantro.
Finish with a squeeze of fresh lime juice.
Fold the sides of each tortilla inward and roll tightly to form a wrap.
For a crisp exterior, place each wrap seam-side down in a dry skillet over medium heat and cook for approximately 1–2 minutes per side until lightly golden.
Serve warm with additional salsa, Greek yogurt, hot sauce, or fresh fruit if desired.
Make It Your Way
Want even more protein? Add lean turkey sausage, shredded chicken, or additional egg whites.
Want more vegetables? Add spinach, mushrooms, tomatoes, corn, zucchini, or jalapeños.
Love extra heat? Add cayenne pepper, diced jalapeño, chipotle seasoning, or your favorite hot sauce.
Need a dairy-free version? Leave out the cheese or use your preferred dairy-free alternative.
Want to make smaller portions? Divide the filling among four smaller whole-grain tortillas instead of two large wraps.
Budget-Friendly Swap: Black beans and eggs provide plenty of inexpensive protein, so this recipe doesn’t require breakfast meat. Frozen peppers and store-brand tortillas also work well and can help keep the cost down.
Storage & Meal Prep
Allow the cooked egg, bean, and vegetable filling to cool before assembling wraps for meal prep.
Refrigerate assembled wraps in airtight containers for up to 4 days.
For freezer meal prep, leave out the avocado and fresh salsa, wrap each cooled breakfast wrap individually, and freeze for up to 2 months.
Thaw frozen wraps overnight in the refrigerator when possible and reheat until steaming hot throughout.
For the best texture, finish reheated wraps in a skillet, toaster oven, or air fryer to crisp the tortilla. Add fresh avocado and salsa after reheating.
Nutrition Information
Estimated per serving of 1 wrap: approximately 380 calories • 28g protein • 38g carbohydrates • 7g fiber • 14g fat
Nutrition values are estimates and may vary depending on the tortillas, eggs, beans, cheese, avocado, vegetables, cooking oil, toppings, serving size, and specific ingredient brands used.
Why You’ll Love It
High Protein • Fiber-Rich • Bold Southwest Flavor • Grab & Go • Meal Prep Friendly • Freezer Friendly • Budget-Friendly Swap
Chocolate Banana Protein Chia Pudding
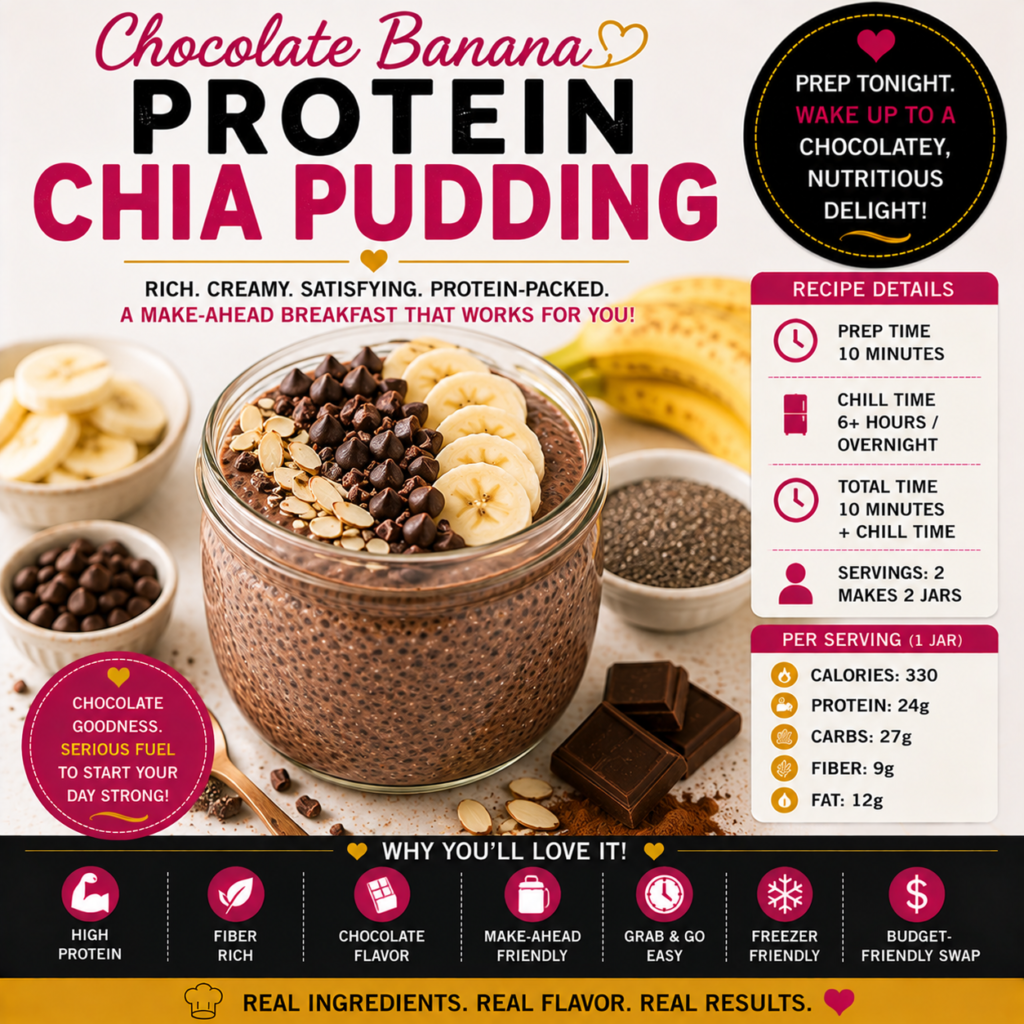
Rich chocolate, creamy banana, and vanilla come together in this thick and satisfying chia pudding that tastes more like a chocolate treat than an everyday breakfast. Chia seeds, Greek yogurt, and protein powder provide plenty of protein and fiber, while ripe banana adds natural sweetness. Prepare it the night before and wake up to breakfast already waiting in the refrigerator.
Prep Time: 10 minutes
Chill Time: 6 hours or overnight
Total Time: 10 minutes + chill time
Servings: 2
Makes: 2 jars
Ingredients
½ cup chia seeds
1½ cups milk of choice
½ cup plain Greek yogurt
1 medium ripe banana, mashed
1 scoop chocolate or vanilla protein powder
2 tablespoons unsweetened cocoa powder
1 teaspoon vanilla extract
¼ teaspoon ground cinnamon
Pinch of salt
1–2 teaspoons pure maple syrup or honey, optional
Optional Toppings:
Sliced banana
Dark chocolate chips
Cacao nibs
Sliced almonds
Chopped walnuts or pecans
Fresh strawberries
Small spoonful of Greek yogurt
Directions
Add the mashed banana, milk, Greek yogurt, vanilla extract, and maple syrup or honey if using to a medium mixing bowl.
Whisk until the mixture is smooth and creamy.
Add the chia seeds, protein powder, cocoa powder, cinnamon, and salt.
Whisk thoroughly until there are no large clumps of cocoa or protein powder.
Allow the mixture to sit for approximately 5 minutes, then whisk again. This second mixing helps prevent the chia seeds from settling or clumping together.
Divide the mixture evenly between two jars or airtight containers.
Cover and refrigerate for at least 6 hours or overnight until thick and pudding-like.
Stir well before serving. If the pudding becomes thicker than you prefer, add a small splash of milk and stir until creamy.
Top with sliced banana, dark chocolate chips, cacao nibs, almonds, nuts, berries, or Greek yogurt if desired.
Serve chilled.
Make It Your Way
Want even more protein? Use a higher-protein Greek yogurt or milk, or adjust the protein powder according to the product directions.
Love chocolate and peanut butter? Stir 1 tablespoon of natural peanut butter into the mixture or drizzle a small amount over the top.
Want a smoother texture? Blend the finished chia pudding briefly after it has chilled. This breaks down the chia seeds and creates a smoother, mousse-like consistency.
Want less added sugar? Use a very ripe banana and skip the maple syrup or honey.
Need a dairy-free version? Use plant-based yogurt, plant-based milk, and dairy-free protein powder.
Want a chocolate-covered-strawberry version? Add sliced strawberries just before serving.
Budget-Friendly Swap: Chia seeds are often less expensive when purchased in larger bags rather than small containers. Store-brand cocoa powder, bananas, and milk work perfectly in this recipe, and overripe bananas provide the best natural sweetness.
Storage & Meal Prep
Store the chia pudding covered in the refrigerator for up to 4 days.
For meal prep, prepare several individual jars at once and keep fresh fruit, nuts, and crunchy toppings separate until serving.
The pudding will continue to thicken while refrigerated. Stir in a splash of milk before eating if you prefer a thinner consistency.
Add sliced banana immediately before serving for the freshest appearance and texture.
Keep the prepared pudding refrigerated until ready to eat.
Nutrition Information
Estimated per serving of 1 jar: approximately 330 calories • 24g protein • 27g carbohydrates • 9g fiber • 12g fat
Nutrition values are estimates and may vary depending on the chia seeds, milk, yogurt, protein powder, banana, cocoa powder,
sweetener, toppings, serving size, and specific ingredient brands used.
Why You’ll Love It
High Protein • Fiber-Rich • Chocolate Flavor • Make-Ahead Friendly • Grab & Go • Naturally Sweet • Budget-Friendly Swap
Protein-Packed Breakfast Burrito
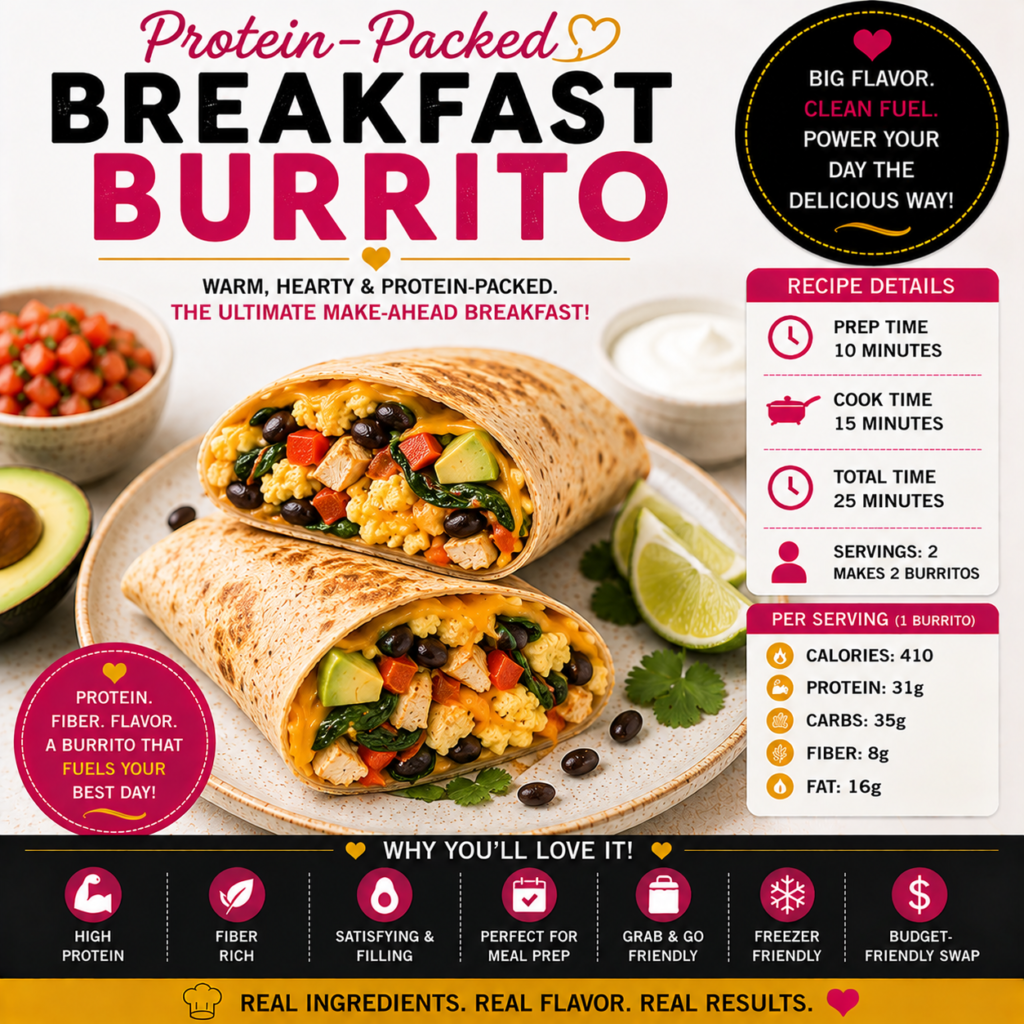
Fluffy eggs, seasoned chicken, black beans, colorful vegetables, creamy avocado, and melted cheese come together inside a warm whole-grain tortilla for a hearty breakfast built to satisfy. This protein-packed burrito delivers the comfort and flavor of a big breakfast while adding fiber-rich beans and vegetables—and it’s freezer-friendly enough to prepare ahead for busy mornings.
Prep Time: 10 minutes
Cook Time: 15 minutes
Total Time: 25 minutes
Servings: 2
Makes: 2 large breakfast burritos
Ingredients
2 large whole-grain tortillas
4 large eggs
½ cup liquid egg whites
4 ounces cooked chicken breast, diced or shredded
½ cup black beans, rinsed and drained
1 cup fresh baby spinach
½ red bell pepper, diced
¼ small onion, diced
½ cup shredded reduced-fat cheddar or Mexican-blend cheese
½ avocado, diced
1 teaspoon olive oil
½ teaspoon smoked paprika
½ teaspoon ground cumin
¼ teaspoon garlic powder
¼ teaspoon black pepper
Pinch of salt
2 tablespoons fresh salsa
1 tablespoon chopped fresh cilantro, optional
Fresh lime juice, to taste
Optional for Serving:
Additional fresh salsa
Plain Greek yogurt
Hot sauce
Fresh fruit
Directions
Heat the olive oil in a large nonstick skillet over medium heat.
Add the bell pepper and onion and cook for approximately 3–4 minutes until they begin to soften.
Add the chicken, black beans, spinach, smoked paprika, cumin, and garlic powder. Cook for another 2–3 minutes until the chicken and beans are thoroughly heated and the spinach has wilted. Transfer the mixture to a plate.
In a bowl, whisk together the eggs, egg whites, black pepper, and a small pinch of salt.
Pour the egg mixture into the skillet and cook over medium-low heat, gently stirring until the eggs are fluffy and completely set.
Warm the tortillas briefly until soft and flexible.
Divide the scrambled eggs between the two tortillas.
Top each with the chicken and black bean mixture, shredded cheese, diced avocado, salsa, and cilantro if using.
Finish with a squeeze of fresh lime juice.
Fold the sides of each tortilla inward and roll tightly to form a burrito.
For a crisp, golden exterior, place each burrito seam-side down in a dry skillet and cook for approximately 1–2 minutes per side.
Serve warm with salsa, Greek yogurt, hot sauce, or fresh fruit if desired.
Make It Your Way
Prefer turkey sausage? Replace the chicken with cooked lean turkey breakfast sausage.
Want to use leftovers? Leftover grilled or roasted chicken works perfectly and makes this recipe even faster.
Want more vegetables? Add mushrooms, tomatoes, zucchini, corn, kale, or additional spinach.
Love extra heat? Add jalapeño, cayenne pepper, chipotle seasoning, or your favorite hot sauce.
Want even more protein? Add additional egg whites or serve with plain Greek yogurt.
Need a meatless version? Leave out the chicken and increase the black beans, eggs, and vegetables.
Budget-Friendly Swap: Use leftover chicken from another meal instead of cooking chicken specifically for the burritos. Eggs and black beans can also replace some or all of the chicken for an economical protein-packed option.
Storage & Meal Prep
Allow the cooked filling to cool before assembling burritos for meal prep.
Refrigerate assembled burritos in airtight containers for up to 4 days.
For freezer meal prep, leave out the avocado and fresh salsa. Wrap each cooled burrito individually and freeze for up to 2 months.
Thaw overnight in the refrigerator when possible, then reheat until steaming hot throughout.
For the best texture, finish reheated burritos in a skillet, toaster oven, or air fryer until the tortilla is lightly crisp.
Add fresh avocado, salsa, Greek yogurt, and other cold toppings after reheating.
Nutrition Information
Estimated per serving of 1 burrito: approximately 410 calories • 31g protein • 35g carbohydrates • 8g fiber • 16g fat
Nutrition values are estimates and may vary depending on the tortillas, chicken, eggs, beans, cheese, avocado, vegetables, cooking oil, toppings, serving size, and specific ingredient brands used.
Why You’ll Love It
High Protein • Fiber-Rich • Satisfying & Filling • Meal Prep Friendly • Grab & Go • Freezer Friendly • Budget-Friendly Swap