Our Approach to Healthy Eating
At Carter Cre8tive Studio, we believe healthier eating should still feel satisfying, flavorful, and realistic. You don’t have to give up the foods you enjoy or make every meal look like “diet food.” Thoughtful ingredient choices, balanced portions, plenty of flavor, and foods you genuinely enjoy can all have a place in a healthier lifestyle.
Our recipes are designed to give you a practical starting point while leaving room to make them your own. Choose the ingredients and portions that work best for you, your family, your preferences, and your individual nutrition needs.
A Note About Nutrition
Nutrition information provided with each recipe is an estimate based on the ingredients, preparation method, and recommended serving size listed. When a complete meal includes recommended sides, the nutrition estimate reflects the full serving shown in the recipe.
Actual nutrition may vary depending on the brands and ingredients you use, substitutions you make, cooking methods, and your individual portion size. Increasing or decreasing the recommended serving size will also change the calories and nutritional values.
Smoky Ranch Roasted Chickpeas
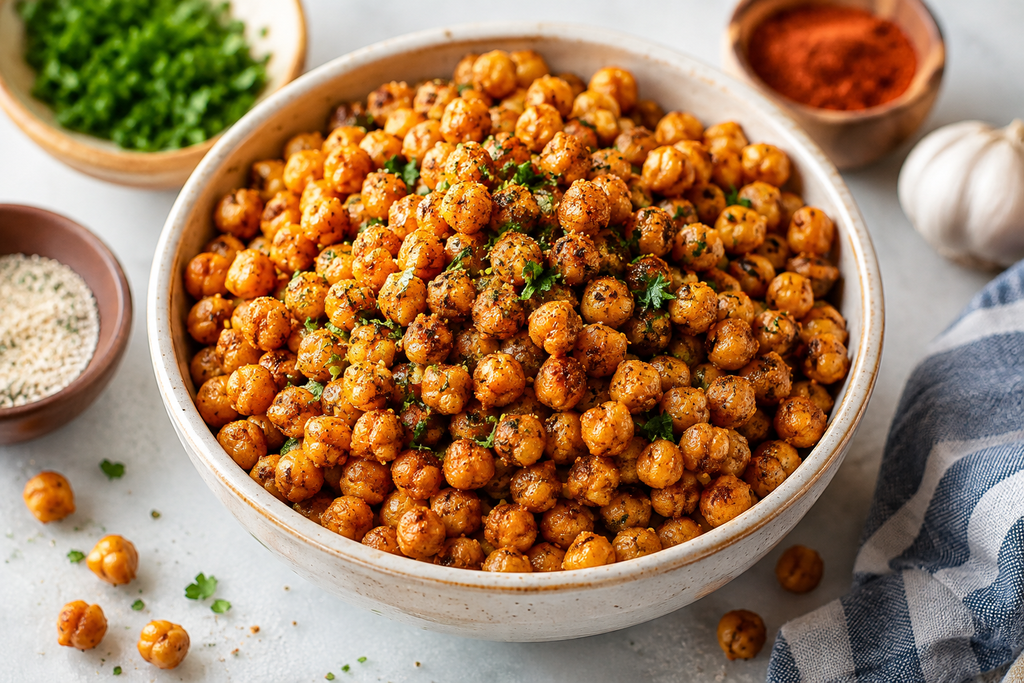
Crunchy, savory, and packed with bold ranch flavor, these Smoky Ranch Roasted Chickpeas are an easy snack for those moments when you want something crispy without reaching for a bag of chips. Chickpeas are tossed with a simple blend of ranch-inspired herbs, garlic, onion, and smoky paprika, then roasted until golden and deliciously crisp.
They’re easy to make, budget-friendly, and perfect for snacking at home, packing for work, or sprinkling over salads for an extra crunch. Make a batch ahead of time and keep them nearby when the afternoon snack craving hits.
Prep Time: 10 minutes
Cook Time: 30–35 minutes
Total Time: 40–45 minutes
Servings: 4
Serving Size: About ½ cup
Difficulty: Easy
Budget Level: $
Best For: Afternoon snacks, work snacks, lunchboxes, meal prep, or a crunchy salad topping
Ingredients
• 2 (15-ounce) cans chickpeas, drained and rinsed
• 1 tablespoon olive oil
• 1 teaspoon smoked paprika
• 1 teaspoon dried parsley
• ¾ teaspoon garlic powder
• ¾ teaspoon onion powder
• ½ teaspoon dried dill
• ½ teaspoon dried chives
• ¼ teaspoon black pepper
• ¼ teaspoon fine sea salt, or to taste
• ⅛ teaspoon cayenne pepper, optional for extra heat
Directions
- Preheat the oven to 425°F. Line a large baking sheet with parchment paper or lightly coat it with cooking spray.
- Drain and rinse the chickpeas thoroughly. Spread them onto a clean kitchen towel or several layers of paper towels and gently pat them very dry. Remove any loose skins if desired. Getting the chickpeas as dry as possible helps them become crisp.
- Transfer the dried chickpeas to the prepared baking sheet. Drizzle with olive oil and toss until evenly coated.
- Spread the chickpeas into a single layer, leaving enough room for hot air to circulate around them.
- Roast for 20 minutes, then carefully shake or stir the pan.
- Continue roasting for another 10–15 minutes, or until the chickpeas are golden, dry, and crisp. Watch them closely during the final few minutes to prevent burning.
- While the chickpeas are still hot, sprinkle them with smoked paprika, parsley, garlic powder, onion powder, dill, chives, black pepper, salt, and optional cayenne.
- Toss until the chickpeas are evenly coated with the seasonings.
- Allow them to cool on the baking sheet for 10–15 minutes. They will continue to crisp as they cool.
- Enjoy warm or completely cooled as a crunchy snack.
Make It Your Way
• Make It Spicy: Increase the cayenne or add a pinch of crushed red pepper.
• Make It Extra Smoky: Add another ¼–½ teaspoon smoked paprika.
• Add a Cheesy Twist: Toss the finished chickpeas with a tablespoon of finely grated Parmesan while they are still warm.
• Go Salt-Free: Leave out the added salt and increase the garlic, dill, smoked paprika, and black pepper for plenty of flavor.
• Air-Fryer Option: Air-fry at 390°F for approximately 12–16 minutes, shaking the basket every few minutes, until crisp. Air fryers vary, so begin checking early.
• Budget-Friendly Tip: Store-brand canned chickpeas work perfectly. You can also cook dried chickpeas in advance and use about 3 cups of cooked chickpeas in place of the two cans.
Storage & Meal Prep
Allow the roasted chickpeas to cool completely before storing. Any remaining warmth can create condensation and soften their crispy texture.
Store at room temperature in a loosely covered container for up to 3 days for the best texture. Avoid refrigerating them if maintaining maximum crispness is the goal, since refrigeration can introduce moisture.
For meal prep, divide cooled chickpeas into individual snack-size portions so they are ready to grab for work, school, errands, or afternoon snacking.
If they lose some of their crunch, spread them on a baking sheet and warm them in a 375°F oven for about 5–8 minutes. Cool before eating.
Nutrition Information
Estimated Nutrition Per Serving:
Calories: approximately 200
Protein: approximately 8 g
Carbohydrates: approximately 28 g
Fiber: approximately 7 g
Total Fat: approximately 7 g
Saturated Fat: approximately 1 g
Sodium: approximately 250–350 mg
Nutrition information is an estimate and may vary depending on the brands, exact ingredient amounts, serving size, and preparation method used. Choosing no-salt-added or lower-sodium chickpeas and adjusting the added salt can reduce the sodium content.
Why You’ll Love It
• Crispy and crunchy enough to satisfy a chip craving
• Made with inexpensive pantry staples
• Provides plant-based protein and fiber
• Bold ranch-inspired flavor with a smoky twist
• Easy to customize with different seasonings
• Simple to portion for grab-and-go snacks
• Naturally vegetarian and easy to make vegan
• Works as both a snack and a crunchy topping for salads or bowls
Crispy Parmesan Zucchini Bites
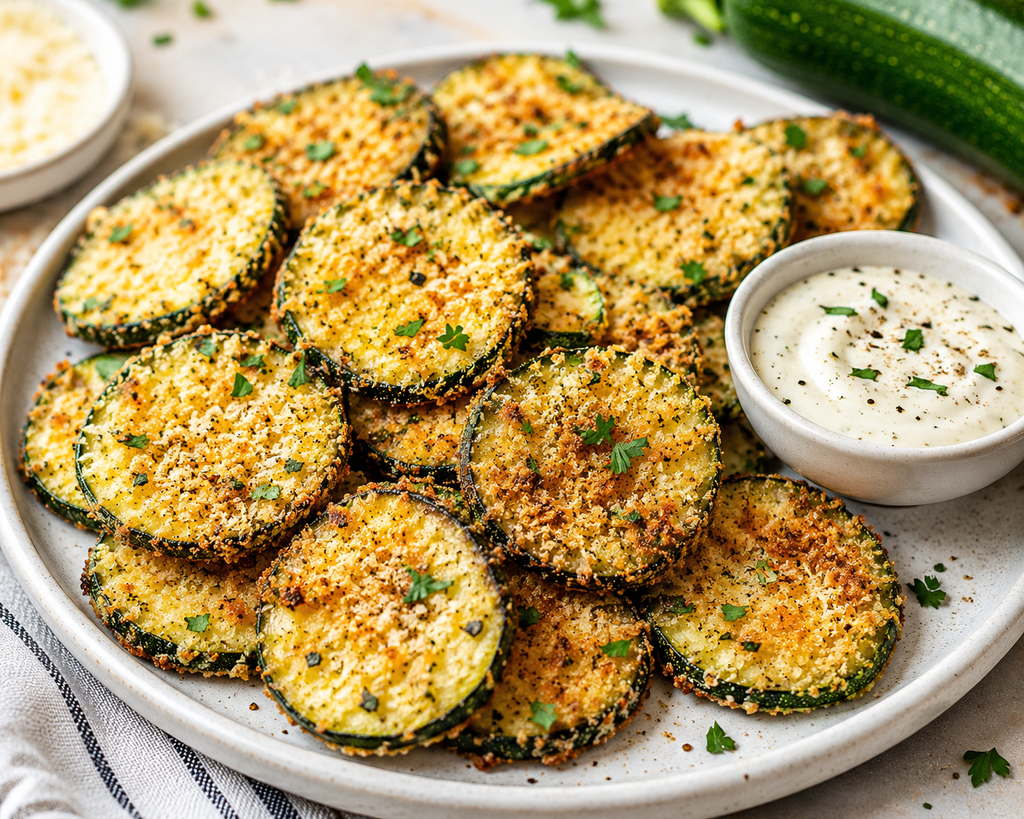
Golden around the edges, tender in the center, and covered with a savory Parmesan-herb coating, these Crispy Parmesan Zucchini Bites turn an everyday vegetable into a snack worth reaching for.
Instead of deep-frying, the zucchini rounds are lightly coated with Parmesan and seasoned whole-wheat breadcrumbs, then baked until beautifully golden and crisp. Serve them warm on their own or add a light marinara, ranch-style Greek yogurt dip, or your favorite dipping sauce.
They’re simple, affordable, and a tasty way to add another serving of vegetables to snack time.
Prep Time: 15 minutes
Cook Time: 18–22 minutes
Total Time: 33–37 minutes
Servings: 4
Serving Size: About 8–10 zucchini bites
Difficulty: Easy
Budget Level: $
Best For: Afternoon snacks, appetizers, family snack time, game-day snacks, or a vegetable side
Ingredients
• 2 medium zucchini
• ½ cup whole-wheat panko breadcrumbs
• ½ cup finely grated Parmesan cheese
• 1 teaspoon Italian seasoning
• ½ teaspoon garlic powder
• ½ teaspoon onion powder
• ¼ teaspoon smoked paprika
• ¼ teaspoon black pepper
• ⅛ teaspoon salt, or to taste
• 1 large egg
• 1 tablespoon water
• Olive oil cooking spray
• 1 tablespoon chopped fresh parsley, optional for garnish
Directions
- Preheat the oven to 425°F. Line a large baking sheet with parchment paper or lightly coat a wire baking rack with cooking spray and place it over a baking sheet.
- Wash and dry the zucchini. Trim the ends and slice the zucchini into approximately ¼-inch-thick rounds. Keeping the slices similar in thickness helps them cook evenly.
- Place the zucchini rounds between clean kitchen towels or paper towels and gently press to remove excess surface moisture. This step helps the coating brown and reduces sogginess.
- In a shallow bowl, combine the whole-wheat panko, Parmesan, Italian seasoning, garlic powder, onion powder, smoked paprika, black pepper, and salt.
- In a second shallow bowl, whisk together the egg and water.
- Dip each zucchini round lightly into the egg mixture, allowing the excess to drip off.
- Press both sides into the Parmesan-breadcrumb mixture until lightly and evenly coated.
- Arrange the zucchini in a single layer on the prepared baking sheet or rack. Do not overcrowd the pan.
- Lightly mist the tops with olive oil cooking spray.
- Bake for 10 minutes. Carefully flip each zucchini bite, lightly spray again if needed, and continue baking for another 8–12 minutes or until the coating is golden and the zucchini is tender.
- For additional browning, broil for 1–2 minutes at the end, watching carefully to prevent burning.
- Sprinkle with fresh parsley if desired and serve warm.
Make It Your Way
• Air-Fryer Option: Arrange the coated zucchini in a single layer and air-fry at 400°F for approximately 8–12 minutes, flipping halfway through. Cook in batches if necessary so the basket is not overcrowded.
• Add Some Heat: Add ¼ teaspoon cayenne pepper or crushed red pepper flakes to the breadcrumb mixture.
• Italian-Style: Add extra Italian seasoning and serve with warm marinara sauce.
• Ranch-Style: Add dried dill and parsley to the coating and serve with a Greek yogurt ranch dip.
• Gluten-Free Option: Substitute gluten-free panko breadcrumbs for the whole-wheat panko.
• Lower-Carb Option: Skip the breadcrumbs and use a mixture of finely grated Parmesan and seasonings. The texture will be different but still delicious.
• Budget-Friendly Tip: Regular panko or homemade whole-wheat breadcrumbs work well if whole-wheat panko is unavailable. Store-brand Parmesan is also perfectly fine.
Storage & Meal Prep
These zucchini bites have their best texture immediately after cooking, when the coating is hot and crisp.
Store leftovers in an airtight container in the refrigerator for up to 3 days.
To reheat, place them in a 400°F oven or air fryer for approximately 4–7 minutes, or until warmed through and crisp around the edges. The microwave will warm them but can soften the coating.
For advance preparation, slice the zucchini and combine the dry coating ingredients ahead of time. Store them separately in the refrigerator, then bread and bake the zucchini shortly before serving for the best texture.
Nutrition Information
Estimated Nutrition Per Serving:
Calories: approximately 140
Protein: approximately 8 g
Carbohydrates: approximately 13 g
Fiber: approximately 2 g
Total Fat: approximately 7 g
Saturated Fat: approximately 3 g
Sodium: approximately 300–400 mg
Nutrition information is an estimate and may vary depending on the exact size of the zucchini, brands of breadcrumbs and Parmesan, amount of coating used, cooking spray, dipping sauce, and serving size. Dipping sauce is not included in the estimate.
Why You’ll Love It
• Crispy and cheesy without deep-frying
• Turns an inexpensive vegetable into a satisfying snack
• Uses simple ingredients available at most grocery stores
• Ready in well under an hour
• Easy to prepare in either the oven or air fryer
• Kid- and family-friendly
• Easy to customize with different seasonings and dipping sauces
• Works as a snack, appetizer, or vegetable side dish
• A flavorful alternative when you’re craving something crunchy and savory
Sweet & Smoky Cinnamon Pecans
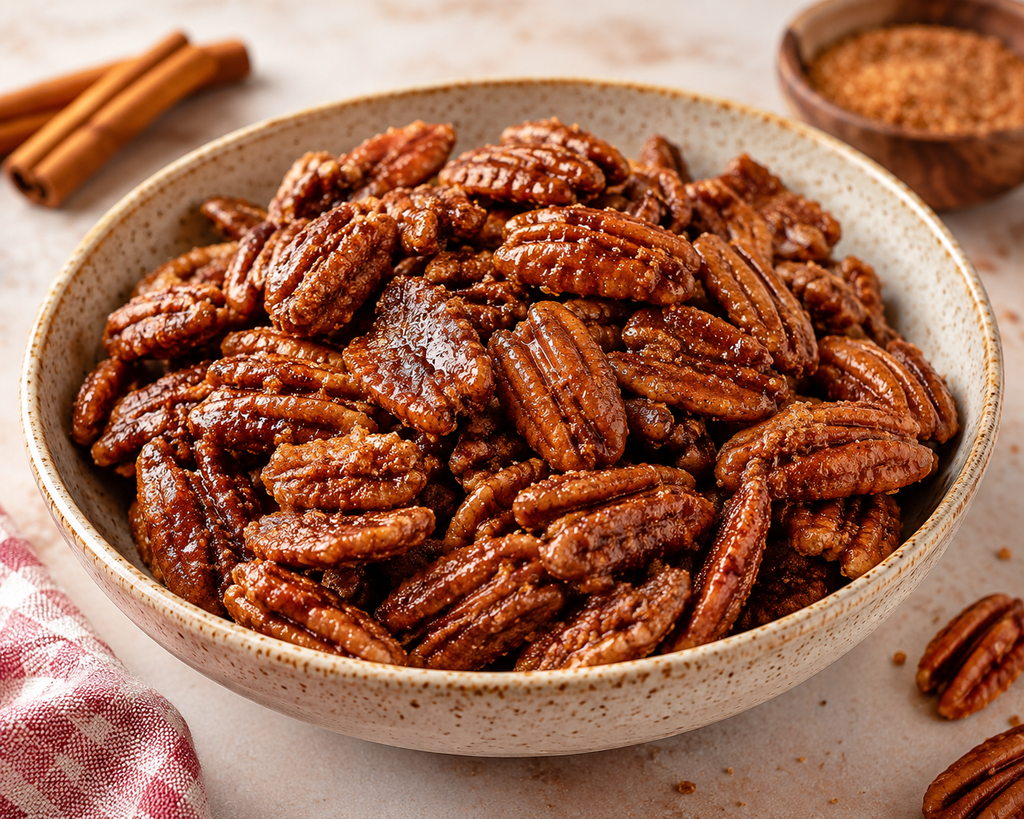
Warm cinnamon, a touch of sweetness, and just enough smoky spice turn simple pecans into an irresistible crunchy snack. These Sweet & Smoky Cinnamon Pecans deliver that sweet-and-salty flavor combination without the heavy sugar coating found on many traditional candied nuts.
A little maple syrup adds sweetness while cinnamon, smoked paprika, vanilla, and a pinch of salt create layers of flavor. They’re quick enough for everyday snacking but special enough to set out for guests or add to a holiday snack board.
Because pecans are naturally rich and satisfying, a small portion goes a long way. Make a batch ahead of time for an easy grab-and-go snack when you want something crunchy and a little sweet.
Prep Time: 5 minutes
Cook Time: 12–15 minutes
Cooling Time: 10 minutes
Total Time: 27–30 minutes
Servings: 8
Serving Size: About ¼ cup
Difficulty: Easy
Budget Level: $$
Best For: Afternoon snacks, work snacks, snack boards, meal prep, road trips, or a lightly sweet treat
Ingredients
• 2 cups raw pecan halves
• 1½ tablespoons pure maple syrup
• 1 teaspoon olive oil or melted coconut oil
• 1 teaspoon ground cinnamon
• ½ teaspoon pure vanilla extract
• ¼ teaspoon smoked paprika
• ⅛ teaspoon fine sea salt
• Pinch of cayenne pepper, optional
• 1 teaspoon brown sugar, optional for a slightly sweeter finish
Directions
- Preheat the oven to 325°F. Line a large baking sheet with parchment paper.
- Add the pecans to a medium mixing bowl.
- In a small bowl, stir together the maple syrup, olive oil or melted coconut oil, cinnamon, vanilla, smoked paprika, salt, and optional cayenne.
- Pour the mixture over the pecans and toss thoroughly until the nuts are lightly and evenly coated.
- If you prefer a slightly sweeter snack, sprinkle in the optional teaspoon of brown sugar and toss again.
- Spread the pecans onto the prepared baking sheet in a single layer. Avoid piling the nuts on top of one another so they toast evenly.
- Bake for 6–7 minutes, then remove the pan and stir the pecans.
- Return to the oven and bake for another 6–8 minutes, watching closely during the final few minutes. Nuts can go from perfectly toasted to burned quickly.
- Remove the pecans from the oven when they are fragrant and lightly toasted.
- Leave them on the baking sheet for at least 10 minutes. The coating will become less sticky and the pecans will develop more crunch as they cool.
- Once completely cooled, separate any pecans that have stuck together and enjoy.
Make It Your Way
• Make It Spicier: Increase the cayenne or add a pinch of chili powder for a stronger sweet-heat combination.
• Make It Sweeter: Add the optional brown sugar or an additional teaspoon of maple syrup.
• Make It Savory: Reduce the maple syrup slightly and add garlic powder, rosemary, or additional smoked paprika.
• Holiday Twist: Add a pinch of nutmeg, ginger, or allspice along with the cinnamon.
• Mixed-Nut Version: Replace half of the pecans with walnuts, almonds, or peanuts.
• Budget-Friendly Swap: Pecans can be expensive. Replace some or all of them with walnuts, almonds, or unsalted peanuts when those options are more affordable.
• Serving Idea: Chop a tablespoon or two and sprinkle over Greek yogurt, oatmeal, chia pudding, fruit, or a salad for extra crunch.
Storage & Meal Prep
Allow the pecans to cool completely before storing. Storing them while warm can trap moisture and reduce their crunch.
Keep cooled pecans in an airtight container at room temperature for up to 1 week.
For longer storage, refrigerate them in an airtight container for up to 3 weeks or freeze for up to 3 months.
For grab-and-go meal prep, divide the pecans into individual ¼-cup portions. This makes them easy to pack for work, errands, lunchboxes, or road trips while also helping with portion control.
If frozen, allow the pecans to come to room temperature for a few minutes before eating.
Nutrition Information
Estimated Nutrition Per Serving:
Calories: approximately 210
Protein: approximately 3 g
Carbohydrates: approximately 7 g
Fiber: approximately 3 g
Total Fat: approximately 20 g
Saturated Fat: approximately 2 g
Sodium: approximately 40 mg
Nutrition information is an estimate and may vary depending on the exact ingredients, brands, portion size, and whether optional brown sugar is added.
Pecans are naturally calorie-dense, so this recipe uses a modest ¼-cup serving. Although they are higher in fat, most of the fat in pecans is unsaturated.
Why You’ll Love It
• Sweet, smoky, crunchy, and satisfying
• Uses only a small amount of added sweetener
• Ready in about 30 minutes, including cooling time
• Easy to make ahead for busy days
• Naturally gluten-free
• Easy to adjust from mild to spicy
• Provides satisfying fats along with some fiber and protein
• Easy to portion into grab-and-go servings
• Works as a snack or a crunchy topping for yogurt, oatmeal, salads, and fruit
• Simple enough for everyday snacking but flavorful enough for entertaining
Loaded Hummus Cucumber Bites
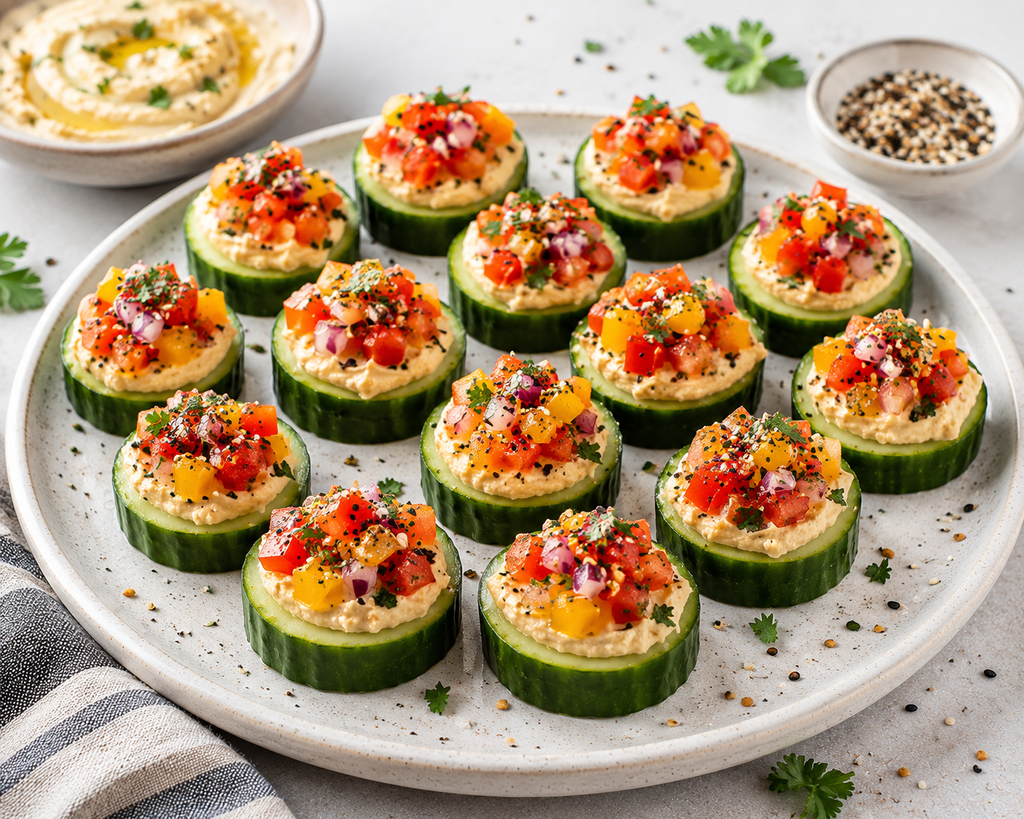
Cool, crisp cucumber meets creamy hummus and colorful fresh vegetables in these Loaded Hummus Cucumber Bites. Each bite delivers a satisfying combination of crunch, creaminess, and savory flavor without requiring any cooking.
Fresh tomatoes, bell peppers, red onion, and everything seasoning turn a simple cucumber-and-hummus snack into something that feels a little more special. They’re refreshing enough for warm days, quick enough for an afternoon snack, and attractive enough to serve as an easy appetizer.
With simple ingredients and only a few minutes of preparation, this is one of those healthy snacks you can make even when you don’t feel like cooking.
Prep Time: 15 minutes
Cook Time: 0 minutes
Total Time: 15 minutes
Servings: 4
Serving Size: About 4 cucumber bites
Difficulty: Very Easy
Budget Level: $
Best For: Quick snacks, work-from-home snacks, appetizers, lunchboxes, parties, or warm-weather snacking
Ingredients
• 1 large English cucumber
• ¾ cup hummus
• ⅓ cup finely diced cherry or grape tomatoes
• ¼ cup finely diced red or yellow bell pepper
• 2 tablespoons finely diced red onion
• 1 tablespoon chopped fresh parsley
• 1 teaspoon everything bagel seasoning
• 1 teaspoon fresh lemon juice
• ⅛ teaspoon black pepper
• Pinch of smoked paprika, optional
Directions
- Wash and thoroughly dry the cucumber and vegetables.
- Trim both ends from the cucumber and slice it into approximately ½-inch-thick rounds. You should have about 16 substantial cucumber slices, depending on the size of the cucumber.
- Arrange the cucumber rounds in a single layer on a serving plate or platter.
- If the cucumber is especially juicy, gently blot the cut surfaces with a paper towel. Removing excess moisture helps prevent the hummus from sliding off.
- In a small bowl, combine the diced tomatoes, bell pepper, red onion, parsley, and lemon juice. Gently toss to combine.
- Spoon approximately 2 teaspoons of hummus onto the center of each cucumber round.
- Add a small spoonful of the vegetable mixture over the hummus.
- Sprinkle the bites evenly with everything bagel seasoning and black pepper.
- Add a light sprinkle of smoked paprika if desired.
- Serve immediately, or refrigerate briefly until ready to serve.
Make It Your Way
• Add More Protein: Sprinkle the bites with hemp hearts or add a few finely chopped chickpeas to the vegetable topping.
• Mediterranean Style: Add diced Kalamata olives and a small amount of crumbled feta.
• Make It Spicy: Use jalapeño hummus or add finely diced jalapeño to the vegetable mixture.
• Change the Hummus: Try roasted red pepper, garlic, spinach, or everything-seasoned hummus.
• Add Avocado: Top each bite with a small piece of avocado just before serving.
• Lower-Sodium Option: Choose lower-sodium hummus and replace the everything bagel seasoning with sesame seeds, garlic powder, dried onion, and herbs.
• Vegan Option: The basic recipe is naturally vegan when prepared with a plant-based hummus and seasoning blend.
• Budget-Friendly Tip: Regular cucumbers work well if English cucumbers are expensive. Peel them completely or in alternating strips if the skin is thick, then remove some of the seeds if necessary.
• Use What You Have: Tomatoes, carrots, celery, bell peppers, green onions, or other crisp vegetables can be finely chopped and used as the topping.
Storage & Meal Prep
These bites are best served fresh because cucumber naturally releases water after it is sliced.
Store assembled leftovers in an airtight container in the refrigerator and enjoy within 1 day for the best texture.
For better meal prep, keep the ingredients separate. Slice the cucumber and store it in an airtight container lined with a paper towel. Keep the hummus and chopped vegetable mixture in separate containers in the refrigerator.
Assemble the bites shortly before eating. This keeps the cucumber crisp and prevents the hummus and vegetable topping from becoming watery.
The chopped vegetable mixture can be prepared up to 2 days ahead. For the freshest flavor and texture, add the lemon juice shortly before assembling if preparing the vegetables in advance.
Nutrition Information
Estimated Nutrition Per Serving:
Calories: approximately 120
Protein: approximately 4 g
Carbohydrates: approximately 11 g
Fiber: approximately 4 g
Total Fat: approximately 7 g
Saturated Fat: approximately 1 g
Sodium: approximately 250–350 mg
Nutrition information is an estimate and may vary depending on the brand and variety of hummus, exact amount used on each cucumber bite, seasoning blend, vegetable quantities, and serving size.
Choosing a lower-sodium hummus and using less everything bagel seasoning can significantly reduce the sodium content.
Why You’ll Love It
• Ready in only about 15 minutes
• No oven, stove, or air fryer required
• Cool, crisp, creamy, and satisfying
• Made with colorful fresh vegetables
• Provides fiber and plant-based protein
• Easy to customize with different hummus flavors and toppings
• Naturally vegetarian and easy to keep vegan
• Affordable and made with accessible grocery-store ingredients
• Attractive enough to serve to guests
• Perfect when you want a fresh snack without having to cook
Zesty Lime Tortilla Crisps with Creamy Avocado Dip
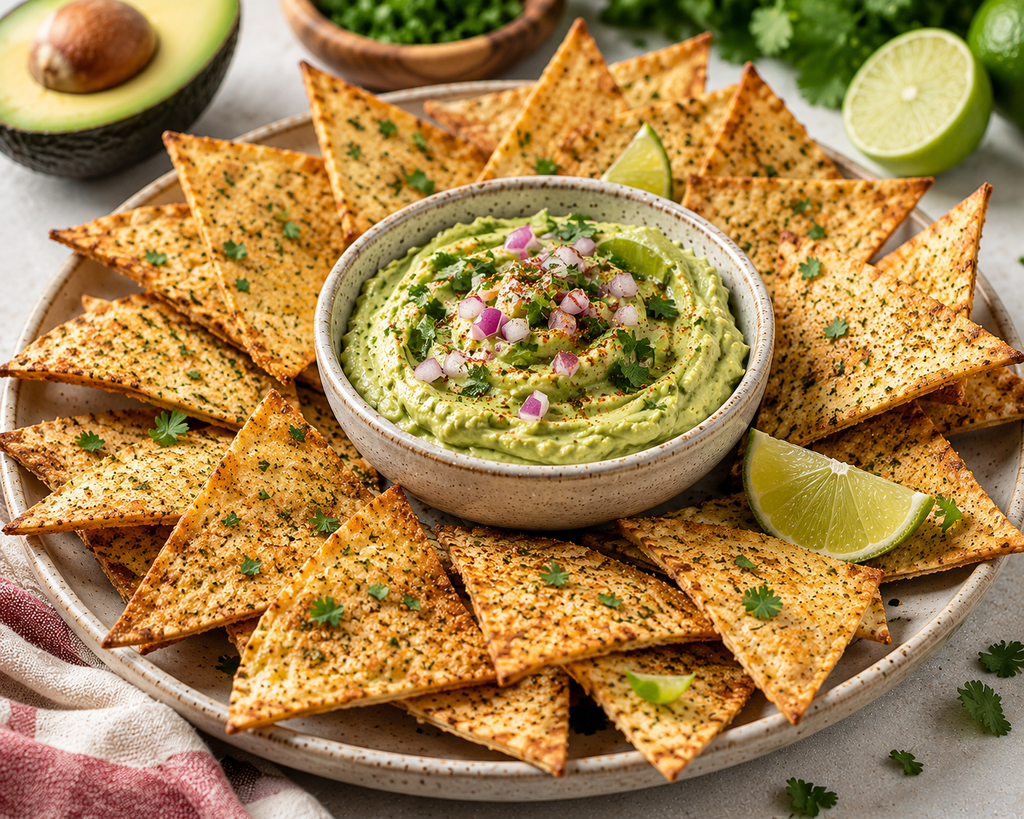
Crispy, zesty, and made for dipping, these Zesty Lime Tortilla Crisps with Creamy Avocado Dip bring big snack-time flavor without deep-frying. Corn tortillas are cut into wedges, lightly seasoned with lime and warm spices, then baked until crisp and golden.
The cool avocado dip combines ripe avocado with Greek yogurt, fresh lime, cilantro, and simple seasonings for a creamy contrast to the crunchy tortilla crisps. It’s a satisfying combination of textures and flavors that works just as well for an afternoon snack as it does for sharing with family or friends.
Best of all, both the crisps and dip are made with familiar ingredients and can easily be adjusted to suit your taste and budget.
Prep Time: 15 minutes
Cook Time: 10–14 minutes
Total Time: 25–29 minutes
Servings: 4
Serving Size: About 12 tortilla crisps with ¼ cup avocado dip
Difficulty: Easy
Budget Level: $
Best For: Afternoon snacks, appetizers, family snack time, game-day snacks, or casual entertaining
Ingredients
For the Tortilla Crisps:
• 6 small corn tortillas
• 2 teaspoons olive oil
• 1 teaspoon fresh lime juice
• ½ teaspoon chili powder
• ½ teaspoon garlic powder
• ¼ teaspoon ground cumin
• ¼ teaspoon smoked paprika
• ⅛ teaspoon salt, or to taste
• ½ teaspoon finely grated lime zest, optional
For the Creamy Avocado Dip:
• 1 large ripe avocado
• ½ cup plain nonfat or low-fat Greek yogurt
• 1½ tablespoons fresh lime juice
• 2 tablespoons chopped fresh cilantro
• 1 tablespoon finely diced red onion
• ¼ teaspoon garlic powder
• ¼ teaspoon ground cumin
• ⅛ teaspoon salt, or to taste
• Pinch of cayenne pepper or finely diced jalapeño, optional
Directions
- Preheat the oven to 400°F. Line one or two large baking sheets with parchment paper.
- Stack the corn tortillas and cut each tortilla into 8 equal wedges.
- Place the tortilla wedges in a large bowl. Drizzle with olive oil and lime juice, then gently toss until lightly coated.
- In a small bowl, combine the chili powder, garlic powder, cumin, smoked paprika, salt, and optional lime zest.
- Sprinkle the seasoning mixture over the tortilla wedges and toss gently until evenly distributed.
- Arrange the tortilla wedges in a single layer on the prepared baking sheets. Avoid overlapping them so they can crisp evenly.
- Bake for 5–7 minutes, then carefully flip the tortilla wedges.
- Continue baking for another 5–7 minutes, or until the crisps are golden around the edges and crisp. Watch closely near the end because thin tortilla wedges can brown quickly.
- Remove from the oven and allow the tortilla crisps to cool for several minutes. They will become crispier as they cool.
- While the crisps are baking, prepare the avocado dip. Scoop the avocado into a medium bowl and mash until mostly smooth.
- Add the Greek yogurt, lime juice, cilantro, red onion, garlic powder, cumin, salt, and optional cayenne or jalapeño.
- Stir until creamy and well combined. For an extra-smooth dip, blend the ingredients in a small food processor or blender.
- Taste and adjust the lime juice or seasonings as desired.
- Serve the warm or cooled tortilla crisps with the creamy avocado dip.
Make It Your Way
• Make It Spicy: Add cayenne, chipotle powder, or finely diced jalapeño to the avocado dip.
• Make It Mild: Leave out the chili powder and cayenne and season the tortilla crisps with garlic, lime, and a little smoked paprika.
• Add More Protein: Stir a few tablespoons of blended cottage cheese into the avocado dip or replace part of the Greek yogurt with cottage cheese.
• Dairy-Free Option: Use an unsweetened dairy-free Greek-style yogurt or replace the yogurt with additional avocado.
• Add Fresh Flavor: Mix diced tomato, green onion, or extra cilantro into the dip.
• Air-Fryer Option: Cook the tortilla wedges at 350°F for approximately 5–8 minutes, shaking or turning them halfway through. Work in batches so they do not overlap, and begin checking early because air fryers vary.
• Budget-Friendly Tip: Store-brand corn tortillas are inexpensive and work perfectly. If avocados are expensive, use one small avocado and increase the Greek yogurt slightly to stretch the dip.
• Extra-Veggie Serving Idea: Serve sliced bell peppers, carrots, celery, or cucumber alongside the tortilla crisps for additional dipping options.
Storage & Meal Prep
Allow the tortilla crisps to cool completely before storing. Keep them in an airtight container or resealable bag at room temperature for up to 3 days.
If the crisps soften, place them in a 350°F oven for approximately 3–5 minutes and allow them to cool again before serving.
The avocado dip is best enjoyed fresh but can be stored in an airtight container in the refrigerator for up to 2 days.
To help slow browning, smooth the surface of the dip, add a light squeeze of lime juice, and press plastic wrap or reusable food wrap directly against the surface before covering the container.
For meal prep, make the tortilla crisps ahead of time and store them separately. Prepare the dip the day you plan to eat it for the best color and flavor.
Nutrition Information
Estimated Nutrition Per Serving:
Calories: approximately 230
Protein: approximately 7 g
Carbohydrates: approximately 29 g
Fiber: approximately 6 g
Total Fat: approximately 11 g
Saturated Fat: approximately 2 g
Sodium: approximately 200–300 mg
Nutrition information is an estimate and may vary depending on the tortilla brand, avocado size, Greek yogurt used, exact portion size, and amount of salt added.
Using lower-sodium corn tortillas and adjusting the added salt can further reduce the sodium content.
Why You’ll Love It
• Crispy and crunchy without deep-frying
• Creamy avocado dip adds satisfying richness
• Fresh lime adds bright, zesty flavor
• Made with simple, accessible ingredients
• Provides fiber, healthy fats, and some protein
• Easy to customize from mild to spicy
• Ready in about 30 minutes
• Works for everyday snacking or entertaining
• Homemade alternative to packaged chips and dip
• Easy to pair with fresh vegetables for even more crunch and variety
Berry Banana Protein Crunch Bowl
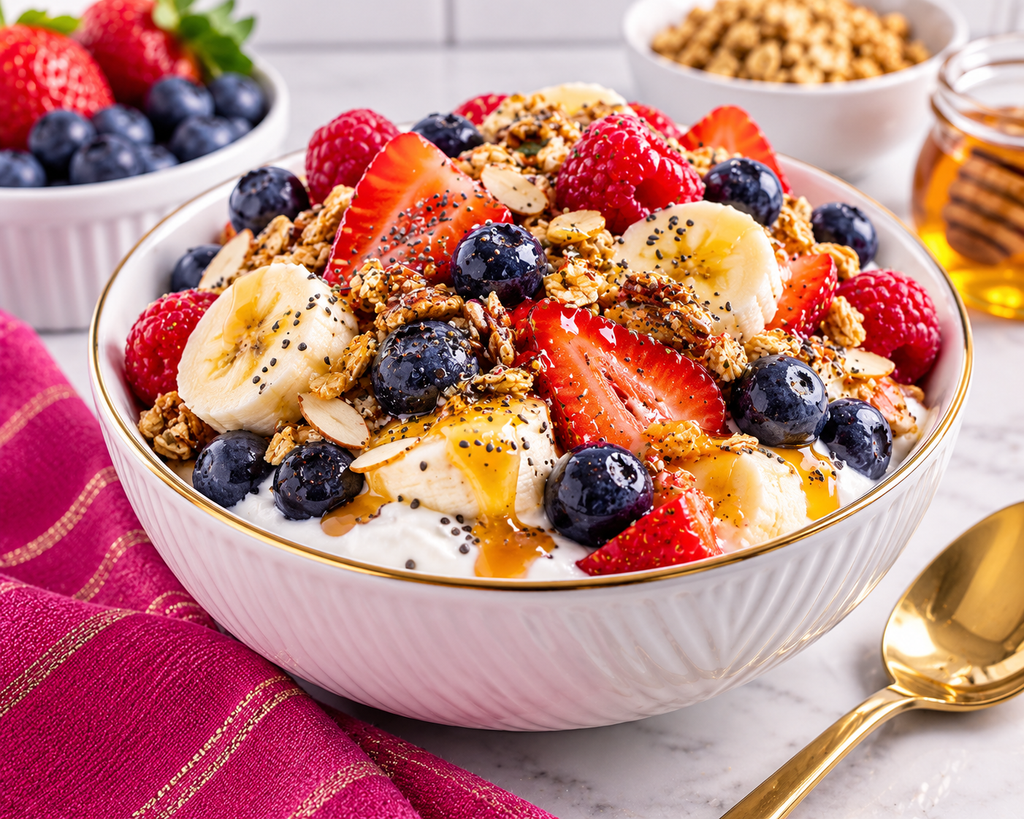
Creamy, fruity, crunchy, and naturally colorful, this Berry Banana Protein Crunch Bowl turns simple Greek yogurt into a satisfying snack that feels more like a treat. Thick Greek yogurt is topped with fresh strawberries, blueberries, raspberries, banana, crunchy granola, sliced almonds, and chia seeds, then finished with just a touch of honey.
The combination of protein-rich yogurt, fiber-filled fruit, and satisfying nuts and seeds makes this a great choice when you need something substantial enough to carry you between meals. It takes only minutes to assemble, requires absolutely no cooking, and can easily be adjusted using whatever fruit you already have on hand.
Whether you need a quick afternoon snack, something filling after work, or a healthier answer to a sweet craving, this colorful bowl delivers.
Prep Time: 5 minutes
Cook Time: 0 minutes
Total Time: 5 minutes
Servings: 1
Serving Size: 1 bowl
Difficulty: Very Easy
Budget Level: $$
Best For: Afternoon snacks, post-workout snacks, quick breakfasts, evening snacks, or satisfying a sweet craving
Ingredients
• ¾ cup plain nonfat or low-fat Greek yogurt
• ¼ cup sliced fresh strawberries
• ¼ cup fresh blueberries
• ¼ cup fresh raspberries
• ½ small banana, sliced
• 2 tablespoons lower-sugar granola
• 1 tablespoon sliced almonds
• 1 teaspoon chia seeds
• 1 teaspoon honey or pure maple syrup
• ¼ teaspoon pure vanilla extract, optional
• Pinch of ground cinnamon, optional
Directions
- Spoon the Greek yogurt into a serving bowl and spread it evenly.
- If using vanilla extract, stir it into the yogurt before adding the toppings.
- Wash and gently dry the berries. Slice the strawberries and banana.
- Arrange the strawberries, blueberries, raspberries, and banana over the Greek yogurt.
- Sprinkle the granola evenly over the fruit.
- Add the sliced almonds and chia seeds.
- Drizzle lightly with honey or maple syrup.
- Add a pinch of cinnamon if desired.
- Serve immediately while the fruit is fresh and the granola is crunchy.
Make It Your Way
• Boost the Protein: Choose a higher-protein Greek yogurt or stir a small amount of your favorite protein powder into the yogurt before adding the toppings.
• Peanut Butter Banana: Replace the almonds with 1 tablespoon of peanut or almond butter and add extra banana.
• Chocolate Berry: Sprinkle 1 teaspoon of mini dark chocolate chips or cacao nibs over the bowl.
• Tropical Version: Replace the berries with pineapple, mango, and banana and add unsweetened shredded coconut.
• Dairy-Free Option: Use an unsweetened high-protein dairy-free yogurt.
• Lower-Sugar Option: Skip the honey and allow the banana and berries to provide the sweetness.
• Nut-Free Option: Leave out the almonds and add pumpkin seeds or sunflower seeds if appropriate for your needs.
• Change the Crunch: Use chopped walnuts, pecans, pumpkin seeds, or a small amount of whole-grain cereal instead of granola.
• Budget-Friendly Tip: Fresh berries can be expensive, especially out of season. Use whichever fruit is on sale, such as bananas, apples, peaches, grapes, or oranges. Thawed frozen berries also work well, although they will produce a softer, juicier bowl.
Storage & Meal Prep
This bowl is best assembled immediately before eating so the granola and nuts remain crunchy.
For meal prep, portion the Greek yogurt into a covered container and refrigerate. Wash and prepare the fruit separately and store it in an airtight container.
Keep granola, almonds, and chia seeds in a separate small container or resealable bag. Add them immediately before eating to preserve their texture.
Banana is best sliced just before serving because it can brown during storage.
Prepared yogurt and most berries can be refrigerated for up to 2–3 days, depending on the freshness of the fruit.
For a grab-and-go work snack, pack the yogurt and fruit in one container and the crunchy toppings separately, then combine when ready to eat.
Nutrition Information
Estimated Nutrition Per Serving:
Calories: approximately 330
Protein: approximately 20 g
Carbohydrates: approximately 48 g
Fiber: approximately 8 g
Total Fat: approximately 8 g
Saturated Fat: approximately 1–2 g
Sodium: approximately 80–120 mg
Nutrition information is an estimate and will vary depending on the Greek yogurt, granola, fruit, nuts, sweetener, exact serving sizes, and brands used.
For a lighter snack, reduce the granola to 1 tablespoon and omit the honey. For a more substantial snack or light meal, increase the Greek yogurt or add additional nuts or seeds.
Why You’ll Love It
• Ready in only 5 minutes
• No cooking required
• Provides a satisfying combination of protein and fiber
• Naturally colorful and packed with fresh fruit
• Creamy, crunchy, sweet, and refreshing in every bowl
• Easy to customize with seasonal fruit
• Helps satisfy a sweet craving with nutrient-rich ingredients
• Works as a snack or quick breakfast
• Easy to pack for work when the toppings are stored separately
• Budget-friendly swaps make it easy to enjoy even when fresh berries are expensive
Creamy Garden Cottage Cheese Dip
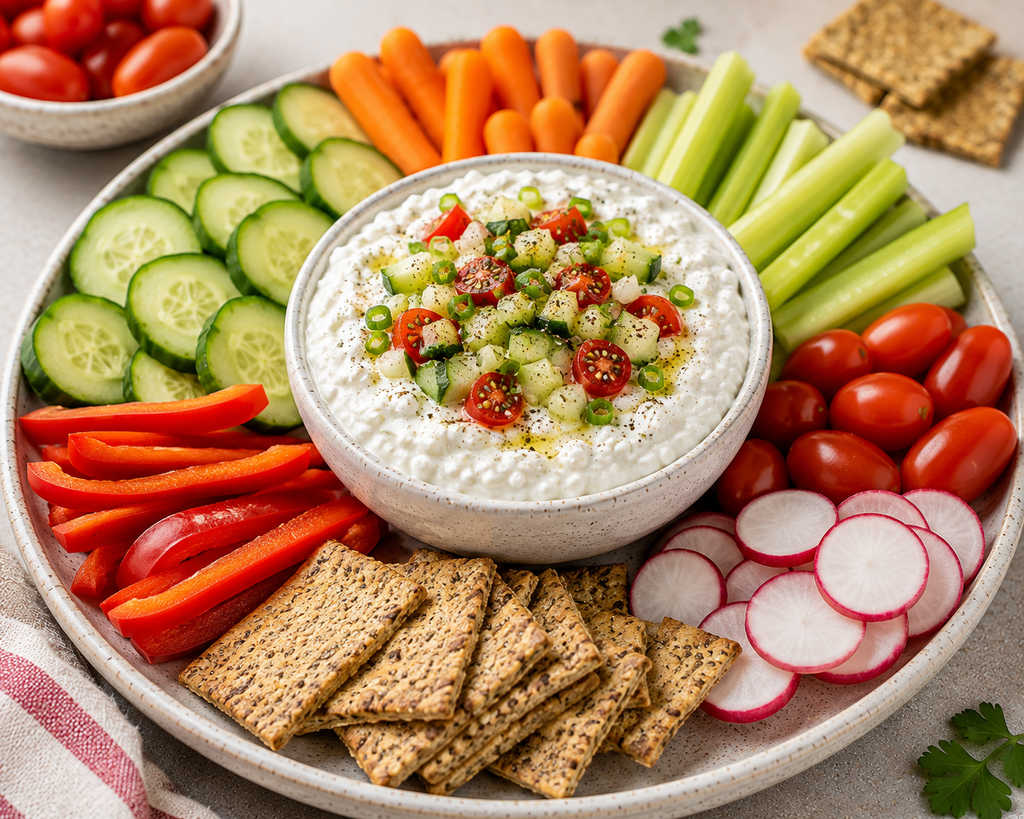
Creamy, savory, and loaded with fresh flavor, this Creamy Garden Cottage Cheese Dip turns a simple container of cottage cheese into a satisfying snack that’s perfect for dipping.
Blending the cottage cheese creates a smooth, creamy base while lemon, garlic, herbs, and black pepper add plenty of flavor. A colorful topping of cucumber, tomato, and green onion gives every scoop a fresh garden-inspired finish.
Pair it with crunchy vegetables for a lighter snack, add a few whole-grain crackers when you want something more substantial, or set out both for an easy snack platter the whole family can enjoy.
Prep Time: 10 minutes
Cook Time: 0 minutes
Total Time: 10 minutes
Servings: 4
Serving Size: About ½ cup dip with vegetables
Difficulty: Very Easy
Budget Level: $
Best For: Afternoon snacks, work snacks, vegetable platters, appetizers, lunchboxes, or post-workout snacks
Ingredients
For the Cottage Cheese Dip:
• 2 cups low-fat cottage cheese
• 1 tablespoon fresh lemon juice
• ½ teaspoon garlic powder
• ½ teaspoon onion powder
• ½ teaspoon dried dill
• ½ teaspoon dried parsley
• ¼ teaspoon black pepper
• ⅛ teaspoon salt, or to taste
For the Garden Topping:
• ¼ cup finely diced cucumber
• ¼ cup quartered cherry or grape tomatoes
• 2 tablespoons sliced green onion
• 1 tablespoon chopped fresh parsley or dill
For Serving:
• Cucumber slices
• Baby carrots or carrot sticks
• Celery sticks
• Bell pepper strips
• Cherry tomatoes
• Radish slices
• Whole-grain crackers, optional
Directions
- Add the cottage cheese, lemon juice, garlic powder, onion powder, dried dill, dried parsley, black pepper, and salt to a food processor or blender.
- Blend for approximately 30–60 seconds, stopping to scrape down the sides as needed, until the cottage cheese becomes smooth and creamy.
- Taste the dip and adjust the lemon juice, herbs, black pepper, or salt as desired.
- Transfer the blended cottage cheese mixture to a serving bowl.
- In a small bowl, combine the diced cucumber, tomatoes, green onion, and fresh parsley or dill.
- Spoon the fresh vegetable mixture over the center of the cottage cheese dip.
- Add an extra sprinkle of black pepper or dried herbs if desired.
- Wash and prepare your choice of fresh vegetables for dipping.
- Arrange the vegetables and optional whole-grain crackers around the dip.
- Serve immediately, or cover and refrigerate until ready to enjoy.
Make It Your Way
• Ranch-Style: Increase the dill and parsley and add a small pinch of dried chives for a ranch-inspired flavor.
• Make It Spicy: Blend in crushed red pepper flakes, cayenne pepper, hot sauce, or a few slices of jalapeño.
• Everything Bagel Version: Sprinkle everything bagel seasoning over the top instead of the garden vegetable topping.
• Mediterranean Style: Top with cucumber, tomato, Kalamata olives, oregano, and a small amount of crumbled feta.
• Roasted Red Pepper Version: Blend ¼ cup drained roasted red peppers into the cottage cheese.
• Extra Creamy: Add 1–2 tablespoons of plain Greek yogurt before blending.
• No Blender? Leave the cottage cheese textured and stir the seasonings directly into it. The dip will look different but will have the same savory flavors.
• Lower-Sodium Option: Choose lower-sodium cottage cheese when available and leave out the added salt.
• Budget-Friendly Tip: You do not need a large assortment of vegetables. Choose two or three inexpensive vegetables that are on sale, such as carrots, celery, and cucumber. Store-brand cottage cheese and whole-grain crackers work perfectly.
Storage & Meal Prep
Store the cottage cheese dip in an airtight container in the refrigerator for up to 3 days.
For the best texture, store the fresh vegetable topping separately and add it just before serving. Tomatoes and cucumbers release moisture during storage and can make the surface of the dip watery.
Prepare dipping vegetables ahead of time and refrigerate them in airtight containers. Keeping them separate from the dip helps maintain their crisp texture.
For grab-and-go snacks, portion the dip into small containers and pack vegetables in separate reusable bags or containers.
Whole-grain crackers should be stored separately at room temperature and added just before eating so they remain crisp.
Stir refrigerated dip before serving if a small amount of liquid separates during storage.
Nutrition Information
Estimated Nutrition Per Serving:
Calories: approximately 120
Protein: approximately 14 g
Carbohydrates: approximately 8 g
Fiber: approximately 1–2 g
Total Fat: approximately 4 g
Saturated Fat: approximately 2 g
Sodium: approximately 400–500 mg
Nutrition information is an estimate and may vary depending on the cottage cheese brand, vegetables, exact portion size, and optional ingredients used.
Vegetables are included in the general estimate, but whole-grain crackers are not because the amount and brand can vary considerably.
Cottage cheese can contain a significant amount of sodium. Choosing a lower-sodium variety and omitting the added salt can reduce the sodium content.
Why You’ll Love It
• Ready in about 10 minutes
• No cooking required
• Protein-rich and satisfying
• Makes raw vegetables much more exciting
• Creamy texture without needing a heavy dip base
• Uses affordable, easy-to-find ingredients
• Easy to prepare ahead for work or busy days
• Customizable with different herbs, spices, and toppings
• Works with whatever fresh vegetables you already have
• Great as an everyday snack or an attractive appetizer platter
Cranberry Chocolate Oat Energy Bites
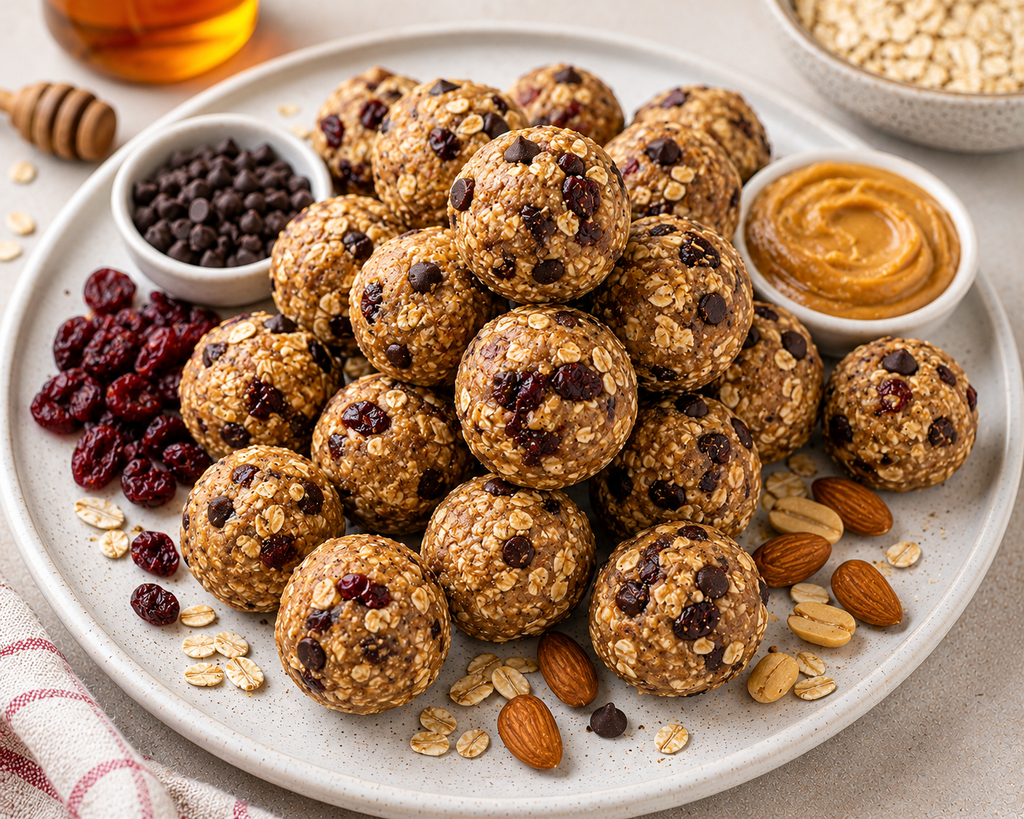
Chewy, nutty, lightly sweet, and dotted with little bursts of chocolate and cranberry, these Cranberry Chocolate Oat Energy Bites are made for busy days when you need a snack you can grab and keep moving.
Old-fashioned oats, peanut butter, chia seeds, dried cranberries, and mini dark chocolate chips come together with a touch of honey to create a no-bake snack that feels like a treat while still offering fiber, satisfying fats, and some protein.
Make one batch, keep it refrigerated, and you’ll have individually portioned snacks ready for work, errands, lunchboxes, or those afternoons when you need something to hold you over until dinner.
Prep Time: 15 minutes
Chill Time: 30 minutes
Cook Time: 0 minutes
Total Time: 45 minutes
Servings: 10
Serving Size: 2 energy bites
Yield: About 20 bites
Difficulty: Very Easy
Budget Level: $
Best For: Work snacks, meal prep, lunchboxes, road trips, afternoon snacks, or pre-workout snacks
Ingredients
• 1½ cups old-fashioned rolled oats
• ¾ cup natural creamy peanut butter
• ⅓ cup honey or pure maple syrup
• ⅓ cup dried cranberries, roughly chopped if large
• ¼ cup mini dark chocolate chips
• 2 tablespoons chia seeds
• 2 tablespoons ground flaxseed
• 1 teaspoon pure vanilla extract
• ½ teaspoon ground cinnamon
• ⅛ teaspoon fine sea salt
Directions
- Add the rolled oats, dried cranberries, mini dark chocolate chips, chia seeds, ground flaxseed, cinnamon, and salt to a large mixing bowl. Stir until evenly combined.
- Add the peanut butter, honey or maple syrup, and vanilla extract.
- Stir thoroughly until all of the dry ingredients are evenly coated and the mixture begins to hold together.
- Cover the bowl and refrigerate the mixture for approximately 30 minutes. Chilling makes the mixture easier to shape.
- Remove the mixture from the refrigerator and stir again.
- Scoop approximately 1 tablespoon of mixture at a time and roll it firmly between your palms to form a ball.
- Repeat until you have approximately 20 energy bites.
- If the mixture feels too dry to hold together, add peanut butter 1 teaspoon at a time. If it feels too sticky, add a small amount of rolled oats.
- Place the finished energy bites in an airtight container.
- Refrigerate until ready to enjoy.
Make It Your Way
• Nut-Free Option: Replace the peanut butter with sunflower seed butter or another nut-free seed butter.
• Change the Dried Fruit: Use raisins, chopped dates, dried cherries, or chopped dried apricots instead of cranberries.
• Chocolate-Free Option: Leave out the chocolate chips and add extra dried fruit, chopped nuts, or seeds.
• Extra Chocolate: Add 1 tablespoon unsweetened cocoa powder to the oat mixture for a chocolate-peanut-butter flavor.
• Add More Crunch: Mix in ¼ cup chopped peanuts, almonds, walnuts, or pecans.
• Coconut Twist: Add 2–3 tablespoons unsweetened shredded coconut.
• Lower Added Sugar: Choose unsweetened or reduced-sugar dried cranberries when available, use dark chocolate with a higher cacao percentage, and reduce the honey slightly if the mixture still holds together.
• Budget-Friendly Tip: Raisins are often less expensive than dried cranberries and work perfectly in this recipe. Store-brand oats and peanut butter also keep this snack inexpensive.
• Portion Tip: These bites are nutrient-dense, so two small bites make a satisfying snack for most people.
Storage & Meal Prep
Store the energy bites in an airtight container in the refrigerator for up to 1 week.
For longer storage, freeze them in a freezer-safe container or resealable bag for up to 3 months.
To prevent the bites from sticking together, arrange them in layers separated by parchment or wax paper.
For grab-and-go meal prep, portion two energy bites into individual small containers or reusable snack bags.
Frozen bites can be transferred to the refrigerator the night before you plan to eat them, or allowed to soften at room temperature for approximately 10–15 minutes.
Because these require no reheating, they are especially convenient for packing for work or taking on busy days.
Nutrition Information
Estimated Nutrition Per Serving:
Calories: approximately 270
Protein: approximately 8 g
Carbohydrates: approximately 32 g
Fiber: approximately 5 g
Total Fat: approximately 14 g
Saturated Fat: approximately 3 g
Sodium: approximately 100–150 mg
Nutrition information is an estimate based on a serving of 2 energy bites and may vary depending on the peanut butter, dried cranberries, chocolate chips, sweetener, exact ingredient amounts, and size of each bite.
These energy bites contain nutrient-dense ingredients such as oats, peanut butter, chia seeds, and flaxseed, so portion size matters. Smaller bites can be made if a lighter snack is preferred.
Why You’ll Love It
• No baking required
• Easy to make with pantry staples
• Chewy, chocolatey, and lightly sweet
• Provides fiber, satisfying fats, and some protein
• Perfect for make-ahead snack prep
• Easy to portion for work or lunchboxes
• Freezer-friendly for longer storage
• Customizable with different nut butters, dried fruits, nuts, and seeds
• Helps satisfy a sweet craving without needing a traditional dessert
• Convenient enough to grab when you’re heading out the door
Mediterranean Whipped Feta Yogurt Dip
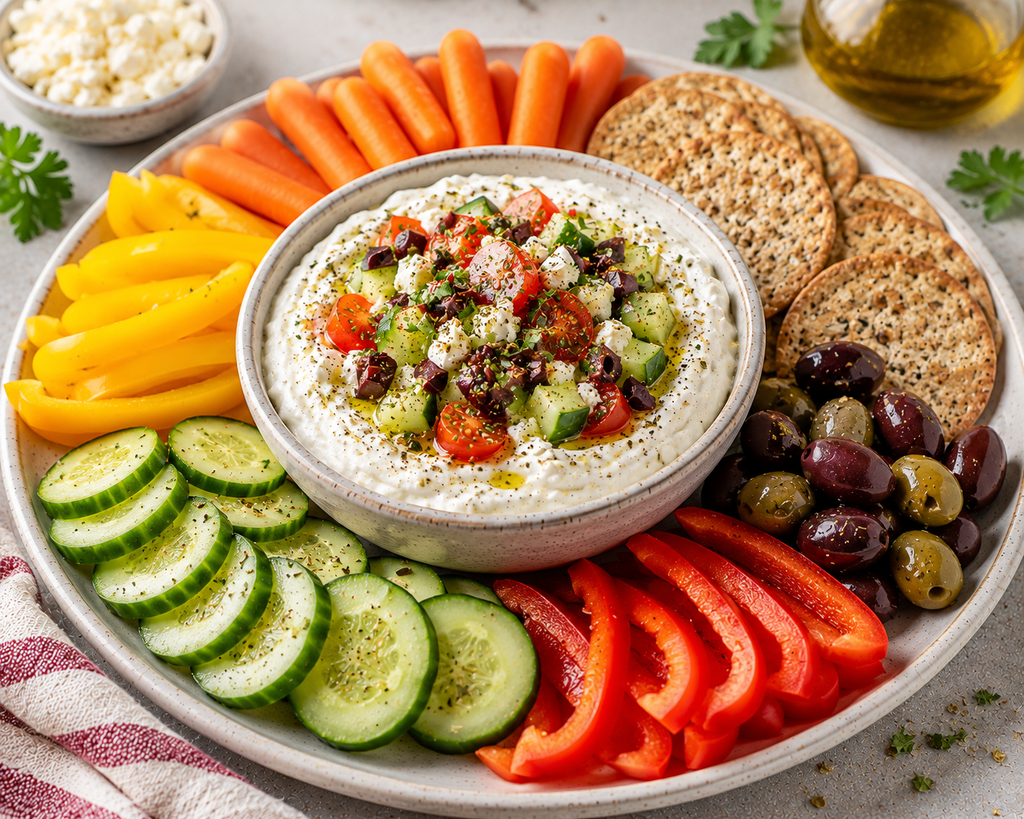
Creamy, tangy, fresh, and packed with Mediterranean-inspired flavor, this Mediterranean Whipped Feta Yogurt Dip makes an everyday snack feel a little more special. Greek yogurt and feta are blended together until smooth, then topped with crisp cucumber, juicy tomatoes, olives, fresh herbs, and a light drizzle of olive oil.
Serve it with colorful fresh vegetables for plenty of crunch, or add a few whole-grain crackers when you want something a little more substantial. The combination of creamy dip and crisp vegetables makes this an easy way to build a satisfying snack without much preparation.
It also doubles beautifully as a simple appetizer or snack board when you’re entertaining.
Prep Time: 15 minutes
Cook Time: 0 minutes
Total Time: 15 minutes
Servings: 6
Serving Size: About ⅓ cup dip with vegetables
Difficulty: Very Easy
Budget Level: $$
Best For: Afternoon snacks, vegetable platters, appetizers, snack boards, family gatherings, or entertaining
Ingredients
For the Whipped Feta Yogurt Dip:
• 1 cup plain nonfat or low-fat Greek yogurt
• ¾ cup crumbled feta cheese
• 1 tablespoon extra-virgin olive oil
• 1 tablespoon fresh lemon juice
• ½ teaspoon garlic powder
• ½ teaspoon dried oregano
• ¼ teaspoon black pepper
For the Mediterranean Topping:
• ¼ cup diced cucumber
• ¼ cup quartered cherry or grape tomatoes
• 2 tablespoons finely chopped Kalamata olives
• 2 tablespoons crumbled feta cheese
• 1 tablespoon chopped fresh parsley
• 1 teaspoon extra-virgin olive oil
• Pinch of dried oregano
For Serving:
• Cucumber slices
• Baby carrots or carrot sticks
• Red or yellow bell pepper strips
• Celery sticks
• Cherry tomatoes
• Whole-grain crackers, optional
Directions
- Add the Greek yogurt, feta cheese, olive oil, lemon juice, garlic powder, oregano, and black pepper to a food processor or blender.
- Blend for approximately 30–60 seconds, stopping to scrape down the sides as necessary, until the mixture becomes creamy and mostly smooth.
- Taste before adding any salt. Feta and olives are naturally salty, so additional salt may not be necessary.
- Transfer the whipped feta yogurt mixture to a shallow serving bowl.
- In a small bowl, combine the diced cucumber, tomatoes, chopped olives, crumbled feta, and fresh parsley.
- Spoon the vegetable mixture over the center of the dip.
- Drizzle the top with 1 teaspoon olive oil and finish with a small pinch of dried oregano.
- Wash and prepare the vegetables for serving.
- Arrange the vegetables and optional whole-grain crackers around the bowl of dip.
- Serve immediately or cover and refrigerate until ready to enjoy.
Make It Your Way
• Add Some Heat: Sprinkle crushed red pepper flakes over the finished dip or blend in a small amount of cayenne pepper.
• Roasted Red Pepper Version: Blend ¼ cup drained roasted red peppers into the yogurt and feta mixture.
• Add Hummus: Swirl a few tablespoons of hummus into the finished dip for an extra layer of Mediterranean flavor.
• More Herbs: Add fresh dill, basil, mint, or additional parsley.
• Make It Extra Lemony: Add fresh lemon zest along with the lemon juice.
• Lower-Sodium Option: Use a reduced-sodium feta if available, reduce the olives, and serve primarily with fresh vegetables instead of salted crackers.
• Make It a Snack Box: Portion the dip into a small container and pack it with cucumber, carrots, bell peppers, cherry tomatoes, a few olives, and whole-grain crackers.
• Budget-Friendly Tip: Feta and olives can increase the cost of this snack. Use store-brand feta, buy olives in a jar rather than from a specialty bar, and choose whichever fresh vegetables are currently on sale.
• Stretch the Dip: Increase the Greek yogurt to 1½ cups while keeping the feta at ¾ cup. This makes a larger batch with a milder feta flavor and can reduce the cost per serving.
Storage & Meal Prep
Store leftover whipped feta yogurt dip in an airtight container in the refrigerator for up to 3 days.
For the best texture, store the cucumber and tomato topping separately and add it shortly before serving. Fresh vegetables release moisture as they sit and can make the dip watery.
The base of the dip can be prepared a day ahead, making this an easy option for entertaining or meal prep.
Prepare dipping vegetables ahead of time and refrigerate them separately in airtight containers.
Keep crackers at room temperature in a separate container or bag so they stay crisp.
For grab-and-go snacks, divide the dip into individual containers and pair each portion with a container of fresh vegetables.
Nutrition Information
Estimated Nutrition Per Serving:
Calories: approximately 150
Protein: approximately 9 g
Carbohydrates: approximately 6 g
Fiber: approximately 1–2 g
Total Fat: approximately 10 g
Saturated Fat: approximately 4 g
Sodium: approximately 400–500 mg
Nutrition information is an estimate and may vary depending on the Greek yogurt, feta cheese, olives, exact ingredient amounts, vegetables, and serving size.
Fresh vegetables are included in the general estimate, but optional whole-grain crackers are not.
Because feta cheese and olives naturally contain sodium, no additional salt is included in the recipe. Using reduced-sodium feta and fewer olives can lower the sodium content.
Why You’ll Love It
• Ready in only 15 minutes
• No cooking required
• Creamy, tangy, fresh, and flavorful
• Provides protein from Greek yogurt and feta
• Encourages plenty of colorful vegetable dipping
• Easy to prepare ahead of time
• Works as both an everyday snack and an appetizer
• Easy to customize with different Mediterranean-inspired toppings
• Makes an attractive snack platter for family or guests
• Can be turned into convenient individual snack boxes for busy days
Zesty Cajun Roasted Chickpeas
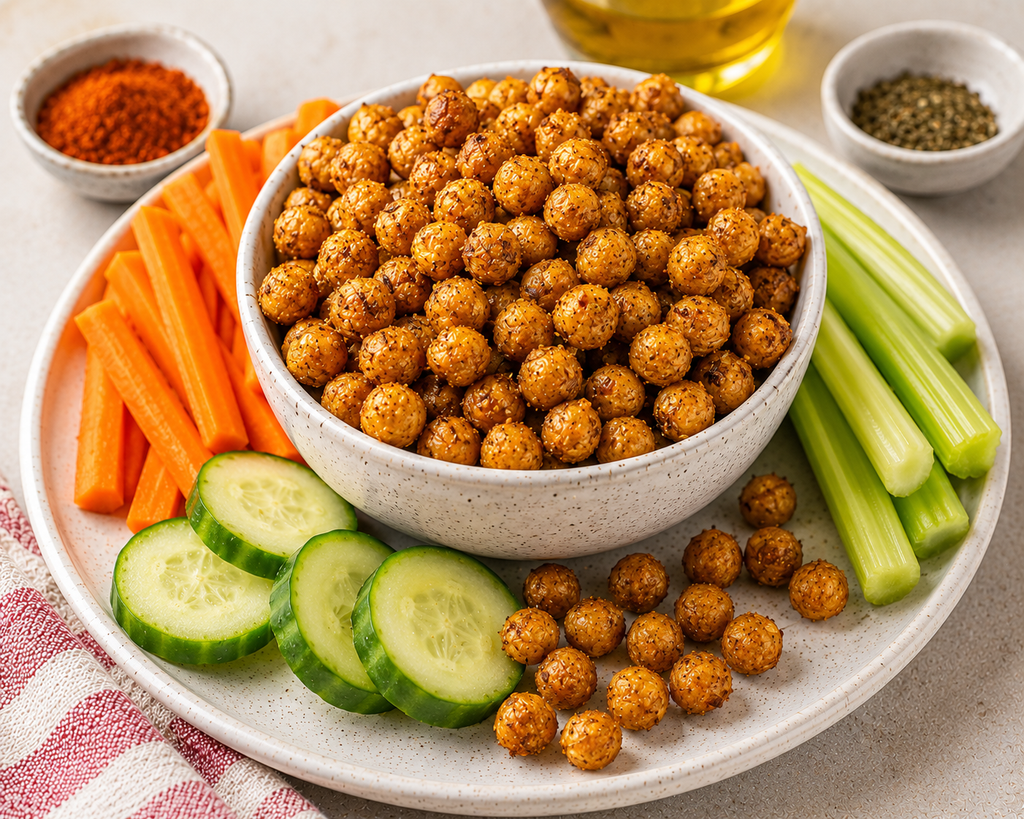
Crispy, smoky, and seasoned with just the right amount of Southern-inspired heat, these Zesty Cajun Roasted Chickpeas are a crunchy snack made from simple pantry staples.
Chickpeas are lightly coated with olive oil and a homemade Cajun-inspired blend of paprika, garlic, onion, oregano, thyme, and cayenne, then roasted until crisp and golden. The result is a savory snack that delivers plenty of flavor without deep-frying.
Enjoy them by the handful, pack them for work, pair them with fresh vegetables, or use them as a crunchy topping for salads and bowls. They’re inexpensive, easy to prepare, and a flavorful way to work more plant-based protein and fiber into snack time.
Prep Time: 10 minutes
Cook Time: 30–35 minutes
Total Time: 40–45 minutes
Servings: 4
Serving Size: About ½ cup
Difficulty: Easy
Budget Level: $
Best For: Afternoon snacks, work snacks, lunchboxes, road trips, salad toppings, or satisfying a crunchy craving
Ingredients
• 2 (15-ounce) cans chickpeas, drained and rinsed
• 1 tablespoon olive oil
• 1 teaspoon smoked paprika
• ¾ teaspoon garlic powder
• ¾ teaspoon onion powder
• ½ teaspoon dried oregano
• ½ teaspoon dried thyme
• ¼ teaspoon ground cumin
• ¼ teaspoon black pepper
• ¼ teaspoon fine sea salt, or to taste
• ⅛–¼ teaspoon cayenne pepper, depending on desired heat
• ½ teaspoon fresh lemon zest, optional
Directions
- Preheat the oven to 425°F. Line a large rimmed baking sheet with parchment paper.
- Drain and rinse the chickpeas thoroughly.
- Spread the chickpeas over a clean kitchen towel or several layers of paper towels. Pat them very dry, gently rolling them around to remove as much surface moisture as possible. Remove any loose skins if desired.
- Transfer the dried chickpeas to the prepared baking sheet.
- Drizzle with olive oil and toss until the chickpeas are lightly and evenly coated.
- Spread them into a single layer, leaving room between the chickpeas so hot air can circulate.
- Roast for 20 minutes.
- Carefully remove the pan and shake or stir the chickpeas.
- Return them to the oven and continue roasting for approximately 10–15 minutes, or until golden, dry, and crisp. Watch closely during the final few minutes.
- While the chickpeas roast, combine the smoked paprika, garlic powder, onion powder, oregano, thyme, cumin, black pepper, salt, and cayenne in a small bowl.
- Remove the crisp chickpeas from the oven and immediately sprinkle them with the Cajun seasoning mixture.
- Toss well while the chickpeas are still warm so the seasoning coats them evenly.
- Add the optional fresh lemon zest for a bright finish.
- Allow the chickpeas to cool on the baking sheet for approximately 10–15 minutes. They will continue to crisp as they cool.
- Serve once cooled to your preferred temperature.
Make It Your Way
• Mild Version: Leave out the cayenne and use sweet paprika instead of smoked paprika for a gentler flavor.
• Turn Up the Heat: Increase the cayenne, add crushed red pepper flakes, or include a pinch of chipotle powder.
• Lemon-Pepper Cajun: Add extra lemon zest and increase the black pepper for a bright, peppery finish.
• Garlic Lover’s Version: Increase the garlic powder to 1 teaspoon.
• Salt-Free Option: Leave out the added salt and increase the herbs, garlic, paprika, and lemon zest.
• Air-Fryer Option: Air-fry the dried and lightly oiled chickpeas at 390°F for approximately 12–16 minutes, shaking the basket several times. Toss with the seasonings while hot. Air fryers vary, so begin checking early.
• Add Fresh Veggies: Pair a smaller portion of chickpeas with cucumber, carrots, celery, or bell pepper strips for extra volume and crunch.
• Budget-Friendly Tip: Store-brand canned chickpeas are inexpensive and work perfectly. For an even lower-cost option, cook dried chickpeas in advance and use approximately 3 cups cooked chickpeas in place of the two cans.
• Meal Topper: Sprinkle leftover chickpeas over salads, grain bowls, soups, or roasted vegetables instead of croutons.
Storage & Meal Prep
Allow the roasted chickpeas to cool completely before storing. Even a small amount of trapped steam can soften their crispy texture.
For the best crunch, store them at room temperature in a container with the lid slightly loose for up to 3 days.
Avoid refrigerating roasted chickpeas when crispness is the priority because refrigerator moisture can soften them.
For grab-and-go meal prep, divide completely cooled chickpeas into individual snack portions.
If the chickpeas lose some of their crunch, spread them on a baking sheet and warm them in a 375°F oven for approximately 5–8 minutes. Allow them to cool before eating.
Fresh vegetables served alongside the chickpeas should be stored separately in the refrigerator.
Nutrition Information
Estimated Nutrition Per Serving:
Calories: approximately 200
Protein: approximately 8 g
Carbohydrates: approximately 28 g
Fiber: approximately 7 g
Total Fat: approximately 7 g
Saturated Fat: approximately 1 g
Sodium: approximately 250–350 mg
Nutrition information is an estimate and may vary depending on the chickpea brand, exact ingredient amounts, serving size, and amount of salt used.
Using no-salt-added or lower-sodium canned chickpeas and adjusting the added salt can reduce the sodium content.
Why You’ll Love It
• Crispy enough to satisfy a crunchy snack craving
• Bold Cajun-inspired flavor with a Southern touch
• Made from affordable pantry staples
• Provides plant-based protein and fiber
• Roasted instead of deep-fried
• Easy to adjust from mild to spicy
• Naturally vegetarian and vegan
• Easy to portion for work and grab-and-go snacking
• Doubles as a crunchy topping for salads, soups, and bowls
• A budget-friendly alternative to many packaged snack foods
Lemon Herb Crunchy Chickpeas
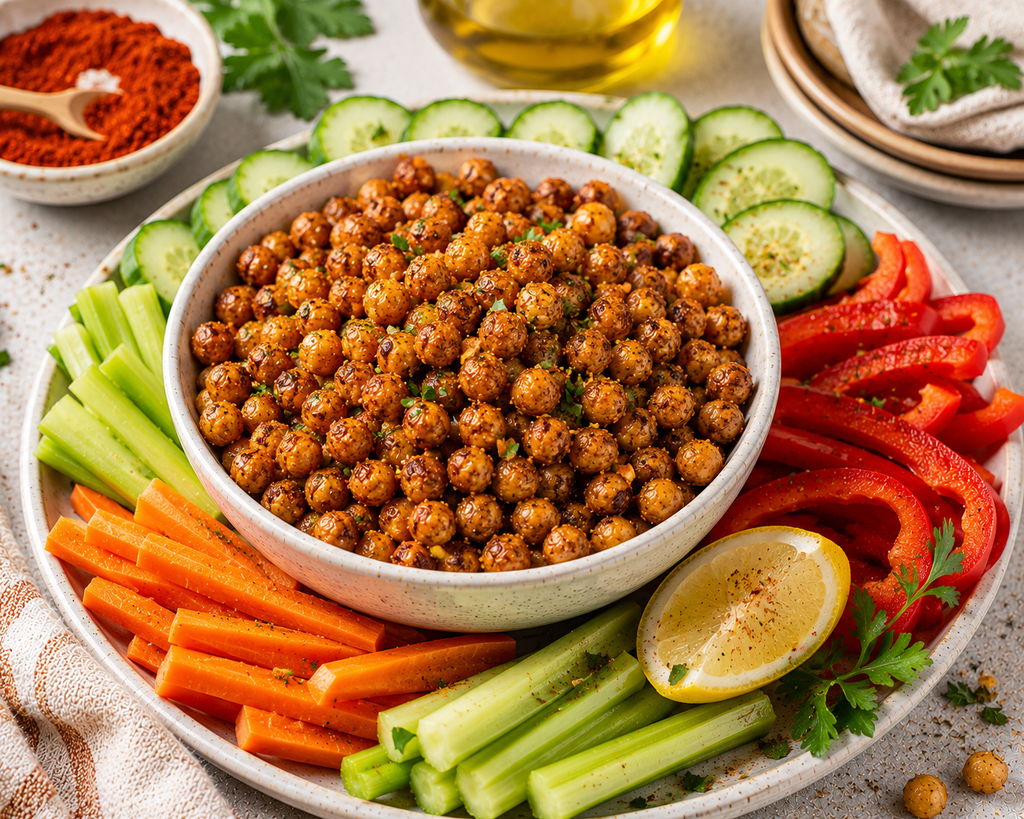
Bright, savory, and satisfyingly crunchy, these Lemon Herb Crunchy Chickpeas bring fresh flavor to an inexpensive pantry staple. Chickpeas are roasted until crisp, then seasoned with lemon zest, garlic, parsley, oregano, and black pepper for a lighter, herb-forward alternative to heavily seasoned packaged snacks.
Enjoy them by themselves when you’re craving something crunchy, pair them with crisp vegetables for a colorful snack plate, or sprinkle them over salads and grain bowls in place of croutons.
With plant-based protein and fiber plus simple ingredients you may already have at home, this is an easy snack to prepare ahead for busy days.
Prep Time: 10 minutes
Cook Time: 30–35 minutes
Total Time: 40–45 minutes
Servings: 4
Serving Size: About ½ cup
Difficulty: Easy
Budget Level: $
Best For: Afternoon snacks, work snacks, lunchboxes, meal prep, road trips, or crunchy salad and bowl toppings
Ingredients
• 2 (15-ounce) cans chickpeas, drained and rinsed
• 1 tablespoon olive oil
• 1 teaspoon finely grated fresh lemon zest
• ¾ teaspoon garlic powder
• ¾ teaspoon dried parsley
• ½ teaspoon dried oregano
• ½ teaspoon onion powder
• ¼ teaspoon black pepper
• ¼ teaspoon fine sea salt, or to taste
• Pinch of crushed red pepper flakes, optional
• Fresh lemon wedges, optional for serving
Directions
- Preheat the oven to 425°F. Line a large rimmed baking sheet with parchment paper.
- Drain and rinse the chickpeas thoroughly.
- Spread the chickpeas over a clean kitchen towel or several layers of paper towels. Pat and gently roll them until very dry. Remove loose skins if desired.
- Transfer the dried chickpeas to the prepared baking sheet.
- Drizzle with olive oil and toss until evenly coated.
- Spread the chickpeas into a single layer so they have enough room to roast rather than steam.
- Roast for 20 minutes.
- Remove the baking sheet carefully and shake or stir the chickpeas.
- Return them to the oven and roast for another 10–15 minutes, or until golden, dry, and crisp. Begin checking frequently near the end because roasting time can vary.
- Meanwhile, combine the lemon zest, garlic powder, parsley, oregano, onion powder, black pepper, salt, and optional red pepper flakes in a small bowl.
- Remove the chickpeas from the oven and immediately sprinkle them with the lemon-herb seasoning.
- Toss thoroughly while warm so the seasonings adhere to the chickpeas.
- Allow the chickpeas to cool on the baking sheet for 10–15 minutes. They will continue to crisp as they cool.
- Enjoy alone or pair with fresh vegetables. If serving with a lemon wedge, squeeze it over only the portion you are eating immediately because added juice can soften the chickpeas.
Make It Your Way
• Garlic Lover’s Version: Increase the garlic powder to 1 teaspoon.
• Spicy Lemon: Add cayenne pepper or additional crushed red pepper flakes.
• Mediterranean Twist: Add dried dill and a small pinch of ground cumin.
• Parmesan Herb: Sprinkle 1–2 tablespoons finely grated Parmesan over the warm chickpeas after roasting.
• Salt-Free Option: Leave out the salt and increase the lemon zest, herbs, garlic, and black pepper.
• Air-Fryer Option: Air-fry the dried, lightly oiled chickpeas at 390°F for approximately 12–16 minutes, shaking the basket several times. Toss with the seasonings while hot. Begin checking early because air fryers vary.
• Build a Snack Plate: Pair a smaller serving of chickpeas with cucumber, carrots, celery, and bell pepper for additional crunch and volume.
• Budget-Friendly Tip: Store-brand canned chickpeas work perfectly. Cooked dried chickpeas are another economical option; use approximately 3 cups cooked chickpeas in place of the two cans.
• Use It Beyond Snack Time: Sprinkle the chickpeas over salads, soups, grain bowls, or roasted vegetables when you want a crunchy topping.
Storage & Meal Prep
Cool the chickpeas completely before storing. Warm chickpeas release steam, which can quickly soften their crisp texture.
For the best crunch, store at room temperature in a container that is not completely airtight for up to 3 days.
Do not add fresh lemon juice before storage. The moisture will soften the roasted chickpeas. Add lemon only immediately before eating if desired.
For meal prep, divide the completely cooled chickpeas into individual snack portions.
Fresh vegetables can also be prepared ahead, but store them separately in airtight containers in the refrigerator.
If the chickpeas become soft, spread them on a baking sheet and reheat in a 375°F oven for approximately 5–8 minutes. Allow them to cool again before eating.
Nutrition Information
Estimated Nutrition Per Serving:
Calories: approximately 200
Protein: approximately 8 g
Carbohydrates: approximately 28 g
Fiber: approximately 7 g
Total Fat: approximately 7 g
Saturated Fat: approximately 1 g
Sodium: approximately 250–350 mg
Nutrition information is an estimate and may vary depending on the chickpea brand, exact serving size, olive oil used, and amount of salt added.
Fresh vegetables shown as optional serving accompaniments are not included in the estimate.
Choosing no-salt-added or lower-sodium chickpeas and reducing or omitting the added salt can lower the sodium content.
Why You’ll Love It
• Crispy and satisfying without deep-frying
• Bright lemon and herb flavor
• Provides plant-based protein and fiber
• Made with affordable pantry ingredients
• Naturally vegetarian and vegan
• Easy to make ahead and portion for busy days
• Pairs perfectly with fresh crunchy vegetables
• Can replace croutons on salads and bowls
• Easy to customize with different herbs and spices
• A simple homemade alternative to many packaged crunchy snacks
Loaded Peanut Butter Apple Crunch Bites
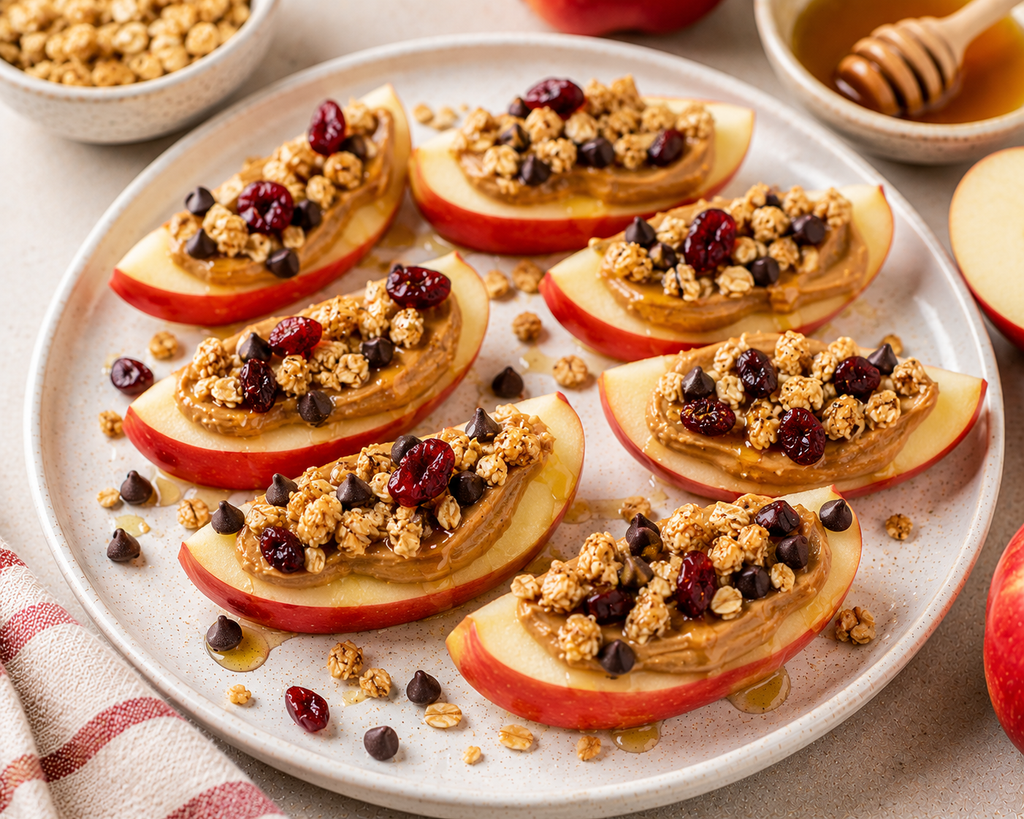
Crisp apples, creamy peanut butter, crunchy granola, tart cranberries, and just a little dark chocolate come together in these Loaded Peanut Butter Apple Crunch Bites. They’re sweet enough to satisfy an afternoon craving but made with simple ingredients that provide a satisfying combination of fruit, fiber, and healthy fats.
These bites require no cooking and take only minutes to assemble, making them perfect for busy afternoons, after-school snacks, or those moments when you want something sweet without making a full dessert.
The toppings are completely customizable, so use what you already have in the pantry and make every batch your own.
Prep Time: 10 minutes
Cook Time: 0 minutes
Total Time: 10 minutes
Servings: 4
Serving Size: About 4 loaded apple wedges
Difficulty: Very Easy
Budget Level: $
Best For: Afternoon snacks, after-school snacks, quick sweet snacks, lunchboxes, or family snack time
Ingredients
• 2 medium crisp apples, such as Honeycrisp, Gala, Fuji, or Pink Lady
• ¼ cup natural creamy peanut butter
• ¼ cup lower-sugar granola
• 2 tablespoons dried cranberries
• 1 tablespoon mini dark chocolate chips
• 1 teaspoon chia seeds, optional
• 1 teaspoon honey or pure maple syrup, optional
• ¼ teaspoon ground cinnamon
• 1 teaspoon fresh lemon juice
Directions
- Wash and thoroughly dry the apples.
- Cut each apple into approximately 8 wedges and remove the core and seeds.
- Place the apple wedges in a bowl and lightly toss or brush them with fresh lemon juice to help slow browning.
- Arrange the apple wedges on a serving plate with the cut sides facing upward.
- Spread approximately 1 teaspoon of peanut butter over each apple wedge.
- Sprinkle the granola evenly over the peanut butter.
- Add the dried cranberries and mini dark chocolate chips.
- Sprinkle with chia seeds if using.
- Finish with a light dusting of cinnamon.
- If additional sweetness is desired, drizzle very lightly with honey or maple syrup.
- Serve immediately while the apples are crisp and the granola is crunchy.
Make It Your Way
• Nut-Free Option: Replace peanut butter with sunflower seed butter or another nut-free seed spread.
• Almond Butter Version: Use almond butter and top with sliced almonds.
• PB & Banana: Add thin banana slices over the peanut butter before adding the crunchy toppings.
• Chocolate Lover’s Version: Add a light drizzle of melted dark chocolate instead of honey.
• Apple Pie Style: Skip the chocolate and cranberries and add extra cinnamon, chopped pecans, and a tiny drizzle of maple syrup.
• Extra Protein: Sprinkle with hemp hearts or serve with a small portion of Greek yogurt on the side.
• Lower Added Sugar: Choose unsweetened peanut butter and low-sugar granola, leave off the honey, and replace sweetened dried cranberries with chopped nuts or seeds.
• Change the Crunch: Use chopped peanuts, walnuts, pecans, pumpkin seeds, or whole-grain cereal instead of granola.
• Budget-Friendly Tip: Use whichever crisp apple variety is on sale. Raisins are usually less expensive than dried cranberries, and store-brand peanut butter and granola work perfectly.
• Use What You Have: The basic apple-and-peanut-butter combination is satisfying on its own. The toppings are optional, so there is no need to buy several extra ingredients just for this recipe.
Storage & Meal Prep
These apple bites are best assembled shortly before eating so the apples remain crisp and the granola stays crunchy.
For meal prep, wash and slice the apples ahead of time and lightly coat the cut surfaces with lemon juice. Store them in an airtight container in the refrigerator for up to 1 day.
Keep the peanut butter and dry toppings separate until ready to assemble.
For lunchboxes or work snacks, pack apple wedges in one container, peanut butter in a small covered container, and granola or other toppings separately.
If fully assembled bites need to be refrigerated, enjoy them within several hours for the best texture.
Some browning of cut apples is natural and does not necessarily mean the fruit has spoiled.
Nutrition Information
Estimated Nutrition Per Serving:
Calories: approximately 190
Protein: approximately 5 g
Carbohydrates: approximately 26 g
Fiber: approximately 4 g
Total Fat: approximately 9 g
Saturated Fat: approximately 2 g
Sodium: approximately 60–100 mg
Nutrition information is an estimate and may vary depending on the apple variety and size, peanut butter, granola, dried fruit, chocolate chips, optional sweetener, and exact serving size.
The optional honey or maple syrup is included only when used. Leaving it off reduces the added sugar while the apples and dried fruit still provide plenty of sweetness.
Why You’ll Love It
• Ready in about 10 minutes
• No cooking required
• Crisp, creamy, crunchy, and slightly sweet
• Made with simple grocery-store ingredients
• Easy way to turn fresh fruit into a more satisfying snack
• Completely customizable with different toppings
• Easy to make nut-free when needed
• Kid- and family-friendly
• Budget-friendly and easy to scale up or down
• Gives you that sweet-and-crunchy combination without turning snack time into dessert
Peanut Butter Banana Oatmeal Snack Bars
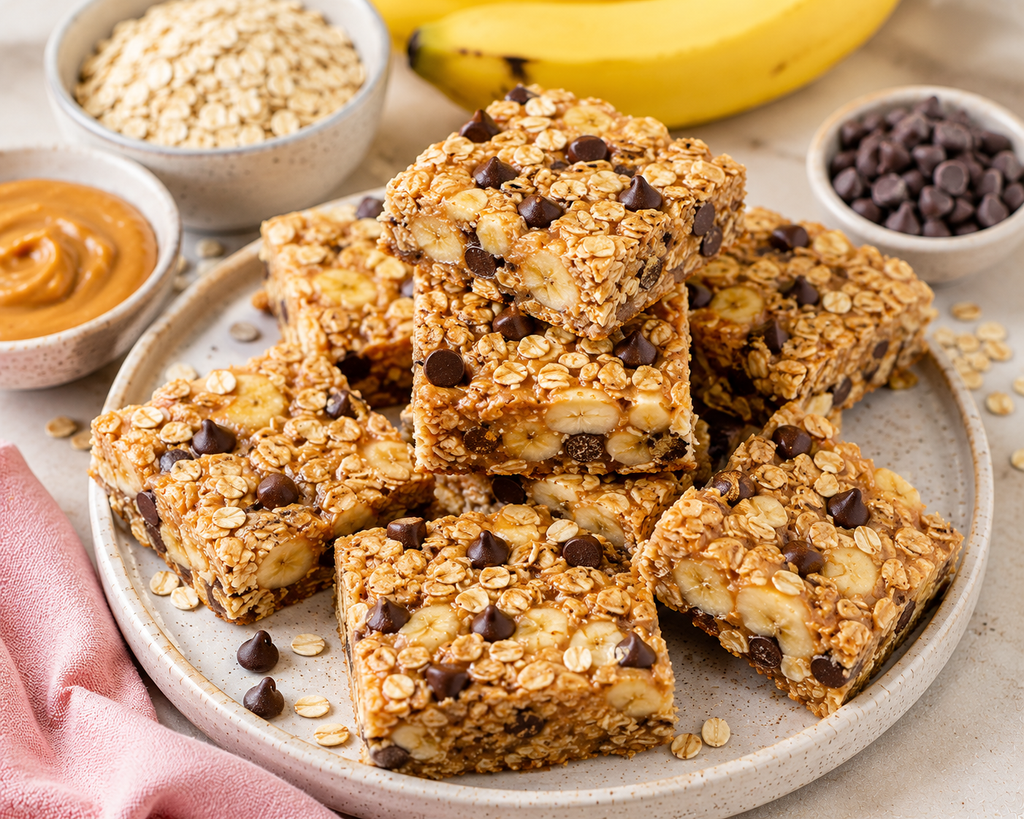
Soft, chewy, nutty, and naturally sweet from ripe bananas, these Peanut Butter Banana Oatmeal Snack Bars turn familiar pantry staples into a satisfying grab-and-go snack.
Oats provide hearty texture and fiber, while creamy peanut butter and an egg add protein and staying power. A small amount of dark chocolate gives the bars just enough sweetness to make them feel like a treat without turning them into a traditional dessert bar.
Bake a batch ahead of time and keep them ready for busy mornings, afternoon snack cravings, lunchboxes, or those moments when you need something more substantial than a piece of fruit.
Prep Time: 10 minutes
Cook Time: 25–30 minutes
Cooling Time: 20 minutes
Total Time: 55–60 minutes
Servings: 9 bars
Serving Size: 1 bar
Difficulty: Easy
Budget Level: $
Best For: Meal prep, work snacks, lunchboxes, after-school snacks, busy mornings, or grab-and-go snacks
Ingredients
• 2 medium very ripe bananas, mashed
• 1½ cups old-fashioned rolled oats
• ½ cup whole-wheat flour
• ½ teaspoon baking powder
• 1 teaspoon ground cinnamon
• ¼ teaspoon salt
• 1 large egg
• ⅓ cup natural creamy peanut butter
• ¼ cup unsweetened applesauce
• ¼ cup milk or unsweetened nondairy milk
• 2 tablespoons honey or pure maple syrup
• 1 teaspoon vanilla extract
• ¼ cup mini dark or semisweet chocolate chips, divided
Directions
- Preheat the oven to 350°F.
- Line an 8-inch square baking pan with parchment paper, leaving a little overhang on the sides for easy removal. Lightly coat with cooking spray if needed.
- In a medium bowl, combine the rolled oats, whole-wheat flour, baking powder, cinnamon, and salt.
- In a separate large bowl, mash the ripe bananas until mostly smooth.
- Add the egg, peanut butter, applesauce, milk, honey or maple syrup, and vanilla. Whisk until well combined.
- Add the dry ingredients to the banana mixture and stir just until everything is evenly incorporated.
- Fold in most of the chocolate chips, reserving a small amount for the top.
- Spread the mixture evenly into the prepared baking pan.
- Sprinkle the remaining chocolate chips over the top and gently press them into the mixture.
- Bake for approximately 25–30 minutes, or until the center is set and the edges are lightly golden.
- Insert a toothpick into the center. It should come out mostly clean with a few moist crumbs rather than wet batter.
- Allow the bars to cool in the pan for approximately 20 minutes.
- Use the parchment paper to carefully lift the bars from the pan.
- Cool completely before slicing into 9 squares for the cleanest cuts.
- Enjoy at room temperature or warm slightly before serving.
Make It Your Way
• PB&J Bars: Swirl a few teaspoons of naturally sweetened strawberry or raspberry preserves over the top before baking.
• Chocolate Lover’s Version: Add 1 tablespoon unsweetened cocoa powder for a chocolate-banana flavor.
• Extra Crunch: Fold in ¼ cup chopped peanuts, walnuts, or pecans.
• Fruit & Nut: Replace the chocolate chips with raisins, dried cranberries, or finely chopped dried cherries.
• Nut-Free Option: Replace peanut butter with sunflower seed butter.
• Extra Fiber: Add 1 tablespoon ground flaxseed or chia seeds.
• Less Added Sugar: Leave out the chocolate chips and use very ripe bananas for additional natural sweetness.
• Gluten-Free Option: Use certified gluten-free oats and replace the whole-wheat flour with a suitable 1-to-1 gluten-free baking flour.
• Budget-Friendly Tip: Overripe bananas are perfect for this recipe, so freeze bananas that are becoming too ripe to eat fresh and thaw them when you’re ready to bake.
• Warm & Cozy: Microwave one bar for approximately 10–15 seconds before serving for a softer texture and warm peanut-butter-and-banana flavor.
Storage & Meal Prep
Allow the bars to cool completely before storing.
Store in an airtight container at room temperature for up to 2 days or refrigerate for up to 5 days.
Place parchment or wax paper between layers to prevent the bars from sticking together.
For longer storage, individually wrap the bars and freeze them in a freezer-safe container or bag for up to 2 months.
Thaw overnight in the refrigerator or at room temperature before serving.
For a warm snack, microwave a refrigerated or thawed bar for approximately 10–15 seconds.
These bars are especially useful for meal prep because they can be individually portioned at the beginning of the week and grabbed as needed.
Nutrition Information
Estimated Nutrition Per Bar:
Calories: approximately 210
Protein: approximately 7 g
Carbohydrates: approximately 31 g
Fiber: approximately 4 g
Total Fat: approximately 8 g
Saturated Fat: approximately 2 g
Sodium: approximately 120–160 mg
Nutrition information is an estimate and may vary depending on the peanut butter, milk, chocolate chips, sweetener, banana size, brands used, and exact portion size.
Using natural peanut butter without added sugar and keeping the chocolate chips modest helps balance the sweetness while still giving the bars a treat-like flavor.
Why You’ll Love It
• Inspired by a proven reader-favorite snack combination
• Soft, chewy, and satisfying
• Provides both protein and fiber
• Uses everyday, budget-friendly ingredients
• Naturally sweetened in part with ripe bananas
• Easy to prepare ahead for busy weeks
• Portable enough for work, school, or travel
• Freezer-friendly
• Easy to customize with fruit, nuts, or different toppings
• Gives you the comforting flavors of peanut butter and banana in a convenient grab-and-go snack
Loaded Veggie & Cheddar Egg Muffins
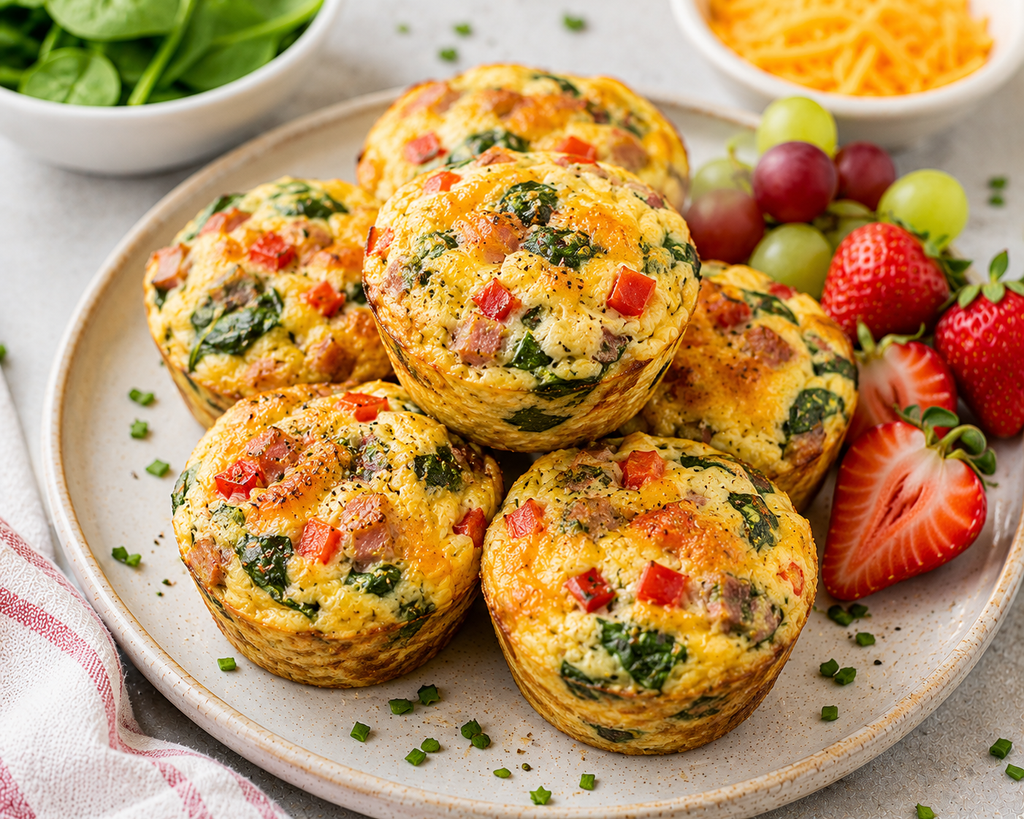
These Loaded Veggie & Cheddar Egg Muffins pack colorful vegetables, savory turkey bacon, melted cheddar, and fluffy eggs into an easy handheld snack.
They’re satisfying enough to hold you over between meals, while spinach, bell pepper, tomato, and onion add fresh flavor and color. Because they can be made ahead, refrigerated, or frozen, they’re especially convenient for busy workweeks.
Enjoy one for a lighter snack or pair two with fresh fruit when you need something more substantial.
Prep Time: 10 minutes
Cook Time: 20–25 minutes
Total Time: 30–35 minutes
Yield: 12 egg muffins
Servings: 6
Serving Size: 2 egg muffins
Difficulty: Easy
Budget Level: $
Best For: High-protein snacks, meal prep, grab-and-go mornings, work snacks, after-school snacks, or light meals
Ingredients
• Nonstick cooking spray
• 9 large eggs
• ¼ teaspoon salt
• ¼ teaspoon freshly ground black pepper
• ¼ teaspoon garlic powder
• ⅓ cup finely chopped baby spinach
• ⅓ cup finely diced red bell pepper
• ¼ cup finely diced tomato, seeds and excess liquid removed
• ¼ cup finely diced onion
• 3 slices cooked turkey bacon, chopped
• ½ cup shredded reduced-fat sharp cheddar cheese
• 1 tablespoon finely chopped fresh chives or green onion, optional
Directions
- Preheat the oven to 350°F.
- Generously coat a standard 12-cup muffin pan with nonstick cooking spray. Silicone muffin cups may also be used to make removal easier.
- Crack the eggs into a large mixing bowl.
- Add the salt, black pepper, and garlic powder. Whisk until the eggs are completely combined.
- Add the spinach, bell pepper, tomato, onion, turkey bacon, cheddar cheese, and optional chives.
- Stir gently until the vegetables, meat, and cheese are evenly distributed throughout the egg mixture.
- Divide the mixture evenly among the 12 prepared muffin cups. Avoid filling them completely to the top because the eggs will puff while baking.
- Place the muffin pan on a baking sheet for easier handling.
- Bake for 20–25 minutes, or until the centers are completely set and the tops are lightly golden.
- Remove from the oven and allow the egg muffins to cool in the pan for 5–10 minutes.
- Run a thin silicone spatula or butter knife gently around the edges if necessary, then carefully remove the muffins.
- Serve warm or allow them to cool completely before storing for meal prep.
Make It Your Way
• Vegetarian: Leave out the turkey bacon and add mushrooms, broccoli, zucchini, or additional bell peppers.
• Western Style: Use diced lean ham, bell pepper, onion, and reduced-fat Swiss or cheddar cheese.
• Southwest: Add diced jalapeño, chopped tomato, green onion, a pinch of cumin, and pepper jack cheese.
• Mediterranean: Use spinach, tomato, feta, oregano, and finely chopped red onion.
• Extra Veggies: Add finely chopped mushrooms, asparagus, kale, broccoli, or zucchini.
• Cheese Swap: Try mozzarella, Swiss, Monterey Jack, pepper jack, or feta instead of cheddar.
• Egg-White Boost: Replace several whole eggs with egg whites if preferred.
• Meat Swap: Replace turkey bacon with cooked chicken sausage, lean ham, or leftover cooked chicken.
• Spice It Up: Add crushed red pepper, cayenne, hot sauce, or diced jalapeño.
• Budget-Friendly Tip: Use whatever vegetables and cheese you already have in the refrigerator. Egg muffins are a great way to use small amounts of leftover vegetables before they go to waste.
Storage & Meal Prep
Allow the egg muffins to cool completely before storing.
Refrigerate in an airtight container for up to 4 days.
For longer storage, place completely cooled egg muffins in a freezer-safe container or freezer bag and freeze for up to 2 months.
For convenient meal prep, freeze the muffins individually before transferring them to a larger freezer bag so you can remove only the amount you need.
Refrigerated muffins can be reheated in the microwave in short intervals until heated through.
Frozen muffins can be thawed overnight in the refrigerator or reheated directly from frozen, adding additional heating time as needed.
For food safety, reheat egg muffins until hot throughout.
If packing them for work or school, keep them refrigerated or in an insulated lunch bag with an ice pack until ready to eat.
Nutrition Information
Estimated Nutrition Per Serving — 2 Egg Muffins:
Calories: approximately 160–180
Protein: approximately 14–16 g
Carbohydrates: approximately 3–4 g
Fiber: approximately 1 g
Total Fat: approximately 10–11 g
Saturated Fat: approximately 3–4 g
Sodium: approximately 300–400 mg
Nutrition information is an estimate and may vary depending on the eggs, turkey bacon, cheese, vegetables, brands used, and exact portion size.
Fresh fruit shown as an optional serving accompaniment is not included in the nutrition estimate.
Why You’ll Love It
• Based on a highly rated, reader-tested recipe concept
• Packed with satisfying protein
• Loaded with colorful vegetables
• Easy to prepare in one muffin pan
• Portable and convenient for busy days
• Great for weekly meal prep
• Refrigerator- and freezer-friendly
• Easy to customize with different vegetables, meats, and cheeses
• Works as a snack, quick breakfast, or light meal
• Helps turn simple everyday ingredients into something flavorful and filling
Mediterranean Veggie Pinwheels
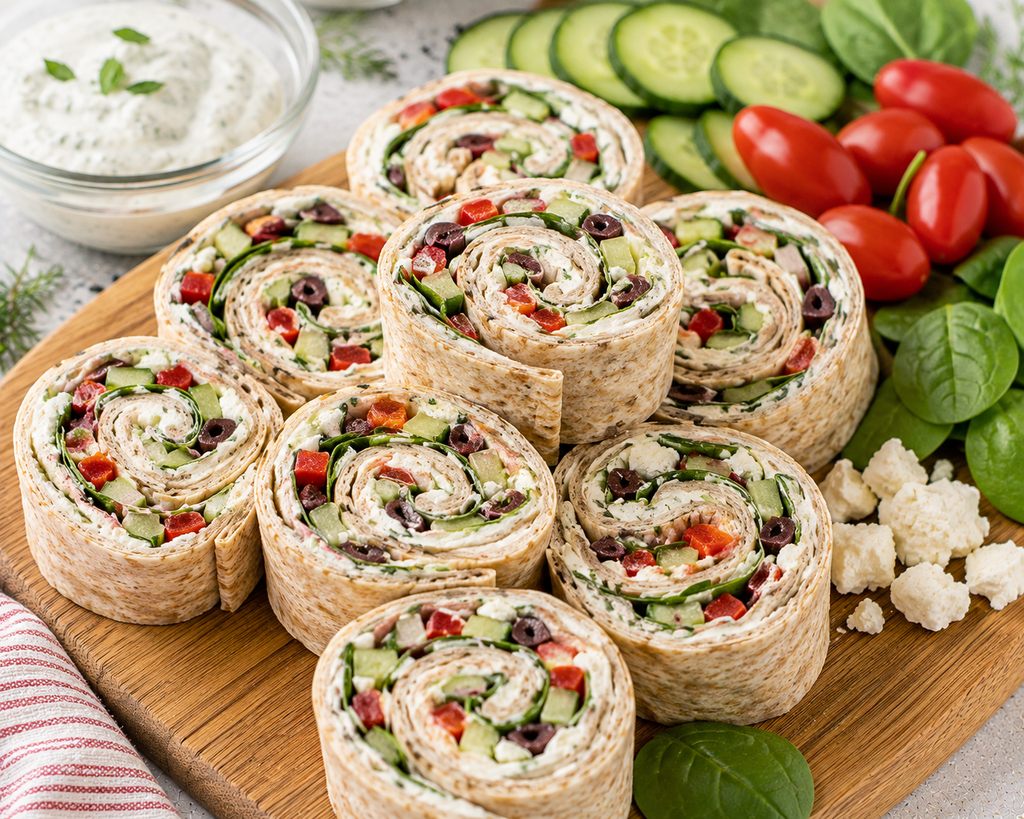
Fresh, creamy, colorful, and packed with Mediterranean-inspired flavor, these Mediterranean Veggie Pinwheels turn simple whole-wheat tortillas into an easy no-cook snack.
A creamy Greek-yogurt and herb spread is layered with crisp cucumber, baby spinach, roasted red pepper, Kalamata olives, and tangy feta before everything is rolled and sliced into bite-size spirals.
They’re easy enough for an everyday snack but pretty enough for a party tray, and because there’s no cooking involved, they’re a great option when you want something fresh without spending much time in the kitchen.
Prep Time: 15 minutes
Chill Time: 30 minutes
Cook Time: 0 minutes
Total Time: 45 minutes
Servings: 6
Serving Size: Approximately 4 pinwheels
Difficulty: Very Easy
Budget Level: $$
Best For: Work snacks, lunchboxes, party trays, afternoon snacks, picnics, or light meals
Ingredients
• 4 large whole-wheat tortillas
• 4 ounces reduced-fat cream cheese, softened
• ¼ cup plain Greek yogurt
• ½ teaspoon dried dill
• ½ teaspoon garlic powder
• ½ teaspoon dried oregano
• 1 teaspoon fresh lemon juice
• 1 cup fresh baby spinach, roughly chopped
• ½ cup finely diced cucumber, patted very dry
• ⅓ cup finely chopped roasted red pepper, patted dry
• ¼ cup finely chopped Kalamata olives
• ⅓ cup crumbled feta cheese
• Freshly ground black pepper, to taste
Directions
- Place the softened cream cheese and Greek yogurt in a small bowl.
- Add the dill, garlic powder, oregano, lemon juice, and black pepper. Stir until smooth and creamy.
- Lay the tortillas flat on a clean work surface.
- Divide the creamy herb mixture evenly among the tortillas and spread it nearly to the edges.
- Sprinkle the chopped spinach evenly over each tortilla.
- Add the cucumber, roasted red pepper, Kalamata olives, and crumbled feta.
- Be careful not to overfill the tortillas, which can make them difficult to roll.
- Starting at one edge, roll each tortilla as tightly as possible.
- Wrap each tortilla roll tightly in plastic wrap or reusable food wrap.
- Refrigerate for approximately 30 minutes. Chilling helps the filling firm and makes the pinwheels easier to slice.
- Unwrap each roll and trim off the uneven ends if desired.
- Using a sharp knife, cut each roll into approximately 1-inch slices.
- Arrange the pinwheels cut-side up and serve chilled or shortly after slicing.
Make It Your Way
• Add Protein: Add a thin layer of sliced turkey or shredded cooked chicken before rolling.
• Hummus Version: Replace the cream cheese mixture with your favorite hummus.
• Extra Greek Flavor: Add finely chopped artichoke hearts or sun-dried tomatoes.
• Mild Version: Leave out the Kalamata olives and use additional cucumber and bell pepper.
• Spicy Version: Add crushed red pepper flakes or finely chopped pepperoncini.
• More Crunch: Add very thin strips of red bell pepper or shredded carrots.
• Different Greens: Substitute arugula or finely chopped romaine for the spinach.
• Cheese Swap: Use goat cheese instead of feta for a creamier, tangier flavor.
• Whole-Grain Option: Choose tortillas labeled whole wheat or whole grain for additional fiber.
• Budget-Friendly Tip: Use regular bell pepper instead of jarred roasted red pepper, and choose whichever fresh vegetables are already in your refrigerator.
• Party Tray: Double the recipe and arrange the colorful pinwheels on a platter with cucumber slices, cherry tomatoes, and fresh vegetables.
Storage & Meal Prep
These pinwheels are best enjoyed the same day they are assembled because fresh cucumber and vegetables gradually release moisture.
For meal prep, prepare the creamy herb spread and chop the vegetables up to 1 day ahead. Store them separately in airtight containers in the refrigerator.
Pat the cucumber and roasted red pepper thoroughly dry before assembling to help prevent soggy tortillas.
Once assembled, wrap the unsliced tortilla rolls tightly and refrigerate until ready to serve.
For the best texture, slice shortly before eating.
Store leftover pinwheels in an airtight container in the refrigerator and enjoy within 1 day.
Freezing is not recommended because the fresh vegetables and creamy filling may become watery after thawing.
Nutrition Information
Estimated Nutrition Per Serving:
Calories: approximately 180–210
Protein: approximately 7–8 g
Carbohydrates: approximately 22–25 g
Fiber: approximately 3–4 g
Total Fat: approximately 9–11 g
Saturated Fat: approximately 4 g
Sodium: approximately 450–550 mg
Nutrition information is an estimate and may vary depending on the tortillas, cream cheese, Greek yogurt, feta, olives, vegetables, brands used, and exact serving size.
Using lower-sodium tortillas, feta, and olives can reduce the sodium content.
Why You’ll Love It
• No cooking required
• Fresh and colorful
• Ready with only about 15 minutes of hands-on preparation
• Packed with crisp vegetables
• Creamy, crunchy, salty, and tangy in every bite
• Easy to prepare ahead
• Portable for work or lunchboxes
• Pretty enough for parties and entertaining
• Easy to customize with different vegetables and proteins
• Gives the Healthy Snack Library a completely different option from the oat bites, chickpeas, dips, fruit snacks, and egg muffins
Garden Herb Stuffed Mini Peppers
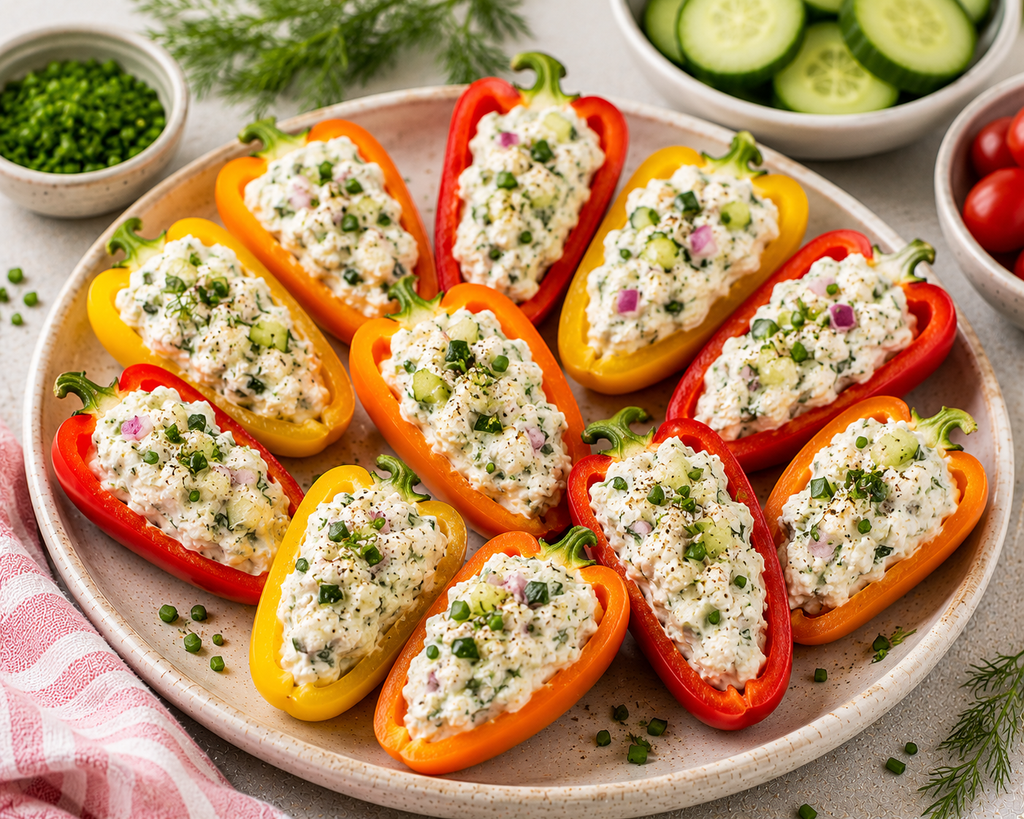
Cool, crisp, creamy, and colorful, these Garden Herb Stuffed Mini Peppers are an easy no-cook snack you can put together in minutes.
Naturally sweet mini peppers are filled with a creamy Greek-yogurt and cream-cheese mixture seasoned with fresh cucumber, chives, dill, red onion, garlic, and black pepper. The combination gives you plenty of crunch and fresh flavor without requiring an oven or stove.
Make them for an afternoon snack, pack them for work, or arrange them on a platter when you need an easy appetizer that looks impressive without much effort.
Prep Time: 15 minutes
Cook Time: 0 minutes
Total Time: 15 minutes
Servings: 4
Serving Size: Approximately 5–6 stuffed pepper halves
Difficulty: Very Easy
Budget Level: $
Best For: Quick snacks, work snacks, lunchboxes, party trays, summer snacks, or no-cook meal prep
Ingredients
• 10–12 mini sweet peppers
• 4 ounces reduced-fat cream cheese, softened
• ½ cup plain Greek yogurt
• ¼ cup finely diced cucumber, patted dry
• 2 tablespoons finely chopped fresh chives
• 1 tablespoon finely diced red onion
• 1 tablespoon chopped fresh dill
• ½ teaspoon garlic powder
• ¼ teaspoon onion powder
• ¼ teaspoon freshly ground black pepper
• Pinch of salt, or to taste
• 1 teaspoon fresh lemon juice
Directions
- Wash and dry the mini sweet peppers. Slice each pepper in half lengthwise and remove the seeds and membranes.
- Pat the pepper halves dry and arrange them cut-side up on a clean work surface or serving platter.
- In a medium bowl, combine the softened reduced-fat cream cheese and Greek yogurt. Stir until smooth and creamy.
- Add the finely diced cucumber, chives, red onion, dill, garlic powder, onion powder, black pepper, salt, and lemon juice.
- Stir until the herbs and vegetables are evenly distributed throughout the filling.
- Taste and adjust the seasonings if needed.
- Spoon the garden herb filling evenly into each mini pepper half.
- Garnish with additional chopped chives or dill if desired.
- Serve immediately, or refrigerate briefly until ready to serve.
Make It Your Way
• Everything Bagel: Sprinkle everything bagel seasoning over the filled peppers just before serving.
• Ranch Style: Add extra dill, parsley, garlic powder, and onion powder for a ranch-inspired flavor.
• Spicy: Mix finely chopped jalapeño or crushed red pepper into the filling.
• Mediterranean: Add crumbled feta, oregano, and finely chopped Kalamata olives.
• Extra Protein: Replace part of the cream cheese with additional Greek yogurt or blended cottage cheese.
• Cucumber-Dill: Increase the cucumber and fresh dill for an extra-refreshing version.
• Cheese Lover’s Version: Add a small amount of finely shredded sharp cheddar.
• Dairy-Free: Use your preferred dairy-free cream cheese and unsweetened dairy-free yogurt.
• Warm Version: Place the stuffed peppers on a baking sheet and bake at 350°F until the peppers are slightly tender and the filling is warm.
• Budget-Friendly Tip: Use whichever package of mini peppers is on sale. The filling also works with strips of regular bell pepper, cucumber rounds, celery, or carrots.
Storage & Meal Prep
These stuffed peppers are best when the peppers remain crisp and the filling is cold.
Store leftovers in an airtight container in the refrigerator and enjoy within 2 days.
For the best meal-prep texture, prepare the filling separately and refrigerate it in an airtight container for up to 3 days.
Wash and cut the peppers ahead of time, but store them separately from the filling.
Pat the cucumber very dry before adding it to the filling. Removing excess moisture helps prevent the mixture from becoming watery.
Fill the peppers shortly before serving or packing whenever possible.
Freezing is not recommended because both the fresh peppers and creamy filling may lose their texture after thawing.
Nutrition Information
Estimated Nutrition Per Serving:
Calories: approximately 120–140
Protein: approximately 6–7 g
Carbohydrates: approximately 10–12 g
Fiber: approximately 2–3 g
Total Fat: approximately 7–8 g
Saturated Fat: approximately 4 g
Sodium: approximately 180–250 mg
Nutrition information is an estimate and may vary depending on the cream cheese, Greek yogurt, vegetables, brands used, and exact portion size.
Why You’ll Love It
- Ready in about 15 minutes
- No cooking required
- Cool, crisp, creamy, and refreshing
- Made with colorful fresh vegetables
- Provides satisfying protein from Greek yogurt and cream cheese
- Easy to prepare ahead for busy days
- Simple to customize with different herbs and seasonings
- Works as an everyday snack or an attractive party appetizer
- Uses affordable, easy-to-find grocery-store ingredients
- A fresh and flavorful way to add more vegetables to snack time
Peanut Butter Banana Crunch Roll-Ups
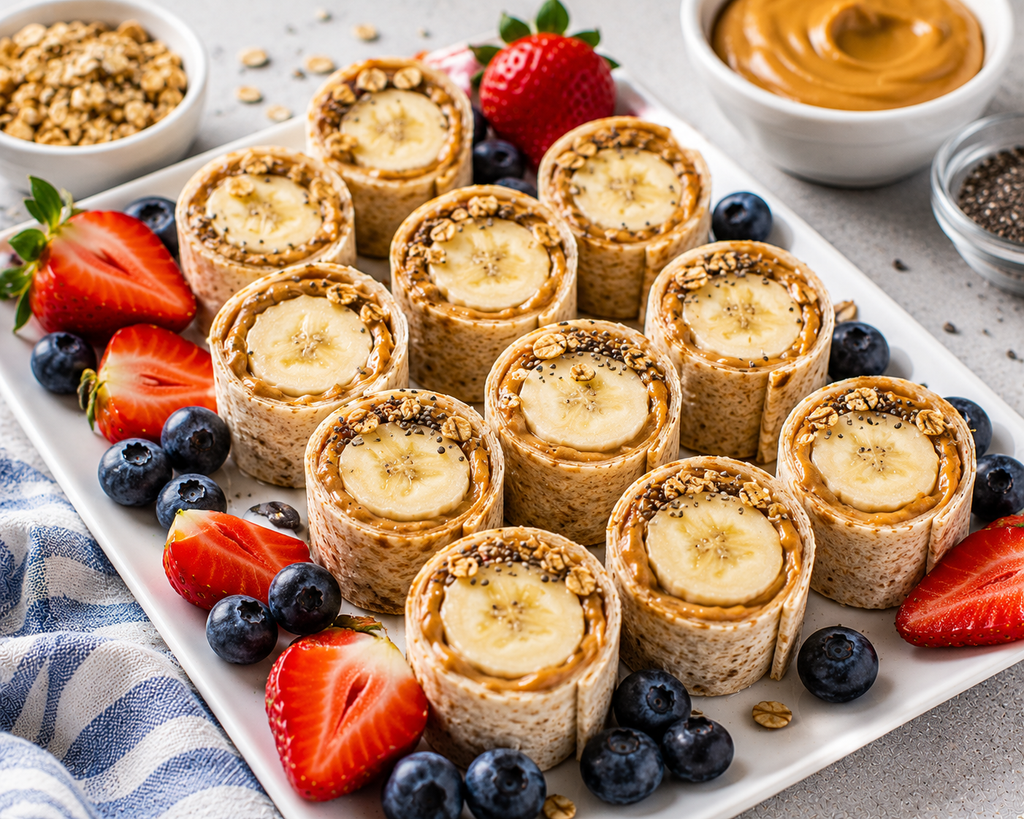
Creamy peanut butter, naturally sweet banana, and a little whole-grain crunch come together in these quick Peanut Butter Banana Crunch Roll-Ups.
Wrapped in a whole-wheat tortilla and sliced into easy-to-eat bites, this snack gives you a satisfying combination of fruit, whole grains, healthy fats, and plant-based protein without requiring any cooking. A sprinkle of chia seeds and crunchy granola adds extra texture without making the recipe complicated.
They take only minutes to prepare, making them perfect for busy afternoons, work snacks, lunchboxes, or anytime you need something quick and filling.
Prep Time: 10 minutes
Cook Time: 0 minutes
Total Time: 10 minutes
Servings: 4
Serving Size: Approximately 5–6 roll-up bites
Difficulty: Very Easy
Budget Level: $
Best For: Quick snacks, work snacks, lunchboxes, after-school snacks, pre-workout snacks, or grab-and-go meals
Ingredients
• 4 small whole-wheat tortillas
• ⅓ cup natural creamy peanut butter
• 4 small bananas
• ¼ cup lower-sugar granola
• 2 teaspoons chia seeds
• ½ teaspoon ground cinnamon
• 1 teaspoon honey or pure maple syrup, optional
• Fresh strawberries or blueberries for serving, optional
Directions
- Lay the whole-wheat tortillas flat on a clean work surface.
- Spread approximately 1 tablespoon plus 1 teaspoon of peanut butter evenly over each tortilla, leaving a small border around the edges.
- Sprinkle each tortilla lightly with cinnamon.
- Sprinkle the granola and chia seeds evenly over the peanut butter.
- If additional sweetness is desired, drizzle a very small amount of honey or maple syrup over the filling.
- Peel the bananas and place one banana near the edge of each tortilla.
- Roll each tortilla tightly around the banana.
- Place the rolls seam-side down on a cutting board.
- Using a sharp knife, slice each roll into approximately 1-inch pieces.
- Arrange the roll-ups cut-side up so the banana centers are visible.
- Serve immediately, with fresh strawberries or blueberries if desired.
Make It Your Way
• Nut-Free: Replace peanut butter with sunflower seed butter.
• Almond Butter: Use almond butter and sprinkle with sliced almonds.
• Strawberry Banana: Add thinly sliced strawberries before rolling.
• Chocolate Banana: Add a small sprinkle of mini dark chocolate chips.
• Apple Cinnamon: Replace the banana with very thin apple slices and add extra cinnamon.
• Extra Protein: Sprinkle hemp hearts over the peanut butter before rolling.
• Extra Crunch: Add chopped peanuts, almonds, walnuts, or pumpkin seeds.
• Lower Added Sugar: Choose unsweetened peanut butter and low-sugar granola and skip the optional honey or maple syrup.
• Warm Version: Lightly toast the whole roll in a dry skillet before slicing for a warm, crisp exterior and creamy center.
• Budget-Friendly Tip: Bananas, store-brand peanut butter, and whole-wheat tortillas make this an inexpensive snack. Skip the granola if you don’t already have it and use a small sprinkle of oats or chopped peanuts instead.
Storage & Meal Prep
These roll-ups are best eaten shortly after preparation because bananas naturally soften and darken after they are cut.
For meal prep, keep the tortillas, peanut butter, granola, chia seeds, and whole bananas separate until you’re ready to assemble.
If preparing a few hours ahead, keep the tortilla rolls whole rather than slicing them immediately. Wrap tightly and refrigerate.
Slice just before serving for the freshest appearance and texture.
Leftover roll-ups can be refrigerated in an airtight container for up to 1 day, although some banana browning is normal.
Freezing is not recommended because the banana texture changes significantly after thawing.
Nutrition Information
Estimated Nutrition Per Serving:
Calories: approximately 300
Protein: approximately 9 g
Carbohydrates: approximately 47 g
Fiber: approximately 7 g
Total Fat: approximately 11 g
Saturated Fat: approximately 2 g
Sodium: approximately 180–250 mg
Nutrition information is an estimate and may vary depending on tortilla size, peanut butter, banana size, granola, optional sweetener, brands used, and exact serving size.
Fresh berries shown as an optional serving accompaniment are not included in the nutrition estimate.
Why You’ll Love It
• Ready in about 10 minutes
• No cooking required
• Kid- and adult-friendly
• Uses inexpensive everyday ingredients
• Combines creamy, crunchy, and naturally sweet flavors
• Provides whole grains, fruit, fiber, and satisfying fats
• Easy to pack for work or school
• Simple enough for people who don’t enjoy cooking
• Easy to customize with different nut or seed butters
• Makes a filling snack without a long ingredient list
Herbed Cream Cheese Cucumber Bites
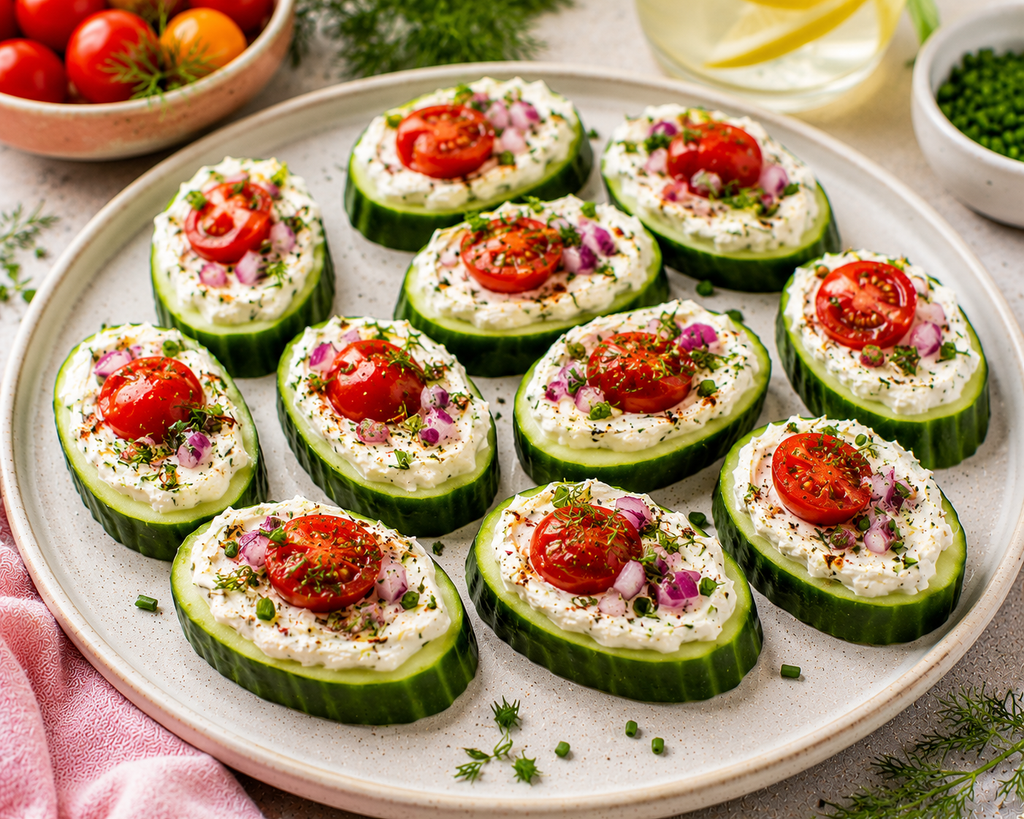
Cool, crisp cucumber becomes the perfect base for these creamy Herbed Cream Cheese Cucumber Bites. Each thick cucumber round is topped with a light, savory herb spread, juicy cherry tomato, red onion, and fresh herbs for a snack that’s refreshing, flavorful, and ready in minutes.
There’s no cooking required, and the combination of crunchy vegetables and creamy topping makes these feel a little more special than simply grabbing raw vegetables from the refrigerator.
Serve them as a quick afternoon snack, prepare a small plate for lunch, or make a larger batch for parties and family gatherings.
Prep Time: 15 minutes
Cook Time: 0 minutes
Total Time: 15 minutes
Servings: 4
Serving Size: Approximately 4–5 cucumber bites
Difficulty: Very Easy
Budget Level: $
Best For: Quick snacks, afternoon snacks, party trays, summer snacks, light lunches, or no-cook appetizers
Ingredients
• 1 large English cucumber
• 4 ounces reduced-fat cream cheese, softened
• ¼ cup plain Greek yogurt
• ½ teaspoon dried dill
• ½ teaspoon garlic powder
• ¼ teaspoon onion powder
• ¼ teaspoon freshly ground black pepper
• 1 teaspoon fresh lemon juice
• 8–10 cherry or grape tomatoes, thinly sliced
• 2 tablespoons finely diced red onion
• 1 tablespoon chopped fresh chives
• 1 tablespoon chopped fresh dill or parsley
• Pinch of smoked paprika, optional
Directions
- Wash and thoroughly dry the cucumber.
- Slice the cucumber into approximately ½-inch-thick rounds.
- Arrange the cucumber rounds on a clean kitchen towel or paper towels and gently pat the surfaces dry. Removing excess moisture helps the creamy topping stay in place.
- In a small bowl, combine the softened cream cheese and Greek yogurt.
- Add the dried dill, garlic powder, onion powder, black pepper, and lemon juice.
- Stir until smooth and creamy.
- Spread or pipe approximately 1–2 teaspoons of the herb mixture onto each cucumber round.
- Top each bite with a slice of cherry tomato.
- Sprinkle with a small amount of diced red onion.
- Finish with fresh chives and dill or parsley.
- Add a light sprinkle of smoked paprika or additional black pepper if desired.
- Serve immediately or refrigerate briefly before serving.
Make It Your Way
• Everything Bagel: Replace the fresh herb garnish with a light sprinkle of everything bagel seasoning.
• Mediterranean: Top with tomato, feta, Kalamata olive, and oregano.
• Smoked Salmon: Add a small piece of smoked salmon and fresh dill for a more substantial snack.
• Turkey Cucumber Bites: Add a small folded piece of deli turkey underneath the tomato.
• Spicy: Mix a little hot sauce or crushed red pepper into the cream cheese mixture.
• Ranch Style: Increase the dill and add dried parsley, garlic powder, and onion powder.
• Cottage Cheese Option: Blend cottage cheese until smooth and use it in place of some or all of the cream cheese.
• Dairy-Free: Use dairy-free cream cheese and plain unsweetened dairy-free yogurt.
• Extra Veggies: Add finely diced bell pepper, shredded carrot, or chopped spinach.
• Budget-Friendly Tip: Regular cucumbers work too. Peel them partially if the skin is thick, and use whichever fresh herbs or vegetables you already have.
Storage & Meal Prep
These cucumber bites have the best texture when assembled shortly before serving.
The creamy herb mixture can be prepared up to 3 days ahead and stored in an airtight container in the refrigerator.
Cucumber rounds can be sliced several hours ahead. Store them separately in an airtight container lined with a paper towel to absorb excess moisture.
For meal prep, keep the cucumber, creamy filling, tomatoes, and garnishes separate and assemble when ready to eat.
Fully assembled cucumber bites can be refrigerated for several hours, but the cucumbers will gradually release moisture.
Leftovers can be stored overnight in the refrigerator, although the texture will be softer the following day.
Freezing is not recommended.
Nutrition Information
Estimated Nutrition Per Serving:
Calories: approximately 100–120
Protein: approximately 5–6 g
Carbohydrates: approximately 7–9 g
Fiber: approximately 1–2 g
Total Fat: approximately 7–8 g
Saturated Fat: approximately 4 g
Sodium: approximately 170–230 mg
Nutrition information is an estimate and may vary depending on the cream cheese, Greek yogurt, vegetables, brands used, toppings, and exact serving size.
Why You’ll Love It
• Ready in about 15 minutes
• No cooking required
• Cool, crisp, and refreshing
• Uses simple, easy-to-find ingredients
• Adds fresh vegetables to snack time
• Creamy without needing a heavy dip
• Easy to customize with different toppings
• Works for everyday snacking or entertaining
• Naturally colorful and attractive on a snack platter
• Perfect when you want something savory without turning on the oven
Honey Berry & Feta Snack Skewers
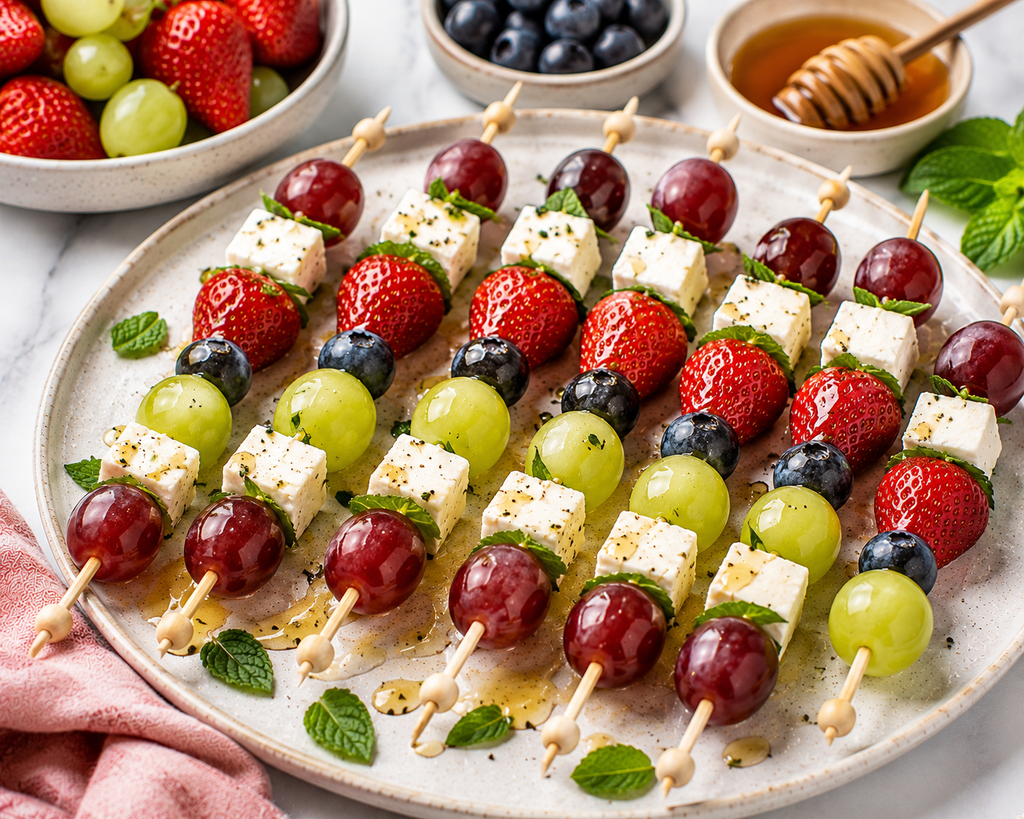
Sweet, juicy fruit meets creamy, salty feta in these colorful Honey Berry & Feta Snack Skewers. Strawberries, blueberries, red and green grapes, fresh mint, and feta are threaded onto small skewers and finished with just a touch of honey for an irresistible sweet-and-savory combination.
There’s no cooking required, and assembly takes only minutes. They’re refreshing enough for warm afternoons but satisfying enough to feel like more than a simple bowl of fruit.
Make a few for an afternoon snack or prepare a full platter for brunches, parties, picnics, and family gatherings.
Prep Time: 15 minutes
Cook Time: 0 minutes
Total Time: 15 minutes
Servings: 4
Serving Size: 2–3 small skewers
Difficulty: Very Easy
Budget Level: $$
Best For: Afternoon snacks, summer snacks, brunch, party platters, picnics, family gatherings, or light appetizers
Ingredients
• 1 cup fresh strawberries, hulled and halved if large
• ¾ cup seedless red grapes
• ¾ cup seedless green grapes
• ½ cup fresh blueberries
• 4 ounces feta cheese, cut into bite-size cubes
• ¼ cup fresh mint leaves
• 2 teaspoons honey
• 1 teaspoon fresh lemon juice
• Pinch of freshly ground black pepper, optional
• 10–12 small appetizer skewers
Directions
- Wash the strawberries, grapes, blueberries, and mint thoroughly.
- Dry the fruit very well. Excess moisture can make the skewers slippery and dilute the honey drizzle.
- Cut large strawberries into halves or bite-size pieces.
- Carefully cut the feta into approximately ¾-inch cubes. Keep the pieces large enough that they will not crumble when threaded.
- Thread the fruit, feta, and mint onto each small skewer, alternating ingredients and colors.
- Continue assembling until all of the ingredients have been used.
- Arrange the finished skewers on a serving platter.
- Stir the honey and lemon juice together in a small bowl.
- Lightly drizzle the honey mixture over the skewers immediately before serving.
- Add a very small amount of freshly ground black pepper if desired for a sweet-and-savory finish.
- Serve chilled or at cool room temperature.
Make It Your Way
• Watermelon Feta: Replace some of the berries with seedless watermelon cubes.
• Peach & Berry: Add fresh peach or nectarine pieces during summer.
• Mozzarella Version: Replace feta with small fresh mozzarella pearls for a milder flavor.
• Extra Protein: Pair the skewers with a small serving of Greek yogurt or a handful of nuts.
• Tropical: Use pineapple, strawberries, grapes, and mango with a mild cheese.
• No Added Sweetener: Skip the honey completely and let the naturally sweet fruit provide the sweetness.
• Extra Fresh: Add additional mint or a little finely grated lemon zest.
• Crunchy Addition: Serve with a small handful of walnuts, almonds, or pistachios.
• Kid-Friendly: Use short, blunt appetizer picks and milder cheese such as mozzarella.
• Budget-Friendly Tip: You don’t need every fruit listed. Use two or three fruits that are in season or on sale and alternate them with the cheese.
Storage & Meal Prep
For the freshest flavor and texture, assemble these skewers the same day they will be served.
The fruit can be washed and dried ahead of time and refrigerated separately.
Cut the feta and store it in an airtight container in the refrigerator until ready to assemble.
Assembled skewers can be covered and refrigerated for up to 1 day.
Wait to add the honey-lemon drizzle until shortly before serving. Adding it too early can cause the fruit to release additional moisture.
If packing the skewers for work or a picnic, keep them cold in an insulated container with an ice pack.
Freezing is not recommended because the texture of the fresh fruit will change after thawing.
Nutrition Information
Estimated Nutrition Per Serving:
Calories: approximately 160–180
Protein: approximately 5–6 g
Carbohydrates: approximately 25–28 g
Fiber: approximately 3 g
Total Fat: approximately 6–7 g
Saturated Fat: approximately 4 g
Sodium: approximately 300–350 mg
Nutrition information is an estimate and may vary depending on the fruit, feta cheese, honey, brands used, and exact serving size.
Skipping the optional honey will reduce the amount of added sugar while keeping the snack naturally sweet from the fresh fruit.
Why You’ll Love It
• Ready in about 15 minutes
• No cooking required
• Sweet and savory in every bite
• Packed with colorful fresh fruit
• Easy enough for everyday snacking
• Attractive enough for parties and entertaining
• Easy to customize with seasonal fruit
• Simple ingredient list
• Refreshing during warmer months
• Gives the Healthy Snack Library a completely different fruit-and-cheese option
Turkey & Veggie Pinwheel Bites
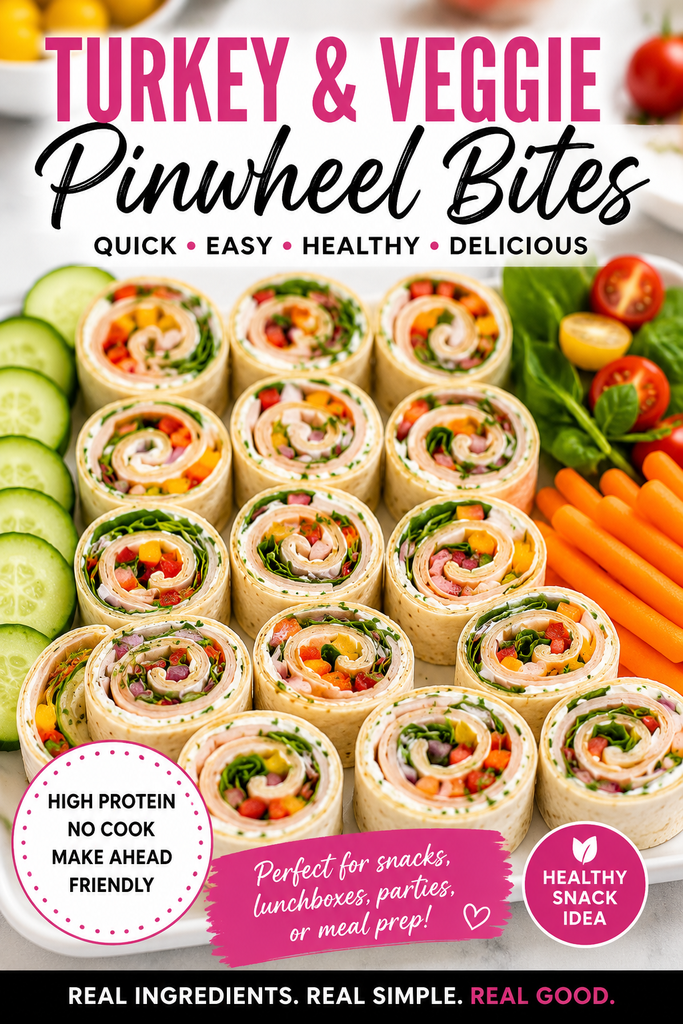
These colorful Turkey & Veggie Pinwheel Bites turn a few everyday ingredients into a quick, satisfying snack with plenty of crunch and flavor.
Whole-wheat tortillas are spread with a creamy herb mixture, then layered with lean turkey, spinach, crisp bell peppers, cucumber, and red onion. Roll everything up, chill, and slice for an easy handheld snack that requires absolutely no cooking.
They’re perfect for busy workdays, lunchboxes, meal prep, or a quick family snack—and they look good enough to add to a party platter too.
Prep Time: 15 minutes
Chill Time: 20–30 minutes
Cook Time: 0 minutes
Total Time: 35–45 minutes
Servings: 4
Serving Size: Approximately 4–5 pinwheels
Difficulty: Very Easy
Budget Level: $$
Best For: Work snacks, lunchboxes, meal prep, after-school snacks, picnics, party trays, or light lunches
Ingredients
• 4 medium whole-wheat tortillas
• 4 ounces reduced-fat cream cheese, softened
• ¼ cup plain Greek yogurt
• ½ teaspoon garlic powder
• ½ teaspoon dried dill
• ¼ teaspoon onion powder
• Freshly ground black pepper, to taste
• 8 ounces thinly sliced lower-sodium turkey breast
• 1 cup baby spinach
• ½ cup thinly sliced red, yellow, or orange bell pepper
• ⅓ cup thinly sliced cucumber, patted very dry
• ¼ cup finely sliced red onion
Directions
- Place the softened cream cheese and Greek yogurt in a small bowl.
- Add the garlic powder, dill, onion powder, and black pepper.
- Stir until smooth and evenly combined.
- Lay the tortillas flat on a clean work surface.
- Divide the creamy herb spread evenly among the tortillas, spreading it nearly to the edges.
- Arrange the turkey slices evenly over the cream cheese mixture.
- Add a thin layer of baby spinach.
- Sprinkle the bell pepper, cucumber, and red onion evenly over the tortillas.
- Avoid overfilling so the tortillas can be rolled tightly.
- Starting at one edge, roll each tortilla firmly into a tight log.
- Wrap the rolls tightly and refrigerate for approximately 20–30 minutes. Chilling makes them easier to slice neatly.
- Unwrap the rolls and trim the uneven ends if desired.
- Slice each roll into approximately 1-inch pinwheels using a sharp knife.
- Arrange cut-side up and serve chilled.
Make It Your Way
• Southwest: Add a thin layer of mashed avocado, pepper jack cheese, bell pepper, and a sprinkle of taco seasoning.
• Ranch Turkey: Add additional dill, parsley, garlic, and onion powder to create a ranch-inspired spread.
• Turkey & Cheddar: Add a thin layer of reduced-fat sharp cheddar before rolling.
• Chicken Version: Replace turkey with thinly sliced or finely shredded cooked chicken.
• Vegetarian: Leave out the turkey and add hummus, shredded carrots, spinach, cucumber, and bell peppers.
• Spicy: Add sliced jalapeños, crushed red pepper, or a small amount of hot sauce to the creamy spread.
• Extra Crunch: Add shredded carrots or finely sliced cabbage.
• Lower-Carb Option: Use a lower-carbohydrate or high-fiber tortilla if preferred.
• Extra Protein: Add a thin layer of cheese or use additional turkey.
• Budget-Friendly Tip: Use whichever lean deli meat, vegetables, and tortillas are on sale. This recipe is also a good way to use small amounts of leftover fresh vegetables.
Storage & Meal Prep
For the best texture, keep all vegetables as dry as possible before assembling the pinwheels.
The tortilla rolls can be assembled, wrapped tightly, and refrigerated before slicing.
For meal prep, prepare the rolls the night before and slice them when you’re ready to pack or serve.
Store finished pinwheels in an airtight container in the refrigerator and enjoy within 2 days.
If packing them for work, school, or a picnic, keep them refrigerated or use an insulated lunch bag with an ice pack.
Avoid adding very wet ingredients, such as juicy tomatoes, directly inside the rolls if they will be stored overnight because excess moisture can soften the tortillas.
Freezing is not recommended because the fresh vegetables and creamy spread may lose their texture after thawing.
Nutrition Information
Estimated Nutrition Per Serving:
Calories: approximately 250–280
Protein: approximately 18–21 g
Carbohydrates: approximately 25–28 g
Fiber: approximately 4–5 g
Total Fat: approximately 10–12 g
Saturated Fat: approximately 4 g
Sodium: approximately 550–700 mg
Nutrition information is an estimate and may vary depending on the tortillas, turkey, cream cheese, Greek yogurt, vegetables, brands used, and exact serving size.
Choosing lower-sodium turkey and tortillas can significantly reduce the sodium content.
Why You’ll Love It
• No cooking required
• Ready with about 15 minutes of hands-on preparation
• Provides satisfying protein
• Includes several fresh vegetables
• Colorful and appealing
• Easy to pack for work or school
• Great for make-ahead meal prep
• Simple enough for people who don’t enjoy cooking
• Easy to customize with whatever vegetables you have
• Works equally well as a snack, light lunch, or party appetizer
Crispy Baked Mozzarella Sticks
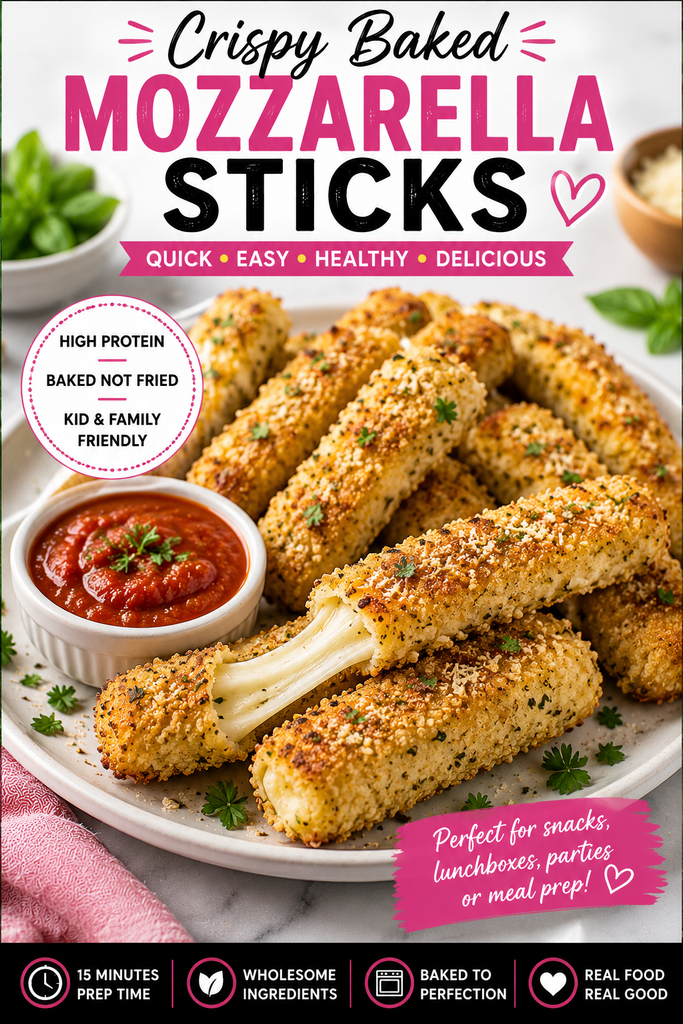
Golden and crunchy on the outside with warm, melty mozzarella inside, these Crispy Baked Mozzarella Sticks deliver everything you want from a cheesy snack without deep-frying.
Part-skim mozzarella is coated in seasoned whole-wheat breadcrumbs, Parmesan, and Italian herbs, then baked until crisp and gooey. Serve them with warm marinara for dipping and you have a satisfying snack that works for adults, kids, game days, or casual get-togethers.
The secret is freezing the breaded cheese before baking. It helps the coating become crisp while keeping that delicious melted cheese inside.
Prep Time: 15 minutes
Freezing Time: 1 hour
Cook Time: 8–10 minutes
Total Time: Approximately 1 hour 25 minutes
Servings: 6
Serving Size: 2 mozzarella sticks
Difficulty: Easy
Budget Level: $
Best For: Afternoon snacks, family snacks, game-day snacks, parties, after-school snacks, or appetizers
Ingredients
• 6 part-skim mozzarella string cheese sticks, cut in half
• ½ cup whole-wheat or regular panko breadcrumbs
• ¼ cup finely grated Parmesan cheese
• 1 teaspoon Italian seasoning
• ½ teaspoon garlic powder
• ½ teaspoon onion powder
• ¼ teaspoon smoked paprika
• ¼ teaspoon freshly ground black pepper
• 2 large eggs
• 1 tablespoon water
• ¼ cup whole-wheat flour or all-purpose flour
• Nonstick cooking spray
• ½ cup lower-sodium marinara sauce, warmed for serving
Directions
- Cut each mozzarella string cheese stick in half crosswise to create 12 shorter sticks.
- Place the mozzarella pieces in the freezer while preparing the breading ingredients.
- In a shallow bowl, combine the breadcrumbs, Parmesan, Italian seasoning, garlic powder, onion powder, smoked paprika, and black pepper.
- In a second shallow bowl, whisk the eggs with 1 tablespoon of water.
- Place the flour in a third shallow bowl.
- Working with one mozzarella piece at a time, lightly coat it in flour and shake off the excess.
- Dip it completely into the egg mixture.
- Coat thoroughly with the seasoned breadcrumb mixture, gently pressing the crumbs onto the cheese.
- For a thicker coating that helps prevent leaking, dip the breaded mozzarella back into the egg and then into the breadcrumbs a second time.
- Arrange the breaded mozzarella sticks on a parchment-lined baking sheet without allowing them to touch.
- Freeze for at least 1 hour. Do not skip this step. Thoroughly freezing the cheese helps prevent it from melting out before the coating becomes crisp.
- When ready to bake, preheat the oven to 425°F.
- Lightly spray the frozen mozzarella sticks with nonstick cooking spray.
- Bake directly from frozen for approximately 4–5 minutes.
- Carefully turn each mozzarella stick and continue baking for another 3–5 minutes.
- Watch closely near the end. Remove them as soon as the coating is golden and the cheese begins to soften. If cheese begins leaking from the coating, remove them immediately.
- Allow to cool for 1–2 minutes before serving.
- Serve warm with marinara sauce for dipping.
Make It Your Way
• Air Fryer: Air-fry frozen breaded mozzarella sticks at approximately 390°F for 5–7 minutes, checking frequently near the end.
• Extra Italian: Increase the Italian seasoning and add dried basil or oregano.
• Spicy: Add crushed red pepper or cayenne pepper to the breadcrumb mixture.
• Extra Crunch: Use panko breadcrumbs for a lighter, crispier exterior.
• Gluten-Free: Use gluten-free flour and gluten-free breadcrumbs.
• Pizza Style: Serve with warm marinara and sprinkle with additional oregano.
• Garlic Parmesan: Increase the garlic powder slightly and add additional Parmesan to the breadcrumb mixture.
• Portion-Friendly: Because these are rich and satisfying, pair two sticks with fresh vegetables or fruit rather than turning the snack into a large serving.
• Budget-Friendly Tip: Store-brand part-skim mozzarella string cheese works well and is often less expensive than specialty mozzarella.
Storage & Meal Prep
These mozzarella sticks are excellent for freezer meal prep.
Bread the mozzarella sticks according to the recipe and freeze them in a single layer until completely firm.
Once frozen solid, transfer the uncooked breaded sticks to a freezer-safe container or bag. Place parchment paper between layers if needed.
Store frozen for up to 2 months.
Bake only the amount you need directly from frozen. Do not thaw before baking because thawed mozzarella is more likely to leak through the breading.
Cooked leftovers can be refrigerated in an airtight container for up to 3 days.
For the best texture, reheat cooked mozzarella sticks in an oven or air fryer until hot and crisp rather than microwaving.
Always make sure reheated cheese is hot throughout before serving.
Nutrition Information
Estimated Nutrition Per Serving — 2 Mozzarella Sticks:
Calories: approximately 190–220
Protein: approximately 13–15 g
Carbohydrates: approximately 16–19 g
Fiber: approximately 1–2 g
Total Fat: approximately 9–11 g
Saturated Fat: approximately 5 g
Sodium: approximately 450–550 mg
Nutrition information is an estimate and may vary depending on the mozzarella, breadcrumbs, Parmesan, flour, marinara sauce, brands used, and exact serving size.
Using part-skim mozzarella and baking instead of deep-frying keeps the recipe lighter while maintaining the crispy coating and melted-cheese center.
Why You’ll Love It
• Crispy outside and gooey inside
• Baked instead of deep-fried
• Provides satisfying protein
• Uses familiar, easy-to-find ingredients
• Kid- and family-friendly
• Freezer-friendly for convenient meal prep
• Easy to prepare ahead and bake only when needed
• Great for parties, game days, or afternoon snacks
• Pairs perfectly with marinara sauce
• Gives the Healthy Snack Library a warm, cheesy option that is completely different from the fresh and no-cook snacks
Frozen Strawberry Yogurt Bark
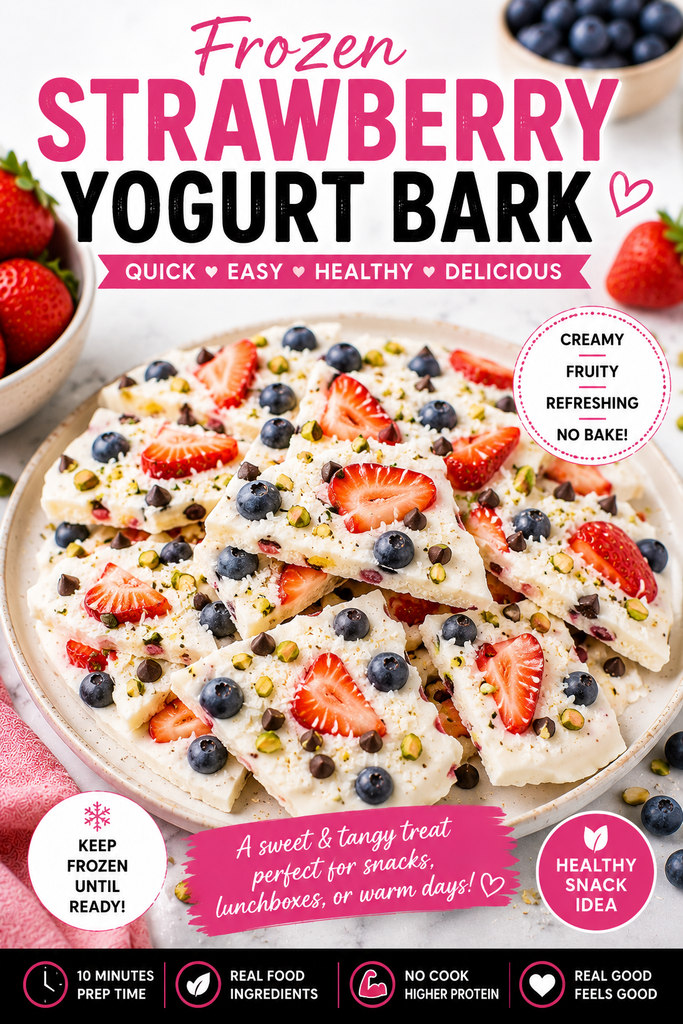
Cold, creamy, fruity, and just a little crunchy, this Frozen Strawberry Yogurt Bark is an easy freezer snack that feels like a treat while keeping the ingredients simple.
Protein-rich Greek yogurt is lightly sweetened and topped with juicy strawberries, blueberries, chopped pistachios, and a small sprinkle of dark chocolate. Once frozen, the yogurt breaks into colorful pieces that are perfect for grabbing straight from the freezer when you want something cool and refreshing.
With only about 10 minutes of hands-on preparation and no cooking required, this is an easy make-ahead snack for warm days, after-school cravings, or a lighter sweet bite.
Prep Time: 10 minutes
Cook Time: 0 minutes
Freezing Time: 3–4 hours
Total Time: Approximately 3–4 hours 10 minutes
Servings: 8
Serving Size: Approximately 2–3 pieces
Difficulty: Very Easy
Budget Level: $$
Best For: Freezer snacks, warm-weather snacks, after-school snacks, meal prep, or lighter sweet cravings
Ingredients
• 2 cups plain Greek yogurt
• 2 tablespoons honey or pure maple syrup
• 1 teaspoon vanilla extract
• ¾ cup fresh strawberries, thinly sliced
• ½ cup fresh blueberries
• ¼ cup shelled pistachios, roughly chopped
• 2 tablespoons mini dark chocolate chips
• 1 tablespoon unsweetened shredded coconut, optional
Directions
- Line a rimmed baking sheet or large freezer-safe tray with parchment paper.
- Place the Greek yogurt in a medium bowl.
- Add the honey or maple syrup and vanilla extract.
- Stir until smooth and evenly combined.
- Spread the yogurt mixture onto the prepared baking sheet in an even layer approximately ¼- to ½-inch thick.
- Arrange the sliced strawberries and blueberries evenly over the yogurt.
- Sprinkle the chopped pistachios over the fruit.
- Add the mini dark chocolate chips and optional shredded coconut.
- Gently press the toppings into the yogurt so they stay attached after freezing.
- Transfer the tray carefully to the freezer, keeping it level.
- Freeze for approximately 3–4 hours, or until completely firm.
- Once frozen solid, lift the bark from the tray using the parchment paper.
- Break or cut the bark into snack-size pieces.
- Serve immediately while frozen.
- Return any remaining pieces to the freezer promptly so they do not soften.
Make It Yor Way
• Berry Lover’s: Use strawberries, blueberries, raspberries, and blackberries.
• Tropical: Use diced mango, pineapple, coconut, and chopped macadamia nuts.
• PB & Berry: Add a light drizzle of warmed natural peanut butter before freezing.
• Chocolate Strawberry: Increase the dark chocolate slightly and use strawberries as the primary fruit.
• Nut-Free: Leave off the pistachios and use pumpkin or sunflower seeds for crunch.
• Extra Protein: Choose a higher-protein plain Greek yogurt.
• Lower Added Sugar: Skip the honey or maple syrup and rely on ripe fruit and vanilla for sweetness.
• Granola Crunch: Sprinkle a small amount of lower-sugar granola over the yogurt before freezing.
• Peach Version: Use thinly sliced peaches with cinnamon and chopped pecans.
• Budget-Friendly Tip: Use whichever berries are on sale. Frozen berries can work, but thaw and pat them very dry first to reduce excess ice crystals.
Storage & Meal Prep
Once completely frozen, break the yogurt bark into individual pieces.
Transfer the pieces immediately to a freezer-safe airtight container or freezer bag.
Place parchment paper between layers if necessary to prevent the pieces from freezing together.
Store in the freezer for up to 1 month for the best flavor and texture.
Keep the bark frozen until you’re ready to eat it. Because the base is yogurt, it will begin to soften relatively quickly at room temperature.
For meal prep, portion several pieces into small freezer-safe containers so individual servings are ready to grab.
This snack is not designed to be stored at room temperature or carried for extended periods without refrigeration or an insulated container.
Nutrition Information
Estimated Nutrition Per Serving:
Calories: approximately 120–140
Protein: approximately 7–9 g
Carbohydrates: approximately 15–18 g
Fiber: approximately 2 g
Total Fat: approximately 4–5 g
Saturated Fat: approximately 1–2 g
Sodium: approximately 30–50 mg
Nutrition information is an estimate and may vary depending on the Greek yogurt, fruit, pistachios, chocolate, sweetener, optional toppings, brands used, and exact serving size.
Using unsweetened Greek yogurt and keeping the honey, maple syrup, and chocolate portions modest helps limit added sugar.
Why You’ll Love It
• Only about 10 minutes of hands-on preparation
• No cooking required
• Cool and refreshing
• Creamy, fruity, and crunchy
• Provides protein from Greek yogurt
• Uses real fruit
• Easy to keep stocked in the freezer
• Customizable with different fruits and toppings
• Kid- and family-friendly
• A satisfying option when you’re craving something cold and sweet
Garlic Parmesan Edamame
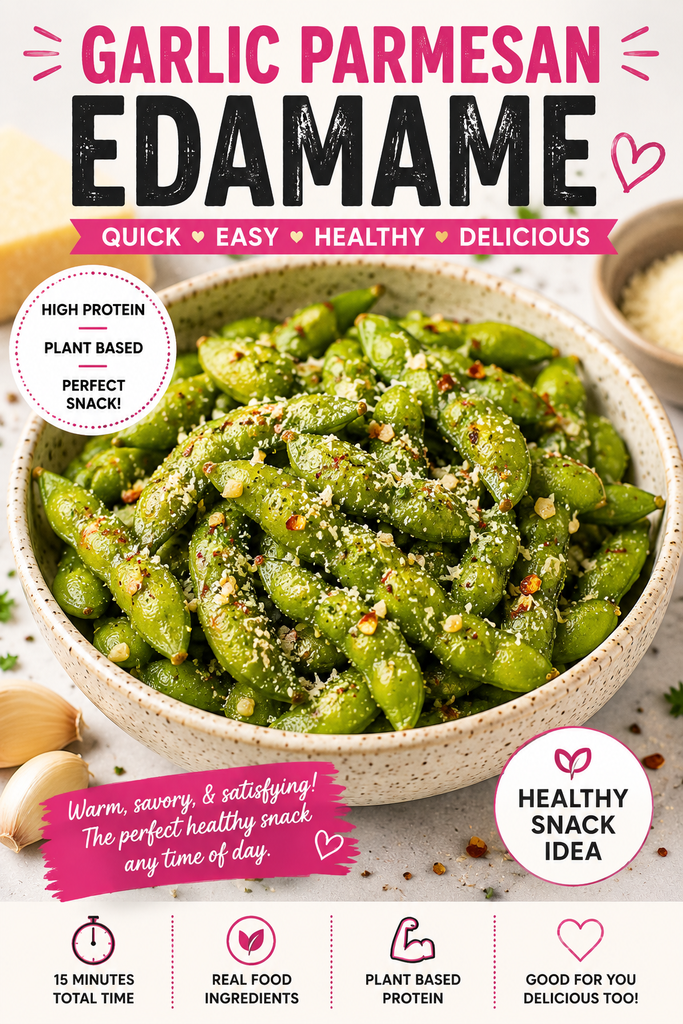
Warm, garlicky, cheesy, and ready in minutes, this Garlic Parmesan Edamame turns a simple freezer staple into a satisfying savory snack.
Edamame is tossed with a touch of olive oil, fresh garlic, Parmesan, black pepper, and red pepper flakes for plenty of flavor without a complicated ingredient list. Edamame naturally provides plant-based protein and fiber, making this a great option when you want something more substantial than chips or crackers.
Keep frozen edamame on hand and you can have this snack ready in about 15 minutes with very little cleanup.
Prep Time: 5 minutes
Cook Time: 8–10 minutes
Total Time: 13–15 minutes
Servings: 4
Serving Size: Approximately 1 cup edamame in pods
Best For: Afternoon snacks, high-protein snacks, family snacks, game-day snacks, or quick savory cravings
Difficulty: Very Easy
Budget Level: $
Ingredients
• 1 (16-ounce) bag frozen edamame in pods
• 2 teaspoons olive oil
• 2 cloves garlic, finely minced
• ¼ cup finely grated Parmesan cheese
• ½ teaspoon garlic powder
• ¼ teaspoon freshly ground black pepper
• ¼ teaspoon crushed red pepper flakes, optional
• Pinch of sea salt, or to taste
• 1 tablespoon finely chopped fresh parsley, optional
• Fresh lemon wedge, optional for serving
Directions
- Cook the frozen edamame according to the package directions until hot and tender.
- Drain thoroughly and pat away excess moisture. Keeping the pods relatively dry helps the seasonings stick.
- Heat the olive oil in a large skillet over medium heat.
- Add the minced garlic and cook for approximately 30–60 seconds, stirring constantly, just until fragrant. Do not allow the garlic to burn.
- Add the cooked edamame to the skillet.
- Sprinkle with garlic powder, black pepper, crushed red pepper flakes if using, and a small pinch of salt.
- Toss well and cook for another 2–3 minutes until the edamame is hot and evenly coated.
- Remove the skillet from the heat.
- Sprinkle the Parmesan over the warm edamame and toss until the cheese lightly coats the pods.
- Add fresh parsley if desired.
- Serve immediately with a fresh lemon wedge for an optional bright finish.
- To eat edamame in the pod, squeeze or pull the beans from the pod with your teeth and discard the fibrous outer pod. Do not eat the pod itself.
Make It Your Way
• Spicy Garlic: Increase the crushed red pepper flakes or add a small amount of cayenne.
• Lemon Pepper: Add fresh lemon zest and additional black pepper.
• Everything Bagel: Replace some of the seasonings with everything bagel seasoning.
• Smoky: Add a pinch of smoked paprika.
• Asian-Inspired: Skip the Parmesan and season with a small amount of lower-sodium soy sauce, sesame oil, garlic, and sesame seeds.
• Shelled Version: Use frozen shelled edamame for a fork-friendly snack that can also be added to salads or grain bowls.
• Dairy-Free: Leave out the Parmesan or use a dairy-free Parmesan-style alternative.
• Extra Herb Flavor: Add dried Italian seasoning or fresh parsley.
• Air Fryer: After cooking and drying the edamame, toss with olive oil and seasonings and air-fry briefly until hot and lightly blistered. Add Parmesan after cooking.
• Budget-Friendly Tip: Frozen store-brand edamame works perfectly and can be kept in the freezer until you’re ready to use it.
Storage & Meal Prep
Garlic Parmesan Edamame is best served warm shortly after preparation.
Allow leftovers to cool before transferring them to an airtight container.
Refrigerate cooked edamame for up to 3 days.
Reheat in a skillet, microwave, or air fryer until hot throughout.
For easy meal prep, portion frozen edamame into individual freezer bags or containers and prepare only the amount needed.
If using shelled edamame, cooked leftovers can also be added cold to salads, wraps, or grain bowls.
Do not leave cooked edamame sitting at room temperature for extended periods.
The outer pods are fibrous and should be discarded after the beans are eaten.
Nutrition Information
Estimated Nutrition Per Serving:
Calories: approximately 170–190
Protein: approximately 13–15 g
Carbohydrates: approximately 13–15 g
Fiber: approximately 5–6 g
Total Fat: approximately 8–9 g
Saturated Fat: approximately 2–3 g
Sodium: approximately 250–350 mg
Nutrition information is an estimate and may vary depending on the edamame, Parmesan cheese, olive oil, seasonings, brands used, and exact serving size.
The nutrition estimate is based on the edible edamame beans rather than consumption of the outer pods.
Why You’ll Love It
• Ready in about 15 minutes
• Provides plant-based protein and fiber
• Warm, savory, and satisfying
• Uses a convenient frozen ingredient
• Requires very little preparation
• Big garlic and Parmesan flavor
• Easy to make spicy or mild
• Simple enough for people who don’t enjoy cooking
• Works as a snack or easy side dish
• A completely different option from the sweet, creamy, baked, and no-cook snacks already in the library
Cinnamon Apple Yogurt Parfait
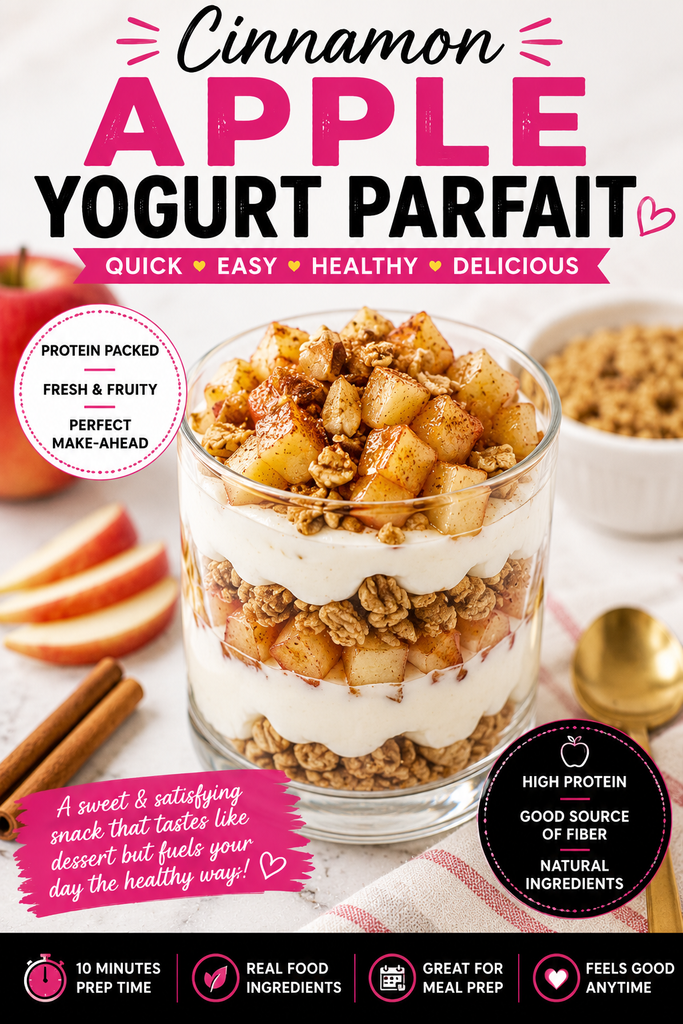
Creamy Greek yogurt, crisp cinnamon-spiced apples, crunchy granola, and toasted walnuts come together in this Cinnamon Apple Yogurt Parfait for an easy snack that tastes a little like apple pie without becoming a full dessert.
The Greek yogurt provides satisfying protein, while fresh apple and whole-grain granola add texture and fiber. Warm cinnamon and vanilla bring out the natural sweetness of the apples, so only a small amount of maple syrup or honey is needed.
Ready in about 10 minutes, this parfait is perfect for afternoon cravings, work snacks, after-school snacks, or easy meal prep.
Prep Time: 5 minutes
Cook Time: 5 minutes
Total Time: 10 minutes
Servings: 2
Serving Size: 1 parfait
Difficulty: Very Easy
Budget Level: $
Best For: Afternoon snacks, work snacks, after-school snacks, meal prep, or satisfying sweet cravings
Ingredients
• 1 medium crisp apple, diced
• 1 teaspoon butter or coconut oil
• ½ teaspoon ground cinnamon
• Pinch of ground nutmeg, optional
• 1 teaspoon pure maple syrup or honey
• 1½ cups plain Greek yogurt
• ½ teaspoon vanilla extract
• ⅓ cup lower-sugar granola
• 2 tablespoons chopped walnuts or pecans
• Additional cinnamon for serving, optional
Directions
- Wash, core, and dice the apple into small bite-size pieces.
- Heat the butter or coconut oil in a small skillet over medium heat.
- Add the diced apple and cinnamon.
- Add the optional nutmeg and stir until the apple pieces are evenly coated.
- Cook for approximately 3–5 minutes, stirring occasionally, until the apples are slightly softened but still retain some texture.
- Remove from the heat and stir in the maple syrup or honey.
- Allow the apples to cool slightly while preparing the yogurt.
- Stir the vanilla extract into the Greek yogurt.
- Divide approximately one-third of the yogurt between two glasses, jars, or bowls.
- Add a layer of granola followed by some of the cinnamon apples.
- Repeat the layers until the ingredients have been used.
- Finish each parfait with cinnamon apples, chopped walnuts or pecans, and a light sprinkle of cinnamon.
- Serve immediately for maximum granola crunch, or prepare the components separately for meal prep.
Make It Your Way
• Apple Pie Spice: Replace the cinnamon and nutmeg with apple pie spice.
• Pear Version: Substitute a ripe but firm pear for the apple.
• Extra Protein: Choose a higher-protein Greek yogurt or sprinkle the parfait with hemp hearts.
• Nut-Free: Leave out the walnuts and use pumpkin or sunflower seeds for crunch.
• Extra Fruit: Add blueberries, strawberries, or sliced banana.
• PB Apple: Add a small drizzle of natural peanut or almond butter.
• No-Cook Version: Skip cooking the apple and toss fresh diced apple with cinnamon before layering.
• Lower Added Sugar: Skip the maple syrup or honey and use a naturally sweet apple such as Fuji or Gala.
• Dairy-Free: Use a higher-protein unsweetened dairy-free yogurt.
• Budget-Friendly Tip: Use whichever apple variety is on sale and store-brand Greek yogurt and granola.
Storage & Meal Prep
For the best texture, store the parfait components separately until ready to eat.
Cooked cinnamon apples can be refrigerated in an airtight container for up to 3 days.
Keep the Greek yogurt refrigerated in a separate covered container.
Store granola and nuts at room temperature in airtight containers so they remain crunchy.
For grab-and-go meal prep, portion the yogurt and apples into covered jars and pack the granola separately. Add the granola immediately before eating.
Fully assembled parfaits can be refrigerated overnight, but the granola will soften as it absorbs moisture from the yogurt and fruit.
Freezing the assembled parfait is not recommended.
Nutrition Information
Estimated Nutrition Per Serving:
Calories: approximately 300–330
Protein: approximately 18–20 g
Carbohydrates: approximately 38–42 g
Fiber: approximately 5 g
Total Fat: approximately 9–11 g
Saturated Fat: approximately 2–3 g
Sodium: approximately 80–120 mg
Nutrition information is an estimate and may vary depending on the Greek yogurt, apple, granola, nuts, sweetener, brands used, and exact serving size.
Choosing unsweetened Greek yogurt and lower-sugar granola helps keep added sugar modest while the apple provides natural sweetness.
Why You’ll Love It
• Ready in about 10 minutes
• Provides satisfying protein
• Includes fresh fruit and whole grains
• Creamy, crunchy, and naturally sweet
• Uses inexpensive everyday ingredients
• Easy to prepare for work or school
• Simple enough for people who don’t enjoy cooking
• Easy to customize with different fruit and toppings
• Works well for make-ahead snack prep
• Gives you apple-pie-inspired flavor while still functioning as a balanced everyday snack